Leaderboard


.thumb.gif.3133dfe8baa328ad146bfe40afe330f0.gif)
Popular Content
Showing content with the highest reputation on 04/24/2024 in all areas
-
Would you look at the time, seems like it's pew pew o'clock. So let's get to it! Due to airsoft guns being outright illegal in Australia (sigh), I wasn't able to get the initial base gun I wanted. Nor was I able to obtain the import permits for a deactivated Sterling due to it requiring permission from my states AG. So instead, I acquired a 'basic build kit' from BlasterFactory. The BF E-11s are based on the traditional Sterling SMGs used in the OT films; where as the Rogue One and anthology series E-11s use an airsoft variant as the base, both real and casts. So basically this build is a kinda love child of the two, or a mutant.. anyways, the primary reference I used for the build is this one from the reference library: It is what I've been referring to as the 'hero' version. Much like OT blasters, there's decent variation between the E-11s we've seen on screen in recent years, so I wanted to have a specific 'fallback reference' to come back to, despite the airsoft/sterling differences. I also prefer it's scope rail over the block ones so there's that too. Delivery was super quick with no import issues thankfully. My previous experience importing blasters hasn't gone so well in the past. Despite me jumping through the many hoops that be our ridiculous import laws, I had one of my resin blasters quite literally broken and destroyed by customs (with what I still believe was malicious intent). Here's how I received that one: Forever salty about that, but anyways, here's the basic BlasterFactory E11 with a (not destroyed) resin E11: She's a beaut. Chris really does fantastic work. - Got it dis-assembled and ready for prep: -Vintage folding stock was delivered with no issues either: -Sourced a vintage R1 appropriate scope that was re-purposed for civilian use and repainted, so it needed stripping: - After removing it from the mount I used acetone to remove the blue paint which was easier than expected. The large optic ring was shiny brass so I repainted with hammer finish followed by flat clear, which was the closest match to the rest: I did keep the original mounting screws, but still have the mount itself if anyone's interested in that sort of stuff. - Also bought the replica 'Surefire' flashlight and rails. Link to my rails post HERE Flashlight link HERE. - As mentioned before, the new era E-11s use a number of different scope rails/mounts so I just bought one from BlasterFactory. The counter mount isn't accurate but I'll probs mod that in the future. Ordered a vintage end cap too, but decided against the vintage grip as there's almost no difference besides the age and weathering. I do plan on swapping some minor stuff too, like the stock screws for example. Sterlings had a smooth dome where as the R1 version had flat head ones, and the BF replica uses hex ones. The aluminum folding stock also uses grub screws instead of a pin-locking system but that's part of the design with the reproduction so I don't think there's much I can do there. Another is the rear sight screw being flat-headed instead of a hex, I think? Will have to double check, but this is just me being picky. - For the Hengstler, I'm waiting until I can find a vintage small eagle version for a good price, but for the time being I just used an already finished resin one I had spare, though it is a medium eagle one (with a small crack/split). I did print up a Rogue One style counter (thanks Trooper96) but haven't gotten around to getting it completed just yet: After getting almost all the required parts, it was now time for primer and paint. - I painted certain pieces (barrel for example) with straight-up flat black, but parts like the mag-well, front sight and rear catch got coats of etch primer to retain as much detail as possible. - Got the trigger housing/grip assembly and power cyls complete, then slightly weathered for now. Just sandpaper for the grip, but for the cylinders I used gun-metal paint and liquid latex before the flat black, then removing the latex to reveal a gun metal colour instead of the base aluminium, finished with flat clear. Everything here got the same black and clear, though the selector switch is untouched at this point: I used a thin disc magnet glued to the base of the cylinders to attach it, this way the mag-well details aren't ruined by glue or anything. The magnet is strong enough to reach the magazine inside and is secure enough that it won't fall off easily. - Probably unnecessary, but the main body tube got some etch primer for texture before the other etched parts were attached and ready for final paint. When painting/priming I suspended most parts from wire and cut coat hangers. For body tube primer and then final paint, I used a set-up similar to what Chris does in THIS video and can't recommend it enough, made everything way easier. - Now, the final paint was rustoleum hammered with flat clear. I tried multiple paints and primer combos on scrap aluminium before settling on the etch+hammered+flat clear. I wanted to closely match the vintage parts without repainting them and I am happy with the result. I did consider trying wrinkle paint but felt the forces of Vern cursing me so I decided against it. Because this is a weathered build I also applied gun-metal paint to spots across the blaster, followed by liquid latex before the hammered. Same as what I did with the power cylinders. - Found the sling mount and talon swivel thingies at a local gun store which was a bonus. It was easily swapped with the bayonet lug. (Still really wanna use a sling with the R1TK, crl update maybe? Plz? I beg) - Bought some "M-Loc t-nuts" for the rail, these seem to be the best solution to attach it securely for trooping. I did this step almost last and it was a pain, I'd suggest doing it earlier in the build. I couldn't use the included rail screws as they were too short, so I used the ones that came with the t-nuts. Not accurate, but it'll do for now. I found the t-nuts locally but you can find the same type on Amazon HERE. I picked up some accurate t-track and installed it using THIS method as hot water didn't work for me. I cut the tracks to these lengths: 1 x 7.25" 4 x 6.5" 2 x 2.5" Once installed they're actually quite secure, I only used glue on one that was a little loose. And without further ado, here it is completed (for now): (scope works too, couldn't pickup the crosshairs with the pic but its way more clear irl) With R1 being ANH adjacent I was going for a more 'real' look and feel with this build, more Sterling and less airsoft if you will. Total weight comes to 2.2kg/4.85lbs for anyone wondering. This was my first proper, full blaster build and I'm very happy with the final product. Test-trooped with it too and everything held up great, even against some VERY grab-happy younglings. My resin and printed ones would've had pieces break off in that situation. Still got some upgrading to do, gotta get a vintage counter, add a dome hex bolt to the mag and a lil more weathering, but I'm deeming it finished as of now. (is anything ever truly "finished" in this hobby though xd). I also can't wait to see how it fares in the coming years, with the wear and tear of trooping I really hope it gets more of that grubby, beat-up R1 look to it. Side note. Unfortunately I had to ditch the vintage stock because of issues when installing. The catch sits further back on the vintage one and doesn't lock into the folded position, even when swapping the catch parts with parts from the included aluminium one. I really tried to make it work without any serious modifications but it just won't. It also didn't wanna work with both the aluminum and vintage end cap for whatever reason.. Really disappointed as it not only wasn't cheap, but it looks, sounds and feels amazing compared to the aluminium. The only bummer of the build. I do plan to build a non-weathered version, expanding on what I've leant from this build. I am also considering doing a few R1 E11s in a run at some stage, once I work out the most viable (and accurate) parts from the currently available vendors/sellers that is. Now, now it's time to blast some rebels!!4 points
-
Premium Anovos Helmet is arriving Monday!2 points
-
When I was at GE on Tuesday, I picked up a TK ID card they had that glows (and has a retractable cord)! And, I don't see any active member with the TK-1901, but if you're new and want to choose it, you'll have a "custom" ID card! Now, I need to see if I can change the number without ruining it... LOL!
 1 point
 -
Oh man I am excited, I've been getting a few bits and bobs for my AM armour while I await it, but the time is nigh! It's in the mail and Big Brown Box Day is going to come a lot sooner than I thought. Still kinda feels unreal that this is happening. In a few days it should be delivered, and hopefully I can get started on doing some work. I'm going to probably need help but hey, that's what forums and build sessions are for.1 point
-
I looked into the garder system for the thighs, but decided to just add a loop of elastic, snapped to the inside of the thighs. I use a 1" black leather belt to hold them up and have never had any issues with them.1 point
-
Hi Vic! Great throwback photos! I'll second Adam's suggest of an ANH-S. Additionally, here's a link to a thread listing reputable armor makers that may be of interest to you as you begin your journey to join the 501st. https://www.whitearmor.net/forum/topic/11538-the-various-types-of-armor-and-where-to-find-them-updated-2023/1 point
-
There isn't much weird we haven't seen before It's much the same way as using a pencil wood scribe, I'm pretty simple so a ruler and pencil does fine.1 point
-
Hello and welcome aboard and thank you once again for the 3D files1 point
-
Easier to trim a little more off than try to add it back1 point
-
Did anyone ever finish modifying their Galaxy's Edge Stormtrooper light-up ID card?1 point
-
Forearms and biceps rough trimmed and taped so we can size, then glue. Sent from my SM-N981U1 using Tapatalk1 point
-
Doing some forearm trimming on a rainy Sunday. Next step is to get them sized and then move on to the biceps. Sent from my SM-N981U1 using Tapatalk1 point
-
Hello everyone, greetings from Peru!! I recently began my journey to make a Rogue One Stormtrooper helmet. My main goal is to learn the art and techniques necessary to refine a 3D print into a 501st approved prop and eventually (who knows) a whole new armor for me. As I said in the title, the file comes from Galactic Armory (https://www.etsy.com/es/listing/1603252278/armadura-de-stormtrooper-de-rogue-one?ga_order=most_relevant&ga_search_type=all&ga_view_type=gallery&ga_search_query=galactic+armory+stormtrooper&ref=sr_gallery-1-5&dd=1&organic_search_click=1) This post can help him improve his 3d model with the feedback we will collect here. I also took some time going down the rabbit hole and learning the details of this helmet such as: differences between this new version and the originals, Nick Henderson's 3D file, etc. Here is my bibliography: https://www.whitearmor.net/forum/topic/44463-11b30b4%E2%80%99s-rotk-build/ https://www.whitearmor.net/forum/topic/49466-tkmodder421s-nico-henderson-r1tk-helmet-build/ https://www.whitearmor.net/forum/topic/48617-rogue-one-tk-vs-ot-tk-comparison/ https://www.whitearmor.net/forum/topic/53406-modifying-the-nico-helmet/ https://www.whitearmor.net/forum/topic/38187-rogue-one-stormtrooper-crl/ https://databank.501st.com/databank/Costuming:TK_rogue_one https://www.whitearmor.net/forum/topic/39843-howto-make-black-series-r1-bucket-more-accurate/ The filament I used is PETG, it is stronger than PLA and heavier, this makes it perfect for heavy work. Here are some pictures : Compared to my Shadowtrooper helmet I continued with the build. I glued all the pieces together, applied automotive filler, sanded, and also applied Rust Oleum primer to see how things where going: (It has toilet paper in the holes, I don't want to spray on the black paint inside) Now is the part where I see what could be improved: From what I've seen in other posts, the vents on the sides are too small to be accurate(Reference from TKModder421: https://imgur.com/7Xnq8aa) That's why I carved each vent on the left side from the original 0.2cm wide to 0.3cm and the length from 1.5cm to 1.7cm: Still, I think I need to carve even more The square surrounding the cheek vents could have a smoother finish on the edges: (Reference from Parquette: https://imgur.com/ejFq1eD) Lastly, I think the square in the back could be larger and with rounded corners:(Reference from Parquette: https://imgur.com/DgL69B7) I'll continue sanding it and waiting for your feedback before painting it. PS: Here is the link to the Imgur album if you want to see the helmet closer: https://imgur.com/a/UZHnh2s1 point
-
My workbench RIGHT NOW!! This is my Nico ROTK helmet. The rest of my kit is a Frankenstein of Jim Tripon and Mr Paul’s Shoretrooper files and is in various stages of completion. This summer I will buckle down on it. I’m excited that you’re working on a New Gen TK too! Maybe we can inspire each other to finish these things up! Look forward to seeing your progress! -Mike 26300 Sent from my iPhone using Tapatalk1 point
-
Congrats on your adventure into the World of White! As you get ready for the armor party, take some time to review other TK builds and watch some videos. Somebody had suggested the TrooperBay Tutorial Videos as a good overview of the assembly process. I agree completely. Mike’s in-depth videos show one way of putting all the puzzle pieces together and he just does it, without any sweating! No panic. No nervousness. He just gets a knife, cuts the pieces and glues them together. I like most of his build process ideas, but I used E-6000 for almost everything instead of his use of super glue and zap-kicker. E-6000 is more forgiving and is removable when it is dried and two years from now if you want to make adjustments. Have fun and be sure to start a build thread!1 point
-
Hello Josh, Welcome to FISD!1 point
-
Jeff @StrmTRPR85 - Can you confirm your transfer to Starkiller Garrison for me so I can update the Attaché list? We've actually been in need to an Attache in that unit, so it will be perfect! You may also want to change your unit here on the FISD profile as you still have Ohio listed. Josh - Now that it's February you're going to attend that armor party this month, right?! Exciting times! And we're all Star Wars-aholics, aren't we?1 point
-
Welcome to the FISD! You've made an excellent choice, one of us, one of us!!1 point
-
Glad to see you made it over here.1 point
-
1 point
-
Welcome to FISD Josh!1 point
-
Welcome to FISD!1 point
-
Hi Josh and welcome to the white zone! Great to hear it's not your first costume in the legion, that means you know what you're up to! As Glen already mentioned, you can request to have your account be upgraded to 501st status. This will open up some new subforums for you. If there's anything you need to know, do not hesitate to ask! Steve aka @Snaps and Jeff aka @StrmTRPR85 are the lokal FISD Attachés for the Ohio Garrison. Best wishes, Danny1 point
-
It is highly encouraged to make a build thread as well! That way you can post updates and photos and ask for guidance and feedback whenever you need it.1 point
-
Hello and welcome aboard, you can request higher access if a legion member1 point
-
I've been slowly working on a 3D print build of Nico Henderson's R1TK helmet. Nico is well known for his accuracy on his Shoretrooper helmet design, so when I saw him post on Facebook that he was going to be releasing a 3D printable model of the R1TK I knew I had to give it a try. It's a beautiful design and I believe it to be the most accurate I've seen. I didn't know how far I was going to get with this build tbh so I hadn't started a build thread, but now that I'm getting close to painting I figured now would be a good time to post my progress. I'll probably need some advice on paint here soon as well, so any advice on paint and/or threads to read would be appreciated!! Here are some pics of the freshly printed pieces: And here's a few of the mockup of the raw printed pieces (except for the chin and ears which I had already started to sand): So after I had sanded things down a bit, I wasn't sure which method I wanted to use to fill the print lines I couldn't get with sandpaper. I had heard some people talking about using XTC3D so I decided to give that a try. My opinion is that it's good if you don't want to process it too much further than the initial polish, but I ended up with bubbles in the dried resin and found it difficult to sand, I think I could've gotten the same results easier just using filler primer, which is WAY easier to sand and get smooth. After endless hours of sanding I was finally ready to attach some of the pieces together. I started with the face and the back, then attached the dome. I wanted to fill the seam line between the back of the helmet and the dome. I wasn't ready to attach the chin yet as I wanted to get the face/back/dome piece as well as the chin up to paint ready smoothness with wet sanding before I attached the rest of the face together. Mostly so I wouldn't have to try and sand the seam between where the chin and cheek tubes meet, as well as the surfaces leading into the frown. So finally, I'm caught up to my current progress. I've got everything wet sanded up to 2000 grit and I have attached the chin to the rest of the helmet. I've mocked up the ears, brow trim and vocoder for looks, everything else you see is attached. Now I need to know how to proceed with painting. I've been trying to research rattle can options and the steps I should follow. I've never attempted to spray paint a project that needed to achieve the level of gloss and smoothness that this requires, so I want to get all the input I can before I proceed. I'm not sure if I should be laying down a particular type of primer first (should I use white primer?) and then what type of paint is best and how I should be going about getting all the angles without missing spots or pooling problems. Also, I've seen people talking about just using gloss white, but then I saw someone mention appliance epoxy, which I think might be a good idea due to the fact that it resists chipping? I found some at my local Home Depot but wasn't sure so I haven't gotten anything yet. This is what I found: Alright, well I'd love to get some feedback on the painting process as well as how to proceed with painting the greeblies (tears and traps) as well!1 point
-
Yeah, I may try and ask someone who has info about the screen used helmets in Kenobi about that backing. If you're interested in updated files, I've actually modified Nico's files to try and get them a bit more accurate, and I'm working on a new build now Here's my new build post:1 point
-
As mentioned before, I modified a Black Series Helmet. I used wood filler for the battery compartement and speakers. As I had to color-match suit with bucket I repainted most of it and since the blue stripes on the tubes where too finicky to mask, I just cut some new in vinyl and just stuck them in. For the inside I gutted every unnecessary bit of plastic, removed the nose bridge and added some foam padding. It's still a bit too loose for my liking, but I might just add some more padding. I painted and wedged a bit of metal web into the frown.1 point
-
So, this is the final visually finished armor. Had to replace the 850AW back with one by Jaime Tripon, as I either was too liberal with cutting mine out. But I'm much more satisfied with look of Jimmy's. Details will follow soon. Next step is modifying the suit for comfort. Some snaps will be replaced by buckles (mainly the shoulder bells) as the keep unplugging. Used a lot of velcro to adjust the fit of the torso and back, gonna cut down on some of that too.1 point
-
Has anyone actually personalised there’s by adding a photo? I’ve yet to do mine. Sent from my iPhone using Tapatalk Pro1 point
-
Man, I'd be all over seeing a run of these, even if they are made to order.1 point
-
Ok I bought my ID badge who's making the replacement plates?1 point
-
On that note, let me know if you want me to try taking it apart if you want to figure out how it's made for customization purposes.1 point
-
I ended up picking one of these up during the cast preview and of course couldn't post about it during the NDA window There's also a small compartment for sticking a passport-sized photo1 point
-
LOL! This was what I came up with for me. The pink is the plastic holder part and border, the rest would be etched...
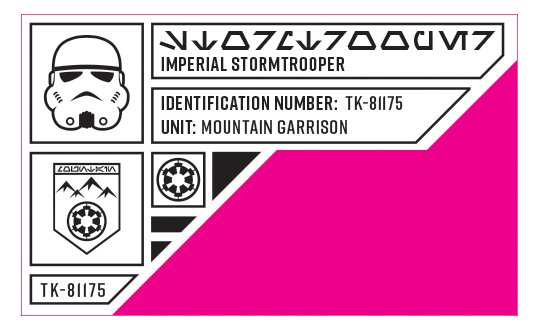 1 point
 -
I feel a dark web sales page in the works lol JK1 point