Leaderboard


Popular Content
Showing content with the highest reputation on 07/17/2022 in all areas
-
So it turns out I do have an update for this little build. I really didn't think I'd have anything more once I got the binocs sealed up. I made a little carrying case. This is a cheap 50 caliber ammo box from amazon. It just happens to be the right size to house a set of bincos. I painted and weathered to match my TK armor box. Of course there's a little plaque on top. I modeled this after vintage military plaques for similar gear. It reads "A unit of stereoscopic sights and enhanced magnification." The serial has my TK number in it, the bar code is my TK number, and it is, of course, property of the Imperial Stormtrooper Corps. All of this exists to protect the delicate volume knob. The resin holding that in place is super thin in order for the knob to mount and spin. It seemed like that could be damaged in transport to and from troops... so a case was in order. This was my first attempt at padding the inside of a case like this. It's adequate but not too pretty. Foam wrapped in black cloth. It should last a long time though, since no foam is being touched directly when taking the binocs in and out. also... the factory put out a 2nd binoc unit. The left set of binocs belongs to @Daetrin . They're also made by @justjoseph63 and got a nearly identical bluetooth modification in my hands. Paul has taken delivery of these, so these pix aren't spoilers. I was holding off posting them till he had them in hand. Paul asked if I could do a 2nd pair, Joseph sent me a fresh electrobinocular, and the magic happened. Aside from the extra weathering, the only big difference between mine and Paul's is that his should be able to open if needed via the 5 screws on the eye plate end. Mine is epoxied shut. I also moved the red light into that grey area. It fit extremely nicely there. And, of course, Paul's set also got a transport case. I didn't want to mail it with any lesser level of protection. Enjoy the binocs Paul!!! They're set 2/2. No set 3 will ever be made... unless my daughter demands one. heh5 points
-
Dunno about you guys, but it sure makes me wish I had an "in" to be in just one episode, just one.2 points
-
A few months ago, I got a set of Electrobinocs from @justjoseph63 and have been extremely pleased with them. But... well... I wanted them to DO something. I got the idea to turn them into Bluetooth speakers so they could play the TK Chatter or some music during non-blaster troops. And, fair warning, this is now a finished project. This won't be an ongoing build. I've wasn't even sure I could make this work, so I didn't post up a build thread for the binocs. I didn't wanna be defeated by this little hunk of plastic. This was my first step - hacking open the binocs. I sliced it at the rear intersection as it seemed like the most logical place. I then cut off the lens and drilled a hole in the (extremely thick) resin. Joseph doesn't mess around in the creation of these guys. The resin is VERY thick front and rear. Walls have some decent thickness too. It can face some serious action without being damaged. You know, aside from being hacked up. The front 3/4 is attached to the back eyepieces with 3 screws and a thick layer of glue all around. I used a dremel cutoff wheel to saw it free. I wanted to use the top knob as the volume control, so off it came. It was held in place by a small screw. I bought this little bluetooth amp off amazon... and destroyed it trying to modify the buttons to be remote. I would not suggest anyone get this amp if you want to modify it. I'm pretty good with electronics and regularly solder gauge clusters back together for my day job. Relocating knobs and switches bricked this little guy bad. Recovery wasn't possible. Then I happened across this Bluetooth speaker KIT on Parts Express. It was mentioned offhandedly in a youtube vid that didn't really have anything to do with the project. At the time of this writing, the kit is about $44USD. Check it out on Parts Express. I didn't need all of the parts, expecially the 2.5" speakers, but the kit was much cheaper than buying the parts individually. Separately, the board and wires are more expensive than the whole kit. I also bought the optional battery board and batteries to allow the board to play without being plugged in. A total of about $66USD. I used two of these tiny 1.5" speaker drivers (coincidentally also Dayton) as they juuuust fit into the binocs. If anyone out there decides to use these parts for their own project, I'd highly suggest buying an extra or two of the 2.1mm DC barrel jack. They're quite delicate and I had to buy a spare. One hole wasn't gonna cut it, so I printed a new sensor array in ABS and sliced off the molded one. Not a bad fit! And not a bad finish after a bit of extra sanding. The volume knob board required a very very thin wall to be installed into. So much grinding! And the speaker fit pretty well in the far left of the binoc housing, but not so well toward the right. More grinding. My dremel extension handle got some action. The tiny speakers needed to be stood away from the front holes to allow them to work well. My local Ace Hardware hand 1/4" spacers and associated tiny screws to enable mounting. I believe each of the speakers uses 3 screws to mount. Drilling tiny holes in a deep housing isn't the easiest thing. This extension made it possible. And let me just apologize right here for the severe lack of build progress photos I took. I had roadblocks at like every step of this project. The drill bit extension for example. Every time I hit a dead end and had to wait another week for more parts from amazon, I was uncertain if this thing would ever get finished... so I didn't take many in-progress photos. I think this pic was of the nose and sensor being glued on for the first time in about 2 months. I also placed speaker cloth in each with hot glue. One of the very few pix I took showing the inner parts placement. It's TIGHT in there. Speakers at the very front and just a tiny bit of space between the back of them and the front edge of those huge batteries. The batteries are screwed on in the very front and have some 50lb double sided mounting tape holding them in place in the back. The extra speaker wire and wire bundle for that volume knob are zip tied and stowed to the right side. The main Bluetooth board has barely enough space to be flipped and live right above the batteries. I used the top center button between the viewports as the power switch. The bottom two hide some screws. The bluetooth blue LED indicators light up the viewports. And the wires are indeed everywhere. I tried to tidy them before screwing the two halves together, but was only medium successful. All of the parts hide behind a printed acrylic panel. And here we are! That's a finished and re-assembled Electrobinoculars!!! It doesn't have the front lens anymore, but the opened up sensor array sorta makes up for that lack of magic. I really like the look of that sensor array. Non-cannon LED pilot light are pretty easy to overlook. The little green one comes on when the unit is charging. Red is power. The two things above the power & green LED are my original attempt at power and line in. They didn't go well. They're basically tiny speaker ports now. Power on and blue Bluetooth lights lit. Note the top button - it sticks out slightly and is a latching SPST push button switch. I found a 6mm switch that would fit inside the little button housing. The only downside of this button is that it can spin a bit when pressed. That's just the nature of the switch I used. It's installed tightly, just the button itself that can spin a little. This is VERY hard to see IRL, but it looks pretty cool in the photo. I did a holofoil desert scene with a little sandcrawler. At least it hides the wiring. And here it is!! A working demo vid. I can't wait to troop with it.1 point
-
Been awhile since I joined the forum. Saying hello and letting everyone know that here in the Interior of British Columbia we have now created (with approval) Ravinak Squad under the Outer Rim Garisson (BC). Just completing our first major event and have people interested in joining as a TK so thought it best to get on and update my information. Thank you.1 point
-
This is wonderful news Brit, congratulations, you look fantastic. Don't forget to request 501st access to the forums so you can see our members only areas. Here is the link1 point
-
Congratulations trooper and welcome to the ranks1 point
-
Absolutely great work done!! Well deserved pat on the back!1 point
-
100% and it's all the more annoying knowing that they have filmed something for most stuff since TFA with in an hour (or a lot less) of me. Scariff was about 5.5 miles from me! I drove part them setting up for Kef Bir and the crashed death star after a tip off from a friend who saw the crew loading up on snacks!1 point
-
I cleaned and shaped up the shoulder bells. Time to figure out where to attach the snaps. Using tape I mocked up where I think they should go. Now it really gets exciting seeing it start to really come together. Sorry for the blurry pics. Let me know if anything needs attention.1 point
-
YESS!!! Congrats Brit!!!! Well deserved as you built a hell of an armor set. Don't forget to request TK status here:1 point
-
I'm positively beaming at these comments. Thanks for the kind words y'all. @Daetrin I keep my own phone hidden just behind my thigh armor. My DSG compression pants have a pocket for a phone right there that hides it perfectly, and between the thigh armor and holster, it's not at all visible. I can quickly slip it out for selfies and song changes though. It does just barely fit though since my thigh armor is quite tight. However... having a dedicated (and smol) older phone for music duties is a very good idea. When I snap a pic, the music either pauses for a second or totally stops. Then I have to restart it or repair the bluetooth... which really sucks at times. Something small in my chest pouch or HWT pack would totally solve that.1 point
-
This is a cool build!1 point
-
Amazing work.1 point
-
Thanks Glen - your detective work is second to none.1 point
-
I have to say I was expecting only a pair of binocs, not an impeccably designed and executed carrying case. My pictures are nowhere near as good as Adam's, so I'll let his stand on his own. The craftsmanship is truly a reflection of this talent. Fortune was kind in that they arrived on Friday and I trooped with them yesterday. One of my garrison-mates should be sending me some photos that I'll post as soon as I get them from here. They are paired to my phone, but it's a bit inconvenient to pull my phone out while in full TK. I think I'll get a small, used smartphone (with no SIM) and put make some loops that I can store on it. This way I can use it in costume and not worry about my real phone being lost/damaged. Alternatively, I'm thinking I can have a spotter, officer, or crewman with an iPad do that for me. In any event, they are absolutely a work of art. Credit to @justjoseph63 as well for an amazing kit. Adam, I can't thank you enough for your amazing work. You're the best!!1 point
-
Fantastic, Fantastic, Fantastic!!!!!1 point
-
Hi everyone! Sadly I wasn´t really communicative the last few weeks. As I said I was on Holiday for two weeks, after that I got sick again and didn´t felt like building. I´m going to cut the coverstrips to there appropriate length today and post pictures about the sniper plate (hopefully I´m not going to forget it again :P)1 point
-
Your talent never ceases to amaze me, Adam! I think you have discovered the perfect transport for the binocs, and I'm sure Paul will be appreciative of the job you did. Well done, brother!1 point
-
Hello, I am 40 years old and live in Wiesbaden (Germany). Now its the time, that I can fulfill my long awaited dream of a stormtrooper armor and joining the 501st. I have read a lot in the past weeks and i want to buy a Stunt Armor Kit from RS. I think, it suits best with my height of 172cm and a small belly :-D Before Corona, i have started to build an Imperial Guard, with 3D printed helmet and self-sewn cape. But i don't had the time to finish it and so i want to build a stormtrooper armor first.1 point
-
I've not come across this issue before but I have a vinyl holster, could be an option to add a piece of vinyl to the backside of your holster to stop the bleed. After I found some black marks from the microphone had bled onto my hand plates I used some automotive cutting compound (rough polish), then went over with a fine polish, came out fine, some mention they use the Novus brand polish with some success. Here is a previous thread you posted with brown marks (lucky you wore the brown pants) Another thread with black bleed on armor Trooperbay has an armor whitening product too but I've not tried it myself https://www.trooperbay.com/products/trooperbay-armorwhite-plastic-whitening-gel?_pos=1&_psq=whitening&_ss=e&_v=1.01 point
-
It's awesome there are finally live action clones as opposed to pure CGI.1 point
-
And it's small details like these (if common to other TK's in the series) that will single out this version of new era TK compare to others like R11 point
-
We'll see. It seems rather odd that the "buttons" on the TD are specifically singled out red sections? On another note, I noticed the abdominal box "square" no longer has the window section inside it. Photo from Jim Hall: https://www.facebook.com/photo/?fbid=560926212357428&set=oa.1243696676165600 R1: (as a side note this paint scheme is inacurrate. The window square button isn't blue, from everything I've seen it appears a dark green like the helmet lens.)1 point
-
I include those (strap and name in Aurebesh) on every order.1 point
-
Don't worry Adam...this project didn't offend to me in any way, I admire your skills to performe this project. Only is that I'm a littel shocked beacause FISD staff and Centurions don't persuade people to be as canon as posible in all events... maybe in Spain we are too strict...1 point
-
As I say it's entirely up to your garrison command, ultimately your GCO has the final say as to what they allow at local non canon events (who I may add can overule a GML), some garrisons aren't as strict as others. For canon events yes every accessory would need approval by the GML or GCO and be from that particular costumes CRL. Locally we have very few canon events but if we ever do only CRL approved accessories are allowed.1 point
-
As far I know, maybe I'm wrong, any extra item must to be approved by the GML before to be used in any 501st troop or event, and they use the CRL for that approval, it isn't?1 point
-
Very nice, I have a printed version on my bench (never ending to do list) just waiting for some electronics, was going to add small screens behind the lenses with a video loop that can play a scene or zooming in or out, still haven't worked that part out.1 point
-
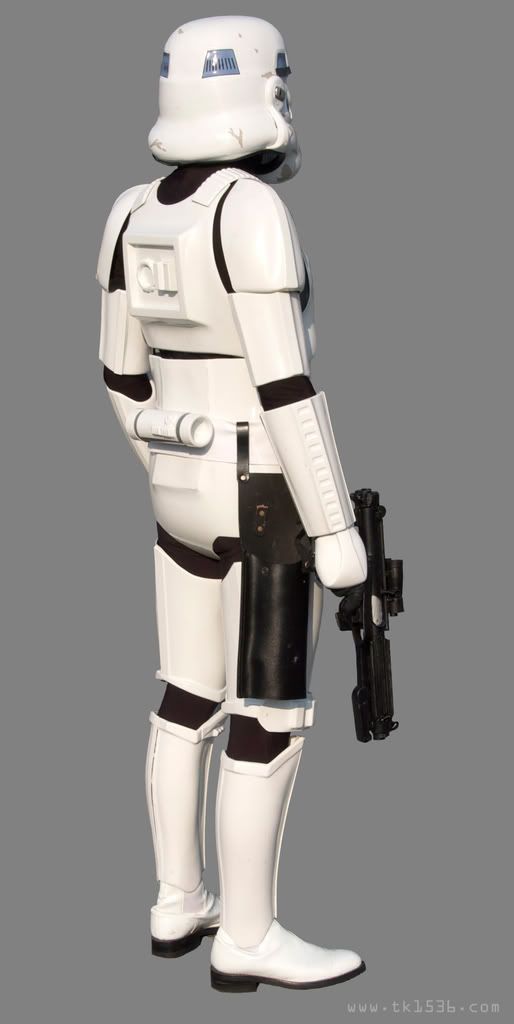
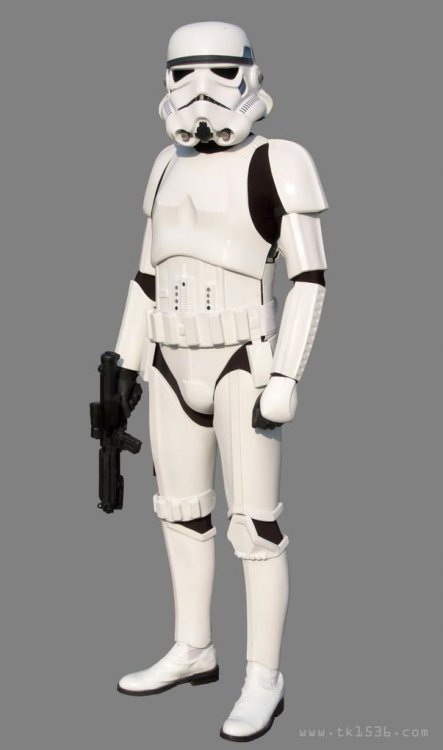
THANK YOU for the photo posting tips! That is so much better! Please enjoy the first looks at my ESB TK!!!1 point
-
Great! Welcome to "Research fun time!" Use the search function and find other WTF builds, go over them and learn from their mistakes (you will see a few of the same). If it were me, I started with the helmet because you can wear it around the house and keep yourself motivated for the rest of the build.1 point
-
Progress report: After a few attempts now, I’ve still been unhappy with the patching I’ve done. Color never matched quite well enough, and the patching looked pretty obvious, even from a distance, so I decided to leave it be for now, and finish up the build for at basic approval. Because I decided to do strapping on both sides of the abdomen/kidney, I figured I would just e6000 the rivets in for now so I can remove them later if I want to have another go at patching the holes and moving the rivet placement. I still needed to sort out the thigh ammo pack though, and get the replacement matching the color of the rest of my armor. I found that a light coat of Rustoleum Gloss White got it to just about match (I know, Rustoleum has its issues… I’ve actually been using it a lot this year and had good results). In hindsight I should have done a clear coat over top, but that can always come later. Before: After: Finishing up, I made a little pouch for my phone (voice changer) out of some scrap canvas and glued it to my chest plate: Finally: added a little extra padding in the abdominal, butt, and thighs to get it sitting better, and took my submission pics. I think it looks pretty good. Abdominal plate could definitely be trimmed down a bit in the future - I’ve lost more weight this year from health issues so it’s even bigger on me than it was last year - but I’m pretty happy with it, and it got basic approval a couple of weeks ago!1 point
-
I first got my numbers in an ROTJ suit that came together in Frankenstein fashion over a couple of years but always wanted the look of a Bespin deployed TK. Finally got around to ordering some ATA armour and assembling it over the last couple of months. Love this kit, solid 2mm ABS, funky OT asymmetry and even the cream white finish of the plastic is tasty. I’m preaching probably to the converted here but for price versus accuracy versus sturdiness this kit is a pretty happy compromise [emoji106][emoji106][emoji106]1 point
-
Depends on the armor, you'll find if you wrap painters tape around quite tightly they will pull together. I use a combination of clamps, magnets and tape for assembly. For getting your trim lines nice and straight after cutting a long block of wood with sandpaper wrapped around can help. Also scuff the surfaces that will be glued with some sandpaper, gives the E6000 something to grip too, any excess glue you can usually rub off with your thumb once dried.1 point
-
You can do whatever you want for strapping, since approvals only concern the outer appearance of the armor. That said, Velcro isn't ideal as unless you get the industrial strength it tends to seperate from the armor, as well as making it harder to dial in your fitment every time you kit up. With snaps you figure it all out once, and unless you gain/lose weight you're good to go every single time. Rivets are only required for the higher approval levels and even then do not have to be functional.1 point
-
I used CA glue (zap-a-gap) on the insides for reinforcement on the arms, but E6000 on the fronts and backs of leg pieces and arm pieces, then CA for inside rienforcement again. E6000 is tough to clean up on the outside IMO, but is great for sturdiness1 point
-
1 point
-
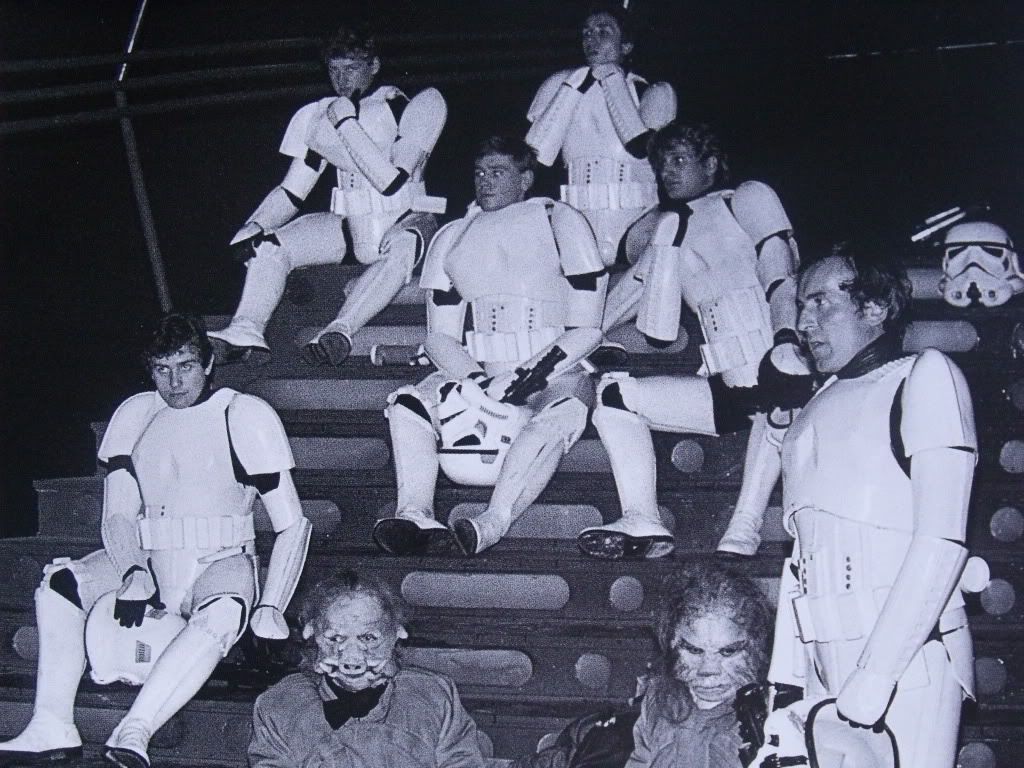
A big thanks to Mike H for the outstanding pictures.
 1 point