Leaderboard


Popular Content
Showing content with the highest reputation on 03/13/2021 in all areas
-
3 points
-
Optional is definitely the way to go. If you want to have it on, go ahead, this is how it's supposed to look like. If not, then that's fine too.2 points
-
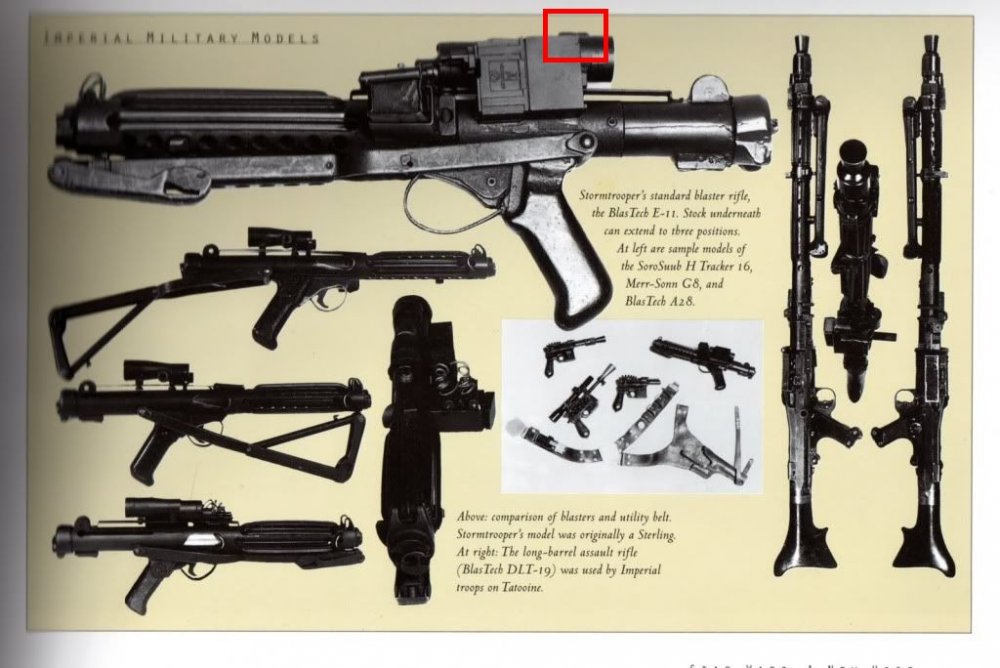
I like the term optional myself as it comes back to my thoughts on inconsistency and how we have added higher level items In the past. I’d still like to get a broader feel for these greeblies but would be satisfied as optional add ons. A clear guide to placement would be needed if someone wanted to add them as it would look worse having these things stuck on blasters in the wrong spots. That would drive my OCD nuts lol. If added, each greeble must be positioned as per the below guide/image etc etc. This means we still need to add something to the CRL and in that case, discuss with the LMO team. Sent from my iPhone using Tapatalk2 points
-
Yes, I am also waiting on cord for the rear of the cylinders to arrive. Everything will be included with kit 2, with the exception of the counter reels. However, at a push I can also supply these, but they would require decals for the numbers as they will be blank. Sent from my SM-G950F using Tapatalk2 points
-
According to the facebook page there are 2 versions available, one with additional upgrade parts.2 points
-
I'm not sure we can/should add them as a requirement in the CRL. as too many folks would have trouble either sourcing or effectively replicating them. This would lead to the number of L3 apps drop or be turned down for that reason alone. Optional / acceptable? My vote is yes.2 points
-
The forum is limited to how much can be uploaded, as you can understand with all the reference material and builds in this forum the server would quickly be filled. Most of us use a free online image host IMGUR, upload your images there then use the "direct link" option and copy those image links directly into your posts. Info here:2 points
-
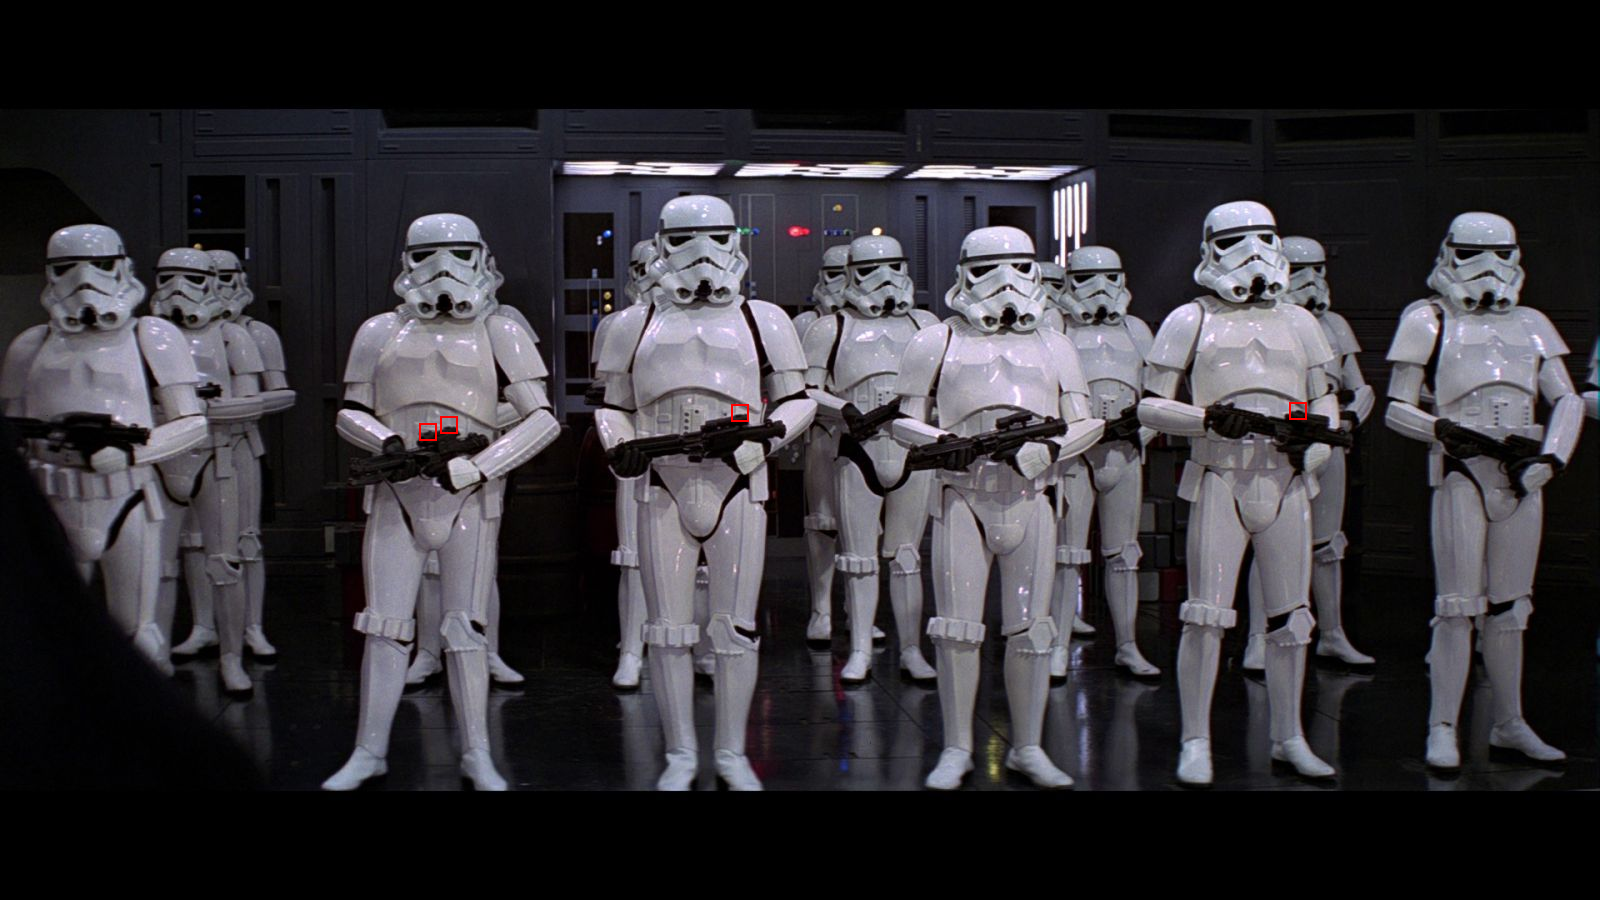
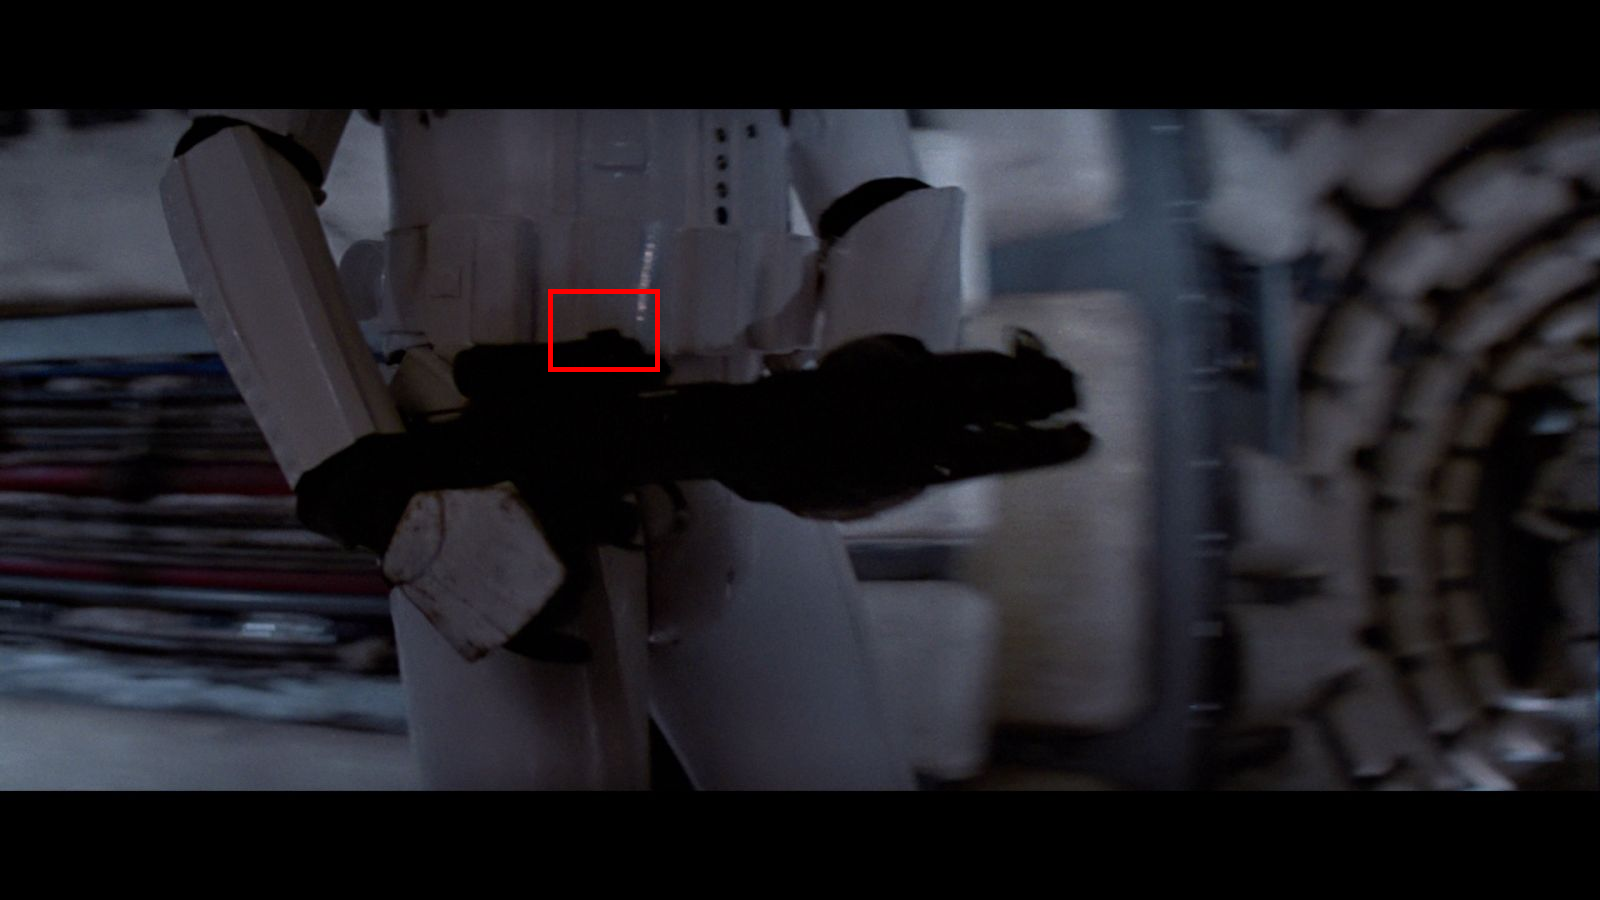
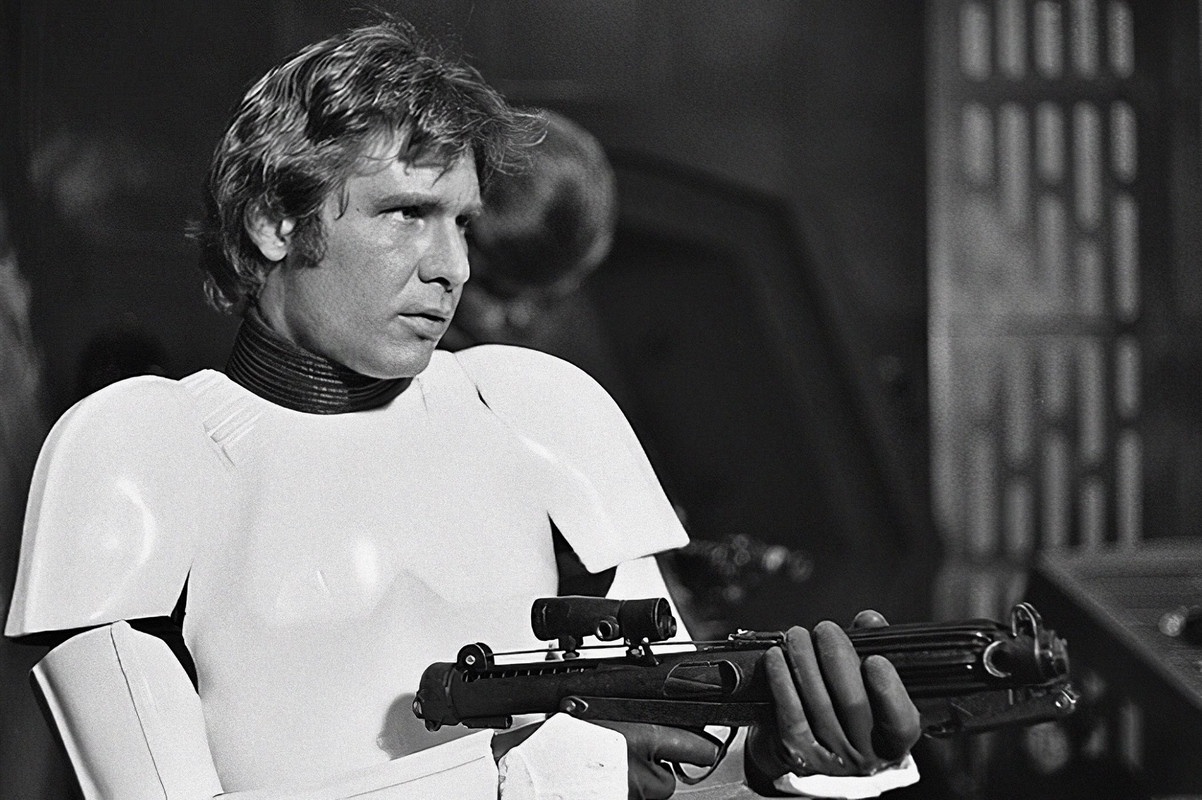
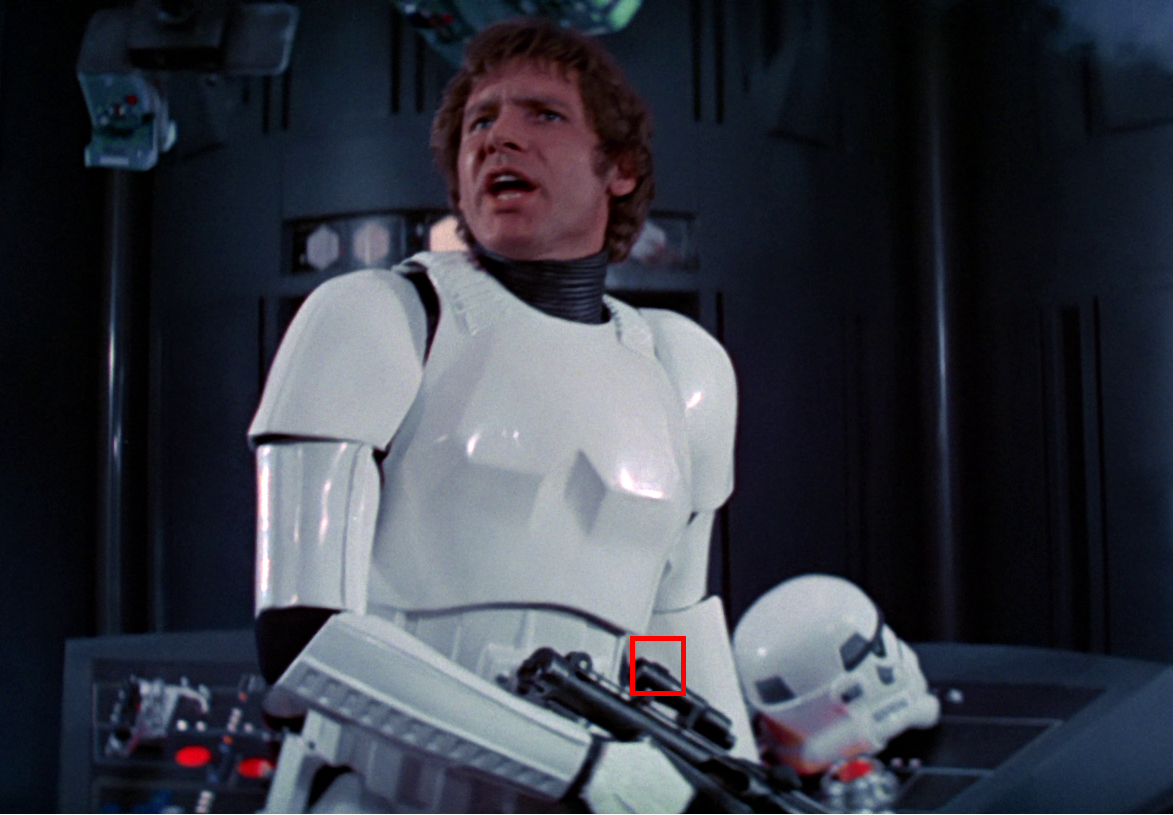
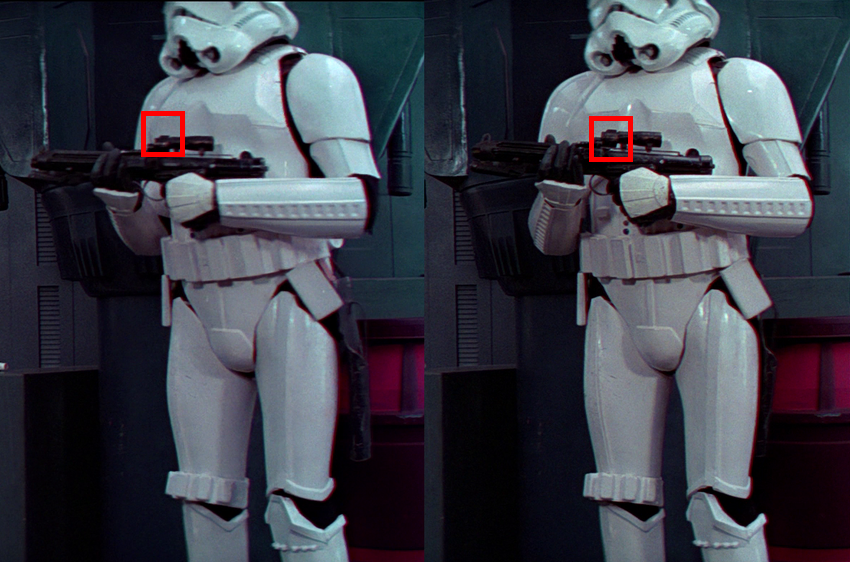
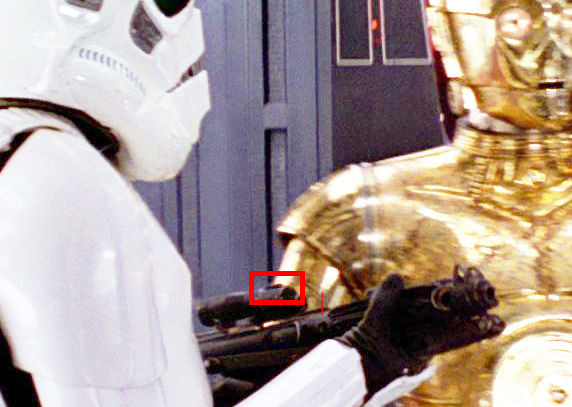
You can definitely see that they grabbed or where given a blaster for what ever scene, there is one where the blaster changes while Han is holding it, with and without Can see the extra detail on a lot of troopers in a lot of different scenes
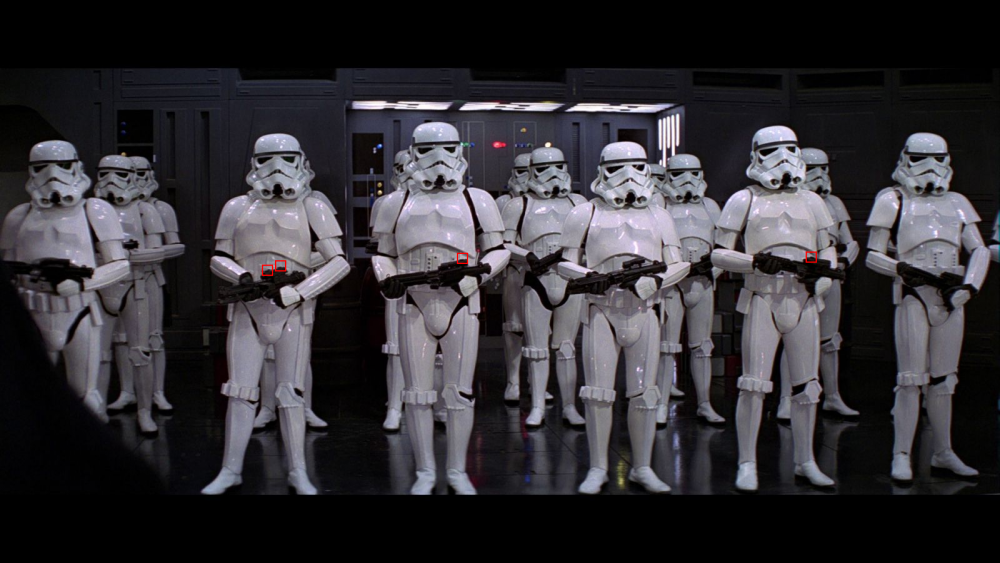
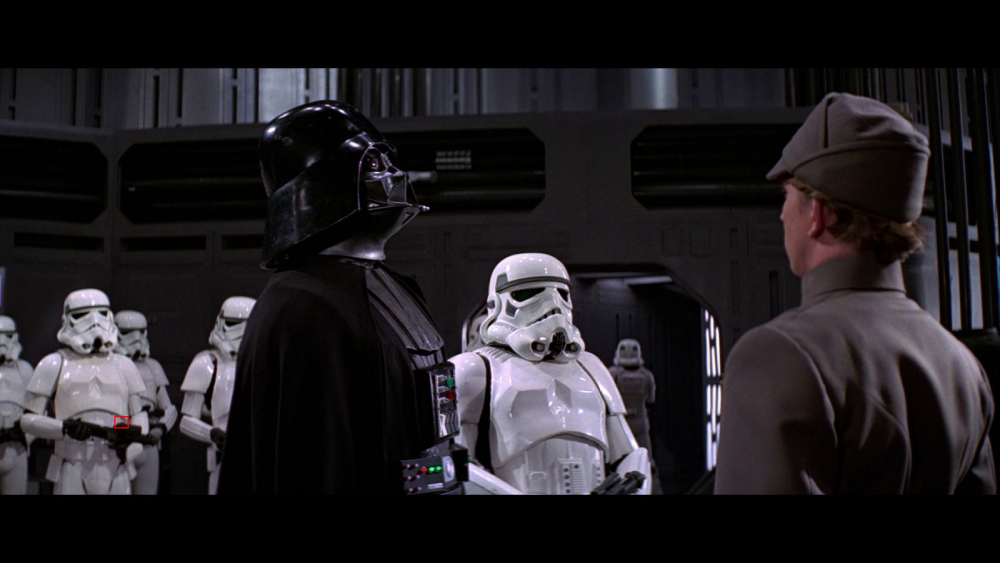
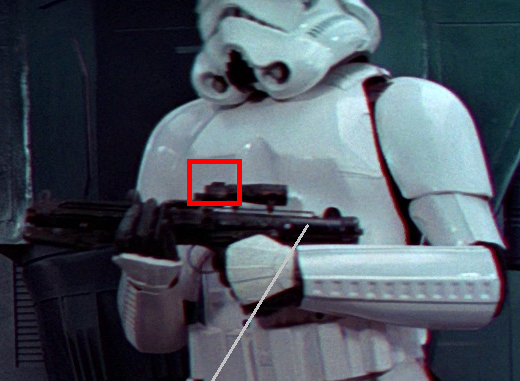

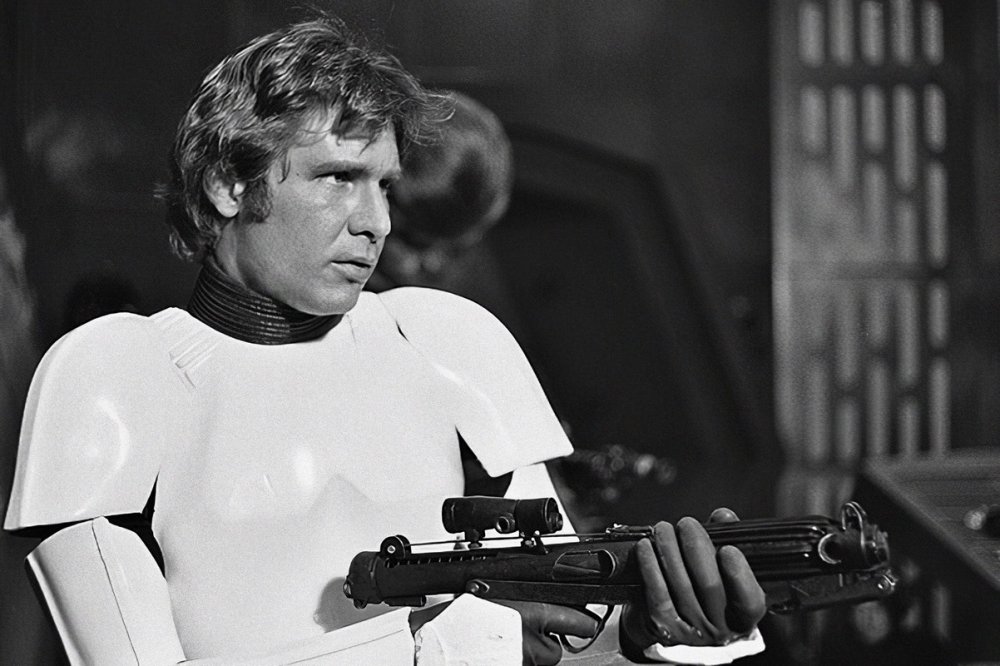

 2 points
 -
Today‘s update is more of a rework. As you may remember, I worried how wobbly the bacta canister was attached to the belt with just a blank wire. Not only this, the wire was also visible on both end caps and on the canister‘s rear side it even got magnified by the liquid. Searched for a more stable and less noticeable way – and played with the idea to illuminate the bacta like seen in ESB… The only way to hide the light source was to place it inside the upper cap, with the LED facing down towards the liquid. Also wanted to hide the switch, for what the bottom side of the lower cap seemed ideal. But how to run the wires between both end caps without seeing them? If I can‘t hide them, maybe I can use them… Not only that, the surprisingly stable wires (hidden on the rear side) are perfect for attaching this bacta canister to the helmet. I simply ran the 'utility belt' between the acrylic tube and the wires and ended up with a very tight fit. No more wobbling. Next update will show the final project and covers more helmet personalization plus comprehensive weathering...2 points
-
Just check your end cap, the gap between that and the panel and also the length of the panel as it looks a little long and your gaps are a little small
 1 point
 -
Jakob Mühlbauer 61199 Centurion DIN A4 TKSpartan https://www.whitearmor.net/eib/certificates/61199-centurion.png1 point
-
Jakob Mühlbauer 61199 EIB DIN A4 TKSpartan https://www.whitearmor.net/eib/certificates/61199-eib.png1 point
-
Looking awesome!!1 point
-
That looks really cool!!1 point
-
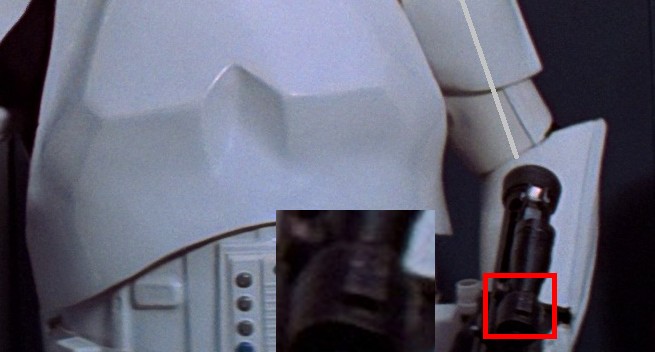
Great research going on with this. I had sort of given up on what these little parts were.1 point
-
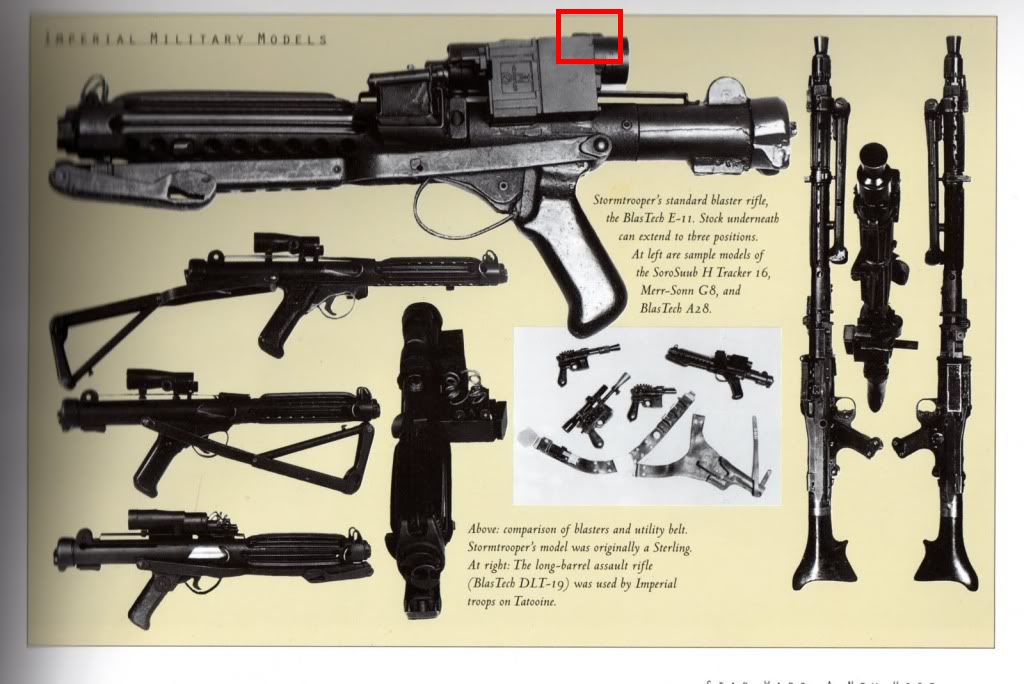
Looks like the scope on Han’s blaster also magically changed from a M38 to a M19. Sent from my iPhone using Tapatalk1 point
-
Some pics I edited of me suited up.1 point
-
Suited up today for a photo shoot. Thought id share.1 point
-
Hi Cory, looks good, take in account the measures Glen pointed and consider the following reference images to place the control panel : The control panel should be positioned so that the controls/round washer style detail can be seen . A common issue we see is that sometimes the disc is facing upwards (like the example photo) . Reference Image Reference Image Example1 point
-
I think you’re exactly right. Probably used whatever they got their hands on. Now if we could only figure out which chips were on which blasters, in which scenes. Too much?? Lol.1 point
-
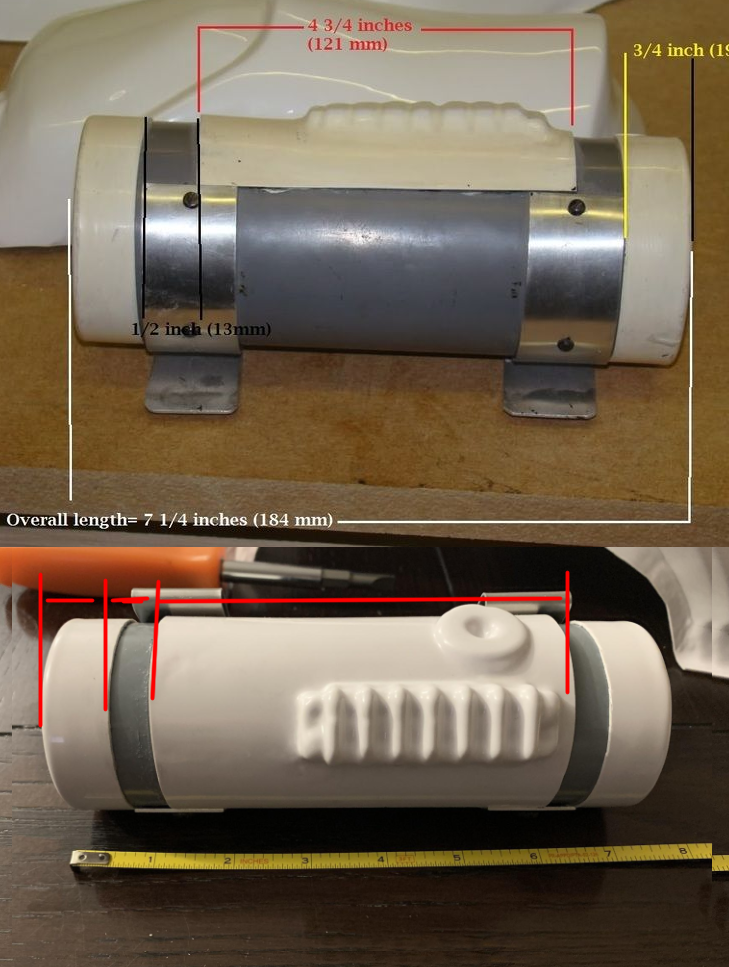
Here's some dimensions to check with
 1 point
 -
welcome bud. Good luck with the build. Here's my TD if it helps any.1 point
-
Slapped the new trim in and looks good. Be careful around the teeth area of your bucket because its pretty thin there and can crack easily.1 point
-
I haven't put in the screws yet. How does this look?
 1 point
 -
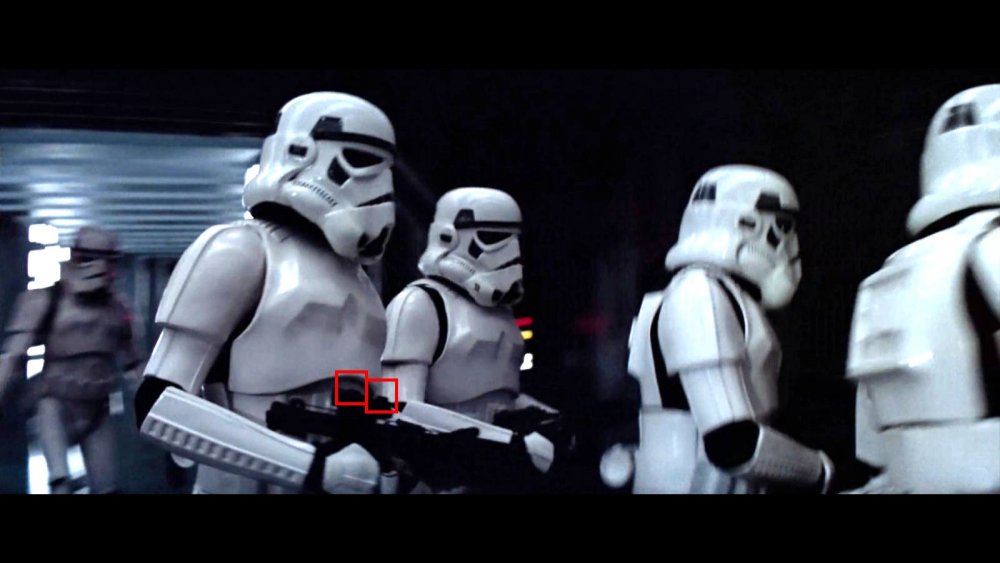
It's quite likely that both 14 and 16 pin sockets were used. I don't think the prop makers cared about which was which at all.1 point
-
Attention Troopers!! please welcome to the ranks Centurion # 497 - Jakob (Yacorp) of the German Garrison. Congratulations sir! Well, Now we are in the final stretch of making this happen only 3 spots to go !!1 point
-
Hi! Life happened and still caught up on work deadlines... I haven't got the time to squeeze in armor work...and sleep.. Here's to hoping I could get free time soon.1 point
-
Received some new s trim earlier I will be adding to my TX & TK. Thanks @ThayNerd1 point
-
Congratulations on your EI approval and looking forward to seeing you at Centurion Jonathan.1 point
-
I am very happy my armor was approved for EIB. Mainly due to the massive help from those of you who have followed me. This weekend I will make the recommended adjustments to have a chance at centurion.1 point
-
On behalf of the D.O. staff, I would like to welcome the 2 newest Centurions to the ranks! 495- Starkiller_2021 (Guillermo) - TK 2201 496- Greg S (Greg) - TK 25034 Way to go, Troopers! Only 4 spots remain to make it into the "First 500", folks.1 point
-
Hi Jonathan, Great to see your Centurion application! There are still some issues to take care of before we can proceed. Starting from the top, the L3 CRL states: There should be a minimal gap between the shoulder armor and the chest/back plates. Your shoulder bells look *much* better than in your EIB application, but we'd still like to see you bring them in further, especially at the top. Reference: Next, the L3 CRL states: The top of the ABS ammo belt should sit at or just above the bottom of the central and vertical abdomen button panels. Your belt is sitting just a hair too low. Reference Images: Moving on, the L3 CRL states: No return edge on the inside of the front of the forearm is allowed. Your forearms still have some return edge. I've indicated all the areas I can see, but you should take a close look and ensure there's nowhere where the forearm is bending in at all. Reference Image: Next, this was an oversight on my part in your EIB review as I should have asked for an interior belt photo, but it's actually a Basic requirement to have the dropboxes connected with white straps: The drop boxes dangle from the sides of the front plastic belt (ammo belt) via white straps and are aligned under the plastic tabs of the ammo belt. Many of us connect them with pop rivets, but you can also simply glue the white elastic to the back of the drop boxes, or use velcro as you are now. Note that when you're replacing the strapping, you should keep in mind the Centurion requirements as well: Drop boxes are vertically aligned with the end of the ammo belt with minimal gap between belt and box. Reference Images: Continuing on with your belt, as was pointed out in your EIB review, the corners of the plastic belt should come as close as possible to the edges of the canvas belt. I believe you can get close enough by carefully trimming off the end of the ABS belt. The corners of the plastic ammo belt shall be trimmed at a 45 degree angle that that meets the outer edge of the cloth belt. Reference Images: Finally, after a lot of discussion, the DO team has concluded that your blaster won't pass Centurion as-is. I love that more troopers are using 3D-printed blasters and I'm sure your blaster looks great at troops, but Centurion is our highest level of approval so our requirements are quite stringent. The CRL states: 3-D printed blasters can not contain visible print lines, and must be sanded smooth for a more realistic appearance. Your blaster has prominent print lines all over which will need to be sanded smooth. Additionally, your grip is missing the grip texture which is clearly seen in reference photos, so the grip will need to be replaced/reprinted. Your Hengstler counter also appears to have been printed in two separate pieces which is okay, but they should look more connected. In the photo there appears to be a pretty visible gap between the two halves. Some other non-blocking issues are that your Hengstler counter is positioned quite far back compared to reference photos, and there are a couple of indicated areas where you're using philips head screws where there should be none. Reference Images: So there's a few items to take care of, but we have a lot of faith that you can get there. Please reach out to us if you have any questions as we're here to help you. Also, when you post your corrections, it would be really helpful to post larger versions so that we can see details more easily. Thanks, Sha Sha1 point
-
For those shooting for Specialist you'll most undoubtedly be required to replace the Anovos bucket screens as well. The weave is still too small for the higher level of approval. When in doubt you can check with the Spec Ops website. Keep up the great work David1 point
-
Congratulations Jim Lau, welcome to the ranks of Centurion!1 point
-
Excellent work Jim, congratulations on Centurion rank.1 point
-
Congratulations Jim!!! Pleased to see another new Centurion1 point
-
Congratulations Jim!!!!!! Welcome to Centurion!1 point
-
Congratulations @gijim Welcome to the ranks of Centurion!1 point
-
Cleaned up the ABS paste. So much better than the White E6000.1 point
-
Nice I am going to be starting my shadow trooper build soon also. Good luck.1 point
-
With any warped pieces I use a heat gun (use a hot water bath for the unexperienced) and blocks of wood, once heated sandwich the plastic with the wood and move around, this works better if the wood is shaped to the deserved curve of the plastic. Can be a tedious process as the plastic will try to settle to it's original shape so you have to keep moving the blocks around until it's finally cooled.1 point
-
Thank you very much Glen @gmrhodes13 and Mario @TKSpartan Before continuing with today‘s update I just have to mention three minor corrections to this build. Daniel @CableGuy has collected some very good information about ANH helmet building and painting in some of his YouTube videos. Watched these just recently and then found flaws on the eyes and the paint job on vocoder and the HOVIs. See the following photos for the corrective actions: Okay, now to the update. Looking at the helmets from TIE-pilots and Magma Troopers, I found tubes or hoses to somehow look pretty cool. But adding them means they have to end somewhere. On a full costume you can run them to a chest box or a back pack. In this case it is just a helmet – with a classic RS Prop Masters helmet stand. So I started figuring, if just one tube could be fitted somehow… In this place it looks like supplying the flashlights or some other hidden electronics. By the way, that painfully reminds me of an aiming device I had planned for the right eye, just below the blast shield. Would be nice but unfortunately I did not manage to find anything suitable for this. Okay back to topic. It was time to run the other ends of tube and cable somewhere. The cable was easy, I just tape-glued it to the inside of the helmet. But that tube, oh boy … The diameters of tube and that chromish metal piece exactly matched. Would have been nicer to see one fitting into the other. However, I am pretty glad it still looks good this way. The next topic is ‚helmet personalization‘. Seems like there is a long tradition of individual drawings on various military vehicles and equipment. Even customized helmets seem common and can be spotted in the Star Wars Universe, too. Found different colors and sloppy lines to look more real than having everything perfectly lined up with just one color. While doing this, I thought about something like a slogan or motto from that trooper, hand-paint onto the helmet. But not with the letters of our alphabet, with letters in Aurebesh… Thought an officially looking military marking (white on NATO green) would be a good addition to this. Instead of sloppy lines, I now needed something that looked like being made with a stencil or template – in Aurebesh of course… The last photo shows the TK-ID is a bit crooked and the black slogan has an offset. First I was a little frustrated, then found it to look more real because such inaccuracies can happen with hand-made things. Anyway, it‘s the rear side which soon can‘t be seen in the display case. List of modifications so far: 1 - Blast Shield 2 - Black Interior 3 - Two-tone paint job 4 - Antenna and radio 5 - Utility belt 6 - Universal supply box 7 - Bacta canister 8 - Helmet flashlights 9 - Breathing tube 10 - Kill marks 11 - Aurebesh letterings Two updates to come - next one in a week.1 point
-
In the last update the brown MUJI box got added to the 'utility belt' and I thought about what it could be for. A red cross came in my mind but we all know there is no 'First Aid' in the Star Wars Universe – there is Bacta. That made me think of something else - and that belt looked so empty with nothing else attached to it… Looks okay, maybe I change it later because the canister wobbles a little and the wires can be seen... In the opening post I mentioned gaps between face plate and blast shield. These needed to get filled. Did that with some black foam - plus something to hide the foam… The original plan was to have cable ties also on the rear ends of the flashlights. But they perfectly fit between the ear caps and the blast shield, additional cable ties aren't needed for that display piece. List of modifications so far: 1 - Blast Shield 2 - Black Interior 3 - Two-tone paint job 4 - Antenna and radio 5 - Utility belt 6 - Universal supply box 7 - Bacta canister 8 - Helmet flashlights Next update comes in one week. Thank you for reading.1 point
-
Congratulations Trooper, Welcome back !!!1 point
-
Excellent Angela! congratulations trooper!1 point
-
Congratulations Trooper Sent from my SM-G981B using Tapatalk1 point
-
Congratulations1 point
-
Congratulations and welcome back to the ranks trooper1 point
-
Indeed. I think we just leave the program to the side line until things get closer normal. It is very much a hands on award scheme. Great to see you thinking outside the box though Justin1 point