Leaderboard


Popular Content
Showing content with the highest reputation on 02/11/2021 in all areas
-
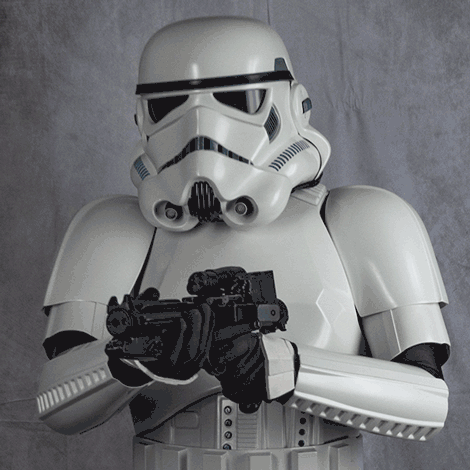
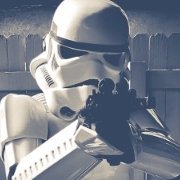
Finally making some progress on the helmet - I have been procrastinating out of fear of messing it up, and just haven't been feeling my best if I'm being honest (more on that at the end, but also GOOD NEWS!)... But I made some big strides this week, so let's go over the details! I started masking and painting the final bits on the helmet and thermal detonator, using a Tamiya brand tape I'd seen recommended a couple of places - it worked great and gave me super clean lines, while still being able to mask curves pretty efficiently. I would usually lay down my line with this, then add a couple inches of masking with thicker tape behind it! I did the Thermal Detonator first to give the tape a try and to get my technique down. I actually learned that it was best to be a teeny bit sloppy with my masking, then go back and remove any of the slight overspray from the rattlecan using a small awl to find the corner, then gently scrape any excess. On the TD you can see a few spots where paint didn't actually get all the way to the edge since I masked TOO close. I learned and did better on the helmet, but mayyy go back and touch up the TD before final mounting. Still, not bad! I also in hindsight should have sprayed the gray, then masked IT before spraying the white, which might have been more efficient than taping off the white... Next up was masking off the helmet to do the gray details on the tears, traps, ears, and frown. I taped all around each of them, then covered the helmet with a garbage bag, cutting holes for the areas I wanted color on, then taping around them. I did about 4 light coats, 5-10min apart of RustOleum Painter's Touch 2x Satin Granite gray. I haven't been the best about documenting, but you can see the masking underneath after I removed the plastic bag. I actually got very little overspray and didn't need to do much cleanup. It's worth it to take the time to mask properly! And finally with all the masking removed! It was a LOT! I went in with my awl again and lightly scraped off any overspray - the 2K clear is hard and smooth enough that the awl would remove the gray paint, but not noticeably scratch the white. I then went around with a Q-tip and some polish to clean anything left up. This let me get even smoother, cleaner lines than I probably could have achieved with masking alone. Again, in hindsight... using a white tape on a white helmet probably wasn't best. The frown was hardest to mask, but cleaned up pretty well too! Next I tried to go in and do the black outlines with a fine marker, which worked okay at first, but when I touched them several HOURS later, still smudged... I gave it overnight to dry, but it was still wet the next day. Upon closer inspection, the pens I was using were water based and probably not bonding to the paint and drying properly. I ended up just wiping as much of the black outlines off as possible, and ordered myself an Extra Fine Oil-Based Sharpie that should arrive this weekend, then I'll give it another go. Next up was the neck seal trim. Didn't take photos, but same deal - masked with the Tamiya, some thicker masking tape, then a plastic garbage bag and a piece of adhesive foam sheet to block the head hole, similar to when I did the white paint. Again, cleaned up with the awl and polish for a respectably smooth line. I used RustOleum Painter's Touch 2X Flat Black for this to simulate rubber and am pleased. I used the same flat black and masking technique - this time with some spare newspaper instead of the plastic bag - to do the brow trim. Once I removed the masking, I went ahead and installed the blacked-out mic tips from Ukswrath (after painting the interior stem, nut, and washer with some flat black) - they look great! Of course, I'm sort of a perfectionist and took the time to make sure they were straight, as was the mesh in them (it was a pain). I set the helmet in such a way that it would stay in place overnight, then used some Gorilla Glue to attach the vocoder as well. I ended up having to heat it with some HOT water and bend it slightly to get it to connect at the top, and at the bottom near the neck seal - it previously had about a 1/4" gap. I also used my Dremel to rough the surface up slightly where it contacts to give it a better physical bond (hopefully if it ever comes off, it doesn't take a bunch of my clear coat with it......). That dried very securely, and brings us to where I'm currently at... all done with paint and just a few items left to assemble! I'll be finishing any final cleanup around the frown tonight, then using some strips of black 3M VHB tape to attach my frown mesh, and some velcro to install the lens (I like it easily removable for cleaning). I'll likely use the VHB to secure some fabric under the tube stripe vents as well. I also added some "airsoft helmet"-style padding from Amazon, but haven't dialed the fit in just yet (pics when I do) - it's a pretty room-y helmet. Which brings me to one of the last major hurdle left - trimming the thigh tops. I started trying to mock up my cut line with some tape... let me know what you guys think! Going way deeper on the inside of the leg for comfort after seeing the mortar trooper shot above... I have an E-11 on order from Hellhounds Props - the very first Rogue One style he's produced apparently - and it should be ready in the next week or two. I'm super excited and have been extremely impressed by the quality of Daniel's work - notably the separate metal scope rails and quality of the rubber casting. I also ordered a repro mini scout light for it, which should be neat! I think that's it for now! Final helmet assembly, thermal detonator mounting, and thigh trimming hopefully this weekend and in my next post! Finally feeling the motivation to get this thing DONE and submitted! Anyone still interested in hearing health news, I have good news - my PET scan ($1,800 out of pocket since it's a new year and new deductible... OOF) results came back and... I AM OFFICIALLY, FULLY IN REMISSION FROM CANCER! So that's cool haha The scan showed no signs of cancer activity, so all I need to do is get scanned again in another 6 months, then a year after that... then a year after that... and then they technically can call me "cured"! So that's amazing news and I'm truly blessed and grateful. It's been a helluva journey. On the slightly negative side, I ended up carrying a lot of anxiety into the new year between waiting on that result, the insanity surrounding the US inauguration, COVID-19 still being fully out of control in Southern California, and changing job roles (not by choice) at work... I kept telling myself that things would get better in the new year, and though it rolled around and they mostly did, I still have been struggling with a good deal of anxiety and have not been sleeping very well. I'm getting things back under control, but wasn't feeling my best the last several weeks and didn't have a ton of motivation or energy to work on armor. Once I finally just committed and YOLO'ed the paint, and it mostly went well, it just kept me going on the next thing and the next, and now I'm nearly done. This armor has been an incredible pain in my butt, but I've learned a ton and it has helped keep my mind off things as well. I'll be proud as hell of it when it's done. Almost there. Thanks for stopping by!5 points
-
Yes.... the "gap" was just a shadow Belt Adjustments2 points
-
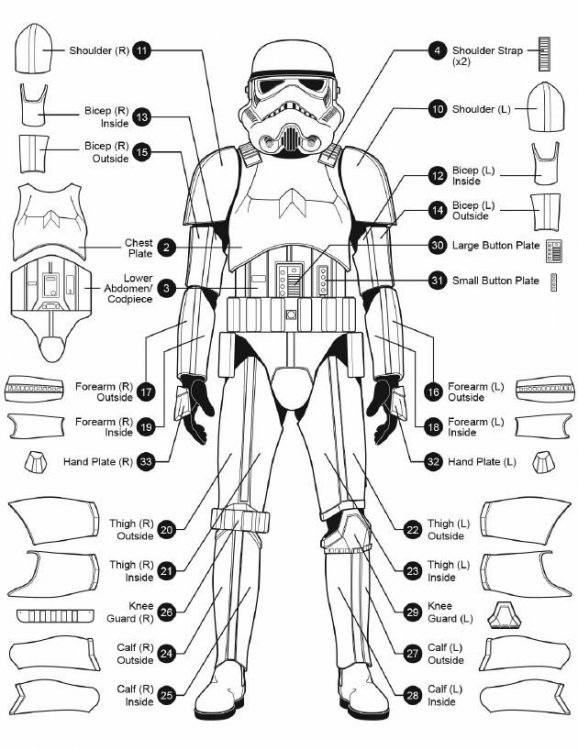
In this tutorial I'll be building the ANOVOS TK armor as ANH Stunt. Though the kit appears to have all the necessary components for 501st basic approval I'll be changing a few things in hopes of making it Centurion (L3) level acceptable. Materials, Strapping & Other used in this build will be highlighted in BLUE Areas that will be changed: NOTE: These changes are NOT required for 501st basic approval A. The kit includes velcro and snaps for the internal strapping which I'll be switching out for brackets and straps provided by Mr. No Stripes. My choice to use brackets is just a matter of preference. Note: The included velcro and snaps appear to be Centurion acceptable except for the chest to back connections which are required to be white. B. The kit includes black elastic for the chest to back connection which I'll be switching out for white, a Centurion requirement. C. The kit includes velcro to connect the shoulder bell strap to the chest to back strap. I'll be using a Dritz #10 sew in snap. Accuracy update but NOT a Centurion requirement D. The kit includes philips head screws for the TD brackets which I'll be replacing with slotted pan head screws, Accuracy update but NOT a Centurion requirement but recommended E. The kit includes velcro for the rear calf connection which I'll be replacing with the elastic and bra hooks set up, Accuracy update but NOT a Centurion requirement F. The kit includes ABS hand guards which will be switched out for Latex style, a Centurion requirement G. Waist belt accuracy modifications - Remove upper holster mounting screws, Repair holes to fabric, Replace line 24 snaps with "Popper" snaps, Correct elastic to drop box connection, Glue drop box elastic to belt. I'm sure this list will build, stay tuned Tools: Pencil Exacto knives, large & small Scissors Steel straight ruler (metric) Dremel with sanding wheel or sand paper. Small carbide bit for helmet teeth or small file. 3M scotch brite pad (any color, gradient) Drill 5/32" & 1/8" drill bits Hammer Screwdriver (blade) Spring clamps (set or 12 or more in various sizes) Earth magnets 1/2" x 1/8" (12.7mm x 3.1mm), 20 to 40 magnets Painters tape PPE (Personal Protective Equipment): I can't stress enough how important it is to wear PPE, especially when working with some of the tools listed above. Wear it! Safety glasses - Hardware store Cut resistant gloves - Hardware store 1/2 Respirator. Sanding releases small carcinogens into the air. Protect your lungs. - Hardware store or http://www.amazon.co...ailpage_o05_s00 Materials: E6000 - two to three+ 2oz tubes, or two+ 3oz tubes Zap-A-Gap & Zip Kicker Elastic (Chest to Back plate) - White 2" x 2' in length recommended) Elastic (Drop Boxes) - White 3/4" x 20" Elastic (Bells to Shoulder Strapping) - Black 1" x 12", ANOVOS supplied Elastic (Bicep to Bicep around arm) - Black 1" x 20" Elastic (Bicep to Forearm) - Black, 2" x 6", ANOVOS supplied Elastic (Thigh to waist belt) - Black, 3" x 24" Elastic (Kidney to Ab right side) - Black, 1" x 8" Elastic (Posterior to Cod) - Black, 1" x 12" Nylon Webbing (Kidney to Ab, left side 6 rivets) - 1" x 6", ANOVOS supplied Single cap rivets (Waist belt drop boxes and thigh ammo belt) 7.4mm or 5/16" Paint: Gloss White: Testers Gloss black: Humbrol #21 Testors # 1747 Gray (Ab plate), Humbrol #5 Testors # 1138 -http://www.humbrol.com/us-en/shop/paints/enamel-paints/5-dark-admiralty-grey-gloss-14ml-enamel-paint.html French Blue (Ab plate & Tube stripes), Humbrol #14 Testors # 2715 - http://www.humbrol.com/us-en/shop/paints/enamel-paints/14-french-blue-gloss-14ml-enamel-paint.html Gunship Grey (TD tube), Testor #1923 (spray paint) NOTE: Painting the TD tube is NOT required for any level of approval Internal Strapping: A. ANOVOS supplied B. Internal Strapping Brackets - http://www.whitearmor.net/forum/topic/20859-accurate-anh-stormtrooper-strapping-brackets-v-20-now-available/. Alternative lock nuts to replace the nuts that come with the bracket kit - http://www.amazon.com/gp/product/B000NBKLOQ C. Snaps: 1) Ab - "S" snaps "poppers" (Used on the following locations: Ab to belt, Ab to Kidney right side, Cod to Posterior, Shoulder to Back plate strapping right/front) 15mm, (bag of 15 is the smallest)- http://www.ebay.com/...=STRK:MEBIDX:IT 2) Ab - "S" Snap die punch and set tool 15-17mm, (1x) - http://www.ebay.com/...=item5413a405e2 NOTE: For the "S" snaps and set tool kit you may need to contact the seller who is in the UK and have him set up a auction with US shipping. The original sales did not have a ship to US option at the time I purchased the items. 3) Thigh Ammo Belt - Single Cap Rivets - 7.4mm or 5/16", Ebay - https://www.ebay.com/itm/Solid-brass-nickel-plated-single-cap-rapid-rivets-7-mm-cap-100-pair/222251554883?hash=item33bf399843:g:zTsAAOSwLnBX2zzO:sc:USPSPriorityFlatRateEnvelope!94513!US!-1 4) Thigh Ammo Belt - Double Cap rivet tool (1x) - http://www.ebay.com/...=item463922315d, or Hobby/Craft store 5) Ab/Kidney - Split rivets (bag) - ANOVOS supplied 7) Inner strapping - Line 24 snaps, nickle, 100ct (recommended), Tandy - https://www.tandylea...ts/1263-12.aspx. Fasnap - http://fasteners.fas...nap-fasteners? 7a) Inner strapping (canon brackets) Not illustrated in this build. For informational purposes only - http://www.whitearmo...-now-available/ 8) Shoulder to Bicep - Dritz Sew in Snaps, Nickle, Size #10 -http://www.amazon.co...YH1DNAAPPP1R3H1 9) COD split rivet - ANOVOS supplied D. Calf closure 1) Elastic - http://www.amazon.com/Dritz-9506W-Non-Roll-Elastic-4-Inch/dp/B004ALO9CK/ref=sr_1_2?ie=UTF8&qid=1454439839&sr=8-2&keywords=3%2F4%22+white+elastic 2) Bra hooks - http://www.amazon.com/Dritz-Hooks-Eyes-Nickel-Size/dp/B005S7FA28/ref=sr_1_10?ie=UTF8&qid=1454440102&sr=8-10&keywords=dritz+bra+hooks 3) Velcro - ANOVOS supplied Other: Thigh Garter belt - http://www.whitearmor.net/forum/topic/29991-thigh-garter-system/ Gloves (ANOVOS supplied) or - https://trooperbay.com/flexible-hand-guards-in-white-black-or-plain.html Rubber hand guards (Joseph) - http://www.whitearmor.net/forum/topic/35702-latex-hand-guards-for-centurion-level-anh/ Boots - Totally killer Boots - http://www.tkboots.com/, Imperial Boots - http://www.imperialboots.com/ Undersuit (ANOVOS supplied) or - Shirt, Pant Waist Belt - ANOVOS modified Waist Belt other - Kittle's belts) - http://www.whitearmor.net/forum/topic/19803-fs-white-canvas-belts/ ANOVOS assembly instructions (if anyone wants them) - https://cdn.shopify.com/s/files/1/0346/5761/files/SWTROOPER001-KIT_V1.pdf?18334450603693831912 UKS Assembly instructions - PDF - https://drive.google.com/file/d/0B-d8yBFyd0CgWGtmSWx6ZHRjbFE/view Sections, Navigation & Check List: 1. Forearms: 1a. Forearm trimming 1b. Forearms Pre- assembly 1c. Assembly (front) 1d. Assembly cont (rear) 2. Biceps: 2a. Bicep trimming right 2b. Bicep trimming left 2c. Bicep Pre-assembly 2d. Assembly 3. Calves/Shins (lower leg): 3a. Shins trimming left & right 3b. Shin Sniper Knee trimming 3c. Shin Pre-assembly 3d. Assembly (front) 3e. Sniper knee Pre-assembly 3f. Rear Closure (Straps and Bra hooks) 3g. Sniper knee, rear cover strip and calf closure elastic system installation 4. Ab: 4a Ab trimming 4b. Ab Button Panel trimming 4c. Ab Button Pre-assembly 4d. Ab & Kidney Split Rivet Pre-assembly 4e. Ab Waist Belt Mount assembly 4f. Ab Right side rivet assembly 4g. Ab Cod Rivet Pre-assembly 4h. Ab Button plates - Painting and Installation 5. Posterior: 5a. Posterior trimming 5b. Posterior rivet assembly 5b. Posterior to Cod connecting strap assembly - Under "Strapping" section 5c. Assembly - Under "Strapping" section 6. Strapping: 6a. Bracket System Pre-assembly 6b. Bicep to Forearm strapping 6c. Chest to Back strapping assembly 6d. Ab to Kidney left side strapping 6e. Ab to kidney Right side strapping 6f. Posterior to Cod 6g. Bracket System final assembly 6h. Bracket system support pads 7g. Thigh Support System (part 1) 7h. Thigh Support System (part 2) 7. Thighs: 7a. Thighs trimming left & right 7b. Thigh Ammo Pack trimming 7c. Thigh Pre-assembly 7d. Assembly (front) 7e. Assembly (rear) 7f. Thigh Ammo Pack installation 7g. Thigh Support System (part 1) 7h. Thigh Support System (part 2) 8. Chest and Shoulders: 8a. Chest trimming 8b. Chest Shoulder Covers trimming 8c. Chest strap to Shoulder Bell connection (Shoulder side) 8d. (6c) Chest to Back strapping assembly 8e. Shoulder Cover assembly 8f. Shoulder Cover Retaining Strap 9. Shoulder Bells: 9a. Shoulder Bell trimming 9b. Chest strap to Shoulder Bell connection (Bell side). 9c. Shoulder Bell strap installation cont. 10. Thermal Detonator: 10a. Pre-assembly 10b. Paint (not required) 10c. Assembly Final 11. Waist Belt: 3/3/16 NOTE: New information regarding the Anovos waist belt, PLEASE READ. The official word is the waist belt is accepted at the EIB (L2) with the previously mention belt modifications however, it is NOT acceptable at Centurion (L3) regardless of the modifications. The cloth portion of the belt assembly will need to be replaced for Centurion approval. You can either skip the following belt modification tutorial and replace the cloth portion of the belt all together, or continue on if EIB is as far as you plan on going. A tutorial on how to change out the cloth portion of the belt is in the works. 11a. Waist belt EIB (ONLY) Accuracy update 11b. Waist belt Centurion Update 12. Back Plate: 12a. Back plate trimming 12b. Assembly - Refer to "Bracket system final assembly" 12c. Upper connection point modification 13. Kidney: 13a. Kidney trimming 13b. Kidney to Ab right side connecting strap - Refer to "Strapping" "Ab to kidney strapping right side" 13c. Kidney to Ab left side connection strapping - Refer to "Strapping" Ab to kidney strapping left side" 13d. Assembly - Refer to Bracket System Final Assembly" 14. Hand Guards: 14a Hand Guard trimming 14b. Hand Guard, Centurion Update 15. Helmet Accuracy modifications: 15a. Helmet Modifications for Centurion and accuracy (Part 1) 15b. Helmet Modifications for Centurion and Accuracy (part 2) 15c. Hovi Tip Mod 16. Fitment Alterations (if any): N/A 17. Final Pictures: 17a. 501st Submission and completed armor pictures 18. Additional information: 18a. Making and install support pads for Mr. NoStripes bracket system (Not a requirement) 19. Helmet Electronics: 19a. Installation of Ukswrath's Hovi Audio system, SHA (hearing assist) and Cooling system Out of the Box
 1 point
 -
Looks good1 point
-
Menshen or threshold guardian are divine guardians of doors and gates in Chinese folk religions, used to protect against evil influences or to encourage the entrance of positive ones. February 12 is the traditional Chinese New Year, I hope you have a peaceful and prosperous new year. 除厄免灾: Removal of bad luck and avoidance of disasters 家宅平安: Keep peace for your home On my chest there's a Chinese character 福(means happiness、satisfied、fulfilled),and it‘s on inverted position. In Chinese it‘s a homonym,福到了=happiness have arrived I know stormtroopers shouldn't use lightsabers,but it's just for fan~1 point
-
Really did make it pop.1 point
-
Looking nice1 point
-
Hi Paul, that's great news and thanks for letting me know and putting my mind to rest. I'm looking forward to my build and especially getting out with the rest of the troopers and having some "Imperial" fun, once this pandemic is in our rear view's. BTW - nice Boba helmet!1 point
-
Beautiful news Justin1 point
-
FANTASTIC about the Test Results!!1 point
-
hello ukswrath, I've just been informed that AKA Works is ready to ship my first set of armor and, yes, I asked about them earlier but just want to make sure before I plop down the $580 that they are legit with good quality. Also, your site here is going to be my "go-to" for my first build, very good detail and thanks for the post.1 point
-
hey, gmrhodes13, I took your advice and found an awesome build site: very detailed and should be a huge help. Thanks.1 point
-
I was just informed by ATA Works that my armor is ready to ship...I just wanted to double check and make sure that ATA Works is good for their word and good armor. Any thoughts, experience with them?1 point
-
DKK 1060,- including shipping for both. Equal to aprox. €143 or $173 I'm installing a resin piece there, so I didn't ask.1 point
-
These are 2mm steel. For the weight and the coldness they will have when holding them, as opposed to a resin or PVC tube.1 point
-
You got this.1 point
-
When it comes to return edges, it all depends on your preference. Some troopers like to keep a lot of them to give that "thicker" look to the armor, but in fact the armor in the films had little to none on many of the various pieces. Return edges can cause "armor bite" in many cases (especially in the groin area), I have a tutorial here that may help with your decisions, but always feel free to contact me if you have any questions.!1 point
-
Thanks all! My kit just showed up today, actually! I figured I would start at the top and work my way down, so after I’m done with the bucket I’ll get started on chest, back, and shoulders. Has anyone compiled measurements for what the return edges should be on every part? Would help me a lot when trimming.1 point
-
First off, glad to hear about the test! Fingers crossed they keep coming back negative! Excited that you finally got some work done! Helmet looks great! TD too! I think the thigh cuts look reasonable. I felt the same uneasiness, seeing different depth cuts in the movie, so I also opted to drop the inside for movement. Don't be surprised if you suit up and still need to trim down a little more...1 point
-
First attempt linking the right bicep with the right shoulder bell. Going to let this cure 24 hours before test fit. Having a problem with the fit if the bicep pops in or out of the shoulder bell. It'll push the shoulder bell up. I could easily get this positioning wrong. Before this action, I did go over both the bottom of the shoulder bell and top of the bicep and shaved a bit more return edge off. Trying to help them slide a bit better.1 point
-
DragonCon maybe?1 point
-
Wow, I am off the internet for a few days and get swamped with notifications. Justin, thank you for chiming in. Jake04, Justin is correct the helmet for this build was a Jimmiroquai helmet and they come unfinished. It is possible to modify a Black Series helmet to look very much like this on. There is a link to my mod in my signature (ROTK BS MOD). another option is to purchase the 3D print files from Nico Henderson, his helmet is very accurate. tat2trooper, thank you but this kit has been finished for some time; although, I am always updating it.1 point
-
Peaceful, Safe and prosperous New Year to you Trooper !1 point
-
Posting a few details1 point
-
Hey Tony I just posted this on the Anovos Kit Building facebook thread. I hope you don't mind this. And I hope that none of the Detachment staff mind as well. If the the staff feels it is not my place then i will take it down. But I just feel this would be a great thread to try and steer some of these new members. Hi everyone. I first would like to congratulate you all on your purchase of the Anovos armor. This is a very exciting time for all of you as you are starting to see these brown boxes arrive on your door steps. I am a member of the 501st and a member of the Empire City Garrison. I am also an active member over at the First imperial Stormtrooper Detachment. I see here that many of you have started a great support group here on facebook and that is a great start. I am asking that for those of you who have not done so already, that you all consider joining the stormtrooper detachment as there is a large group of very talented guys and gals waiting to assist members who are aspiring to join the 501st as stormtroopers. The website is www.whitearmor.net. There is a huge bank of excellent build threads as well as an abundance of great threads for building certain aspects of the armor. Specifically speaking there is a new thread that has popped up on building the Anovos armor by ukswrath (Tony) http://www.whitearmor.net/…/35086-ukswraths-anovos-tk-build/ Tony is very talented and is going to provide an excellent resource for building a set of this armor. Tony is also one of the "Deployment Officers" on FISD who is responsible for certifying members in the Expert Infantry and Centurion tiers. So who would be better to see a build thread from then him? So everyone enjoy your time building your armor. It is a very satisfying experience. Good Luck!1 point
-
Here's my finished pimped out armour transport:1 point