Leaderboard


Popular Content
Showing content with the highest reputation on 02/06/2021 in all areas
-
Greetings fellow members My team and I are privileged to serve you all for another term. For me personally, this is an honor and I am truly grateful and humbled by your continued support. Many of you already know me and understand the direction my team and I are working on driving this great Detachment, but for the benefit of all our newer members that have joined this mighty establishment recently, I shall start this address off with a brief on who I am so everyone can get to know me a little better. I also understand that those who do know me, missed the opportunity of a Q and A as part of the process, so this allows me to give you the plan for the new term. We also have the benefit of an extra 10 days where the detachment does not stall for the Q and A or the voting process, so we are immediately at work to bring you the forum experiences you all deserve. From this, we will move on to some details of how we grew last year and then my vision and planning for this new term. TK11469, forum name Sly11, Andrew Franke. Centurion, a 7-year member of the 501st and 8-year member of FISD. I am a big nerd who loves Star Wars and anything to do with Stormtroopers from the OT TK’s right through to the current day First order TK’s. I am proud to be a member of the Legion and honored yet again to serve this Detachment with everything I have. Being a people person, FISD and legion have given me the ability to help hundreds and by now thousands of others both in our community and out there in the charity field. I am personable, approachable and friendly. Just like so many here, my love of Star Wars began as a child in 1977, and that feeling is still as strong today as it was all those years ago. Being able to dress in Stormtrooper armour and continue to spread the joy and love of something so dear to me is an absolute privilege and something we can never take for granted. I have served on Garrison staff as charity officer and our CRC (costume review committee) assisting the garrison GML in costume approvals. Here at FISD, I have served in the following positions. Attaché, Deployment officer, Detachment XO, and Detachment leader. Every one of these positions has been an absolute privilege and opportunity to make these forums a better experience for everyone. Let’s talk about last year and the 2020 term. A year that affected all of us globally, restricting the ability for members to troop, let alone leave their homes in many cases. It was tough there is no doubt. It became very apparent that we needed to do as much as possible to keep FISD the place to be with activity and support for our brothers and sister around the world. I had a plan, the mission was to execute as much of it as possible but be flexible in understanding how we could keep you the members involved and your minds off the difficult times surrounding the globe. I was amazed at how our members stood up to be counted and were indeed part of the 2020 journey, troopers helping troopers was not only our motto but firmly became the hallmark of FISD. You are all so resilient. We gave a facelift to the forums, a splash of colour with forum header imagery. We created the First Order Battle Group, consolidating the entire First order knowledge into its own sub forum. A place to shine and not get lost in swathes of OT TK posts, yes a proper home long overdue and well deserved to strengthen our community and be stronger and inclusive. A massive forum cleanup effort is still running to declutter and restore lost images. I don’t want to rest on this as there is still much work to do and I believe my team is headstrong in completing this (Phase One) stage of a much bigger picture and plan I have for the detachment. We celebrated 1000 Expert Infantry, a tremendous milestone and honored it with a beautiful 11” patch to commemorate, open to all members it allowed everyone to share in that celebration and enjoy the spoils of victory. We brought you new Visual guides and photo guides to make it easier than it has ever been to get approved for EI and centurion across all our costumes. The team worked on several CRL’s again to make details clearer and remove grey areas completely rewriting the Rogue One TK with more descriptive language and new imagery And we introduced a new CRL for the TFU TK. A minor revamp of the Replica section took place, and we brought you the DL’s blog for some behind the scenes goings-on and to improve transparency. We sorted out trading cards and brought you new easy to follow threads and a “Print your own” set up. This reduced delays and streamlined the entire process. We also added a feedback thread so members could give real world recommendations on who they chose with to print their cards and how satisfied they were. We also launched the Centurion500 campaign. Those on staff not adversely affected by Covid worked double-time to bring you these and several other of our plans to fruition. We worked hard and very well as a team to keep FISD on the map for all the right reasons, but it doesn’t end there. I have over viewed 2020, looked at what work needs to be done and created a phase two plan which will not only consolidate works done but allow completion of the larger tasks of clean up and allow for new initiatives and further Forum evolution. FISD will stay very recognisable but will become easier again to navigate have some new bling but not shake its friendly forums reputation we have instilled over last year. The following are just some points of what the 2021 Detachment plan looks like. I won't be giving it all away because I do like to surprise and engage you all, not only this but I have also left room for things to develop organically. · This year I will have space for member’s ideas, a discussion forum where some of your ideas have the potential to be developed and become a reality. You will have the chance to leave your mark on the FISD forums and work with the staff from ground zero. I think this is an exciting initiative as we have so much talent across the wonderful membership and I look forward to working with you in that forum space. · Re invigorating the New members section with some major work that will take place in reorganising all the subsections, removing more clutter and creating the “New Troopers Club”. I won’t elaborate too much but there will be more ways to engage with the staff, Q And A and the hopes of a better introduction to the mass of information stored here on the forums. · The continuation of repairing and cleaning up all those Photobuket broken images and missing links. This is still a large task that takes time but we will not rest until phase one is complete. Then we will jump into Phase two of this process, a refining treatment. · An all new Expert Infantry Gallery will be created. The old one has been broken for a few years and we certainly tried to revive it last year, but unfortunately, the data is quite incomplete much of it lost when the detachment was transferred across onto the Legion server. This will require a hefty rebuild and we have devised a method to get this underway. It will have a new look and the plan is to make it easier to maintain for the future. This is a large task so I will be looking to enlist some new blood into extended staff when we are ready to launch the project. It was a great gallery of honor, and it will shine again. · 2021 will bring us some more milestone events to celebrate, and with celebration comes merch. · We are ever mindful of the costings when it comes to merch and will continue to work with suppliers to bring you affordable and exciting items. My team have already done some brainstorming and we have some seriously good ideas and designs in mind for items we haven’t seen in an FISD merch run before. There will also be detachment favorite merch items available in the new term and of course special milestone and celebratory item, it is FISD's 15th anniversary after all so we will have plenty of cause to party. These are just some of the plans prepared for the year but we already have something new and almost ready to launch. I'll make that announcement shortly, but keep an eye out for some new sub forums in the 501st members section so we will indeed hit the ground running as of today. Once again, I am honored to lead all of you through 2021 and grateful to have the opportunity to continue driving our detachment and our membership on an upward trajectory. The team are eager to get the job done, but with new initiatives, there will be some changes and opportunity to expand our team and bring new staff on board. This could be you! Last year was just the beginning, we look forward to continuing making the journey to become a Stormtrooper truly exhilarating. With Unquestioned loyalty Sly11 TK 11469 Andrew13 points
-
The FISD Membership has Spoken! Please join me in congratulating Andrew Franke as the FISDs Detachment Leader for another term! Congrats Andrew!!3 points
-
Congratulations Andrew! Looking forward to another great year under your leadership.2 points
-
Congratulations Glen! Also Congrats on making us all look lazy2 points
-
Nice! Couldn't have happened to a nicer guy. It speaks a lot to how outstanding you are doing that the election was this close ;-)2 points
-
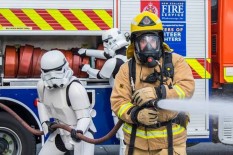
Hi all, For those of you who may not know, RS Props have sadly had a fire on their premises this week. Thankfully their contingency planning has protected their moulds but most importantly, everyone at RS Props is safe and unharmed. They have posted this update on their YouTube channel on how this will impact orders. My fascination with the stormtrooper has been lifelong but it is only recently I’ve embarked on my ambition to acquire the full armor. I’ve been following their content and even ordered a hero helmet from them only yesterday. Whilst they will be devastated and it will hit them hard, I wish them the very best in picking up the pieces, dusting themselves down and getting back to doing what they do best; making awesome armor. Tim1 point
-
Hello everyone! After reading through a bunch of build threads, I just started on my build. I have two young kids at home in the pandemic, so I will have to squeeze out moments here and there to work on this, but I look forward to the escape. My plan is at least EIB, but I will aim for Centurian if possible at every step along the way. I will be hand painting where I can, using some templates from Trooper Bay. My background: I have several costumes in the Rebel Legion and my 327th Star Corps clone trooper (movie version) is approved in both. I am on the CRL team in the Clone Troopers Detachment, and my clone was recently made the CRL model when we updated that CRL. I am a digital artist and graphic designer, so I love doing elaborate photo-editing of photos of my clone into in-universe scenes. These all feature me, and about 100 layers of photoshop. (For more my Instagram is @OddViking): I love to build, and am not worried about the precision parts of the ANH Stunt, it looks like a well-documented challenge. I LOVE weathering all of my costumes, so that part I will miss, but the whole "cover-strips instead of seamless joining" will more than make up for it! I did a very well-documented build of my clone, and I appreciate everyone who adds to the collective knowledge base. Because I am not sure how much different my build would be to add to it all, I will just be documenting parts of my progress that I have questions about, or new things I discover. So I hit my first few snags. The first was answered by the people on the AM builder group on FB, and that was about how asymmetrical those forearms are. I already trimmed off most of the return, and am doing inner strips for strength. I have decided I will do the arched cut on the left as well for mobility. Someone posted good reference of some having that in ANH: ANH reference: I ground the back of the teeth with the Dremel, and then finished with needle files (that part was way easier than in the resin clone helmet, I am getting the feeling that parts of this build are going to go a lot more quickly being finished ABS from the start). So my first big question is about the helmet brow ridge. I have seen plenty of examples where the rubber ends where mine does, not quite to the back of the trap. But I am thinking I may need to order a new strip, cut the helmet notches further back, and line it up with that trap edge. What do you all think? It is a hassle, I wish I hadn't cut it where it was, but I prefer the more finished look of it all lining up. The CRL doesn't even show or mention that edge. How many of you have it like this? Also, does this strip ever get glued in with E6000 on the inside, or is the tension enough to keep it there?1 point
-
As read elsewhere they luckily had their master molds offsite. That way they can at least restore their business1 point
-
Congrats trooper.long live the empire.1 point
-
Congratulations Andrew, please keep up the good work!1 point
-
Congratulations Andrew! Here's to another year of great leadership.1 point
-
Congratulations, Andrew... even if I didn’t vote for you.1 point
-
Wooohoooo! Congratulations!!1 point
-
Congratulations Andrew! You've done a great job as DL. Looking forward to another year of fun!1 point
-
Congratulations Andrew here's to another great year for FISD1 point
-
Congrats Andrew! Thanks for all you do as DL!1 point
-
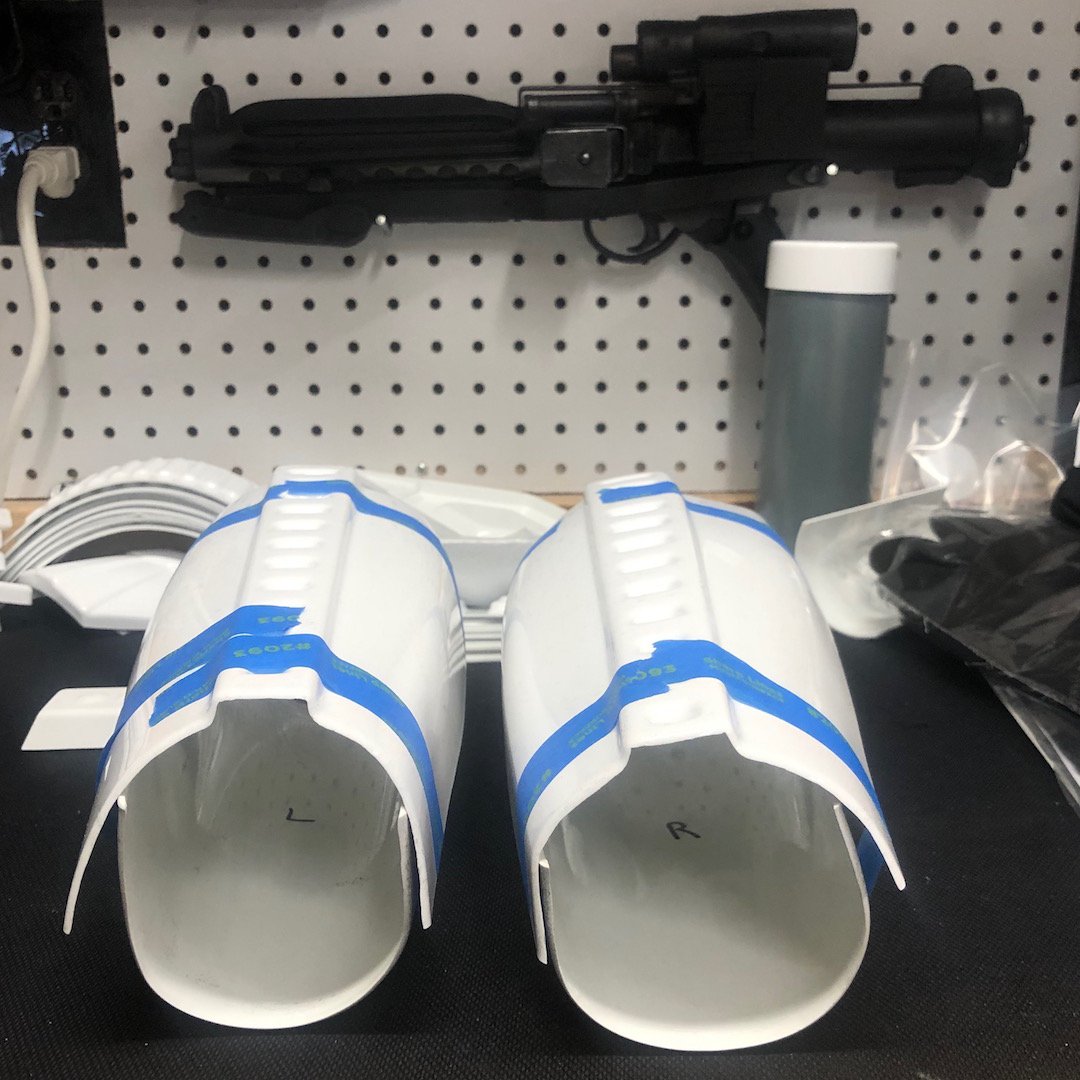
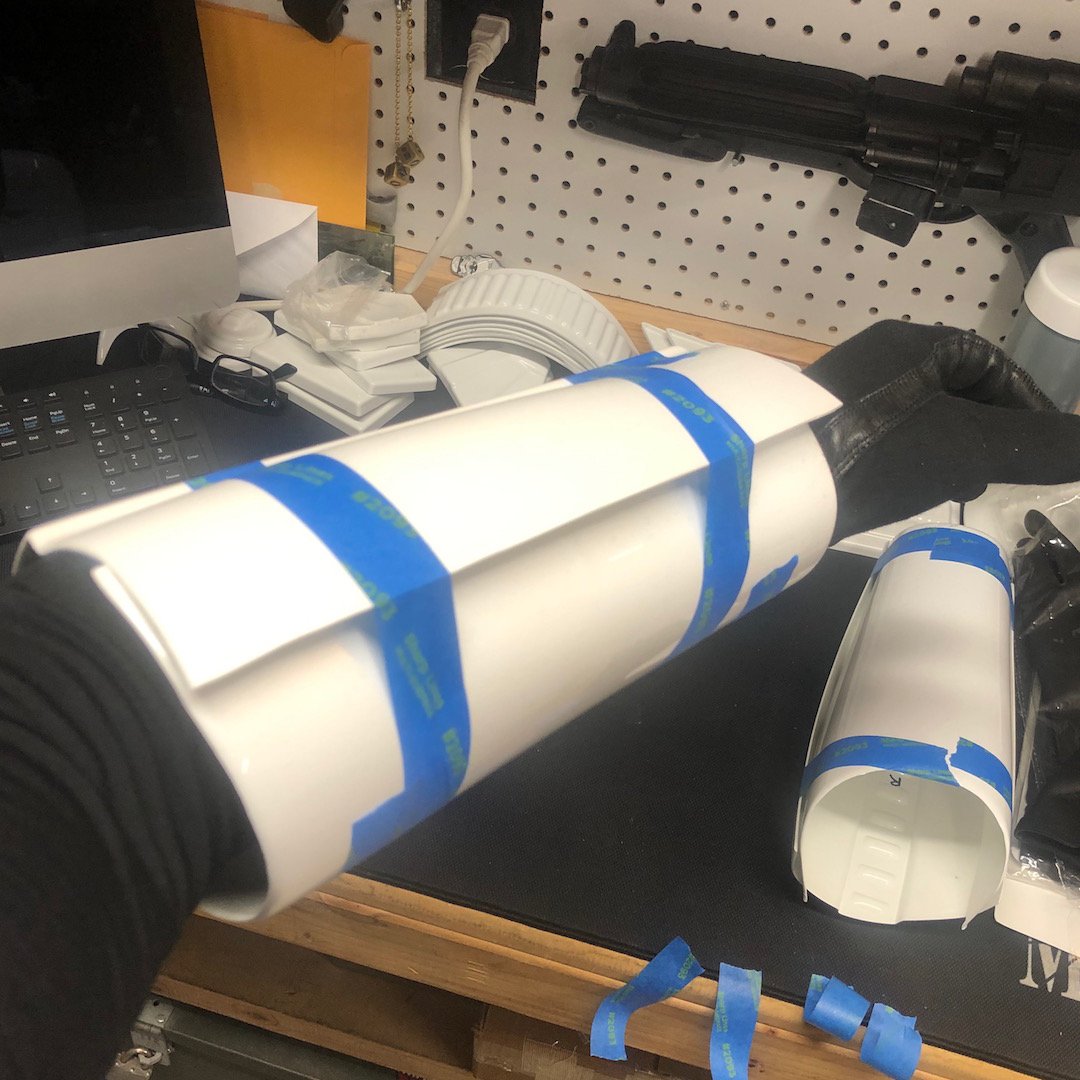
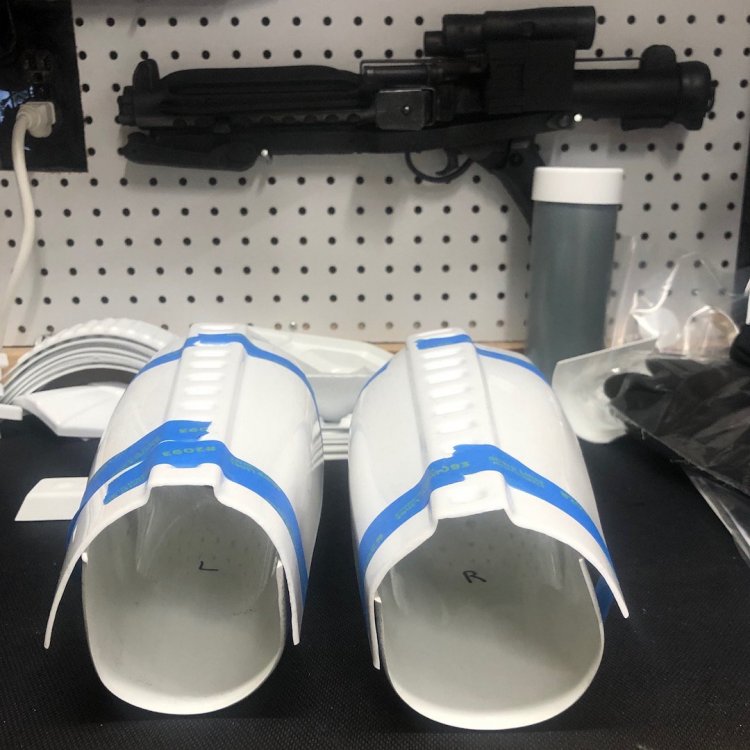
Those lines look ok to me? I was going to suggest that you copy over the measurements from the right as a starting point. I’d tape that bad boy up using those lines you’ve marked and try it on. As someone said earlier, they weren’t made to match and quite often people end up with one leg bigger than the other. My right thigh came out slightly bigger. Sent from my iPhone using Tapatalk1 point
-
No one was hurt , and all their master moulds were stored off site , so they can get up and running soon . The giant vac former was unfortunately damaged , so they are awaiting on the insurance company. Obviously there will be a delay with all current on going orders , so they have asked people to be patient . One thing is for sure , they will deliver all orders and come back better than ever .1 point
-
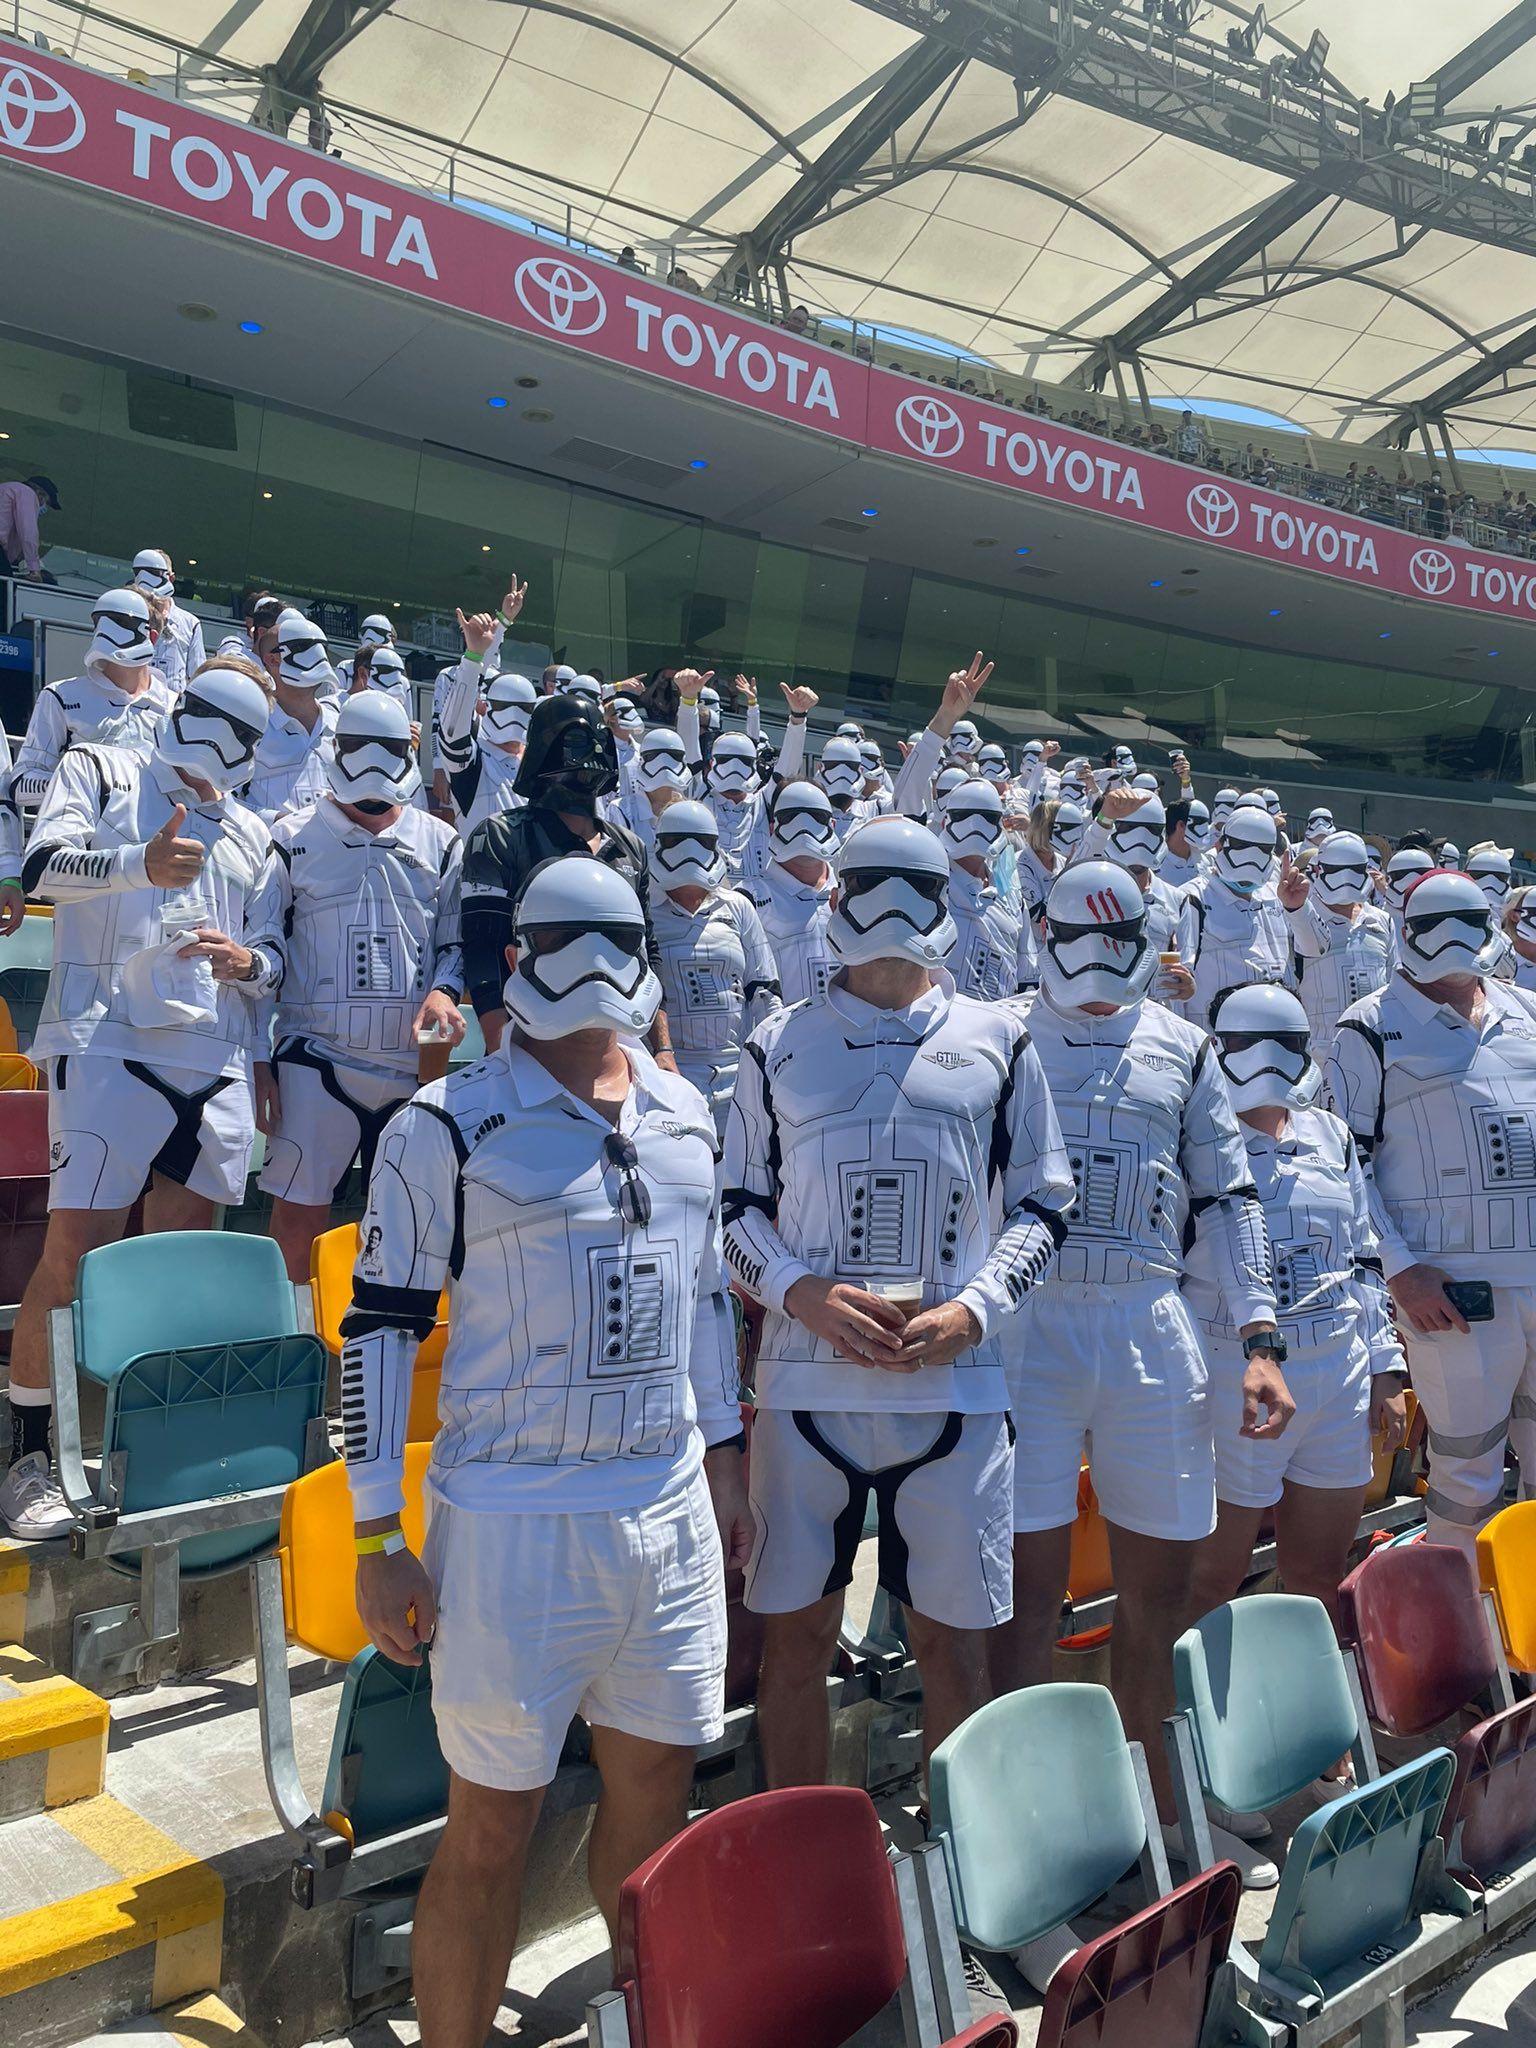
NEW Detachment Leader Detachment Affiliation Elections Centurion500 What You Wearing Merchandise Hall of Fame Just For Laughs In The Media INFORMATION & AWARD PROGRAMS Common FISD Acronyms and TK Glossary Pre Approval Forum 3D Section Field Exercise Award Master Armorer Program Imperial Attaché Program Fire Teams EIB & Centurion: What do these terms mean? Advanced Tactics Awards Public Relations Staff List 2020 Follow FISD Greetings fellow Stormtroopers February 1st kicked off the election cycle for another year, and as you will see in the posts below, there is a timeline map so you all are aware of when we enter the next phase of elections and when it's time to do your Imperial duty and vote for the leaders of our great costuming club. That make this the last edition of this terms Newsletters and the reason why we are sending it out a week early. We achieved many things together this last year and I am amazed at the resilience of this detachments members to cut through some of the most difficult times in recent history. Thank you for keeping FISD on the map, staying in touch with each other, and supporting all the new recruits and members that come our way. Every day in any way possible we make peoples lives better and live the FISD mantra, Troopers helping troopers. Hopefully 2021 keeps turning the corner for all, and allowing us to troop again, see our friends and legion family and keeps bringing people to our forums so we can make their dreams a reality. Hope to see everyone on our forums, maybe in the Q and A and again after the elections. With Unquestioned Loyalty Andrew Franke TK11469 "Sly11" Detachment Leader With elections starting at the beginning of February it's time to check your detachment affiliation. OK so you look at your Legion profile and it shows that your detachment affiliation to FISD is pending, or otherwise incorrect. Why does this happen, and what is detachment affiliation anyway, and what will FISD do about it? The answer is that detachment affiliation is only ever used once a year, and for one purpose. The only time the Legion ever uses it for anything is to determine who can run for DL and who can vote in detachment elections. That's it. Otherwise it is pretty much ignored and not used for anything. The process of validating detachment membership is cumbersome and time consuming because people use different email information between their Legion and detachment logins, and that there is no way to bulk update the rosters. For a small detachment it is not a big deal to do this manually, but for a detachment the size of FISD with hundreds and soon thousands of 501st members, it's impossible. Fortunately we have technical folk both on FISD and in the Legion web team. Once a year they take a feed from FISD's database and do a bulk update on the Legion database. This occurs right before the election cycle starts and is done once per year. Pro tips: 1) Ensure the email address you use on the Legion & FISD boards are the exact same. 2) Ensure that your FISD profile has the correct TKID. 3) IMPORTANT! You MUST be in the right security group. It should be "501st Stormtrooper" in order for the automated system to pull you over. This thread is where you get your detachment access updated. 4) If after the bulk update is complete and your profile is still not updated, and you are 100% sure your info is in sync between the two boards, then ask for to the Legion web team. They should get feedback on why this isn't working. 5) If all else fails, ping the FISD staff. Which basically means that we'll simply tell the 501st web team to bulk approve everyone 6) If still you have no luck you can contact the legion web team directly via email: [email protected] To check detachment affiliation go to the 501st Mb database here then click Your Profile Data. FISD affiliation shows "pending" contact our DL @Sly11 and request a manual update. 2021 Legion Election Timeline Voting is well underway and you have until Tuesday 16th February @ 11.59pm GMT to have your say. Transition period will take place after then and the new DL and their staff will take office on Monday 22nd February @ 12.01am GMT Election Issues/Access You may reach the Legion Election Moderators by emailing [email protected] Link to legion election here Costume Approval Information - Legion Elections 2021 With the Legion election period about to start February 1st, the membership database will be in lock down, during this time new member applications through your local garrison/outpost can not be finalized, you may however still submit them but they won't be processed until the end of this cycle. This does not affect the addition of any new costumes to an active members roster/profile, however it does affect any membership status changes ie: active / reserve / retired and any personal information updates. The period of membership database lockdown for 2021 starts Feb 1st and ends @ Feb 22nd. Hot off the heals of our Victory1000 celebrations, FISD are proud to bring you our next target event. We are fast approaching another milestone and another chance to celebrate victory as we hit 500 Centurions approved. This miles stone will also come with another special Centurion only piece of merch for the first 500, in the form of a pin to match the Expert Infantry exclusive. Our very own gmrhodes13 (Glen) has outdone himself yet again and put together the perfect introduction for this milestone event so without further adieu, FISD brings you. THERE ARE ONLY 8 POSITIONS ON THE GRID, SO IT'S TIME TO HIT THE ACCELERATOR, SHIFT INTO HYPER-DRIVE AND HELP US BLAST ACROSS THE LINE! Now that we have reached 1000 Expert Infantry, It's time to once again become part of FISD history and enter the "Centurion500" We are aiming to have 500 approved Centurions by the end of the year. We only have 8 to go, so in order to reach that goal we are asking that you read over the CRLs for your particular armor, (this thread will help) make any necessary adjustments and post up your submission! Photo Checklists - Link here Apply here Questions: 1. Not sure if I have what it takes to reach Centurion- You don't know until you try, and you have not only the D.O. staff but an entire Detachment to help! 2. I need some repairs/fixes first- This is why we are here! We honestly want you to succeed and are here to help in any way we can. 3. I am happy with the way my armor looks, so why bother?- It not only makes you look more screen accurate, it instills a sense of pride and "esprit de corps"! 4. What if I don't make it? No worries, we will provide detailed suggestions on how to reach your goal! Benefits: 1 Bragging rights for being one of the "Original 500" 2. You get a cool badge under your name here on the FISD (full forum version) 3. Access to Exclusive Centurion500 pin for those in the original 500. 4. Certificate for your accomplishment. 5. You will have a more screen accurate looking set of armor. Now that the entire Staff and those who have reached Levels 2 and 3 are here to help in any way we can, you are more than welcome (and encouraged) to ask any and all questions you may have on this thread, or contact one of our Deployment Officers Joseph, Sha Sha or Mario. Let's get up to speed, push that throttle and prepare for lightspeed, you can do it troopers Your Deployment Officers, Staff and the whole detachment crew are standing by ready to assist If you'd like to show your support on FB here is the link to the Centurion500 profile frame www.facebook.com/profilepicframes/?selected_overlay_id=331320651285964 What You Wearing? - Armor Poll 2020/21 CLOSED You can find the results here: INTEREST LIST OPEN - CENTURION500 PINS We are almost at the finish line, 9 positions left on the grid for the Centruion500 and as promised we will have another amazing prize for this milestone, available ONLY to the first 500 approved Centurions: Another beautiful metal pin to match the Expert Infantry exclusive, commemorating this historic event! Our very own gmrhodes13 (Glen) has outdone himself yet again and put together the perfect introduction for this milestone event so without further adieu, FISD brings you... You can find the interest list here VICTORY 1000 11" Patch *NOW CLOSED* ORDERS HAVE SHIPPED Majority of members have already received, any issues thread is here EI Approved Gold Coins You must be an Expert Infantry member to purchase one of these coins. If you've ever purchased an Expert Infantry gold coin before, from any run, you cannot purchase another one. These are once per EI! There are only 7 coins remaining which are numbered and these are the First Order version. There will NOT BE another run of EI Gold coins until all of these are sold You can find the thread here here Stormtroopers feeing the heat the Brisbane's Gabba cricket grounds 16th January 2021 "You know it's hot in Brisbane when even Darth Vader and his stormtroopers are in shorts Hope there are no members of the rebellion at the Gabba" story: ABC Brisbane INFORMATION & AWARD PROGRAMS Are you new to the FISD and wondering what the heck all those abbreviations and strange sounding terms mean? To help you @justjoseph63 has started a list of the most commonly used ones that will give you some insight. If you have ANY questions about a particular term that is not listed or suggestions for new ones please contact Joseph. You can find the list here Pre Approval Forum allows future Troopers the opportunity to submit photos of their completed build to be reviewed by the Staff, Imperial Attaches and others in preparation for forwarding it to their GML for approval. Any and all advice/suggestions given will be specific, constructive, helpful and respectful. Please note that this program will NOT take the place of your local GML, as Detachments are not chartered for costume approval and can not override a GMLs decision, but is instead a peer review program designed to help you look your best and offer guidance and positive feedback. You will have the opportunity to ask questions about your completed armor, weapons (if applicable), accessories, etc. and get accurate information from the experts here at the FISD.. the definitive home of TKs worldwide. For more information on this program, please visit the link here Contributor Awards Don't forget to visit our 3D section when next surfing the FISD forums, there is plenty of useful information to potentially help you on your next TK adventure. You may be a designer wishing to showcase your latest designs or prints, or maybe looking for a file to print your very own Blaster or Laser Axe. You might be feeling may generous and share with our community a new TK related 3D file and maybe win yourself a 3D contributors award so check out the details below and be part of the in house 3D community. Here is a link to the FISD 3D Contributor program. Don't forget to create a troop log here on FISD and get awarded for your adventures The list of accomplished troopers keeps growing, so get on board and register your troops today. Simply start (or update!) your troop log, keep the running total in the title, and post (at least!) a date and name for the official 501st event where you wore your TK! Once you've hit a milestone count, go over to the "Field Exercise Awards -- Post your milestones here" thread to request your profile be updated! Simple, right? Milestone post example: Milestone and Troop Log Title: [100] TK12345 My troop log Date and Event: 8/23/2019 -- Death Star Cooking Class Photo: Pictures are not required, but are highly encouraged! Your picture may end up in the Stormtrooper Hall of Fame Award Recipients January - February TK6427 "Berbs42" Chris - Are you an approved TK that spends more time on the boards than the average Trooper? Do you enjoy using your knowledge to help out future and existing Troopers? If so, we would like to invite you to join the Imperial Attaché program! Members of the I.A. team are chosen to help out not only those here on the boards, but on a local level as well. Our aim is to have at least one in each and every Garrison, Squad and Outpost in the entire legion to be the eyes and ears of the FISD on a local level. A suggested level of EIB or above is preferred, as part of the duties include assisting those aiming for levels 2 and 3, but is not a requirement. Being active on the boards on a regular basis , welcoming new members and helping out where you can is, though. Some of the benefits: 1. Access to exclusive Attaché merch., including patches, IA patch , IA Rocker 2. Having the Imperial Attaché title under your name. 3. Being a part of the team that welcomes new and prospective members of the FISD. 4. Being the "go-to" person in your Garrison, Squad or Outpost. 5. Exclusive access to the Attaché HQ area, Imperial Propaganda Machine (newsletter) and merchandise discussions. For a complete list of Imperial Attaches, go here IMPERIAL ATTACHE AWARD Imperial Attaché Award for those attaché's who have gone above and beyond [minimum 1 year of service] You can find a list of prior recipients here Attaché Ambassador With Unquestioned Loyalty Frank Peranteau TK75139 "Frank75139" Attaché Ambassador Update Your Fire Team Info: Hi all, I've been doing some housekeeping in the approved Fire Team area, mainly to make all the posts in a uniform, easy to see format. The original post were in a different forum theme and those font colors were hard to see in the current theme. Anyway, please check any teams you may be a part of and see if they are still active, members up to date and the logo still works. Please contact me directly if any of your information is incorrect or you need your logo updated. For the full list of Fire Teams here Thanks! With Unquestioned Loyalty Mark Ryner TK4584 "captsafe66 " FISD/Fire Team Director So what exactly are EIB (Expert Infantry Badge) and Centurion levels? These programs were designed for those who choose to take their armor above and beyond the minimum requirements for basic 501st Legion approval. It gives you the chance to show a level of dedication and pride that takes your armor closer to being as "screen accurate" as possible, without as much extra work as you may realize! It also works on giving a better look to the Legion as an entity, and you can bet others will take notice of your hard work. The 501st has a list of detailed requirements for Basic approval, (level 1), EIB, (level 2) and Centurion, (level 3) which can be found here in the Costume Reference Library, (CRL) http://databank.501st.com/databank/Costuming:FISD_CRL Here are a few of the questions people may be wondering about: 1. "I am a (tall/short/heavy/thin) Trooper. Can I still apply? Of course! These programs are open and encouraged for all sizes of TKs, as long as the costume is correct and meets the guidelines. There are many specific build tutorials to every option, as well as a vast network of fellow TKs on the FISD to help you out and offer suggestions. 2. "How much extra will I have to pay for extra items"? The cost is actually quite reasonable, considering the few extra supplies you will need, which are listed in the requirements area. While it may run you a little more to implement these additions to your costume, they will go a long way to improving accuracy. All needed items can be found for sale on this thread: https://www.whitearmor.net/forum/forum/16-ongoing-sales-project-orders/ While blasters are not required for basic approval, for EIB and Centurion levels they are, and may need upgrades (also listed in the CRL). 3. "I haven't even got my kit yet, is it too early to start planning"? Actually, aiming for Centurion is easiest to do right out of the box. 4. "I have my basic TK approval, can I still get in these programs"? In a word... absolutely! 5. "Are there any "perks" to this extra work and cost"? Besides knowing that you have a great looking set of armor, the 501st and FISD believes you should be deservedly recognized for your achievement(s), and allows you to wear the appropriate embroidered "rocker" badge of rank (available for a very minimum cost) on your shirt, helmet bag, etc., as well as rank decals to put on your armor bin. You will also have access to select "challenge coin" runs, receive (free) a cool certificate for your new rank, and have your title posted below your name in your FISD signature. Plus, once you reach these levels, you will have the extra knowledge to help out those who are looking to apply as well. 6. "Is it hard to apply, and what happens then"? After basic approval, all you do is make sure your armor is up to the standards set forth in the CRL, post a thread with the required photos in the appropriate area (see below), and wait a bit for the D.O.s (Deployment Officers) to address it. (Hint: Studying other people's threads before you submit can be a GREAT help). These are also listed on the main page of the FISD site. While waiting for approval, you will get some comments from others who will offer suggestions and constructive advice to help you out. If you should need any changes, the DOs will let you know, so you can adjust accordingly. Don't be dismayed if you do need changes... it's all for your benefit! After you are approved for EIB, then you can submit for Centurion. 7. "Can I achieve additional awards"? Yes and No, you can achieve extra awards at EIB for each additional version costume approved, this will be shown on the thread title as [APPROVED 2nd], [APPROVED 3rd] and so on and you will receive an extra star for each EIB approval on your profile. NOTE If you are approved with a second version of a particular costume you do not receive an additional award, there is only 1 award issued for each costume version ie: only 1 Hero, 1 Stunt, 1 HWT, 1 ESB and so on. If you have a second/additional version costume approved you will see "2nd version" and [APPROVED] added to the thread title, no additional profile stars (more info on profile awards here) For Centurion the award program is a little different, you are only issued the Centurion award once no matter how many additional version costumes you have approved. EIB https://www.whitearmor.net/forum/forum/19-request-expert-infantryman-status/ Centurion https://www.whitearmor.net/forum/forum/72-request-centurion-status/ Photo Checklists To make it easier (and faster) to get you approved, we have updated the Photo Requirement checklists for both OT and FO and included visual examples of what we as D.O.s are looking for in order to move you along at an expedited rate. These can be found here: Expert Infantry: (For all non-FOTK costumes) Centurion: (For all non-FOTK costumes) FOTK: (EI and Centurion) Just remember that the FISD is here to help you every step of the way with whatever other questions you may have, but if you can't seem to find what you are looking for in your research, just ask away here on the forum. This area lists all those who have gone above and beyond basic approval toward screen accuracy. FOR January - February the 1st Imperial Stormtrooper Detachment would like to congratulate: Expert Infantry Badge Award: Ardeshir "equuspolo" TK42128 EIB APPROVED - Second ANH Hero Version (no additional award) Dan "CableGuy" TK421911 EIB APPROVED - Second ANH Stunt Version (no additional award) Jakob "Yacorp" TK61199 EIB 1016 GREAT job on your approval, now on to Level 3! Request your free EIB certificate here --------------------------------------------------------------- Centurion Badge Award: Josh "Silverback73" TK20112 Centurion 491 Scott "Ruck" TK69901 Centurion 492 Ardeshir "equuspolo" TK42128 Centurion APPROVED - Second ANH Hero Version (no additional award) Outstanding job on reaching Centurion, Troopers! Request your free Centurion certificate here If you see any of these Troopers around your Garrison or Squad, be sure to congratulate them! Newsletter If you have any interesting stories or photos or something you think newsworthy please send them to me via pm. With Unquestioned Loyalty Glen "Q" Rhodes TK-85421 "gmrhodes13" PRO Newsletter Staff List 2020 Detachment Leader (DL): Andrew Franke (Sly11) TK11469 Executive Officer (DXO): Tim Waychoff (Dark CMF) Deployment Officer (DCA): Joseph Pedigo (justjoseph63) TK-10963 Deployment Officer: (DCA): ShaSHa (ShaSHaChu) TK-19233 Deployment Officer: (DCA): Mario (TKSpartan) TK-48117 Lead Provost Marshal (DCOG): Steven Sheades (starsaber25) TK-10466 Provost Marshal (DCOG): Chris Pearson (themaninthesuitcase) TK-10911 Provost Marshal (DCOG): Aaron (Bronx) Gibson (Pyrates) TK-99725 Fire Team Relations (PRO): Mark Ryner (Captsafe66) TK-4584 Personnel Officer (PER): AC (Novatie) TK-5597 Content Editor At Large (PRO): Christoph (Danny) Lauber (Ripper_L) TK-55550 Content Editor Awards (PRO): This will be handled by the XO Newsletter Publisher (PRO): Glen Rhodes (gmrhodes13) TK-85421 Attaché Ambassador (PRO) Frank Peranteau (Frank75139) TK-75139 Social Media Relations (PRO): Teresa Nuthall (Soulart) TK-41307 Social Media Relations (PRO): Jim Ferrell (Rat) TK-95970 Imperial Propaganda Machine: Brien Edick (Harbinger) TK 92802 Imperial Propaganda Machine: Eric Ho (Hoda) TK 77520 Systems Administrator (DWM): Eric Brager (Darth Aloha) TK-9674 Systems Administrator (DWM): Mathias (Locitus) TK-2959 Detachment Founder (DF): Paul (Daetrin) TK-8020 Replica Section Curators (PRO): Dan Branton (CableGuy) TK-42911 Don't Forget We're on Facebook, Twitter & Instagram Facebook: www.facebook.com/whitearmor Facebook Group: 1st Imperial Stormtrooper Detachment (FISD) Official Twitter: www.twitter.com/FISD501st or @FISD501st Instagram: www.instagram.com/fisd501st On behalf of the 1st Imperial Stormtrooper Detachment Command Staff and the Imperial Propaganda Department


 1 point
 -
I created an IG post about my helmet electronics, and made a panoramic, labelled pic of the inside, which I will share here. Most troopers add small fans for the heat and fogging. Many have an external sound system with some modulation effects (usually behind their chest plate with a headset mic). For mine, I wanted it all contained. I added a voice system, fans, power, and en environmental hearing assist system, and somehow had to fit all of that around my larger-than-usual head. Swipe for a panoramic inside view with labels. Here’s what I have in there: - Ukswrath trooper talk system (mic, amp, iCOMM modulator that adds static after speaking, and the Hovi tips on the front of the helmet are the speakers) - Ukswrath Stormtrooper Hearing Assist (SHA) system (mics are under the “ear” plates, over-ear headphones inside are detached from Velcro and put on my ears as I put on the helmet) - flat power pack with dual USB outlets - USB in line switches - two USB 5v fans - A lot of Velcro (click if it is too small to see)1 point
-
Ok I removed all the return edges from the forearms. Fitted them up with my gloves and under suit on. Next is to trim off the excess material. Also will cut the back and cover strips.
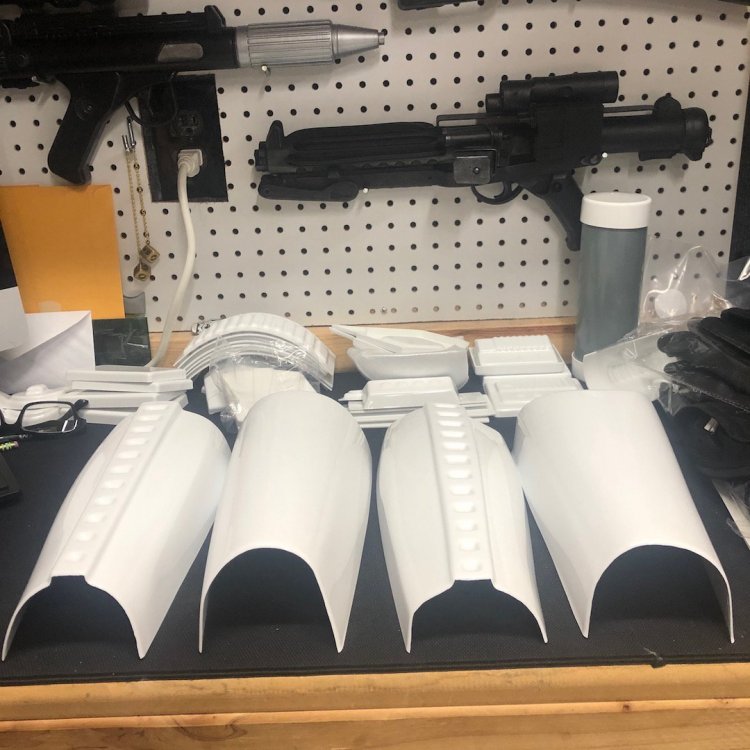
 1 point
 -
My tricky repair after a trimming mistake: I was following along with my notes on various measurements, but made the mistake of not double-checking against the actual connections. On my lower thigh ammo strap, I checked one side, and then cut both to sides to the same length. The trouble is, even though it is not required on the CRL, the back corner mounts on the ammo strap should end up the same distance from the back "corners" on the thigh armor (the green line pictured below). Also not required, but aesthetically important to me, was to have the center box aligned with the front cover strip on the thigh. My options were to order a replacement, or to try a tricky repair, but cutting the inside edge square, and fuzing a new piece to extend it to the correct length: Once I had the pieces prepped, I also cut a "backer" piece of thinner styrene (from a parking sign) to go behind the seam (not full width, so it won't be seen from the top), and sanded all surfaces with coarse sandpaper. I did a quick test of some scrap to make sure how best to apply pressure during the bond, and then I used this "ABS and Styrene cement" for the initial edge bond. This cement is the consistency of water, but it temporarily "melts" the contact areas you brush it on, and then when pressed together, it "welds" those two soft areas. So I first brushed it on the edges, pressed them until they were clearly joining, and then once partially cured an hour (full cure reached at 24 hours), I used that same cement to bond the backer plate to the join behind the seam. Once that was cured a few hours, I then spread a line of ABS sludge to the top of the seam. Let it all cure overnight. I then sanded the sludge down flat, going up to wet sanding with 1000 grit sandpaper, and then the polished to a shine with Novus 2 and Novus 1 polish. Everything seemed good. Until I tried to flex it onto the thigh for a test fit. The seam cracked right where it needed to bend around the corner (circled in red): So. I emailed AM for a replacement, because my work was for nothing. I was beaten. Or was I? Maybe I could save it, so I could at least have it finished and swap it out later? The seam failed because of the extreme tension there, it was basically internally weaker than the surrounding plastic, so it was breaking like a score and break. My issues probably stemmed from my attempting to weld it flat, when it should be welded in a curve. I figured there was no harm in one more attempt, so I solved the tension first. I used a heat gun and gently bend the plastic to one side following the thigh's corner, to relieve the tension on my seam. Then, I once again brushed the seam with the cement, and then laid a line of ABS sludge into the now more angled gap, and let it fully cure over night. Then sanded and polished that seam again, and tried it out. It worked! There is a slight seam imperfection in the shine when you look for it, but being on the inside of the thigh behind the last box, it may never be noticed. I drilled my holes and mounted it with two-piece rivets (paint to come), and it seems to work well!1 point
-
Magnetic calf-closure system: After my initial test of my butted-magnet system, I finally got to completing the shin armor so I could try it out. A note about magnets: they are only really at full strength when exactly touching. Even 1mm apart, and they are at about half strength. So for this to work, the pairs of magnets need to be as close to each other as possible. Because of that, I tried one method on one, and through that process came up with a better method for the second that ensured optimal placement. To begin with, I created a bunch more of my heat-formed "pockets", including a different type for the top and bottom edges (longer rather than wider shape because of how close to the top and bottom edges it would be). I have my 25mm cover strips all ready to use, but because of the nature of mounting these, save the cover strips for after the closure is complete. Even though my armor was pretty close to butted, it needed to be a lot closer for this to work. I started by fine sanding the edges, and a little mild heating to get the edges to meet more flush. The tops will get the mobility cuts, but I waited until after the closures were complete to know what the true edge would look like. Once I had it flush, I taped it closed matched up, and drew my marks. These marks would be on-center for each magnet pair. I started with the top and bottom, and then divided the distance between by 5 (giving me four marks between, for a total of six magnetic closures, 12 magnets in all, per shin). My number was about 63mm between each line. Once marked, I removed the tape. I used some coarse 60-grit sandpaper to roughen the back side behind each mark, where the pockets would be glued. In the right photo, you can see what my pockets would look like. I paired them up to ensure they were similar. A note on glue. I know the Stormtrooper lives and breathes E6000, and for most of the armor, that glue is a great choice. For this process, you will really need speed, and quick results, so CA glue with an accelerator spray is ideal. Because I once was unsure, CA glues (Cyanoacrylate adhesives) are often called "Super Glue" and it's a clear glue that sticks really well to things like plastic, fabric, and... skin. Many people call this "Gorilla Glue" but the problem with that (or any brand) is that Gorilla glue makes about ten products, including wood glue, and an expanding glue, all called "Gorilla Glue". CA glue is the preferred name to ensure people know what to use. Now, for the accelerator spray. Zap-A-Gap makes one, but there are many types. What it is is a spray that you can spritz on a wet bond, and it sets the glue (at least on the edges) in about 3 seconds. No kidding. Like you could take a quarter, glue it to the side of your work bench, spritz the edges, and then let go. In my experience, if you quickly pried it up, the CA glue would be wet underneath for some time, but it would be "clamped" by the already cured edges while the remainder dries. This closure method relies a lot on that rapid dry time. Gluing magnets into the pockets. It is fairly important to keep track of polarity for the magnets, so put them ALL in a line, and use two different colored sharpies to mark each end, so that you have (for example) a blue and red end on each, and every red wants to stick to a blue. On the pockets, mark the "center line" that is where the center of the magnet would be on the seam edge, so you can line it up from the outside. Sand the bottom of each pocket to prep for gluing. Then set out your pockets bottom-side-up (if possible, on a piece of sheet steel like I have, or some other magnetic surface to keep them from sliding or trying to attach each other. Mark them red and blue as well to keep track of what goes where. Drop some CA glue in the bottom of each, and set a magnet in each pocket, aligned toward each other by color, so you have a red side and a blue side (or whatever colors you use). If you have accelerator, you can spritz these and be ready to move to the next step: Note: the following process was what I tried on one calf, and then improved on it, so be sure and read ahead for a much better process for gluing. Start on one side and in order down one "color" set, take each pocket, and add CA glue to the bottom edge, filling in more around the magnet. Mount it in place lined up with the edge line on-center for each magnet, and as perfectly close to flush with the seam edge as you can. This works best when the magnets are just touching. As each is set in place, spritz with CA glue accelerator, and then add a line of glue around the back edge and sides of the pocket, and spritz again. Move up one side, and then down the other, taking care to keep it from shutting before everything is truly cured (I would give it at least 30 minutes to an hour). These magnets are quite powerful, and could likely pop free from un-cured glue. Here is where I found a problem, and a new solution: Once I finally put the sides together, they clicked nicely with a satisfying click. The trouble was, you can see in the first photo, is there were gaps where various pockets were too close together, which then kept the better positioned ones from touching. So I had to go to each joint, and with a small piece of sandpaper wrapped on a bit of plastic, sand them until they met flush. I eventually got it much closer, but it took a lot of fine sanding and trouble to get them to match: My solution for a more precise alignment of the magnets: I realized that the magnets want to be close and perfectly aligned. That's their purpose. So I should use that. So I did as before, and glued one side (like the "red" side), again, as close to the edge as possible. Full CA glue on each, and spritzed with accelerator to lock them in, and then I let that side sit for an hour to fully cure. First, I taped the calf closed as perfectly as I could, with the edges tight together. Then I took the other set of pockets with the magnets glued in, the "blue" side, and put glue on just the back half, away from the seam edge. I didn't want to risk getting any glue on the seam or opposing magnets, and it does spread out a bit. So for now, just glue the back side (pictured). Then I carefully, in order, set the magnets down the side across from their "mates" and the magnets themselves snapped into the perfect spot, touching exactly. If the other side was a little over the line, they would lock in back a little. It aligned them perfectly. As I went, I would place a pocket, then do some CA glue along the back and back corners, a little on the edges (remember, nowhere close to the seam edge), and then spritz with the CA accelerator, locking them in. Once that side was done, I set it aside for a half hour to more fully cure before removing the tape, popping it open, and then gluing the remaining spots, including around the edges up to the seam edge. That one went together much more quickly, and it was nearly perfect. One of the pockets had pried up a little, so had to be clamped and re-glued, but otherwise a much easier method. I then taped the top edge, and now that it was in the final alignment, ground my mobility cuts. And now the moment: Does it work? I tried them on, and they snap right shut around my calves. In the little I have worn them this morning, they seem to work really well. I will say that I expected them to be a little harder to open. I walked around, up and down stairs, and they stay closed, but when I do something extreme with the top edge, like crouching in a kneeling position, the top can spring open. I tried them on before the mobility cuts, and they sprung open more often when bending my knees past 90 degrees. Because of this, I am adding a "fail-safe snap" (popper for the UK folks) on a 1" black nylon strap inside that crosses the top of the seam on either side of the top magnet snapping on one side. The strap will be connected by reaching in from the top after the armor magnetically closes around my calf, that should ensure it never opens without me doing it. I will add pics of that in my next post, but for now it is on E-6000 time. Also I will finally add my rear cover strips, which should help finish these out!1 point
-
Moving along, little by little, in the dark of the morning before the kids wake up. I have finished the inner and outer cover strips on my forearms, biceps, and thighs. I used to have just ten large magnets, which was only a strip of five on each side. For this project, I added 20 more, and I am glad I did. I used all 30 on the front seams of the thighs! I was awaiting a new brow trim piece so I could extend it to the back of the trap (I know many are short of the back, it is just my preference for how it looks), and once I had it, tackled a bunch of the helmet, including a lot of the hand painting. The ears were as troublesome as everyone says, and I even had to do some minor heat bending to make it work with less of a gap. Amazing how it all feels flush, and then the bolts get tightened and it is a gap again. I am glad to be moving on. Just finished most of the hand painting. I used the Trooper Bay templates for most of them, but freehand painted the buttons (experienced artist, still was challenging). My question is this, in the CRL it states for level 2: “ Fall of tube stripe tops ideally lean toward the front.” but my template didn’t do that, and I am finding a lot of original helmets that also looks just like mine. It does say “ideally...” and I have examples of it comes to it (third pic of four original helmets). Originals that look like mine: I asked around, and @CableGuy pointed me toward the reasoning. The "Dave M." template has a more distinct lean, and it needs to be toward the front. For the tube stripes, I painted lightly with white first to "seal" any seeping cracks in my template, then 20 minutes later did a few lightly brushed blue coats 10 minutes apart, until solid: More painting, vocoder, frown, ears, traps and tears (not shown), and buttons:1 point
-
Okay, I decided to try something new for my shin closures. I am just testing out the concept, and it looks like it may work. Many people have used Cricket's magnet closure system. Having trooped with some Velcro on my clone, I know that Velcro is not the most trustworthy. While I wanted to use magnets, I came up with a different approach. The good part with this method is that if it is a terrible failure, it is more removable than the disk magnets with holes method. My primary reason for trying a new approach is that we all know that magnets are strongest pole to pole, and have their most strength in that direction. If you have a stack of disk magnets, you slide them to detach them because it is way easier than pulling straight up. The issue with Cricket's design is that we are trying to resist the calf armor from opening side to side, and yet that is how the magnets are weakest. I had some strong cylinder magnets, 1/4" N-52 that are magnetically aligned along the length. I would put them on either side of the opening on the inside, so that they have their strong pull directed at each other. They are nearly 5 lbs of strength each, so I needed to cut that down a little, and I also didn't want them snapping directly together which would chip them over time (some of mine are already chipped). So I needed to create a sort of case around them that I could glue down. Because there will be plastic on the face, they will be a little easier to separate with that material, and protected. Here are the magnets from K&J Magnetics, and I believe I will use 24 total for the two calves: To make the magnet pockets, I made a slot in a scrap piece of thicker aluminum by drilling two holes and filing it out. This could be made of wood as well, just something that you can press hard on, and doesn't mind some heat or pressure. For these magnets, the hole needed to be larger on all sides to accommodate the plastic, and I ended up with a 9mm x 16mm opening. It helps to have one edge bent up, so you can press it flush, sort of like a spatula. For the plastic, the cover-strip sheet that came with the kit was too thick, about 2mm, so I found some scraps I trimmed off my clone arms, and my thigh scraps from this suit will have plenty as well. That trimmed plastic is between 1mm and 1.5mm, and the thicker 1.5mm was more difficult to stretch, so the thinner is better in this case. I put a piece of sheet mild steel down on a scrap of plywood. This was both a non-stick surface, a heat sink, and the magnet holds itself in place on the steel. First I heated the plastic on low, until it just started to go floppy. Pressed down my aluminum guide, and got it halfway down. Then I hit it, while on the magnet, with the high heat until it just starts really shriveling (this is about 5 seconds of high heat, and rapidly gets too hot, so act fast), and pressed the guide slot down over it until totally flush with the metal base. Sometimes it took a few re-heatings to get it flush, and it needs to be so that when mounted, it glues flat to the inside of the armor, with the magnet contained. Then I clipped it to have side tabs for gluing (though a few will need a different shape, at the top and bottom channel shapes in the shin), and then trim one edge really close. The magnet needs to be as close to the edge as possible, so I sanded it more flush on a sanding belt (and rounded the corners). Now for my initial test. I clamped them onto the edges of some strips, and they seem to work well enough. So I made then more pockets, so I could test it on the shin halves. I was most worried that they might be too strong, so I did five on each side, taped in place, right up to the edge of the plastic. I marked my stack of magnets that were all stuck end to end with two colored sharpies, red on one and blue on the other, so I could make sure one whole side was mounted with red ends at the edge and the other side all blue ends at the edge (When I do this on the armor, I will glue the magnets into the ABS pockets and mark them on the underside). I taped them all in, and tried it out, and it works really well. In fact, I think I will do six pairs on each calf instead of five, because it was not too difficult to open, but it really wanted to stay in place. If this doesn't work, I can still remove the pockets, and go with a different closure, because the armor will be un-affected. So I will update when I get to assembling my calves. I do have a question for those with velcro or other closures: Where are the trouble spots, top or bottom? Meaning if I were to have a stronger spot, is it needed at the bottom, where the boots sometimes pry it open when walking, or at the top, from bending the knee? Progress update, I started on my snap mounts, cut and fit my abdomen, finished the forearms and biceps with inner strips and cover strips, and started on the thighs.1 point