Leaderboard


Popular Content
Showing content with the highest reputation on 10/16/2020 in all areas
-
Hi Ardeshir, Thanks for your Centurion application. Joseph really nailed it in his answer above, but I just want to emphasize that on the whole, we go for the 'fresh off the Death Star' ideal trooper look. In order to come up with these guidelines we examine a lot of screen reference and try to come up with the most common look for that trooper. Now as we all know, there will always be exceptions (e.g. everyone's favorite Mr. No-Stripes). With ESB in particular, two things make this job difficult - 1) my understanding is that most of the suits were re-used ANH suits which were just trashed by the time the second movie came out and 2) there are actually very few scenes with TKs in ESB, giving us limited information to work with. When we do these reviews, we try as hard we can to maintain consistency no matter which DO is doing your review (this is why we have every application reviewed by the entire team before posting), but in the end we are only human and things definitely slip through the cracks. I also want to ensure that you and others know that we try to be clear what are requirements and what are suggestions. Suggestions are just that - things which we think will improve the look of your armor, but won't block L2 or L3 approval. With all that out of the way, let's get to what we're all really here for! CRL and Centurion Application Requirements All required photos are now in and, after review, we are pleased to welcome you to Centurion! On behalf of the DO team and myself, many congratulations! Other-Armor Fit/Assembly In this area we discuss areas that could benefit from additional improvement. Note that we consider both text (CRL) and pictures (screen caps/reference images) when reviewing submissions As already mentioned, just keep an eye on your cover strip alignment once you suit up. Of course the instant you take a step everything will shift around. Reference Image: Congratulations again on your fourth Centurion award!3 points
-
I get passionate about this stuff and came in a little hot on the last post, but I do appreciate everyone here. Glad to hear that we all agree the CRL could use an update. Let's make it happen Mic tips replaced with some from @ukswrath that I painted up per your request - satin black exterior, interior, and mesh, with white nip-... accents. Repainted the vocoder with Model Masters semi-gloss black, and chipped a bit more off that middle tooth. Didn't want to paint it since it's rubber, but I did use some sandpaper to knock as much of the silver off my blaster grip as possible. It came that way. *shrug* See you guys over in the Centurion sub this weekend3 points
-
Okay, I shifted my boxes over, and then tightened the elastic to raise them to be closer to the belt: On my shoulders, I am doing the slight curved edge (rather than straight), to match the originals, and to help close the black gap between the shoulder and chest & back plates: Soon I am attaching the elastic between my arm pieces, and I plan to use the more movie-accurate alignment that @CableGuy has found (based on the RS suit, and screen captures) that does not align to the cover strips as builders usually do. You can see in the RS gallery a spot where it is folded over, and clearly shows the mounting locations as not aligning those strips. He has a full video showing his findings, but this is what it looks like: Video link: Cable Guy's arm alignment2 points
-
So dad being the absolute legend he is helped me sand the bucks smooth among some other stuff today. Decided to pull some stuff including new ear moulds and decided it was good enough for a mock up. For a couple hours of work I'm pretty happy with it, some of the hardware isn't accurate and the mould needs some details fixed but definitely not too bad. Sent from my SM-G950F using Tapatalk2 points
-
COSTUME INFORMATION Armor: ANOVOS TFA beta kit Chestplate seam mod (wings cutted and reassembled) Chestplate chestslot mod (cutted and reworked) Biceps detail mod (3 step stairs) Shoulder bracket mod (àla Ukswrath) accurate fabric behind detail holes replaced front Belt Boxes with resin Belt Boxes (made by R2Dan) replaced Handguards with resin Handguards (made by R2Dan) Helmet: ANOVOS TLJ Standard Line Gaskets: ANOVOS Belt: Belts of The First Order Belt Pouches: custom made (by TK-72216) Holster: working metal holster (made by R2Dan) Undersuit: shiny pants and black top from Amazon Neckseal: custom made (by TK-72216) Boots: Imperial Boots Gloves: Endor Finders F-11D Blaster: 3D Printed (printed by Sanotized Creations) Name: Richard Voss Height: 176cm (5‘9“) Weight: 85kg (187 lbs) TKID: 40193 Garrison: German Garrison Basic Approval: https://www.501st.com/members/displaymember.php?userID=26769&costumeID=408 About my action Shot: unfortunately I forgot my blaster, when we were taking photos of me in armor. While we still had to do an action shot, I was lent the Blaster of TK-51337. The Blaster in the single shots is my own (this single photos we taken a few days later). Of course, if required I can jump into full armor again and take a new action shot with my own blaster. Here is a picture with all of our F-11D's at once (mine is in the middle) Basic Shots (Guideline Points 1-5): Chest (Guideline Points 6-10): Detonator (Guideline Points 11-13): Shoulders (Guideline Points 14): Biceps (Guideline Points 15): Forearms (Guideline Points 16-18): Abdomen (Guideline Points 19-21): Cod (Guideline Points 22): Posterior (Guideline Points 23): Thighs (Guideline Points 24): Shins (Guideline Points 25): Ankle Spats (Guideline Points 26): Helmet Details (Guideline Points 27-30): Neckseal (Guideline Points 31): Undergarments (Guideline Points 32): Shoulder Gaskets (Guideline Points 33): Knee Gaskets (Guideline Points 34): Gloves (Guideline Points 35-36): Belt (Guideline Points 37-38): Boots (Guideline Points 39): Blaster Details (Guideline Points 40-45): To prevent confusion: We (Richard TK-40193, Daniela TK-72216 and Sebastian TK-51337) built our stormtroopers together last year - the local Rise of Skywalker premiere was our first troop as FOTKs. In January we submitted our armors for basic approval and passed it. We then decided to update the few parts that we hadn't initially built to the Level 2 and Level 3 standards and are now appliying for the next levels of approvement. Since we built the armors together almost every mechanism, closure method and solution to strapping problems is the same - there are small individual differences but nothing major. We took our new approvement photos before a green screen in our living room with a set up to lights over a couple of days so lighting and background should be consistent in all three of our applications. Thank you very much for your time!1 point
-
Thank you brother for all of the help and guidance.1 point
-
Sha Sha, I agree with everything you said and 100 percent on board. Appreciate always always all of the DO's kindness and guidance and it is something I highly look forward to and respect very much. If I ever ask it is only for my own knowledge. Again Sha Sha, I can not thank you enough for your time and consideration and encouragement. Appreciate it beyond words.1 point
-
Almost there1 point
-
More progress this week. Belt done. Decided to copy a suggestion from Mayo's build to put some storage in the belt boxes for cash and ID. Just gloves and shoulder strap to go. Then to fix up all the other little things on my list. Sent from my SM-A520F using Tapatalk1 point
-
Awesome news, so glad to hear you are almost ready for approval, it's been a long road and you stuck it out. Looking forward to seeing your pre approval images1 point
-
Thank you...It would be a good option to improve my helmet [emoji1303] Enviado desde mi iPhone utilizando Tapatalk TK-157111 point
-
Congrats! Tenacity works!1 point
-
Thank you Mario1 point
-
Congratulations once again trooper1 point
-
Wow Congratulations 4 star General. Welcome, once again to Centurión!!!1 point
-
I have also stated to put some of the parts together and fill them in prep for paint. Starting with the trigger guard. because I'm working on a new front trigger as well as trying to find a print and decide what to do with the back trigger. either it will become the mod button or something... not sure yet...1 point
-
It’s getting there Chris, keep up the great work. Sent from my iPhone using Tapatalk1 point
-
Removed 1-2mm from the thigh ammo pack.1 point
-
Congratulations!1 point
-
Thanks, glad it helped. THT What joseph said1 point
-
The artificial Allen head screws on the underside of the scope rail to barrel brackets interfered with the scope rail attaching to the barrel properly, so they are gone. I also ground down the heads of the real screws I'm attaching the brackets to the Hengstler counter with, so they don't rub on the barrel. The existing LED/sound chip wiring seems to be backwards on the sound selector switch, but I won't be using that portion. Will need to locate both the charge port and the selector switch for stun/kill sounds somewhere, and the speaker that came with the original kit is not very good. I'll get a better speaker that is the same size. More pics coming soon.1 point
-
Yeah, I need to dig for it. I don't recall seeing it... I know I have the 2 Shin boxes. -- EDIT I just looked at my spread out photo of the kit parts and I believe I see it in there!1 point
-
It arrived! Hmmmmm... there seems to be another layer below the wedge, that I don’t believe I have...1 point
-
They are screen accurate. I prefer double snaps on mine just in case one fails you have a backup1 point
-
Jeff, Thanks, I was just taking my morning break/ forum check and saw you post this. So, my shoulder traps sit similar to the reference pics you posted with a very small gap under the bottom. I'll play around with them a little. I still need to finesse those tabs on the belt a little bit. I intentionally left them a little "fat" so I would have room to trim. Also, since I added an extra strip underneath the belt (I forgot to post a pic, but it's basically the same size as the test strip I bent) the belt sits in a position that should allow me to bend the tabs inward slightly. Also, I actually just went to my garage and looked at the rear belt. I may play around with it a little bit because I feel like there's too many layers of plastic there. Finally, I saw this pic of the boots before and I love it. For reference below is my 1980 Dengar figure and one of my son's Stormtroopers from 2010. In Rogue One, are those "holes" cut out or painted? They look painted to me, but I wasn't sure if anyone ever got a close look. I have no problem with painting a "hole" on the bottom of my boots when they come in. That might be fun.1 point
-
1 point
-
Looking GREAT, sir! I wish all the submissions we receive had such fantastic photos..1 point
-
Hi Richard, thank you for your EIB app. Another FOTK great Build !! One of us will be with you shortly.1 point
-
This is one of my favorites.. Sent from my iPhone using Tapatalk1 point
-
I’m happy to report, my Garrison leader invited me to come and see them in action on one of their trooping. This only reinforced my desires and drive. Although I don’t know your TK ID here, thank you Jeremy and the rest of the troopers I met today. Sent from my iPhone using Tapatalk1 point
-
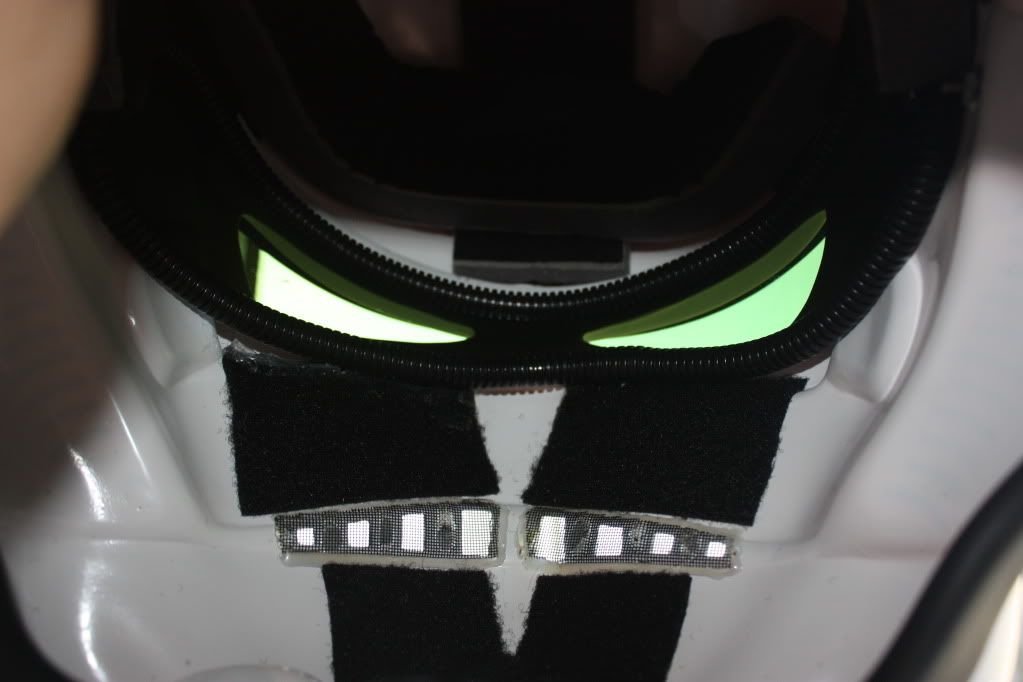
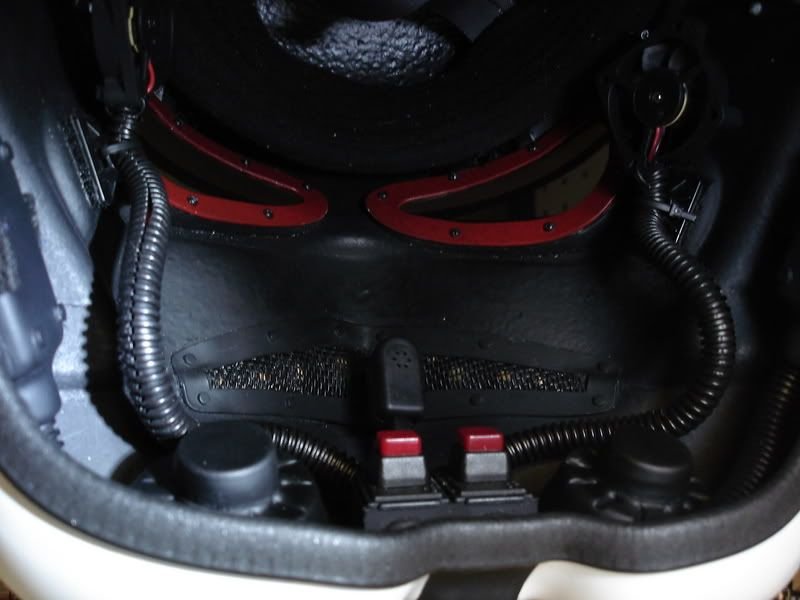
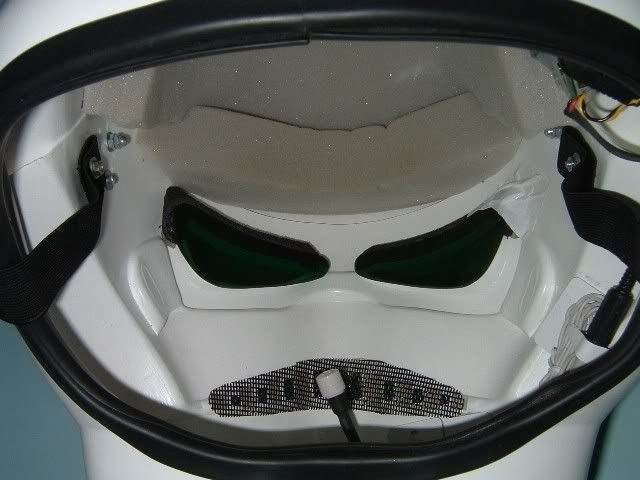
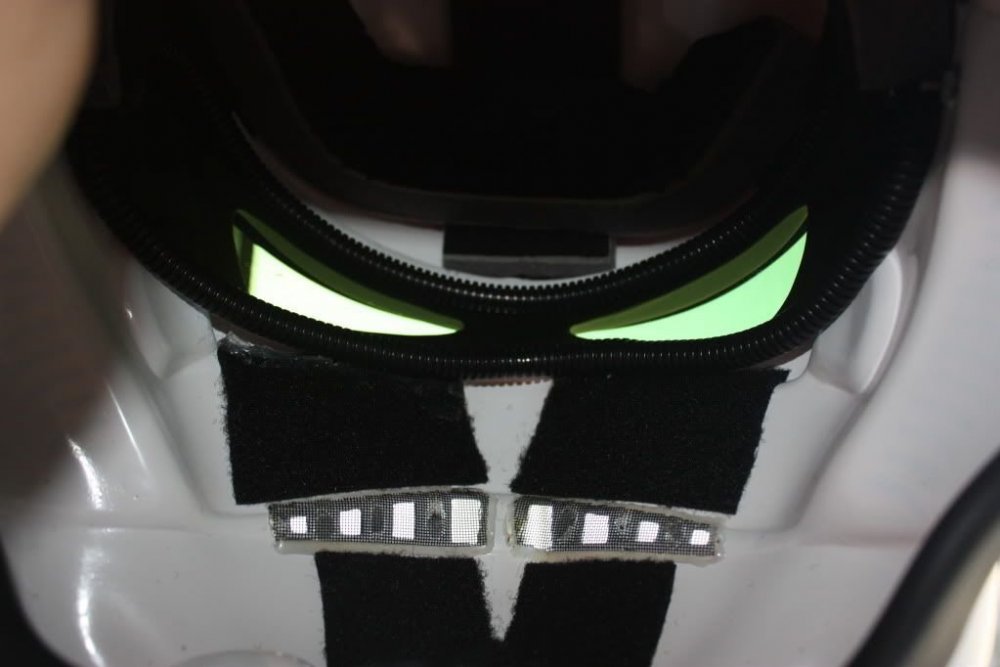
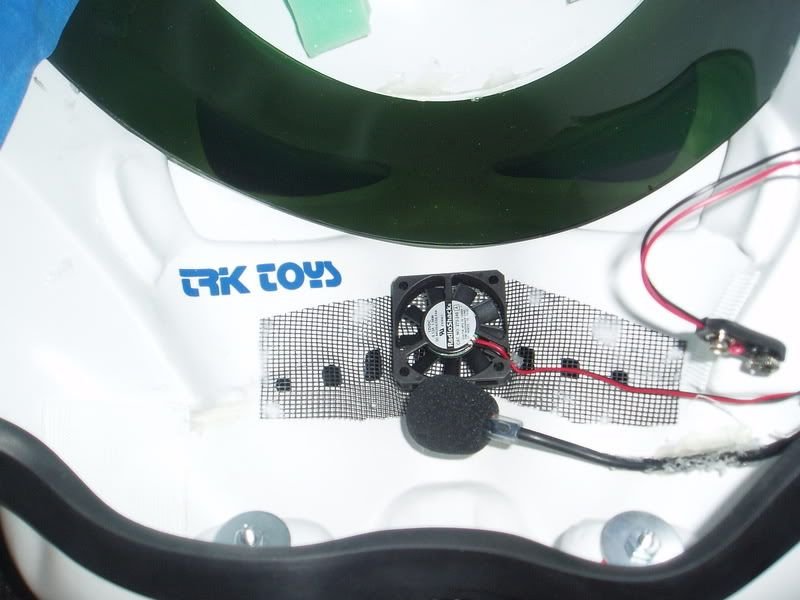
I've seen quite a lot of different ways to add mesh. I use a metal flywire mesh, cut larger than the teeth area so I can fold over, tape in place and add a couple of dabs of black silicon to hold it, normally in both corners then top and bottom in the middle. I've seen tape used, velcro, silicon, hot glue, tabs and screws the list is endless Here are a few examples Even gaffa tape
 1 point


.thumb.png.69856e02550a2e6d07e44a2b1bda020c.png)
.thumb.JPG.0594464b5116e73e45fce31c6b373ef5.JPG)