Leaderboard


Popular Content
Showing content with the highest reputation on 08/19/2020 in all areas
-
I am sooooooooo close. I’m submitting for basic this weekend hopefully and then EIB first part of next week. I’ve got a few minor things to finish and my E-11 should arrive Monday if it doesn’t get delayed by US Customs.3 points
-
Belt Boxes: Finished up the last of the boxes. The cast-in Chicago Screws should allow for a good connection to the belt. Will probably use a piece of 1/8" ABS as a mounting point for some elastic cord that will connect to the belt. I've heard from JAFO that these get banged around a bit and he recommended a similar solution. I'm really impressed with these models from Empire3D. If you are looking to replace the boxes in your kit with ones that are more accurate, you will not be disappointed. Highly recommended.2 points
-
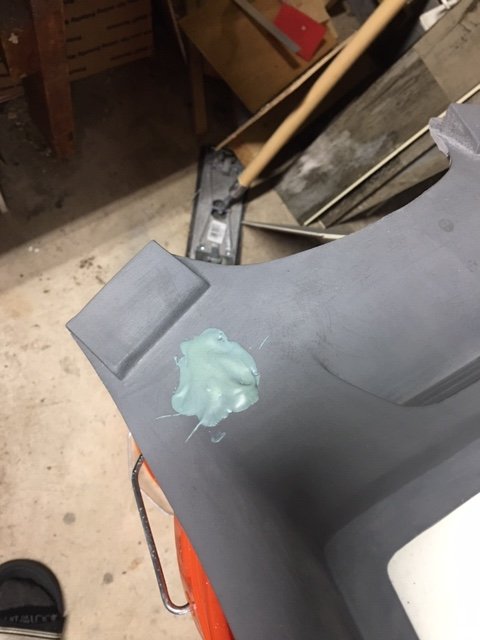
found some pinholes and imperfections needing fixing i got some resin on the abb buttons so they lost some sharpness hopefully i can recover from it the legs need the most work with sanding hope to sand down to 600 and give the pieces another coat2 points
-
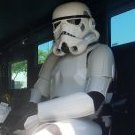
Armour pictures for documentation for my progress to EIB Helmet: Neck seal: Chest Piece/shoulder straps: Backplate: Biceps/Shoulder Bell: Forearms: Ab plate: Kidney: Butt plate: Left thigh: Right thigh: Left shin: Right shin: Thermal Det: Sent from my iPhone using Tapatalk2 points
-
Finally got my armor back now just have to wait for the new materials I need!2 points
-
Finally got my kit back here is some photos of me in it! Still some work for EIB waiting for my new helmet and new shim material but will be going through the check list of EIB requirements Also went to ANH with some friends in kit! Sent from my iPhone using Tapatalk2 points
-
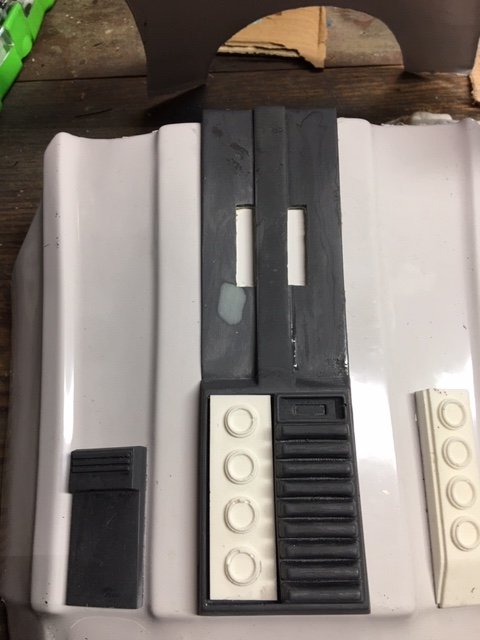
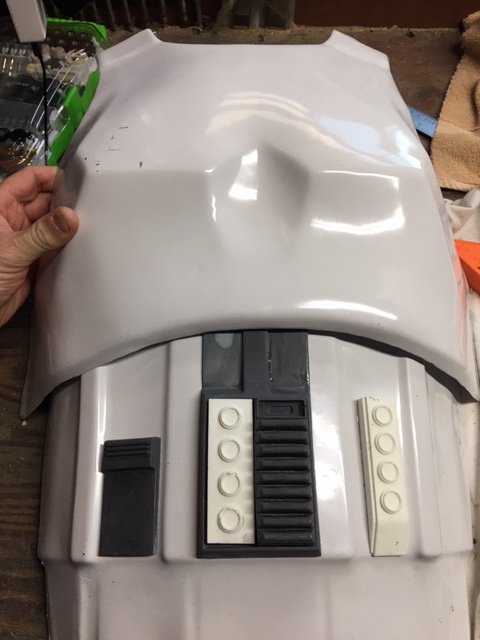
So there are a couple "issues" that'll need addressed with the ab armor. First the center strip. I'm not overly sure it matches the movie references 100% but I'm working with it. You'll need to add the small rectangle holes as I've done. Now the stupid starts because sometimes you see them and sometimes you don't. They'll probably show on me since I'm 6 feet tall. I got all the ab section glued down now. On the back plate you'll need to fill the hole on the left shoulder piece like I did. LEAVE the circle hole on the right shoulder. I've got more work to do on the helmet specifically to drill out and file down the vent tubes and heat up and form the frown teeth back piece. Once that is done the helmet is ready for paint. I've got "U" shaped gasket on the way for the bottom helmet trim. After that I'm onto fitting the ab/kidney section then I'll go down to the thighs and shins. It's getting there. I'm not an expert on it so I have to keep bouncing between the CRL and reference pics a lot.
 2 points
 -
I found a link in one of the other threads to an AliExpress page and I ordered some. https://www.aliexpress.com/item/32929669955.html?spm=a2g0s.9042311.0.0.46784c4dHxmmqf1 point
-
I sanded the putty on the barrel, sides, and belt to 220 today. Hopefully the gloss coats tune out smooth... I thought about priming the bells and biceps, but air quality is really bad due to a huge fire nearby so I didn't want to deal with ash and debris. I hope to spray gloss white on the barrel and satin black inside the side plates tomorrow.1 point
-
Man, hard to believe we just need a dozen more. How hard can it be to convince a dozen folk to just to a few small tweaks and go EI? :-)1 point
-
Okay so now that I’m clear that we are all AM, I would recommend joining the AM Armor’s Costuming Group on Facebook if you aren’t already a member. I got awesome advice on our specific kit because that’s all that group is about. Hope to see you there! Sent from my iPhone using Tapatalk1 point
-
Joe’s is AM as well, as is mine.1 point
-
It really is if I had a nickel for a pinhole $$$$$$$$$1 point
-
Looking good! The pinholes never seem to end...1 point
-
Forgive my ignorance as I'm still new to understanding the ins and outs of the STAR WARS costuming community but I noticed an etsy seller, Matt Gauthier (TE) Etsy-leatherbygauth, listed on the "sellers to avoid" post and I would just like to know why? His armour looks good to me and he has high ratings. Is he a recaster or am I missing something?1 point
-
Hi Avery , welcome to FISD. Research , asking and reading first , this is the right path for making a good investment . Don't worry , make all questions you have, we are here to help.1 point
-
Thanks everyone!1 point
-
It's not ignorance, Avery, it's just that there is a ton of information here and wading through it takes time. You did the absolute right thing by asking about this seller, and Glen added some excellent reference material to go over so that you can make an informed decision. But, know that we don't just put armorers on any particular list (good or bad) without a reason. The ones in our "vetted" section have a solid, tried-and-true reputation of delivering a high quality product at a fair price, great communication with the buyer and maintaining good business practices. In the end the choice is yours, but always feel free to ask if you have any more questions.1 point
-
Hi again, Alex! Thanks for fixing your TD clips and adding the extra requested photos, sir, but we do have 2 issues before we can complete your request. After discussing the matter with several of the Staff members: 1. We are asking that you remove the Gaffer tape from your biceps. Although this particular use of it (on the biceps) was seen on at least one trooper in the film, on the vast majority it was not present. While it is screen accurate to a degree, the FISD (and 501st) are about "standard" armor and not exact costume prop replication. While some other Detachments (like the MEPD) may require these small details as seen on a particular trooper in the film(s) for higher levels, we at the FISD are about the "ideal" overall look and do not permit Gaffer tape on EI and Centurion submissions. Reference images If you choose to add the tape back after your approval(s) that is up to you, but note that it will eventually need to be replaced over and over, depending on how much you troop. One suggestion (even if you use the tape in the future) is to add a strap/snaps to connect the shoulder bell/bicep to help keep it in place. 2. While we appreciate that your tube stripes are hand painted and the placement is ideal, the shapes will need to be more consistent with those seen onscreen. Note in the reference photos that each stripe is almost identical to the others and much more uniform. This can be achieved by either using a template (as seen here) or decals (seen here). This is going to take a little work on your part, but we have the confidence that you can do this and if we can be of any help, just ask! Reference images We look forward to seeing the updated photos so that we can get that EI badge under your name!1 point
-
happy with the helmet1 point
-
i was able to to apply some gloss white to the back ,barrel, thighs and helmet was happy with how it turned out i found some cracks on the barrel and the back hopefully i can get away with filling them with spot putty1 point
-
Nice progress Wally It's good to finally see some R1 TK's being built again, i know you are only just recently into this build, but we are working on a complete re-word of the R! TK CRL and are welcoming any feedback on the proposal. It is designed to make it a more clear explanation and help reduce grey areas in the language. It wont affect your build as you started before we did plus we always have a grace period for those working on the armour. Please when you have some time, take a look and by all means offer comment in the thread.1 point
-
Questionable recasting casting issues I believe, you can find some info here1 point
-
Never mind. Found it in the tutorials.1 point
-
Sooooo close. Nail biting time.1 point
-
I touched up a few spots on the barrel, but then saw LOTS of pinholes on the belts and sides! Thankfully I caught them now. I decided to smear putty on them like I did for the bells and biceps yesterday. Some primer pealed off as I smeared the belts, but not the sides. It must be just due to the specific primer... I'll inspect closely after wet sanding to 220 tomorrow. I must've ordered the combat-tested armor from Jim cuz these pieces HAVE SEEN SOME SH1T!! I'm glad I smeared putty on them and didn't just try to fill a few spots, cuz they NEEDED IT! I wet sanded them to 400 and you can see how bad it was! Hopefully the extensive putty prep yields a smooth finish... Do ABS suits require this much prep, or is it mostly just trim-to-fit? At least now I'm ahead of schedule!!1 point
-
Keep the questions coming! Look at those other AM builds, Firedog above is doing the same build so you guys are now build buddies. When you hit a snag or question, more than likely it has happened to others and we all want you to succeed. Keep in mind no matter how well you build it, you WILL make changes after your first troop! But those changes are specific to you, and only you will know after wearing the armor. Is seems daunting to make it, but the satisfaction of building and seeing the smiles from all the kids is awesome!1 point
-
The only bad question is a question unasked. Keep ‘em coming! Sent from my iPhone using Tapatalk1 point
-
To be honest I've never noticed that. Having just checked my belt though it's not coming apart . I'm not sure if I can do anything about it. I hope it's not a deal breaker, I've just ironed it out and this was the result ( above ) I think it looks better. Was there any other issues that stood out. Thanks.1 point
-
Using a double snap system inside can be the difference from not trooping to trooping, occasionally a snap can fail and if you don't have a spare your day is done, a little more work but can pay in the long run. I lost a shoulder strap snap and if it wasn't for the extra snap I wouldn't have trooped You can use what every you like inside the armor as it is not seen, many use velcro and it works for them, I prefer snaps and elastic as it has some give and stays in the exact same place each time I put it on, well until the elastic stretches over years.1 point
-
Yep, we are down to only 12 spots left to become a part of FISD history... to be one of the original 1000! Who knew lo these many years ago that we would have so many dedicated troopers who would take the time to bring their armor to the next level of screen accuracy! For those who have already been approved, and those about to step up and set themselves apart, I salute you!1 point
-
Paxton Sanders 36770 EIB Letter Sha Sha http://www.whitearmor.net/eib/certificates/36770-eib.png1 point
-
Man we are close. We are like 99% of the way there...almost.1 point
-
First coat of primer is on. Now I see all the blemishes, time for some more sanding.1 point
-
17 spots and counting down . Last approved EIB #983 Nora (TK26590) Spain Ole Ole !!1 point
-
I added a charging port at the end. Here is the charging port before I added to the blaster. I 3D printed a holder for the plug and also a backing for the spring. I then inserted a copper tube to run the wires through so I could still move the bolt and spring.1 point
-
Bit of a status update with my blaster. The magazine has been added to the reciever and glued to the pipe. I painted the blaster a silver color, giving it 2-3 good coats before I put on a solid first coat of black paint, then a lighter coat later on. All was going well so far. After I put on a black coat, tragedy struck and the magazine assembly broke off. I was using E6000 which I now understand why from experience it is the recommended glue, but it wasn’t quite strong enough for my liking. I then sanded down and removed the paint where the ammo counter was gonna be mounted. Next came the part where I added some wood to the magazine assembly to give it more surface area to cling on to. I used a 3900 psi epoxy, and this was my first time using an adhesive that strong. I wore a respirator and gloves while working with it. Got the scope and the rest of the greeblies attached, except for the end cap. That’s just resting there. I had the shell ejection port masked along with the T rings. The ejection port is still the silver color that I put on before the black paint, and the T strips I intend on going over those with Flex Seal to give it a rubbery feel. As time went on, I realized I made a horrible, terrible mistake that seemed so obvious. The black paint I used was glossy, and it stuck to every surface I sat it on, as well as catch all the dirt and dust from outside where I was working on it. Something had to be done. And by the power of acetone, I was going to try to remove as much of the gloss paint as I could and leave as much of the silver paint underneath it. I ended up calling this as “good enough” and I saw that because of how sticky the gloss paint was, it created all these unique textures that I actually really liked. So I decided to keep then and basically start painting all over again. I used a much nicer silver paint and tried to find the closest to brass color for the scope. Hopefully you can see the texturing on the blaster, reminded me of cast iron surfaces. As a tank nerd, this really pleased me. Painted the blaster with a flat black this time. I decided I wanted to try a trick I saw with other weapons where you put graphite on the surface to give it a sort of dark sheen to it, so I gave it a go. To be continued shorty. (I realized I haven’t taken pictures of the weathering yet)1 point
-
Well holy cow, I was genuinely caught off guard when I got home at 5pm and it was 70 degrees. So, I carped them diems! Plasti-dipped Phasma's interiors! So long fiberglass remnants! AND I got coats down on the gaskets. woop woop. For some extra bonus material, here's a few other items on hand! Imperial Boots, Spec Ops. I think they were renamed after I bought them: TK Boots Dry Fit of the boot and lower shin armor! Looks good. We'll see how it'll go once I incorporate my foot lol.1 point