TC5800
-
Posts
62 -
Joined
-
Last visited
About TC5800

Recent Profile Visitors


-
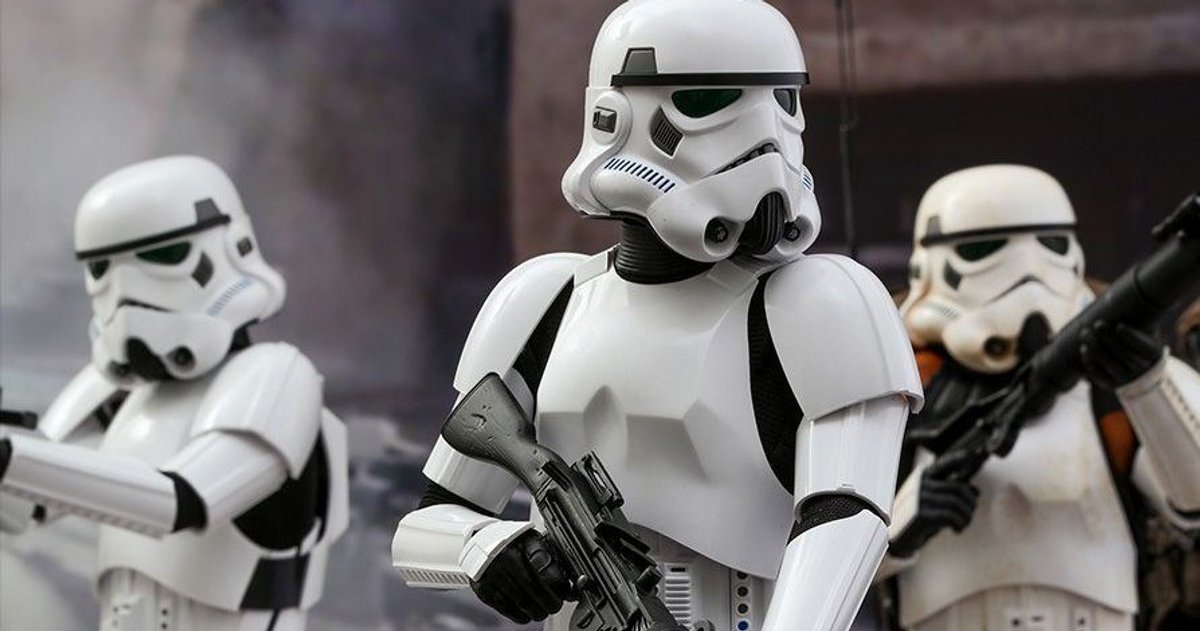
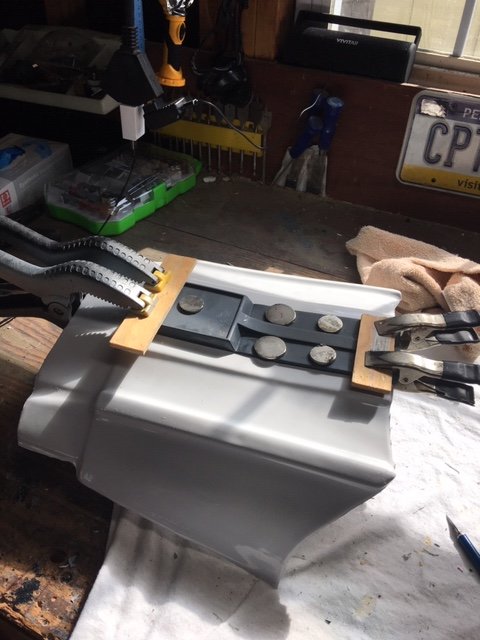
Don't use Bondo, use Poly Flex for your filling and final finish: https://smile.amazon.com/Fibreglass-Evercoat-411-Poly-Flex-Polyester/dp/B000P6US6A/ref=sr_1_3?dchild=1&keywords=polyflex&qid=1598527233&sr=8-3 Bondo has zero flex and as soon as the armor bends/flexes the bondo will crack away from the plastic surface. I'm a "Clone Guy" and have had one since my very first approval back in 2007 and can't tell you how much it sucks to have a big piece of armor crack off at an event. I found this stuff back in 2010 and have never used Bondo again. The nice thing is this can be used as the filler AND the finisher. Yes it is "expensive" but you get what you pay for here. Another thing is the small tube of hardener that comes with the bottle is blue. You can buy the same tube of hardener for Bondo, red, at Walmart and it works the same. I've used it on some of the resin pieces of my ROTK and the helmet. On my FOTK I used it on every seam and no issues 5 years later with any of them cracking apart. Plastic Clamps, Metal Clamps, and Rare Earth Magnets are HUGE to get this kit done. I have several of the big bags of multiple sized clamps from Walmart in a big bowl in my shop along with several of the smaller metal clamps with strong holding power. You can never have enough different sized and powered clamps. Rare Earth Magnets are great for areas you can't reach with a clamp like the middle of a shin or thigh. You can put 3 or 4 of these between the clamps and they'll hold the pieces tight while drying from the glue or whatever you used to put them together. A big key is to get super strong ones. A couple things I'd suggest is to have something metal to keep them on. I use a metal wire basket that is secured to wall. Next make sure you keep all the plastic rings that go between the magnets. The magnets are STRONG and it is tough to get them apart if they have attached to each other. They will grab onto ANYTHING metal so anything close will be grabbed. Also if they are far enough apart they will crack apart if they grab each other and come together. They'll also pinch the sides of your fingers. They can be a pain in the butt to use because of all that but the benefits outweigh the problems. The last thing I'll throw in with clamps is that you should have some small pieces of wood close to your clamp area along with pieces that are long enough to cover the length of a thigh, shin, or ab plate. Why? Lets say you need to clamp down something too far in for a clamp to reach and it is too thick for the earth magnets to hold tightly. I have several 1"x1" strips that are long enough to cover those pieces length wise. You can put this piece over whatever you want to hold down and clamp it at both ends. Now you have a clamp that can cover any span of your armor. If you can't see what I'm talking about this picture will show you how I use clamps and pieces of wood to secure pieces I can't with just a clamp or magnet.

- 1 reply
-
- 4
-

-
Thank you sir!
-
Sgt Carida's HSP R1 TK Build
TC5800 replied to TC5800's topic in Build Threads Requireing Maintenance
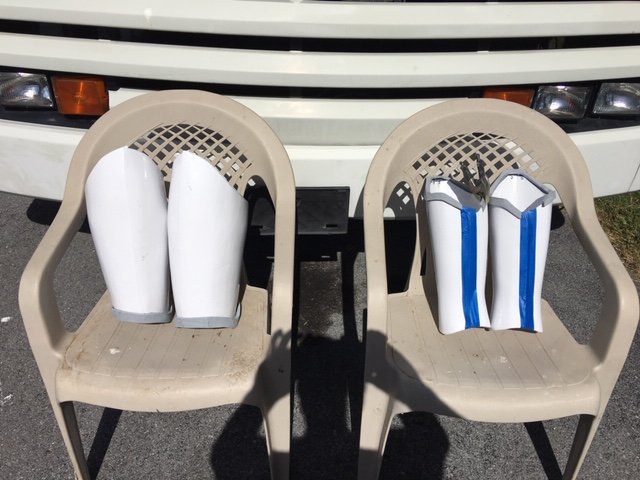
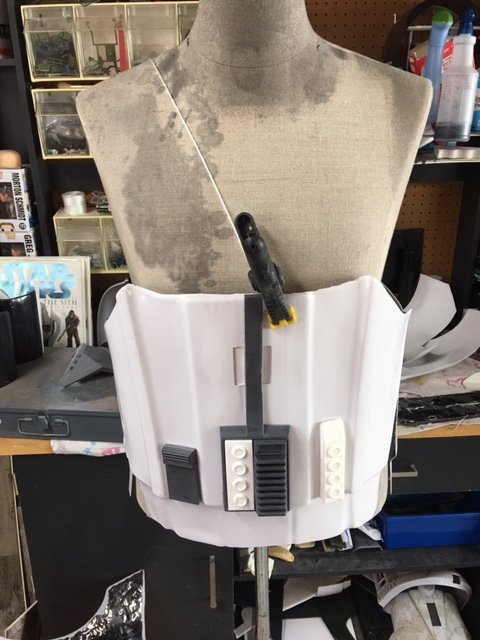
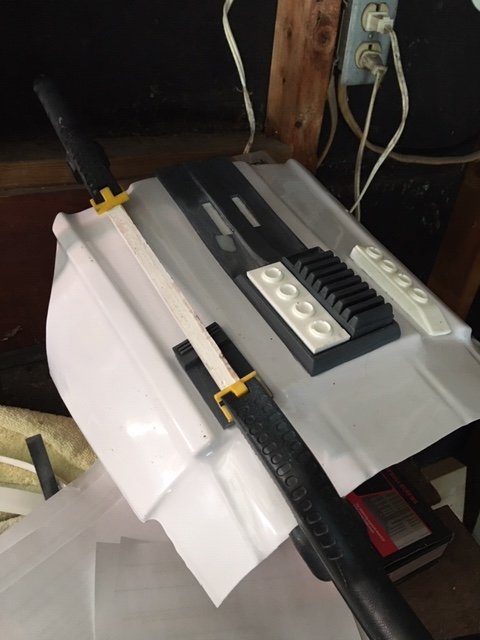
So I got some E6000 this morning and went to work this afternoon when I got home. It's "better" but not great. I still used small screws and drilled them in from behind to hold the resin in place to the ABS pieces. I started by heating up the resin pieces and molding them to the ABS pieces an used clamps to secure while they cooled down. They aren't perfect but they will work fine for basic approval. I have them taped up and baking in the sun so they warm up and form better. I'll do this the next few days so they form and stay that way. I also tore the center section off the ab section and modified it. I also used screws from behind to secure it. I also test fitted the entire ab section to my body and it held good. I'll add suspenders later. Notice the black on the sides? That is the velcro that opens up. I might end up adding 2" on the front side of the ab section so it is further back like in the movie. It'd also give me a little more room. I also rough cut the belt and boxes out. The next step here is to heat the belt up and form it. My shop is above and behind an automotive garage and there are 55 gallon drums outside. I'll heat up the belt pieces and form them over the drums. I won't cut out any of the belt notches until it is formed and contours with the ab section. I am seeing the finish line here now. The resin to ABS was holding my brain up but now I got it.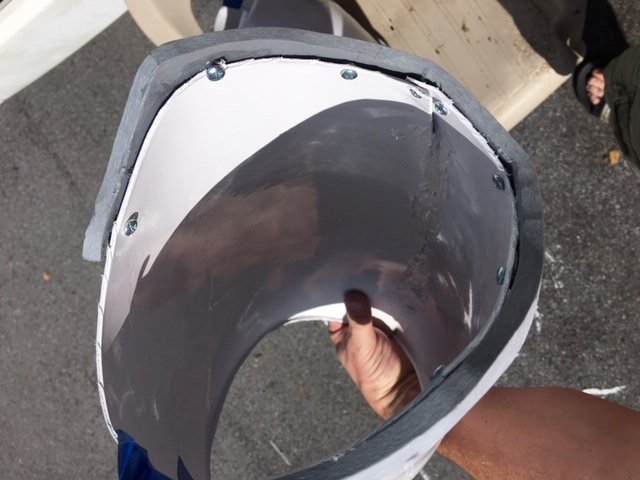
-
You can add me to the roster please.
-
Sgt Carida's HSP R1 TK Build
TC5800 replied to TC5800's topic in Build Threads Requireing Maintenance
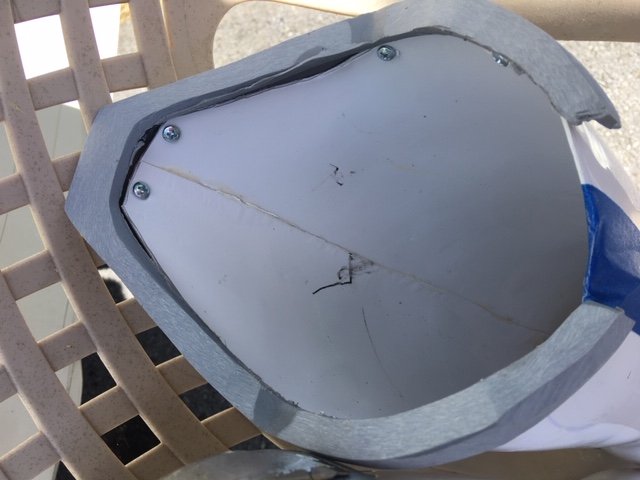
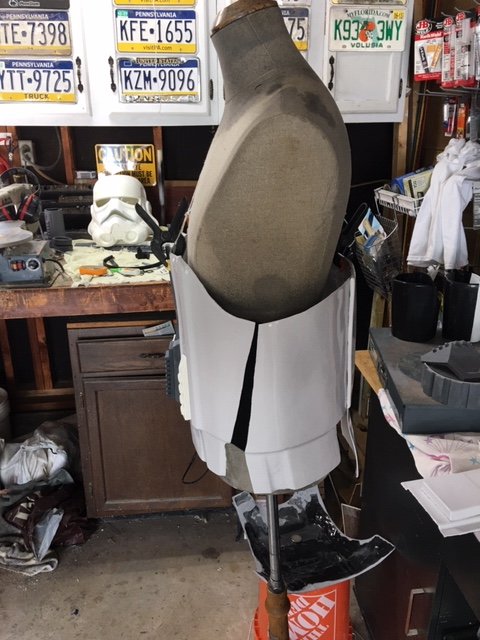
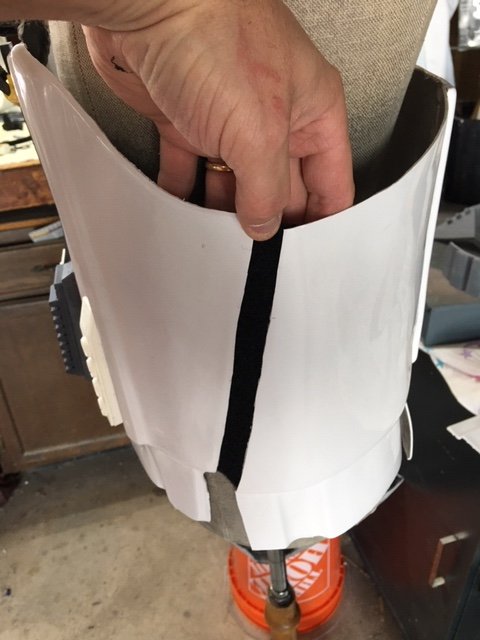
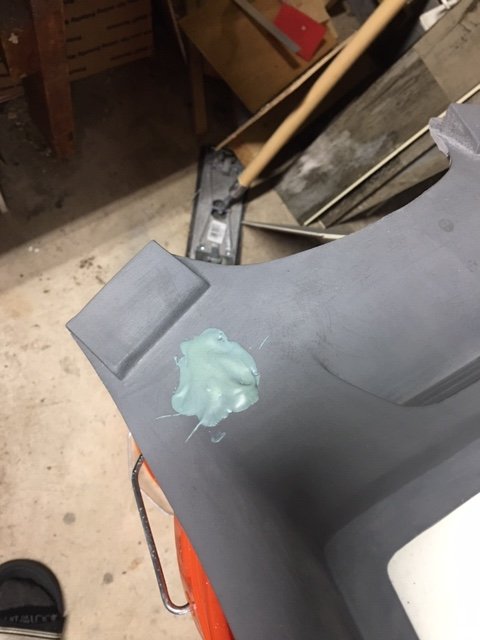
Tonight I started to fit the ab and kidney sections. After test fitting I had to split the back apart and I needed to trim down on the sides. Why? The black line on the sides is where I'm using the same thing I did on my Shoretrooper. I will back that seam with black velcro so it'll open on the left or right side instead of the back. On the lower back center piece I glued from the inside and used ABS sludge to bond together so it doesn't come apart. Since the glue/sludge is on the inside the outside will give the same appearance of "opening there" like in the movie. Well the biggest issue I thought would happen started tonight. As I was fitting and flexing the ab section both of the side resin greeblies popped off. I used JB Weld brand 5 minute epoxy. I roughed up the back of each resin piece and also the ABS section they glued down to. Still came off with little flex. This isn't a Maker issue with HSP's parts. This is an issue across the board trying to adhere resin to ABS. What I did on the left lower greeblie was screw in two small recessed head screws into it from behind the ABS so it won't come off. I'll do this to the center and the smaller one once the glue dries. So here is the bigger issue/question that some of you might have answers for me but I don't know. The biggest problem I'm going to run into is gluing the resin pieces on the top of the shins and lower thighs along with the shims/cover strips on the shins, thighs, fore arms, and biceps. The thighs, shins, and biceps all will velco in the back. When I put on the shins, thighs, fore arms, and biceps I'm going to have a LOT of flex and those resin pieces are going to pop off. WHAT am I to use to hold them down? I've tried the following on this and previous builds: JB Weld 5 minute epoxy JB Weld 1 minute epoxy Gorilla Glue 5 minute epoxy Gorilla glue gel super glue None of that will hold the resin down to the ABS when it flexes. It just pops loose. I can use the screw method on the ab section, sniper plate and lower thigh ammo strip but those cover strips and top of shins and lower thigh pieces aren't going to hold down at all. As soon as I open them up to put on they are going to pop right off. I am going to see if there are shorter screws then I am currently using because those pieces are so thin but I'm not sure. Has anyone had any type of glue they have used that will hold up to flexing?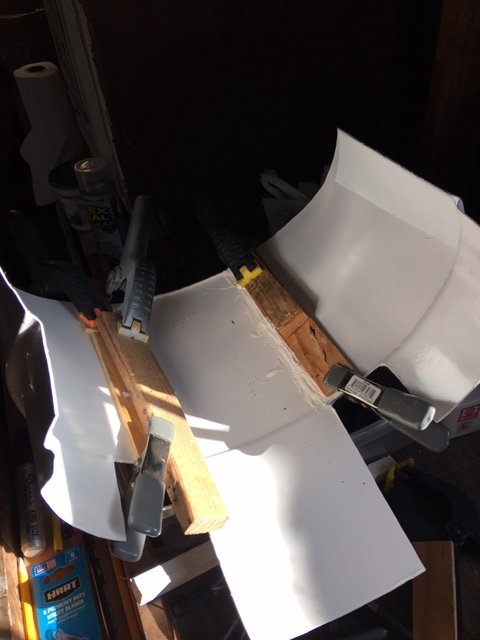
-
Sgt Carida's HSP R1 TK Build
TC5800 replied to TC5800's topic in Build Threads Requireing Maintenance
I found a link in one of the other threads to an AliExpress page and I ordered some. https://www.aliexpress.com/item/32929669955.html?spm=a2g0s.9042311.0.0.46784c4dHxmmqf -
Sgt Carida's HSP R1 TK Build
TC5800 replied to TC5800's topic in Build Threads Requireing Maintenance
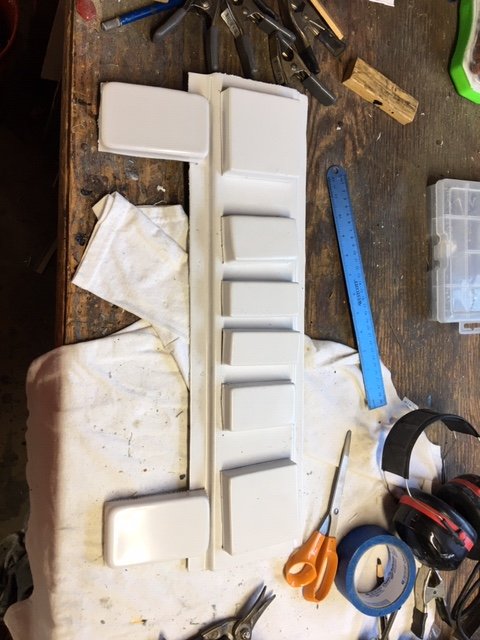
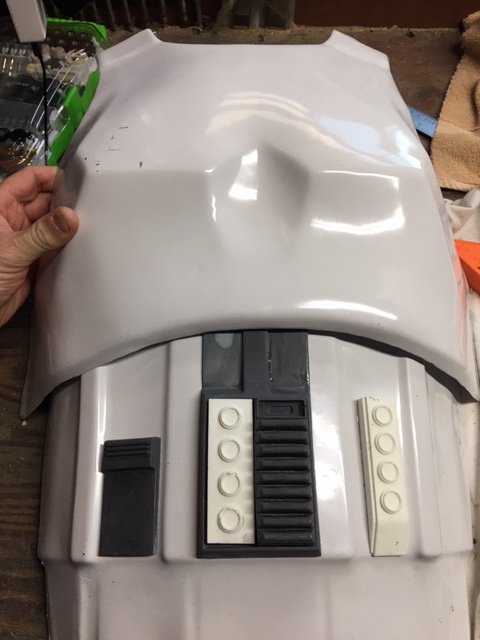
So there are a couple "issues" that'll need addressed with the ab armor. First the center strip. I'm not overly sure it matches the movie references 100% but I'm working with it. You'll need to add the small rectangle holes as I've done. Now the stupid starts because sometimes you see them and sometimes you don't. They'll probably show on me since I'm 6 feet tall. I got all the ab section glued down now. On the back plate you'll need to fill the hole on the left shoulder piece like I did. LEAVE the circle hole on the right shoulder. I've got more work to do on the helmet specifically to drill out and file down the vent tubes and heat up and form the frown teeth back piece. Once that is done the helmet is ready for paint. I've got "U" shaped gasket on the way for the bottom helmet trim. After that I'm onto fitting the ab/kidney section then I'll go down to the thighs and shins. It's getting there. I'm not an expert on it so I have to keep bouncing between the CRL and reference pics a lot.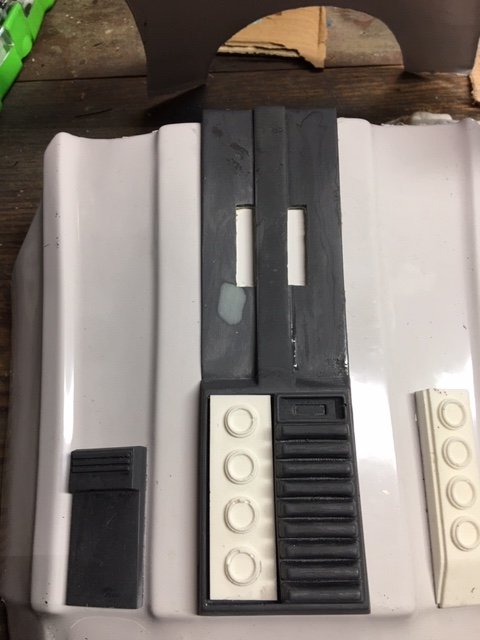
-
Sgt Carida's HSP R1 TK Build
TC5800 replied to TC5800's topic in Build Threads Requireing Maintenance
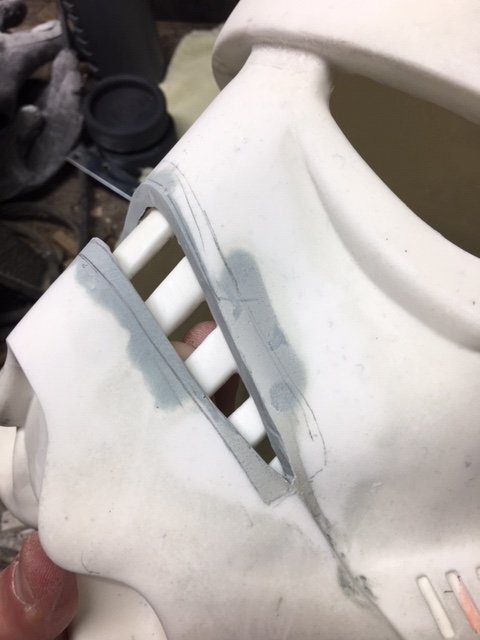
So I got all the abs trimmed, sanded and final sanded. I got all the resin pieces sanded and cleaned up. The big thing I ended up doing was buying a table top belt sander to sand down the resin bits. I can't tell you how fast that went compared to hand sanding or palm sanding. I also worked a BUNCH on the frown on the helmet. I cut it out and had to grind down inside the helmet a lot to get the frown to even look good. I sanded more and more and it just didn't look right. I kept looking at reference pics and the frown and couldn't figure out WTF I could do to make it look right and then it hit me. I need to have a thicker wall down into the frown so I backed the frown opening with tape and filled the entire thing with poly flex. After letting it sit for 2 days I sanded it down on the outside and put the frown piece over the filled in opening and traced the hole I wanted. After I did that I cut out the frown with a dremel cutting disk. I sanded down the inside piece with fine sandpaper. I held the frown piece in the opening and it still didn't look right. I'm looking at the movie helmet and comparing and the frown just sits too far down and in the hole. I'm not sure if the frown piece provided is suppose to sit behind the opening made in the helmet OR if you are suppose to cut out an even bigger opening and glue/sand in the frown. So I had an idea to sand down the frown piece so the teeth sit almost flush with the opening inside. I sanded about 50% away and it was still too deep. I ended up taking almost all the top of the teeth part away with the belt sander. As you can see the teeth sit almost as they do in the movie helmets. I almost wish I could get just the teeth pieces and glue them in. I might try to figure that out later but for now I am happy. Lots of work to get it right. It's important to point out here that no one makes perfect armor and bits. You've go to "figure things out" to make things work sometimes and especially when a Maker makes new armor. I think this frown piece is the trickest part on HSP's armor so far. I'm overall happy with everything HSP has provided with this kit. I also started gluing resin pieces. I glued the OII piece into the backplate and the first strip on the ab section. When I glue resin to ABS I rough up the abs section. I also use 5 Minute epoxy. If I end up having problems with them staying I'll screw small screws from behind the ABS pieces into the resin. I've done that on my Shoretrooper and Mudtrooper and it works.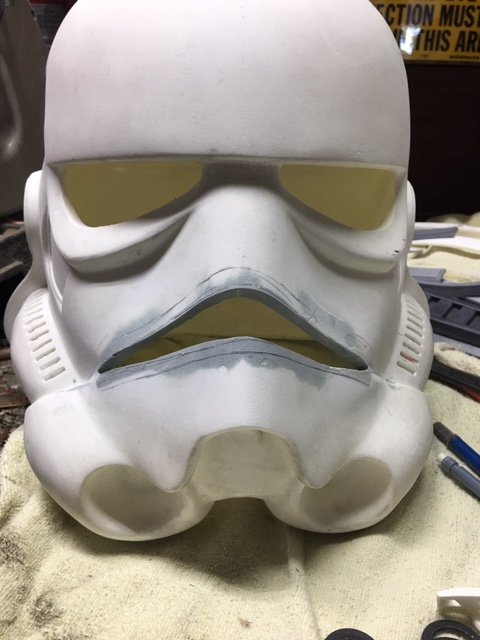

-
Sgt Carida's HSP R1 TK Build
TC5800 replied to TC5800's topic in Build Threads Requireing Maintenance
I just saw it is getting a revision. I'm glad FISD is on top of it. I get the rush to get the CRL done. The Ep7 Kylo was a hot mess when it was posted before the movie so I get it. If an Admin could move my build thread that'd be great. I didn't even notice the section for the build threads. My fault 100%. -
Sgt Carida's HSP R1 TK Build
TC5800 replied to TC5800's topic in Build Threads Requireing Maintenance
I have all my ABS pieces rough trimmed and final sanded now. I've started gluing together pieces. I start by gluing together the front/outside of all the pieces I can which include: Bicep Forearm Thigh Shin I do not feel, never have, that you need to start fitting the parts to you body at this point. These suits were made on an assembly line of some kind and made to fit different body types. What I mean is they didn't fit a single suit to a single person. Each suit was made to fit different height, weight, and body size. I don't feel that a perfect fitting set of TK armor matches what is seen on screen. That said this WILL fit my body very closely when I am finished. The cover strips are the big thing here. They will cover up the seams on the front and back when fitted to my body. If there is too much excess I'll cut each piece down until it fits me. Key here is not to get hung up on things that don't need to be hung up on. The next thing I'm going to say goes against the CRL 100%. The back plate. I not convinced that the back plate that goes over the kidney sections is removable. On my Shoretrooper it is glued down and I open on the left side down the black line and my belt overlaps backwards. On my Deathtrooper the front and back armor is all one piece and comes together like a clam shell and splits down the sides. My Tank Commander is the only set of armor that opens under that kidney back plate and it doesn't like to stay on and pops off very easy. My theory goes back to having these sets of armor fit different people and how the belt connects on the left side. I'd be more in line with splitting and adjusting on the left and right sides down the ab sides and down that black line and adjusting the belt overlap on each side. You'd easily be able to tighten up the armor or let it out a bit. So when I build mine I'm going to first see if the kidney plate has enough reach without cutting down the middle. I'll glue the center plate onto it if it does. If it doesn't and needs more reach I'll cut it and use the center plate to glue it further out and give me the reach. Either way I do it that center plate will be glued down BUT it'll appear to not be glued down. I'll leave the outer edges un-glued to give that appearance. Nothing I'm doing is sexy with the armor now. All the abs is final sanded as much as I can until I fit, glue, and add the resin bits where needed. I still need to sand down all the resin bits and work on the helmet frown. -
Sgt Carida's HSP R1 TK Build
TC5800 replied to TC5800's topic in Build Threads Requireing Maintenance
So I've been bouncing back and forth the past few days between each piece and the 501st CRL. What I will tell anyone building a R1 TK using the CRL model photos as reference will build garbage. To me it looks like someone took an OT TK and turned it into a R1 TK. IMHO FISD needs to re-do the R1 TK CRL and adjust the basic level 1 requirements and remove ALL OT TK items they have mixed in. You need to go by the text when building HSP R1 TK armor or you will mess it up. . If you try to build your R1TK by the basic level 1 text you'll screw this armor up! Trust me you need to look at level 2 and level 3 text to build this armor. For photo references you need to google "rogue one stormtrooper" and use the movie photos you find. The belt on the R1 TK is overly detailed and IMHO will be the most difficult to cut and get correct. Second will be the frown in the helmet. You can also use this fantastic reference right here on FISD: There are some great reference photos for almost every angle of this armor and will be a huge help for anyone building anyone's set of R1 TK armor. If you've built any R1 armor you are going to have a big advantage building this armor because almost all of it is a combination of shoretrooper, deathtrooper and tank driver/commander armor. I've got all three of those sets of armor and it is HUGE for me to have that. Like yesterday when I was rough trimming all the ABS pieces I took out one of my ST shoulder bells, put it inside the HSP shoulder bells, marked and trimmed. No guessing on a cut line! So I've rough trimmed all the ABS pieces and I have both of my thighs glued on the front and drying. For the thighs, shins and fore arms you can glue down the front side of them without measuring because it doesn't matter at this point. They will all need trimmed down and when I get to that point I'll explain how I do it. The big thing I'm trying to get done as fast as I can is getting all the pieces trimmed and finish sanded, ABS and resin. I'll get some pics up at some point but they aren't anything special at this point. -
Sgt Carida's HSP R1 TK Build
TC5800 replied to TC5800's topic in Build Threads Requireing Maintenance
Make sure you take the time to wash off all the resin parts to your TK kit. The chemical released during curing can and will cause glue not to stick and the worst it does is not allow paint to stick. Wash with soap, rinse and air dry. -
Sgt Carida's HSP R1 TK Build
TC5800 replied to TC5800's topic in Build Threads Requireing Maintenance
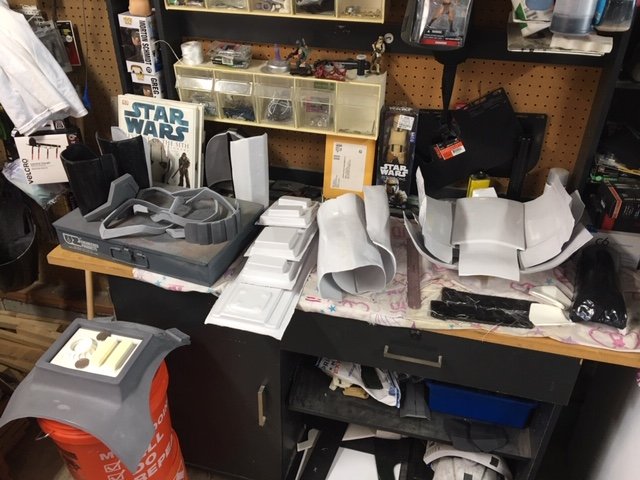
I've built a lot of sets of armor in my 13 year 501st career. The last set being a HSP Mudtrooper. I've built 3 sets of TK armor as well....First Order, ESB TK, and Stormtrooper Commander. I've built a lot of clones as well as building a shoretrooper, death trooper, and Tank Commander from R1. I started with the helmet tonight. Here is what it looked like out of the box: I also laid out the abs parts and the resin parts together: The helmet I got is resin. Pull is ok. I don't see anything odd about it and clean up has been pretty easy so far. I let the helmet sit in the sun for about 30 minutes so the resin warmed up and was easier to sand. I got the major seam line mostly off with a hand held sander and sanding sponge. Pretty easy. There is going to be some difficult sanding in places but I'll get that later. I wanted to get the eyes, frown and head opening cut out tonight. Eyes went pretty easy. Head opening I didn't do it all because some areas are thicker and I was trying to maximize my time on the eyes and frown. The frown is where I spent the most time and will have to re-visit. The CRL model helmet isn't accurate to the movie and I want to get this cut out and fitted like the movie helmet. The frown piece sits behind the opening and there is a seam there. The most difficult part is going to be cutting the frown from the inside of the helmet and getting the edges just right so the frown piece will sit correctly. I'll probably have to head up the frown piece to get it to merge/sit correctly. I'll cross that bridge when I get to that part. I'll need to cut more of the frown out but that will be for another day. You can see how much more I'll need to cut and how it sits right now. -
HSP asked if I'd be up to the challenge of building one of their R1 TK kits and making a tutorial here and I said sure will! So I got the big brown box last week and here is what it looked like: There were 2 missing parts and one extra part sent. I sent a message to HSP and the parts are in the mail. No big deal since I didn't start till today.