Leaderboard


Popular Content
Showing content with the highest reputation on 07/21/2020 in Posts
-
20 to go, and here is the next piece
 3 points
 -
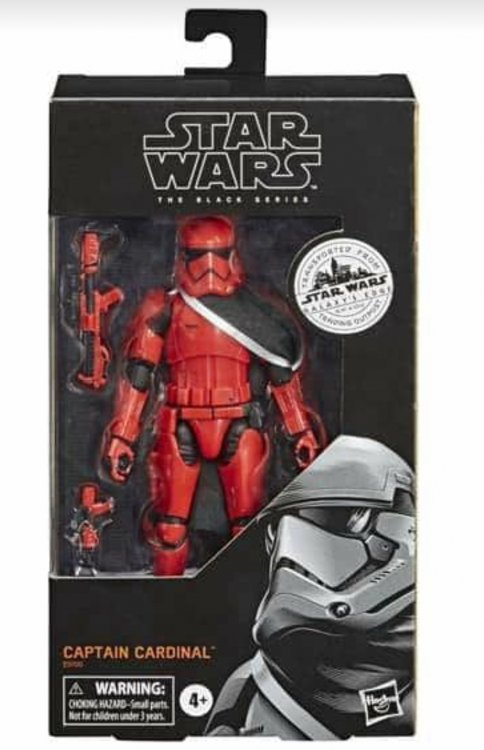
Going to be some happy people who built Captain Cardinal costumes, there is now a Black Series figure, depending on the current LMO's this could see a new CRL, then it would be what detachment does it fall under. https://www.target.com/p/star-wars-the-black-series-captain-cardinal-toy-figure/-/A-79416662 GUEST_e57a74e0-f763-4064-92f4-a07a77b1af77.webp
 2 points
 -
The first, thank those responsible for the department for studying and evaluating the photos, as well as the time invested in it. I greatly appreciate all the advice for the correct placement of some elements, that after taking the photos, I already observed certain errors. My wife will consider it for next time;) I appreciate the help to modify and correct those details that provide an image as faithful and exact as possible to the films. I will keep it in mind and will exert myself to make it so, although I will need some time for it. And finally, thank you for your congratulations. I am proud to belong to the Expert Infantry Lo primero, agradecer a los responsables del departamento por estudiar y valorar las fotos, así como el tiempo invertido para ello. Agradezco enormemente todos los consejos para la correcta colocación de algunos elementos, que tras realizar las fotos, ya observé ciertos errores. Mi mujer lo tendrá en cuenta para la próxima vez Valoro la ayuda para modificar y corregir aquellos detalles que proporcionen una imagen lo más fiel y exacta posible a las películas. Lo tendré muy encuenta y me exforzaré para que así sea, aunque necesitaré algo de tiempo para ello. Y por último, agradecer vuestras felicitaciones. Orgulloso de pertenecer a la Infantería Experta2 points
-
We are working hard, encouraging people to achieve EIB and CENTURION levels...2 points
-
Thanks for all the feedback. How is this for that return edge? Also, I cleaned up the buttons on the ab plate too, any thoughts: Thanks all!2 points
-
21spots remaining congratulations Alex TK551052 points
-
quick fix. Thanks,2 points
-
Scope bored out and installed the electronics from FXBlasterOS.2 points
-
So...an interesting "development" regarding the AM kits. As I mentioned previously, I have an AM2.0 kit that I built into a Sandy: As it's a Sandy, there are a few leftover bits. As I unboxed, unwrapped (Dave does an amazing job in wrapping and protecting all the pieces!...although I abhor the "packing peanuts"), and inventoried the new kit, some of the pulls seemed "off." So I dug out parts from the kit I purchased in 2016 to compare. In this pic, the top row is 2016, bottom row is 2020: Shoulder straps...2020 on the left, 2016 on the right: Belt...2020 top, 2016 bottom: Belt...top view...both 2020 with 2016 on the bottom: This isn't meant to slag off Dave, as I don't believe he actually does the pulls (as I understand it...I could be wrong). This is more of an informational/"isn't that interesting" post. Still, the quality of the ABS is great, there are a lot of extras, including plenty for cover strips. But, I'll be using my left over pieces as needed over the newer versions.2 points
-
If you still have issues this link works:1 point
-
Nice work, a few images you will need to post: Close up of your shin sniper plate, front on and both sides Close up of your thigh ammo strip and rivets, inside and out. D ring on blaster It's also a bit hard to make out the teeth area, perhaps a front on photo of the teeth not at an angle A couple of adjustments you may want to make: Bring your shoulders in at the top, there is a large gap there. Rear shoulder straps are sitting up. Reduce the gap on your sides, from the CRL: L2 Any gap between the abdomen and kidney armor is no more than 1/2" (12.5mm) wide You could paint the rim of your mic tips/hovis, from the CRL: L2 Screens used shall be of a wide type mesh, with the rim of the mic and the inside white or painted white. Good luck with the application.1 point
-
Hey guys, update for today. I was able to cut out the tears and teeth, and file the teeth. I think they turned out pretty good! The far right one might be a hair larger than the left, but I’ll look at it again later. I started sanding the grooves in the back left trap and man is it a tight fit! Slow progress is still progress though. I wish that I could finish the left one today, but I’ve got to be somewhere in an hour, so it looks like that’s it for now. Thanks1 point
-
Toma tu tiempo para preparar tu armadura, estaremos aqui cuando estés listo. Saludos Take your time for the fixes, we'll be here for your Centurión submission. Cheers1 point
-
Greetings! “Lexan” scissors are what you want for cutting ABS. Some also use tin snips, but they are larger and less maneuverable. Having both curved and straight lexan scissors will greatly help you with ABS trimming. Sent from my iPhone using Tapatalk1 point
-
Gloves. Impossible to locate somewhat screen-accurate gloves in Cameron's size. I even bought a pair of FOTK gloves from Endor Finders in their smallest size, but they are huge on him. I decided to upgrade the old gloves he wore with the old suit instead. These are Rubie's kids size FOTK gloves. Essentially, they are made of stretchy polyester, white on the palm side, black on the back of the hand, and a piece of white foam stitched on the back of the hand to simulate a hand plate. It was simple to remove the foam plate with a seam ripper. Then I added velcro to the backs of the plates and back of the gloves. Done! Next, I decided that I could do better for Cameron's leggings for his undersuit. While they seemed somewhat suitable under the armor, they were really too big. I was constantly failing at finding a pair made from the stretchy shiny material I wanted that would actually fit his toothpick-legs. The only solution left was to make a pair. Which I have never done before. Still, sewing a pair of leggings looks easier than sewing a shirt... So I taped together a bunch of tissue paper to make a very large sheet I could draw on. I folded the "too-large" pair of leggings in half and traced the shape. Then I cut out the leggings shape slightly smaller than the original (ha! I now have a PATTERN!), and placed it on two layers of stretchy shiny black fabric. I traced the pattern piece on the fabric, cut out the fabric, sewed the edges, and voila, I ended up with some slick leggings. Big hurdle was trying to sew the waistband on these, though. The material likes to stick and stretch on the sewing machine plate. I ended up applying blue tape to the areas where I needed to sew to stabilize the material and allow for it to better slip under the presser foot. It worked well, but man, a total PITA to remove. Once I sewed the waistband and removed the tape, I had myself some leggings! Shiny! Here's what the old leggings vs the new leggings look like. Cameron is thrilled with the better fitting leggings! He reports that these new leggings are so comfortable that he did not want to take them off. Seriously, I had to do an incredible amount of pleading to get Cameron to change out of them. And I guess I'll keep the larger leggings for when he (eventually) grows.1 point
-
At my first troop I didn’t have a blaster. A fellow garrison member had a spare one and let me use it. It’s kind of nice just holstering it and using it sparingly, as I find my shoulders get tired holding after a while. I’m sure you will figure a way to pose or stand until you get a blaster. Sent from my iPhone using Tapatalk1 point
-
Thanks, no I have had the kit for about a year. I keep checking Doopys because I want to get another but nothing yet. I have slowly been working on the kit and finally getting around to posting pictures. The stock is from War Machine Replicas, it is a great one off and fully functional.1 point
-
Thanks! I thought it would add some realism. Not too much is left of the doopys here.1 point
-
Power cylinders are complete, thank to T-Jay's kit1 point
-
Enhorabuena!!!1 point
-
My counter is finished. The top half is a genuine Hengstler counter. I set the numbers to my ID. The lower half and plug are 3D printed parts I made. The finishing parts are from T-Jay's kit.1 point
-
Folding stock I purchased ready for install.1 point
-
bolt plate before splitting Thanks Dracotrooper! The exposed bolt is fixed, I epoxy it in place. My original intent was to make it movable but after removing a lot of material I realized I was weakening it. I also needed a place to put the electronics. What I ended up doing with the non-seen end was making that movable, so I can pull it back. I split the bolt plate and 3D printed a cylinder behind it to keep it aligned1 point
-
Thank you guys for everything, I really appreciate all the help. I'm gonna try and go for Centurion before I head off to college.1 point
-
Felicitaciones Sergio , Bienvenido a Exp de Infantería.!!!! Congratulations Sergio, Welcome to EIB. ranks. !!!!!1 point
-
Hola, Sergio, and thank you for your EIB application! CRL and EIB Application Requirements: All required photos have been submitted, and on behalf of the entire D.O. staff we are pleased to welcome you to the rank of Expert Infantry. Congratulations! Other-Armor Fit/Assembly; In this area we review observations made by your fellow troopers and the DO team. Some observations may lead to suggestions to improve the overall look of your armor. Overall a great looking set of armor, mi hermano, and I am VERY impressed by the paint job on your helmet! A few items here that will help you look your best: The left eye opening is spot-on, but the top of the right one could use a tiny bit of trimming if you get the chance. Reference images The brow trim on both sides is long, and should end at the rear of the trap line above. But, the height of your ear on the left is about 4 mm lower than the one on the right, which may leave an unsightly opening. Reference images A simple strapping adjustment here, but both thighs should sit at the same level. It looks as if rotating the left one out a bit and raising it about 1 cm should do the trick. Reference images Another easy fix here.. when getting suited up, having the rear top connection of the calves level will give you a much better appearance. Reference images Your TD is sitting pretty high on the belt and needs to be straightened out. Just make sure whoever attaches it for you pushes it all the way down onto the belt! Reference images Centurion Requirements; In this section we prepare you for Centurion. Because Centurion photos show more detail than EIB, items pertaining to Centurion might be seen there and not here and additional photos may be required. We try to point out all that we can from what we see, but the final accuracy is the responsibility of the trooper. Unfortunately, your teeth are way over-trimmed, brother. The openings should be only slightly higher than the paint, but your extend pretty far beyond that and at this time I'm sad to say that they are not acceptable for Centurion approval. Reference images Although the left side is perfect, the top of the right shoulder bell needs to be brought closer to the shoulder strap. Reference images The ridge on the sniper knee are about 4 mm lower than the ridge of the calf and will need to be raised. Removing all the return edge from the bottom will help a lot. Reference images The outside edge of the drop boxes must be aligned with the outer edge of the ABS belt. Some E-6000 on the rear of the strap will hold them in place! Reference images As per the CRL for Level 3, "The corners of the ABS ammo belt shall be trimmed at a 45 degree angle that meets the outer edge of the cloth belt". Unfortunately, it looks as if you do not have the space at the end to accomplish this due to the button position, so it may need to be replaced. Reference images Last up, it looks like you have some silver paint on the T-tracks of your E-11. The original T-tracks were made of plastic, so no "weathering" should be present. Reference image And that's it! Another EI added to the Spanish Garrison!1 point
-
Superb detailing Likemike973. Your trigger mod looks close to the real deal. Curious, how are you keeping the exposed bolt plate in position? Interested also to know if you will be leaving the non-seen end of the ejector with or without a jet fin. [emoji1] cheers and interested to see more of your progression. Sent from my SM-G960W using Tapatalk1 point
-
Woo Hoo! Congrats AleX I shall reveal another sneak peek of the merch item when we hit 20.1 point
-
Hi Alex, and thank you for your EIB application! CRL and EIB Application Requirements: All required photos have been submitted, and on behalf of the entire D.O. staff we are pleased to welcome you to the rank of Expert Infantry. Congratulations! Other-Armor Fit/Assembly; In this area we review observations made by your fellow troopers and the DO team. Some observations may lead to suggestions to improve the overall look of your armour. Let's start from top. The brow trim of your helmet, as you can see in the reference photos, should be a bit shorter, this is a very easy and fast adjustment, just be careful to do it little by little so as not to cut too much. Reference Images For a better look and confort, we are suggesting a bit trimming down the marked lines at the top of your forearms . This will not only make you look better, but it will help keep it from snagging on your under-suit and poking into you. Reference Images We are suggesting that you reduce the size of your small ab-button plate a tad. AP makes the buttons a little wider than was seen onscreen, but this can be done and still maintain the look. Also, the edges should be square and not rounded off. Reference Images *************************************************** Centurion Requirements; In this section we prepare you for Centurion. Because Centurion photos show more detail than EIB, items pertaining to Centurion might be seen there and not here and additional photos may be required. We try to point out all that we can from what we see, but the final accuracy is the responsibility of the trooper. Let's start Alex CRL: There should be a minimal gap between the shoulder armor and the chest/back plates. As the CRL states for level 3 , there should be minimal space between the shoulder bells and the chest armor. (Although not specifically mentioned), the tops of the shoulder bells should touch (or be very close to) the shoulder bridges. In your case it seems that it is a matter of shortening the elastics of the connection between these. Also, you can trim all the return edges from the bottoms of the Shoulder Bells to have more room. Reference Images CRL: Ideally there no gap between the abdomen and kidney armor. Abdominal and Kidney Plate align horizontally at top. Your Left Ab/Kidney connections looks perfect, but It looks like your right side is overlapping, perhaps loosen the belt a little or add some foam behind the ab/kidney to hold them outwards Reference Images CRL: The top of the ABS ammo belt should sit at or just above the bottom of the central and vertical abdomen button panels. Your belt needs to go up a little to be perfect, a widely used trick is to place a couple of small strips of Velcro behind belt to ensure it doesn't sag in the front, easy fix ! Reference Images \ CRL: Drop boxes are vertically aligned with the end of the ammo belt with minimal gap between belt and box. This is one of the most common issues we see, but is quite simple to address. Some E-6000 on the inside strap will take care of this. Reference Images Your Thermal Detonator control pad sits very high and It needs to be a bit lower so that the controls/round washer can be seen . Reference Images Reference Images Finally , the gaps in the lower ridges as seen below will need to be filled. A small ABS shims behind them would do the trick, but remember that the top of the ridge is curved so keep that in mind. Reference Images Again , Congratulations and I'm sure you can deal with the fixes and go for the next level. CENTURION ***************************************************1 point
-
Recap of what I’ve been able to complete the past month or so: After a bit of trial and error size wise, I got the elastic for the hand guards glued on and Velcro glued on the gloves. I put a couple of strips on the hand plates so I can move them higher and lower on my hands. Belt was pretty straightforward and good to get done while waiting for glue on other bits to dry. RS is kind enough to have the rivet positions marked both on the fabric and the plastic, and I already had riveting tools from previous leather work, so assembly was pretty quick. Drop boxes are riveted to the strapping, and a dab of E6000 between the strapping and the belt holds them in place nicely. Finally I cut out back of the elastic around the belt snaps for a little extra screen accuracy (and ease snapping it to the abdominal plate). Please ignore the extra holes on the strapping... may have measured wrong there! On to the legs! Thighs: 20mm thigh coverstrips and strapping measured and glued in. I went back and forth a bunch trying to figure out how I wanted to trim the backs, since looking at reference every one is different. Went through a few iterations: Initial trim for both: Right (with cutout marked out): Left: Right final: Left final: I ended up focusing on keeping the back cover strips approximately the same length for both. I may need to adjust the right a bit more - I’ll see how it looks next time I do a test fit. Gussets added to bottom of the thigh fronts to keep under suit from showing through (and add a little reenforcement): Measured the thigh strapping with the belt on, and glued accordingly. Left a bit of room at the tops of the elastic on the thighs so that their pivot point isn’t right at the top. I’m hoping that this will make them hang a bit nicer... we’ll see. Sewed loops in the elastic to attach to the belt. Final trimming of the thigh and clean up of return edges done, plus gave it a nice gentle wash: As you can tell from the background, this leads to the thigh ammo belt... Ammo belt trimmed and corners rounded off as per reference. I think I cut a bit too much off of the beveled corners, but I don’t think it’ll be noticeable once installed... Drilled holes in the belt corners with a 1/8th inch bit. Lined the belt up evenly between the back corners of the thigh, and marked the outer rivet placement, then put the first rivet in and stuck the cap on just to test fit. Wrapped the belt around as tight as I could and marked + drilled second hole and put the second rivet in! The belt is fitted tight enough that it’s held in position by the front of the thigh as per what Rob does in the RS videos. I sanded the rivet heads here too so they’ll accept the white paint better when I get there. I’m pretty happy with it, but I’m waiting to pound the rivets in just in case anyone has feedback!1 point
-
I believe I will be removing nearly all of the return edge on the biceps prior to fitting. Joseph has a great thread on that here.1 point
-
Magwell assembly1 point
-
I bored out the bolt area and used sheet metal to simulate the bolt. I installed a spring made from T-Jay's kit.1 point
-
I started by boring out the trigger area for the selector switch install, I went through the top so I did mess up the trigger area. I used my 3d print to complete the trigger.1 point
-
So far, I've been trying to following RS props tutorials cautiously so I dont mess up anything. Measure ten time, cut once. So I started on the right bicep as per the tutorial setup. So I trimmed down the top of the bicep, left a little bit of the return edge on the inner bicep and tried to trim the outer to match up with the end of the inner. I left the bottom of the bicep alone since it just seemed to line up just fine and fits alright. Gives me a little room to move around too. So I just sanded the rough edges down for comfort. Also, trying to find a good way to post these dang photos. Cant upload them due to the data restrictions here. Any suggestions before I go further into the build??1 point
-
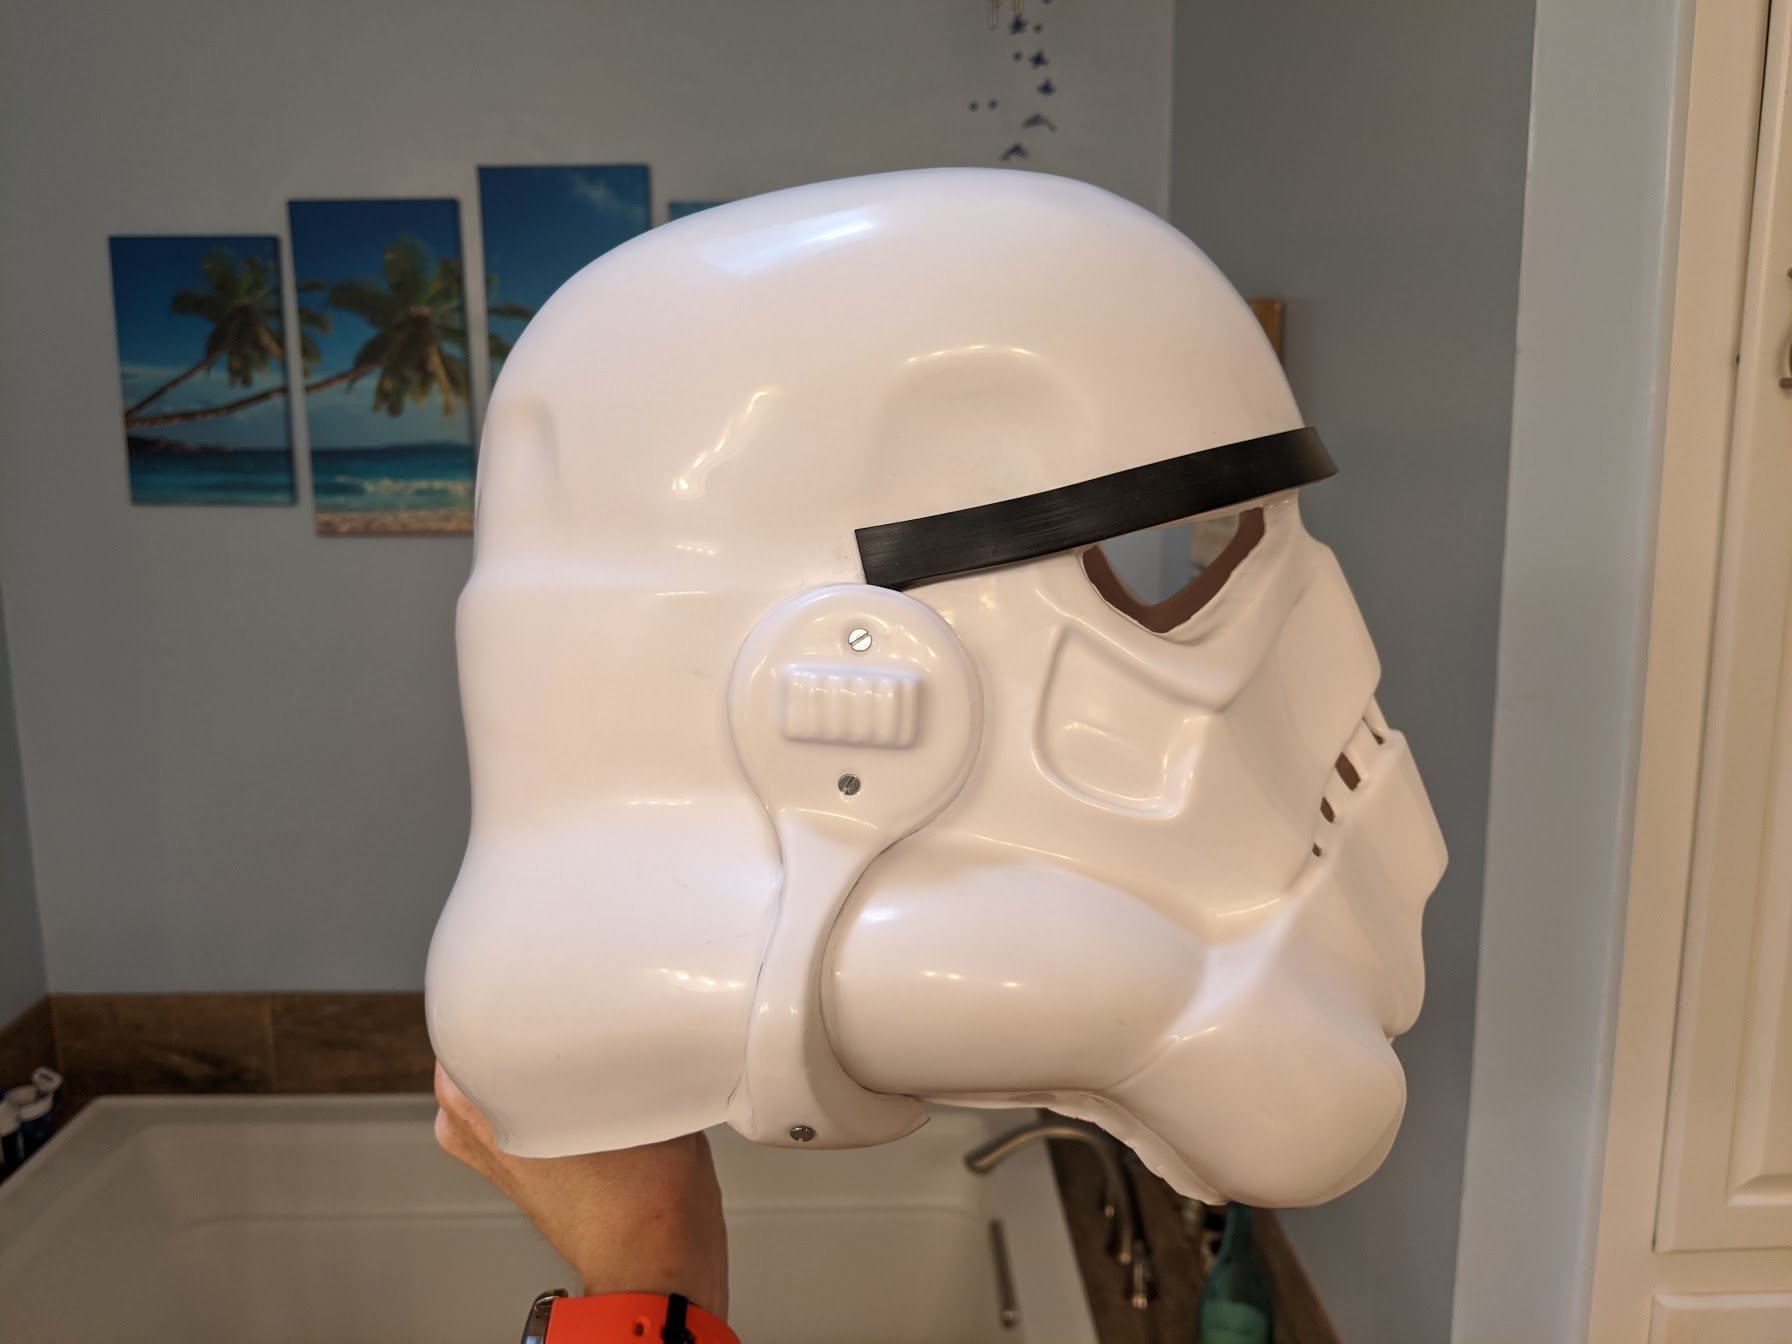
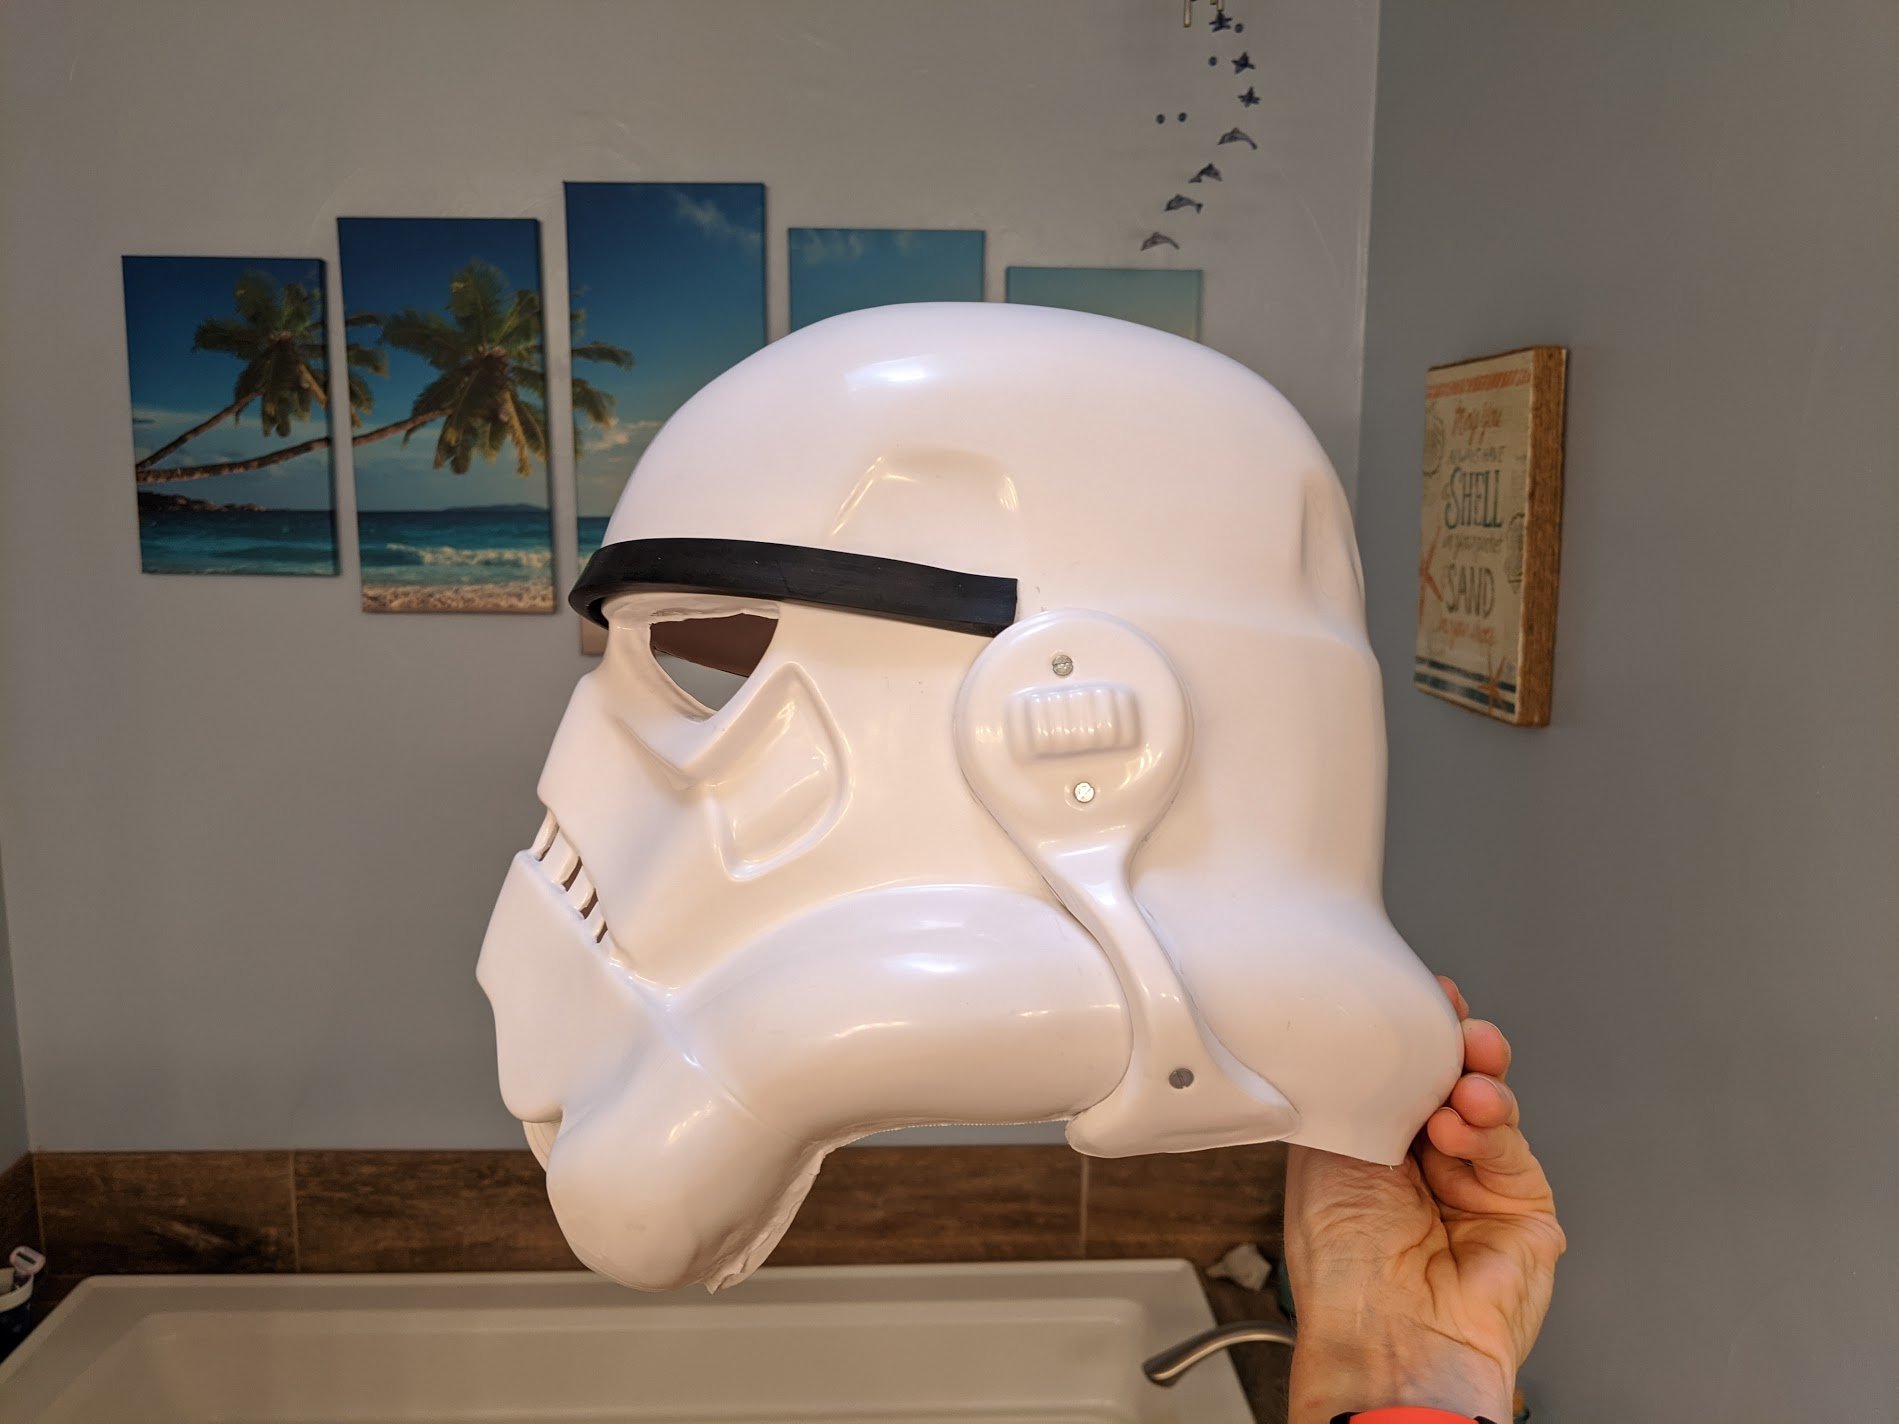
I looked at references images, watched all the videos I could find for similar builds (thanks @gmrhodes13!), and think I got pretty close. The ears were definitely a challenge, but I'm pleased with how it turned out. Feedback welcome.

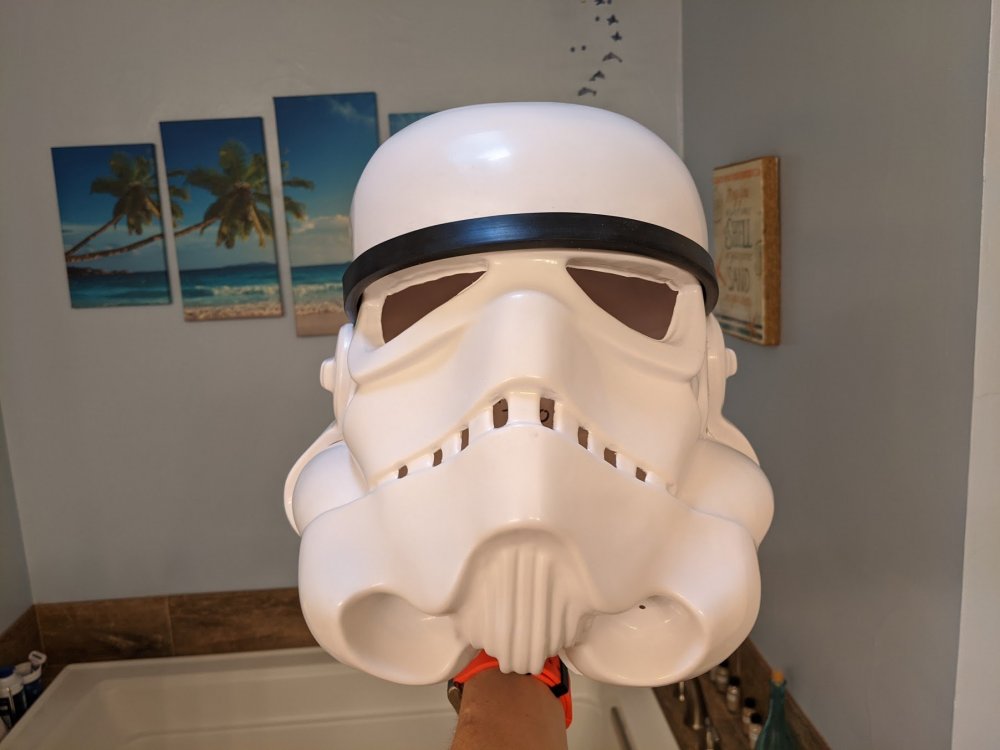
 1 point
 -
I think I'm done! Well maybe a clear coat since I have already noticed some premature and not intentional wear from my constant fondling on my newly completed happy thing. Commence photo dump: The wires are snugly concealed under the scope rail. Blast "em!1 point
-
Hi James, and thanks for your submission for EI! Unfortunately, you are missing some mandatory information as well as some required photos. Please click on the link below for more precise information/requirements, and I look forward to seeing the updated pics! EI Photo checklist: https://www.whitearmor.net/forum/topic/49685-ei-photo-checklist-updated-version/1 point
-
¡Estoy trabajando en tu presentación ahora, soldado! ¡Gracias por su paciencia, y estaré con usted en breve!1 point
-
1 point
-
25 spots and counting down . Last approved EIB Caleb (TK84095)1 point
-
Ah, interesting. So the greeblie side is fixed and the inner side is velcro? Did your spats come with that bit where you put the velcro on? Mine totally don't have it, so I am debating about cutting down the "main" spat to accommodate a slot for it, or manually adding on a tab for it1 point