Leaderboard


Popular Content
Showing content with the highest reputation on 06/28/2020 in Posts
-
Update! Today I received a few sheets of ABS shimming material, that’s the green light I’ve been waiting for to continue with the process. Tomorrow I’ll begin work on measuring, cutting, and attaching my shim to my kidney armor. Other than that there’s just the matter of the cod buttons and then I’ll be submitting photos. Thanks again everyone, I’ll keep you posted.3 points
-
Finished the other cloth box today. Let's just say that sewing boxes is not my thing. These turned out adequate for my liking. The additional layer of fabric involves an extra level of challenge that I neither anticipated nor enjoyed. Glad they're done. And assembled on the belt. Good enough, I think! I still need to sew in closure fasteners for the fronts. They're too small for an amp or trading cards, unfortunately. And I'll be adding some foam blocks inside to help them keep their shape. I bought three HUGE sheets of EVA foam last year from The Engineer Guy (a local FX supply store here in Atlanta), so I've got more than enough to stuff these pouches. Seriously, the EVA sheets are larger than a standard Twin sized bed. Two of them are 1" thick each, and are different densities. My husband asks me from time to time if he can get rid of them out of our basement, and I always respond, "But... PROJECTS!!!!". See, I can make blocks now.3 points
-
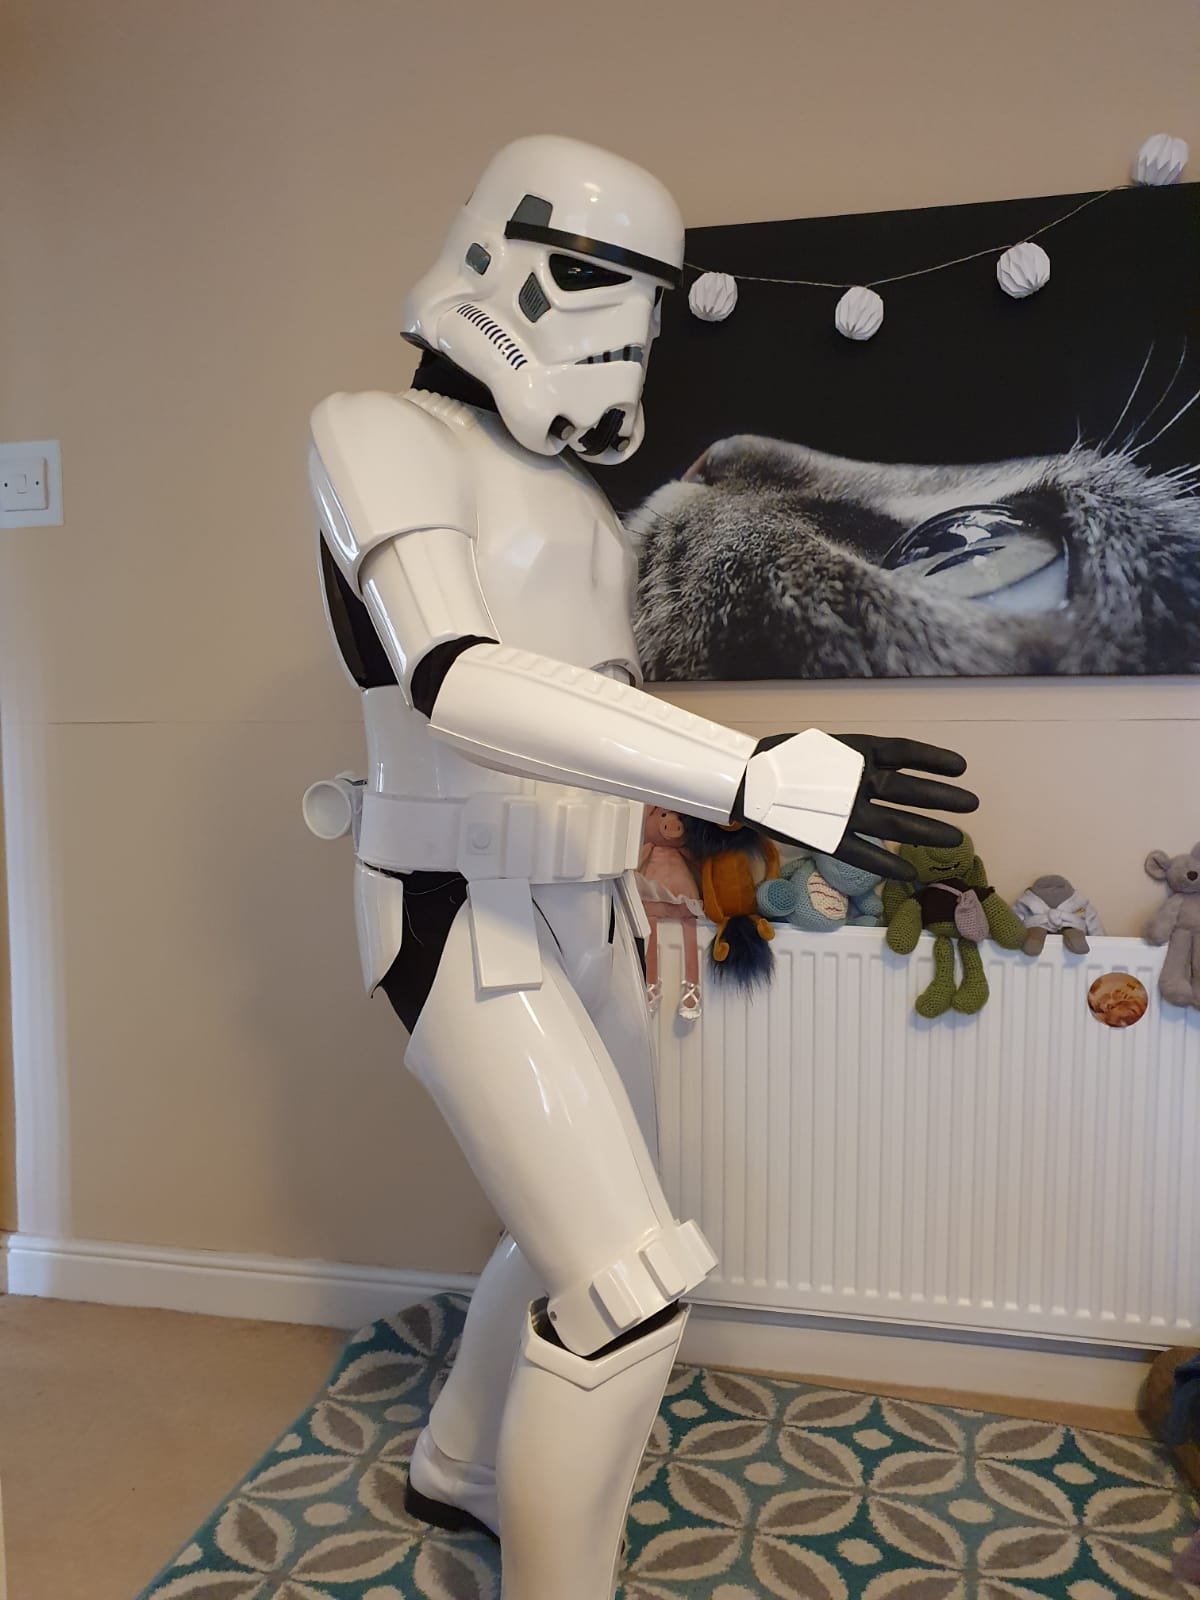
Hi all! Trevor from Gibraltar. I’d always dreamt of owning my own Stormtrooper outfit (or at least since 1977!). And now, after starting the process in October last year, I finally have not one outfit but two! I am now the proud owner of a TK Commander and a ANH Stunt! Was originally going to apply via the UK Garrison but seeing as it’ll be easier to join events in Spain (Gibraltar is a British Overseas Territory connected to Spain via a land border) I eventually applied via the Spanish Garrison and, on the 26th June, I was accepted and given my long-awated TKID! Over the moon is an understatement! I’m so looking forward to meeting everyone I’ve already made friends with over WhatsApp! Over and out...
 2 points
 -
Or is it "Old New Member?" Eh...anyway...I've been a forum member for about 4 years now, and have posted occasionally. I primarily joined so I could research my AM2.0 kit build for MEPD : Now, I'll finally be building a bright, shiny white ANH Stunt TK to Centurion level (AM4.5)...with a stop at EIB1K along the way. I'll be starting a build thread, and hope to keep it updated. I'm very bad at taking pics of things in process...be it vacations or builds (this will be my 6th costume overall, and 1st build thread ). Thanks for reading my rambling. BTW...looking for a basic, current FISD patch or 2 for my helmet bag.2 points
-
Inner strips for the biceps were glued and clamped on each side and cured for 12 hours. After 12 hours I closed the biceps and used clamps and magnets to hold everything together. This will cure for 24 hours for full cure time. Next up are the forearms.2 points
-
A happy find today! I was about to get started on making Cameron's neck seal when I realized that I was missing about a yard of pleather fabric I had bought about a year ago. I was going to use some of it for the bib, so off I went to my long-term Nerd Supply Bin (a 50-gallon Husky bin stored away in a closet in the guest room) to see if it was stashed somewhere in there. Alas, it wasn't in there, but I found something better: a neck seal! This is a neck seal I had bought from Trooperbay (I think?) when I was working on my very first TK. I've ended up buying other neck seals since then, and I had totally forgotten about this one. It's small- about 14 inches I think? Anyhow, Cameron's neck size is about 12.5 inches. Close enough. He tried it on, and it pretty much fits! I will add a little extra loop velcro to one side to help secure the little bit of extra flap overlap. Easy mod- and much easier than making an entirely new neck seal for sure! Now, still wishing I could find that pleather fabric I'd been looking for. I don't need it now, but would still like to know where it went.2 points
-
I had an idea to resolve my vocoder issue whilst making lunch. So I went back to my meshmixer file, because you always keep your working files, and duplicated both the vocoder and the helmet part (#8 if you care). Always work with a copy of objects as this app uses destructive edits, like photoshop, so you will end up with helmet-final-final-no-really-final2.mix if you create copies of the files. By keeping copies of the objects as you work it's only 1 file but it can get a bit tricky to manage in meshmixer. First job, enlarge the vocoder. Painting will take up space so I need to account for this ahead of time. Measuring the vocoder my now traditional 5% gives me 1mm to play with, factor in the resin shrinks a bit so after paint I should be okay. Next I subtract the new larger Vocoder from the helmet section. What this means is: anywhere the 2 parts overlap, remove it from the helmet. If this looks awful I can also try the reverse, and cut the vocoder down to fit the space in the helmet. This would not be a bad idea as it would then key in, but I prefer the first method. You can see the result here, sorry about the weird colours I don't know how to turn those off. I now have a slightly oversized channel in the part that the vocoder *should* fit into. I'll be printing the new part tomorrow. There's a few odd artefacts from the operation due to how meshmixer does this, other apps might do it better but I know how to do it here. However they are pretty small and I can probably sand/scrape them out later if needed.2 points
-
Hi Dan. I put some pieces of ABS to reinforce the area...
 2 points
 -
Hey troopers, Working on the torso: I’ve better trimmed and sanded the parts, and now started on the original strapping system. Using screen reference material, plus the RS videos, for reference. 3mm drill used for the holes. The bolts supplied by TM are approx 3mm threaded shaft with a 5mm, flat head. As it’s my first time using this method, the chest went fine, however, I had to drill some additional holes in the top of the ab plate as the chest and ab brackets didn’t quite line up. Thankfully, these will not be at all visible. It’s a slow build (as I’ve had the kit since Christmas), but it’s really enjoyable. :-)2 points
-
Oh, wow! Congratulations! I'm hoping to make a similar announcement within a couple of months.2 points
-
Armor Bin Imperial Cog Wheel Covers File-Name: Wheel_cover_imperial_logo.stl, Wheel_cover_base.stl Designer: GoofTrooper [TK-37423] Last Update: 01/2020 File-URL: https://www.thingiverse.com/thing:4122064 Description: This is a wheel cover for your Husky brand rolling toolbox used for armor storage. Customize your armor bin by changing the look of the stock wheels to an Imperial Cog. I designed these wheel covers to use on a Husky brand 37 in. toolbox. I'm not sure if they will fit other sizes of Husky toolboxes. Let me know if they do! Terms of Use: This design is licensed under the Creative Commons - Attribution license. Image:1 point
-
Hi! Sick of photobucket being a slow, bloated piece of bantha poodoo (that now apparently charges you insane amounts for external hosting)? Wish you could just upload some images to your build thread to show off your sweet-an impolite person testfit of your armor after you've done all the strapping and not use 50% of that time closing popups? FEAR NOT! PSA: Keep a backup of your images! No one can predict the future, Imgur may not always be around (or may hold your images hostage like Photobucket). 1) CLICK THIS TO GO TO IMGUR.COM (Or you could click the mouse wheel, which opens any link in a new tab) 2) Make an account: 3) Fill in your stuff or use Facebook/Google whatever: 4) Go to your images: 5) Find your awesome picture: 6) Drag and drop your awesome picture right onto Imgur (or use CTRL C+V): 7) Click your newly uploaded picture: 8) Click the Copy button on the BBCode section: It will flash green and stuff, welcome to the future! This baby's almost ready for paint! Pretty painless! It also has albums, ability to auto-resize, you can even select several pictures from your folders and just drag them all onto Imgur. Pictures are hosted on imgur, and you are merely linking to them by posting them using this method. If you remove it from imgur, it will be removed from anywhere else you posted it using the link. Here's what all the sections do: Image Link: Links to the image, but on Imgur. [EXAMPLE] Direct Link: Links directly to the image, and nothing but the image. [EXAMPLE] Markdown Link: Formatting for Reddit comments, disregard this one. HTML: For embedding your picture onto your website. HTML Code. BBCode: For embedding your picture onto forums (like FISD and 99% of all other forums). Linked BBCode: Same as above but with a clickable picture that leads to the picture on Imgur. [Example below, click it!] HOW TO RESIZE YOUR PHOTOS FROM YOUR SMARTPHONE/CAMERA IF YOU HAVE BANTHA POODOO INTERNET CONNECTION (WINDOWS ONLY): If you're like me, you have a sub-par internet connection and a "regular" smartphone. Smartphones takes pictures with a large file size and it is not optimal for us with a bad connection wanting to upload it for web viewing. 3.5mb takes a long time to upload, so let's shrink those files while still keeping it high quality for the web. 1) Open up the pic in MS Paint Right clicking the image and clicking edit should open up the selected pic in Paint. If you highlight multiple images and do this, it should open an instance of paint for every selected pic. 2) Resize in Paint Click the "resize" button in MS Paint. You'll see this: Click TAB once and it should highlight the number, making you able to type into the field. I usually resize my pics from my Samsung S8 by 40-50%. Press OK (or just hit enter) and it should resize. Now you can go to File->Save/Save As.. or simply just press CTRL+S to overwrite and save to the file you opened. Now it only takes a few seconds to upload a picture, instead of a minute. Time saved that you can use on removing excess E6000 glue from your coverstrips If you have any questions i'll do my best to answer them. Ensi out!1 point
-
Name: Cameron Porter Blair TKID: TK-22020 FISD Forum Name: Order and Justice Garrison: Garrison Titan
.jpg.bfe68721ba8b02192321b40c24445a98.jpg)


 1 point
 -
Helooooo everyone! Today is a very special day- it's Big Brown Box Day! Pictures will be coming out tomorrow In the meantime, I want to thank everyone in advance who will help me out and answer my many future questions. I am new to this and this is overwhelming but I am also very, very excited. I will be building an ANH Stunt from Walt's Trooper Factory, and my goal is to make it to Centurion standards the first time around. I am 5'5" so this will be a challenge, but it has been done before so this makes me feel better!<br><br><br> My first question is:<br> Where did everyone get the mesh material for behind the frown and on the mic tips (and is it the same material?)? <br><br> I plan on posting regular updates and a very detailed log of my progress. This has has been a longtime dream of mine and I am beyond excited to begin my journey to trooper-dom. All help is welcome, more updates coming soon!!!1 point
-
Wanted to share with you all my Millennium Falcon model (don’t tell Vader). Finished it a couple years ago and I maybe obsessed a little too much on getting every detail from the original 5ft ANH filming model. If my house was on fire (knock on wood) this would probably be the first thing I try and rescue lol.1 point
-
Hi everyone. I've been following the forums off and on for some time now with hopes to eventually start my own build. I've wanted to have my own TK armor and join the 501st since I was in my 20s. I'm 44 now. My son started college last year and we began discussing building armor and joining 501st as a way to share a hobby, stay close, and make even more friends and lasting memories together. Well, that being said, we just put in our order for our kits and are about to start this exciting journey. I look forward to meeting you all and learning from the seasoned vets.1 point
-
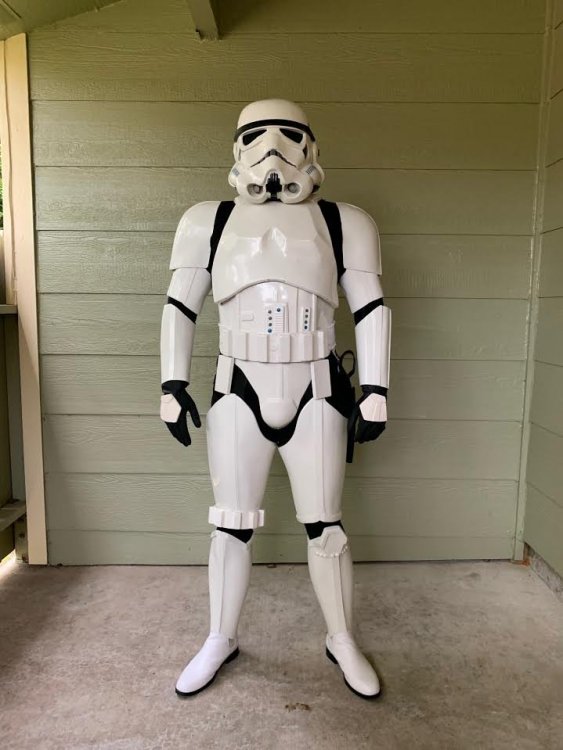
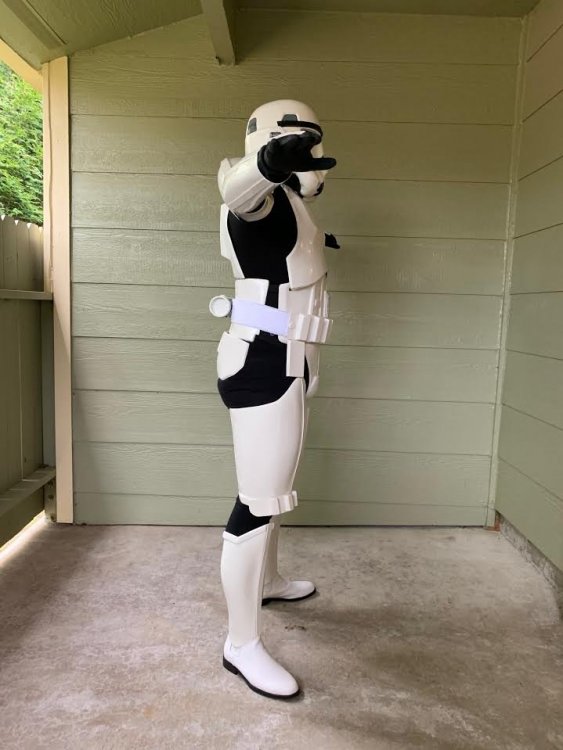
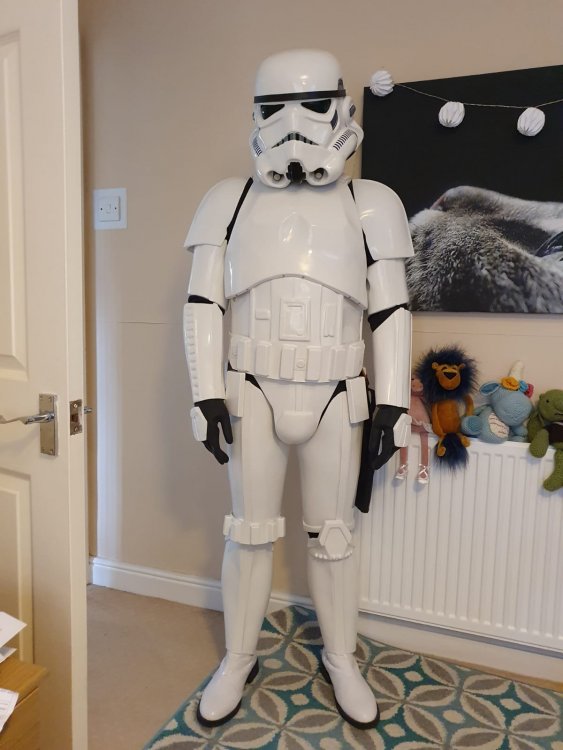
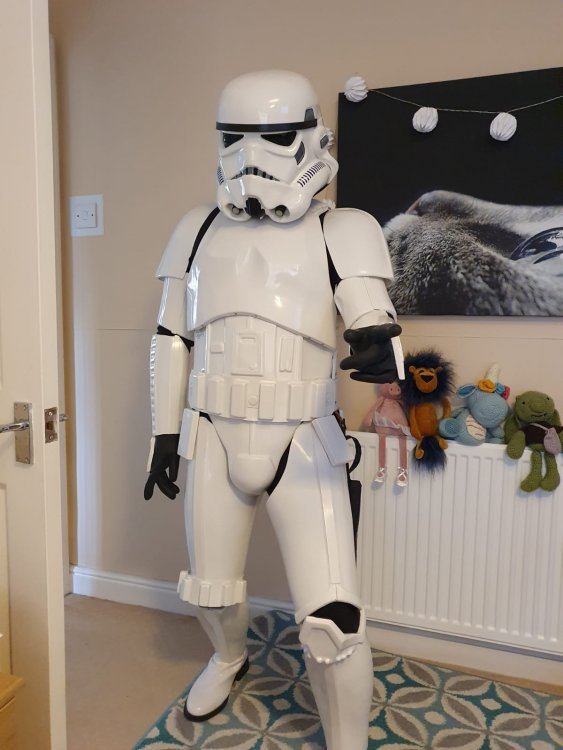
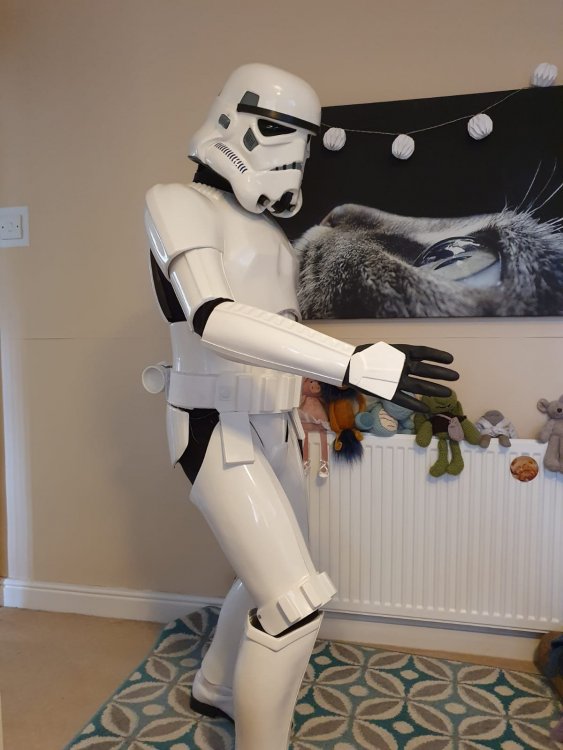
Hi, here's a few pics of my WIP TK RS Prop masters Stormtrooper armour. I purchased this about 6 weeks ago as a lockdown project, I already had a helmet & few other accessories so just needed a set of armour to complete the outfit! Lol! I still have a few bits & pieces to do before it's finished then I'm hoping to submit it for basic approval ( I may go up another level at a later date ) sorry I don't have any build pics as I've also been quite busy doing DIY as well during lockdown! Lol! hope you like them. Cheers Darren
 1 point
 -
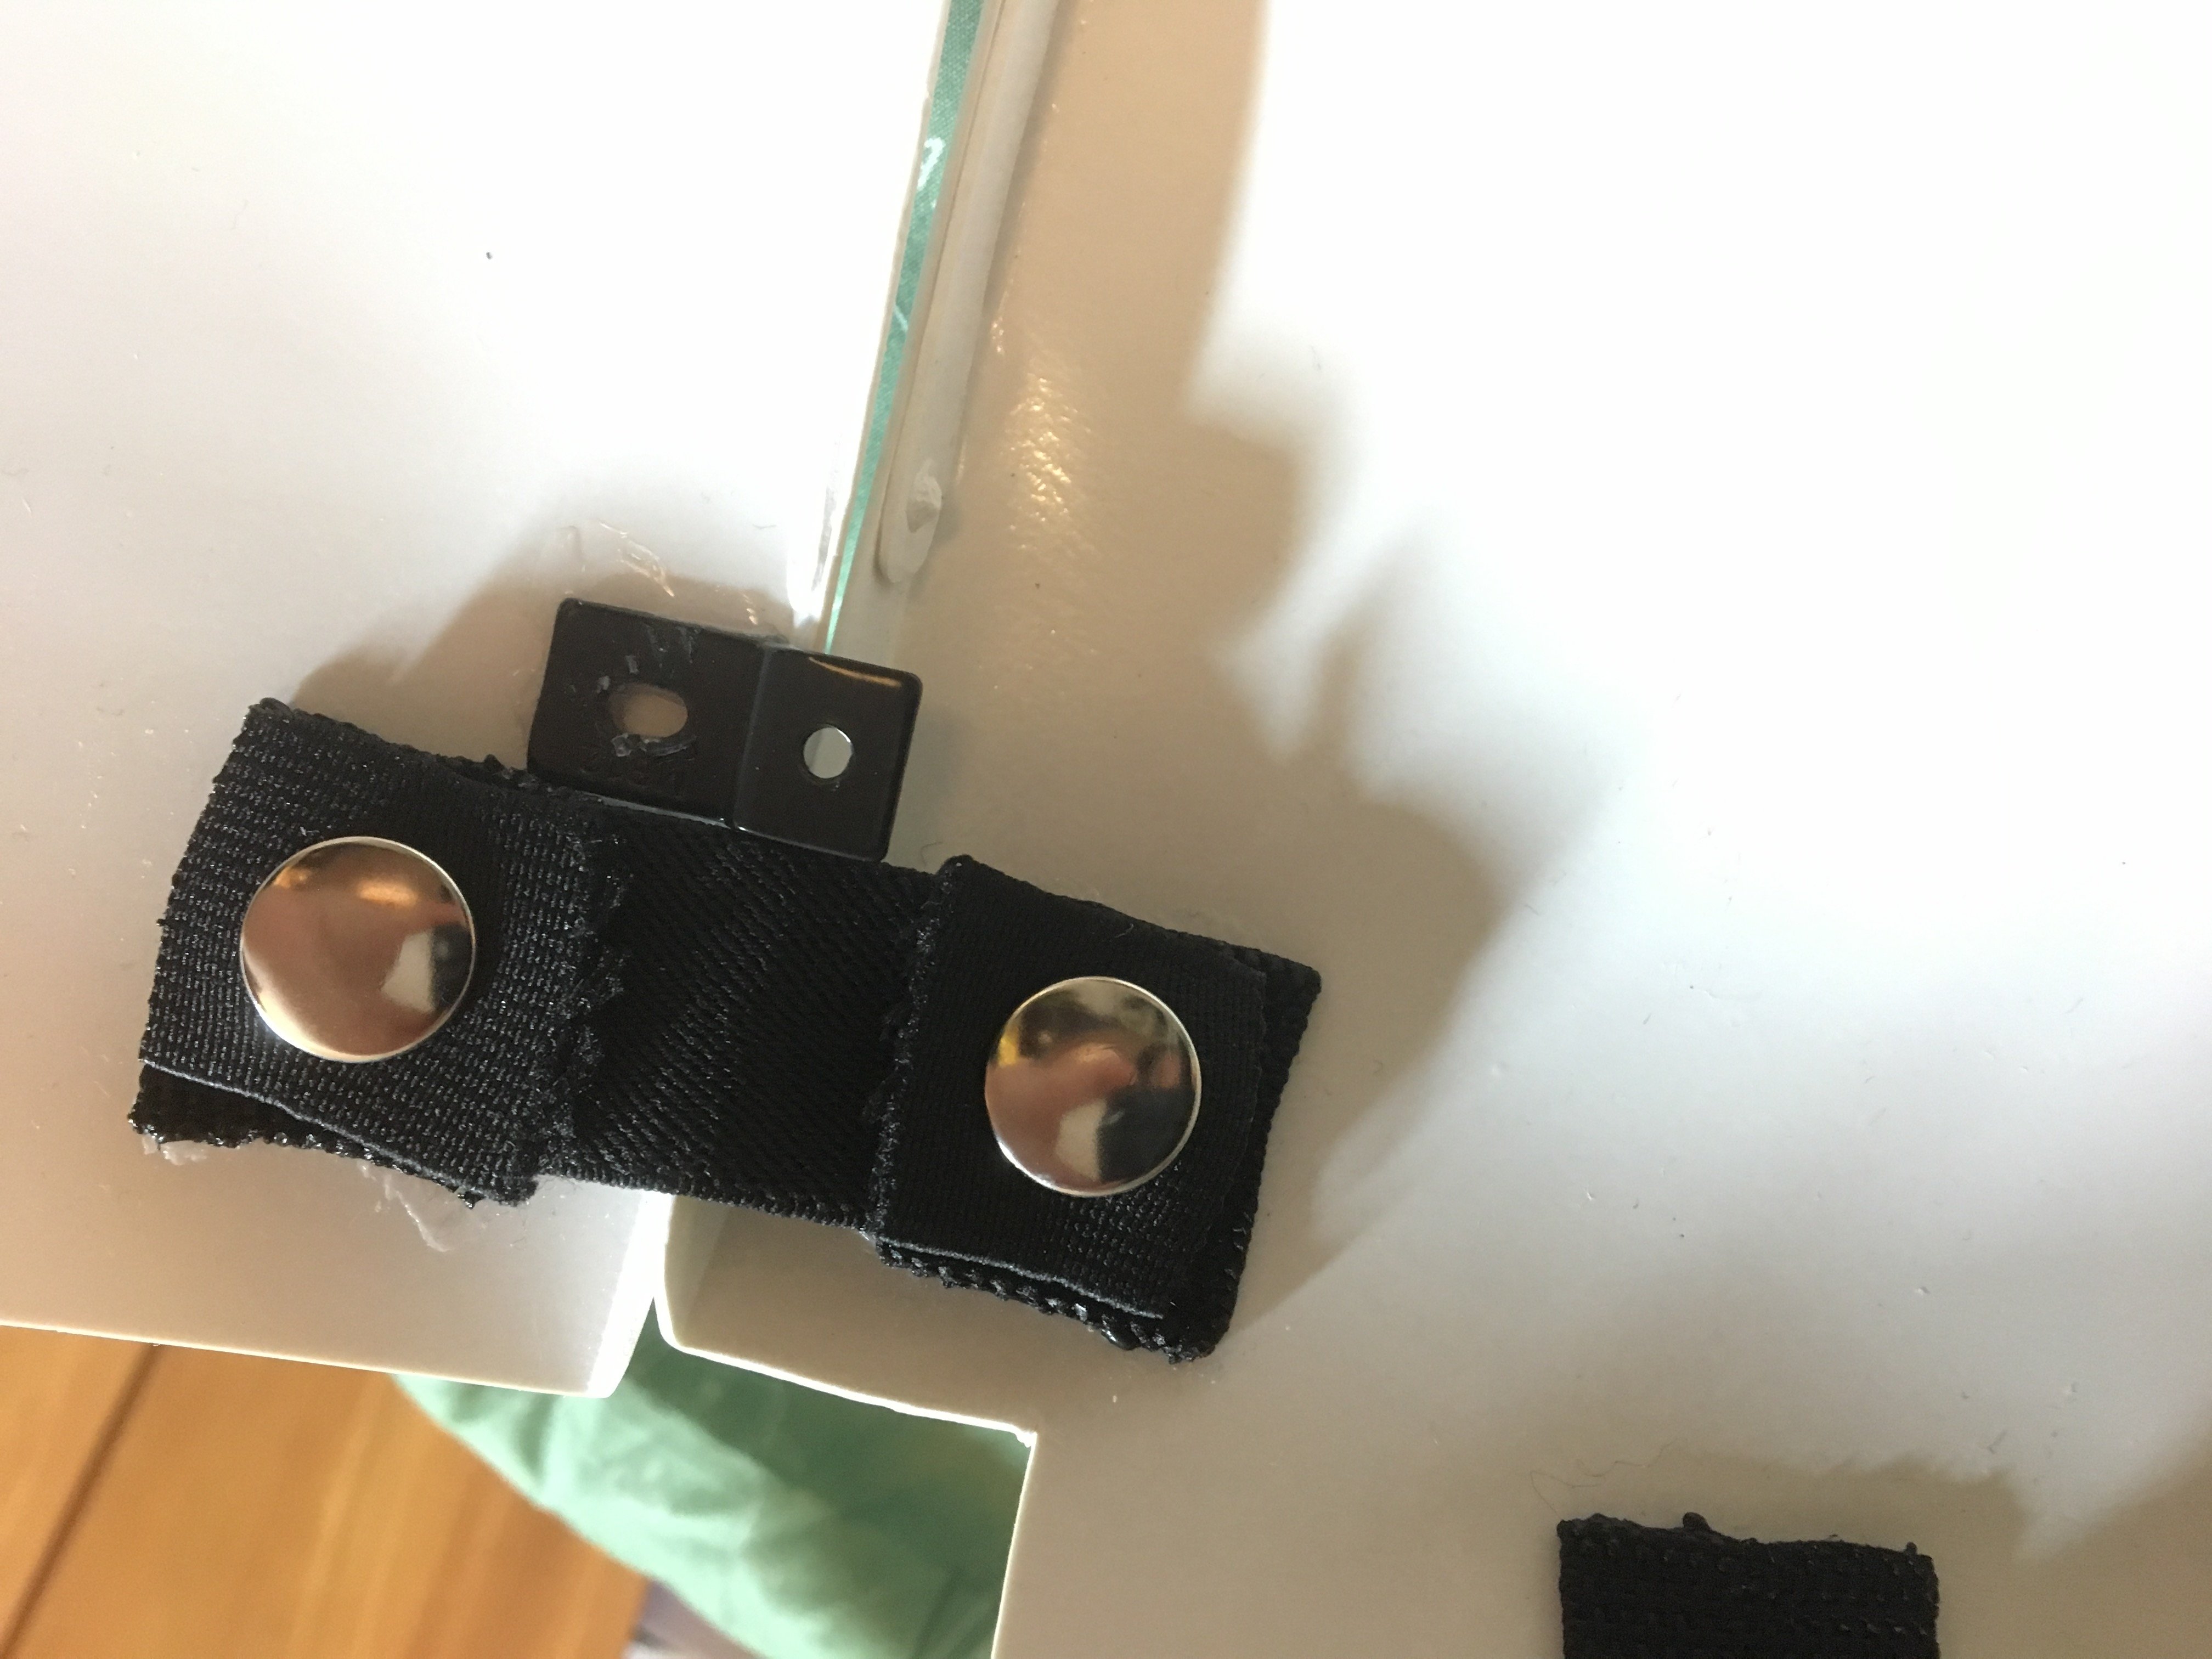
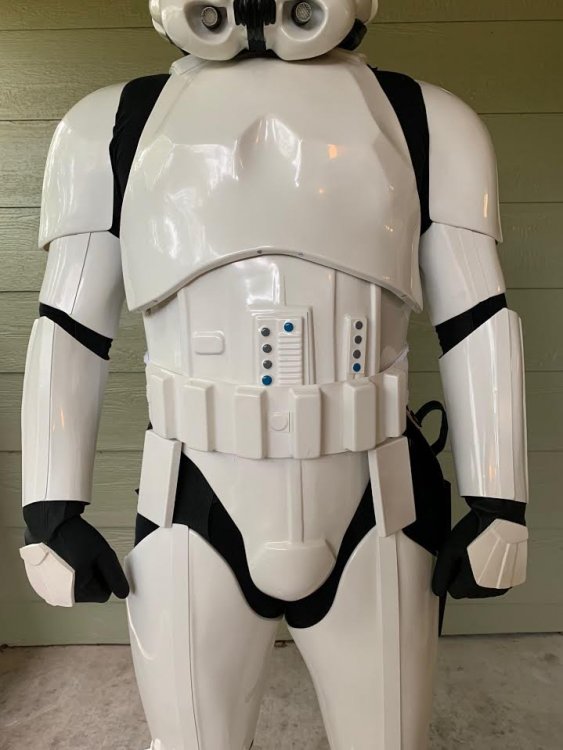
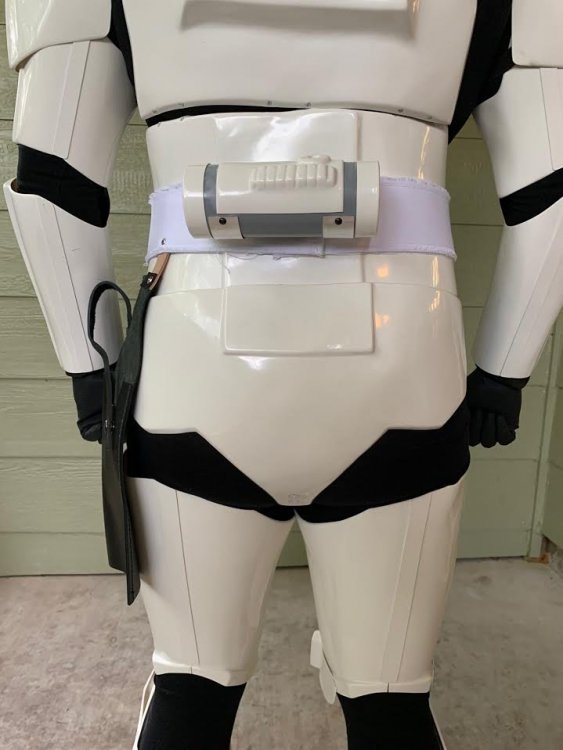
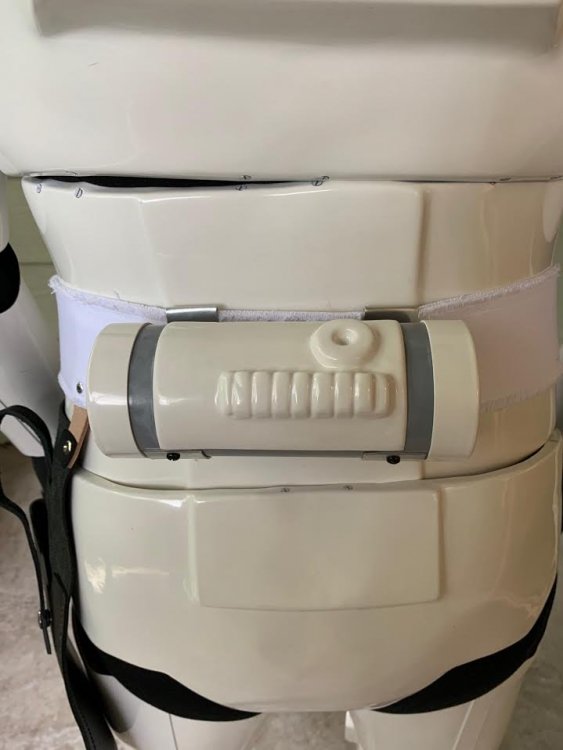
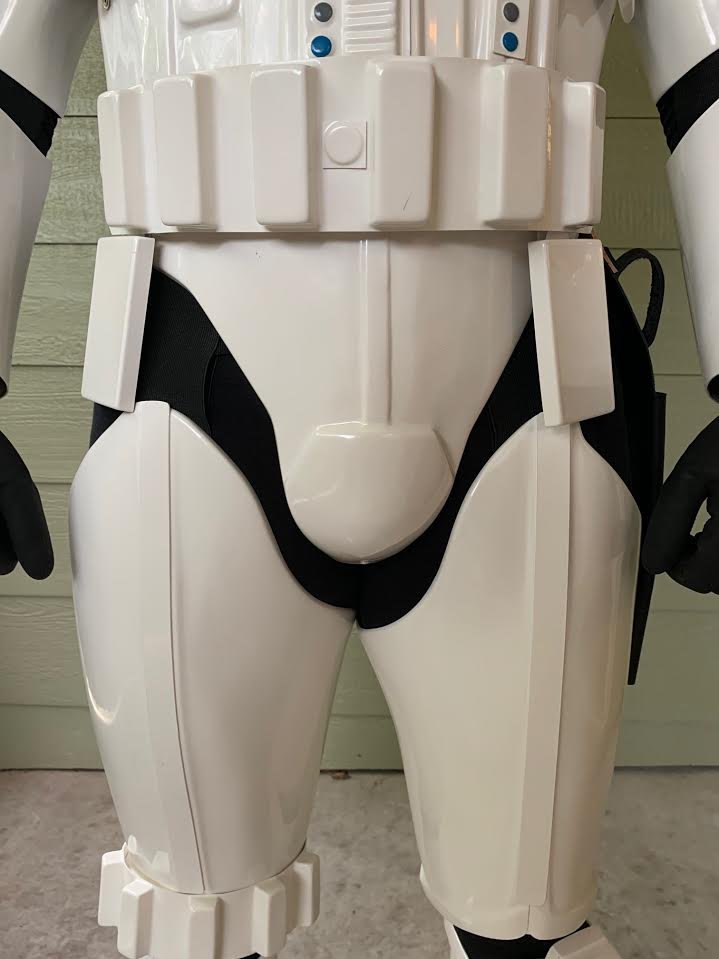
Howdy troopers! I just wanted to share a fix I used for my armor to keep my butt plate from slipping and overlapping the kidney plate. Basically, I went to a hardware store and found these small brackets that ended up being a perfect fit. I glued one on each side of the butt plate close to the elastic; since that's where the tension is coming from that causes them to overlap. The lip of the bracket that sticks out will hit the return edge of the kidney plate and prevents the butt plate from moving rearward any further. During my troop after installing the brackets I had no problems with it slipping free and overlapping. Hopefully this can help fellow troopers struggling with the same issue. Happy trooping!
 1 point
 -
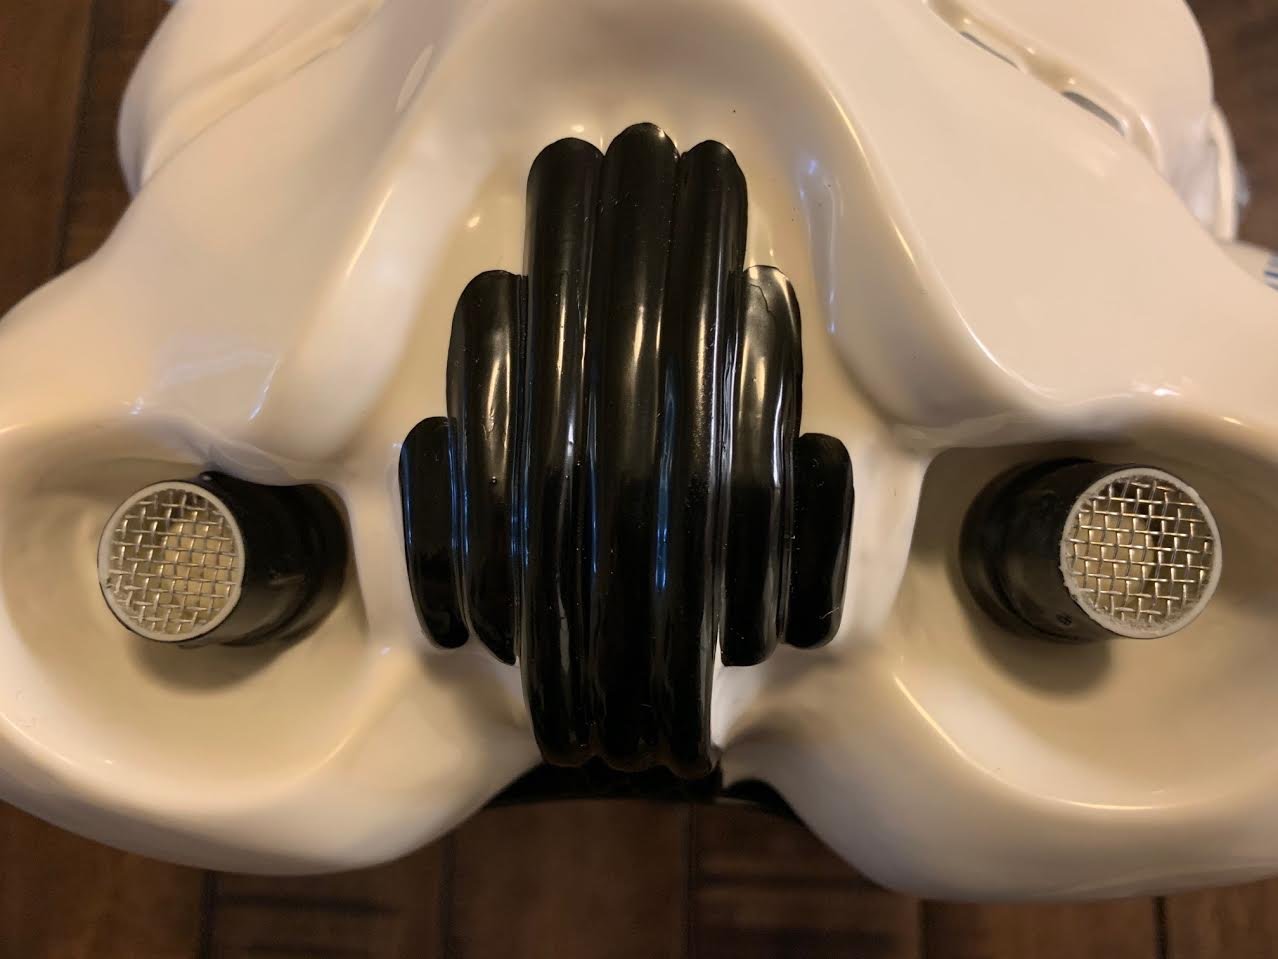
Opened up the eyes all the way... Got my cut line marked out on the AM handguards... they come super big. How's that look? Also disassembled the Hovi mic tips for a lick of white paint on the interior, and prepped the ears - opened up the holes to fit Joseph's slightly larger countersunk hardware, and decided to add extra rank bars. I use vinyl stickers because I can't freehand paint worth a d*mn and rock the "Captain" style since I occasionally like to wear an orange pauldron for funsies if there a ton of TKs at a troop... so even when I'm not canon, I'm accurate lol And got the mic tips holes drilled out to fit Tony's bolts. Progress! Reassembly soon...1 point
-
Hi Caleb, according to the reference that is usually posted, you're right. As a suggestion, place the Ab section rivets first ,( don't make holes in the kidney yet ) and then , align a remark the kidney's and proceed. Cheers1 point
-
Yes forgot to mention. I roughed up each side with 220 grit sandpaper and spread thin layers of e6000 with a tongue depressor prior to clamping together. When I removed the clamps after 12 hours the bond was strong. You should have seen my wife’s face when I spent an entire night making the magnet sachets lol. I am going to attempt crickets shin closures so I picked up that tip from her tutorial.1 point
-
Freed from sewing that neck seal, I set to tackling the shoulder brackets. I relied exclusively on Tony's tutorial here, and it was extremely helpful! Thanks @ukswrath as always for blazing the trail for us and leaving a map! I started using his measurements as a guide, knowing I'd have to size it down anyhow. Here is my paper template cut to size, but you can see it's too big. So I pressed it into the space and made marks. Here are the measurements I ended up with. I omitted the little tab thingies on the outer edge because I don't really need them as reinforcement. The chest/shoulder/back area on this print is quite strong. I used this aluminum sheeting for my brackets. It's thin enough to cut with tin snips, but also strong enough to hold the shoulders up. I have a lot of this on hand because when I bought it through Amazon, it only came in a 6 pack. Lots of material in case I mess things up! I traced my template on the aluminum and cut it out. I bent it slightly and tested it for fit. It looked good, so I made the opposite side bracket. I then took the leap and made holes into the shoulders. This part was so scary for me!!!! But it worked out, and the brackets fit nicely. I made all three holes on each side, and marked the brackets with where I needed to attach the snaps. Drilled those holes out. (This was easy!) Set the snaps. Verified fit. Again. Scuffed up the side that was going to get the glue, and stuck the brackets on. I'm too lazy to drill a bunch of holes in there. I'll let everything cure over several days. I'm really glad that I haven't finished painting yet. Those holes look somewhat messy, and I know I would have been gutted to mess up the paint! This piece of armor is pretty dirty after all the cutting and trimming. Will give it a good cleaning before painting. Weather still not looking to cooperate with me for at least another week now. Ah, well. More time to think about other strapping that I can tackle in the meantime!1 point
-
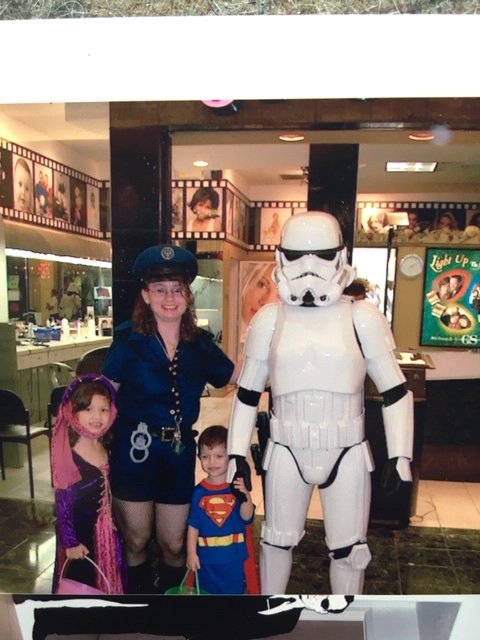
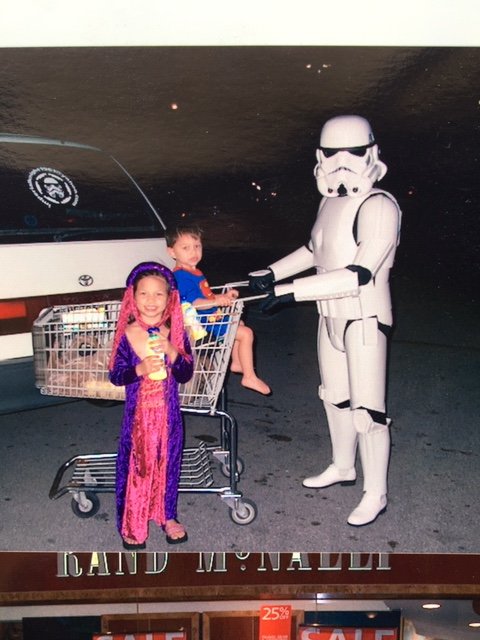
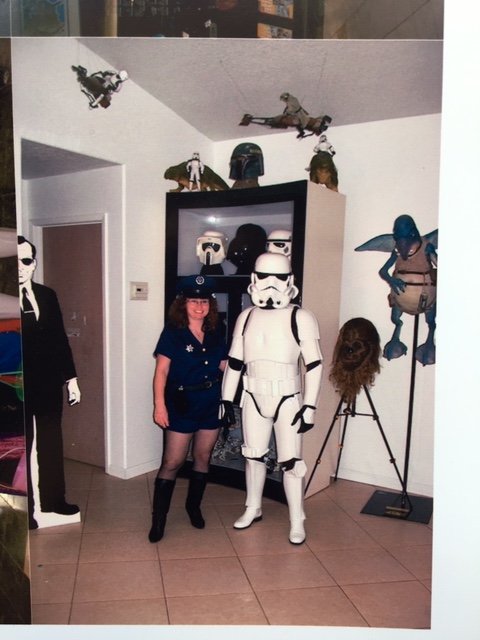
Back in the days had a great time with the family at Halloween
 1 point
 -
Welcome back, Jerome! For the TK footwear, I can highly recommend Imperial boots. They are 100% approvable at all levels and very comfortable. Note that they are made in "waves" (once a month or so) but delivery times are actually quite fast. The next "wave" for ordering starts on July 3rd, info here: https://www.imperialboots.com/ These are the ones to look for: https://www.imperialboots.com/product/421/ One thing I suggest is ordering a size larger than what you normally wear, as they can run a bit small.1 point
-
Your build is coming along great! Keep up the good work. It can be long process, but it is all worth wild in the end. I've loving the pictures, gives some great reference to your process, and will be a huge help to others running into similar challenges. Keep it going!1 point
-
It probably sounds far fancier than the reality!1 point
-
Welcome back Chris!!!...Waiting to see your build...1 point
-
The "real" ANH Stunts weren't made out of white ABS but instead out of that weird green HDPE. They were painted then. That we here use white ABS is a durability and usability optimization to prevent paint flaking off and messing up the armor.1 point
-
This is just amazing! Great job Trevor! Congrats on both amazing kits! Welcome to the Brotherhood of white armor!1 point
-
Hi Damien, Great boots and great work with the return edge. About the sniper knee, it's just perfect for high levels. I would suggest that for better look you could trim it down a bit to closer match the reference images. Reference Photos Cheers1 point
-
Welcome to the FISD Chris Sent from my SM-G960F using Tapatalk1 point
-
Hello and Welcome Back to FISD1 point
-
I would buy as a kit myself, not a completed helmet, there’s not enough fun in that for me. Sent from my iPhone using Tapatalk1 point
-
Hahaha! Thanks for that suggestion, but I've already got an amp system in the works for Cameron. In his previous kit, I rigged it up similar to my TK, with the amp velcroed into the ab, and the mic wires running to the lid. That said, I'm eagerly waiting to hear when you plan on releasing that FOTK sound glove setup you were working on. Nothing would be cooler than my mini FOTK sounding like a full-sized FOTK.1 point
-
Hola buenas tardes. Estoy dado de alta en la Spanish Garrison de España y me gustaría ascender a nivel experto y no sé dónde tengo que míralo o con quién tengo que hablar no sé si me podrías ayudar. Muchas Gracias Enviado desde mi SM-G955F mediante Tapatalk1 point
-
https://www.501st.com/members/displaymemberdetails.php?userID=32476 did that work?1 point
-
Hola Trevor... Que pasa con la Garrison Española que está muy activa... Bienvenido al FISD. Soy Chemi de Valladolid, y te conozco del WhatsApp de AFP... Te animo a que llegues a nivel centurión con tus 2 armaduras, la ANH y la commander...Si necesitas cualquier cosa ya sabes, email, mp, WhatsApp, lo que quieras... Un saludo... Hi Trevor ... The Spanish Garrison is very active ... Welcome to FISD. I'm Chemi from Valladolid, and remember you from the AFP WhatsApp group... I encourage you to get to the centurion level with your 2 armors, the ANH and the commander ... If you need anything you know, email, mp, WhatsApp, what you want ... Regards1 point
-
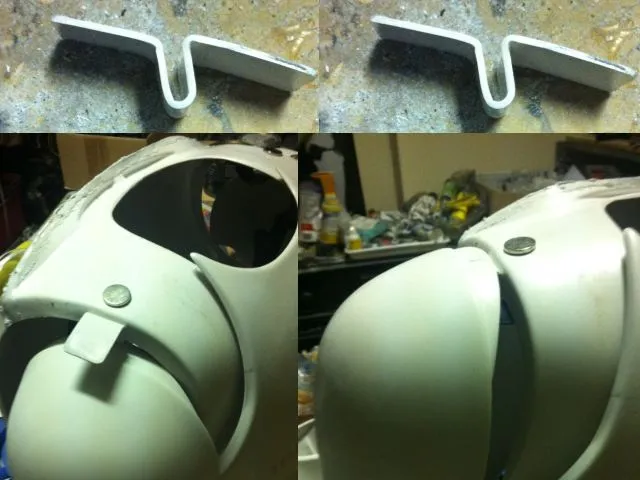
Boring stuff first, exciting stuff after that! For the other thigh, I had to glue a second small inner cover strip behind the front ridges, just because it indents outward and one continuous piece of plastic wouldn't bend at that angle. So I just added a little bit of spared plastic behind the front ridge for reinforcement before gluing the outer front cover strip tomorrow. Exciting stuff now! I did my first torso fitting and boy was it actually really fun and exciting!!! Here's some pics: (I didn't know my dad was taking a picture so my face is atrocious, pardon that ) Here, the butt overlaps the kidney slightly. It just slid up a little bit but it's no big deal, it still fit me height-wise when it slid down a bit too. It was hard to keep it even because right now there is no return edge on either the top of the posterior or the bottom of the kidney. More on that in a minute. I decided there are several things I want to do to get this torso to fit me a bit better. Here is my game plan: 1. Add kidney shims! I measured approximately a 4 inch gap from the ab to the kidney. Because of how the ab sits unevenly and not completely vertically when it rests against my stomach, I measured from the top of the kidney to the top of the ab and the bottom (before the inner notch) of the kidney to the bottom of the ab. I went with the largest measurement, the bottom of the kidney to the bottom of the ab, which, when I make the shim, will push out the ab slightly on the top and help set it more vertically instead of lying slanted against my stomach. I also will make the kidney shim height slightly taller than the actual kidney height to fold over the top of it into a small return edge to make it continuous with the kidney proper. 2. Use the heat sealing iron to make new return edges on the butt and the kidney for the bracket installation! I calculated the overlap between the butt and the kidney that I was most comfortable with (not shown) and will divide that measurement by two to determine how much return edge to make on both the top of the posterior and the bottom of the kidney. This doubly functions to shorten the back profile, which the overlap helped simulate during the fitting. 3. Slice the cod! I have been messaging Cricket about this for advice and recommendations about the ideal distance from crotch to cod. I will have to bring it up slightly I think, but this one is still a maybe. 4. Install chest brackets and then trim the remaining return edge on the bottom of the chest and see how else to lessen that gap between the chest and ab (heat?). Once I install the chest brackets, I can see how much of that excess return edge I can afford to trim. Then, if there's any issues, I can resort to heat reshaping, or just accept the gap for what it is. Here is PART of my game plan illustrated: You can see how I am referring to the shim "pushing out" the top of the ab so it is more vertical, using the bottom of the kidney to the bottom of the ab measurement (the wider width) to configure my shim. You can also see where I plan to slice the cod and bring it up, and an approximation of the butt overlap (again, here, there is TOO MUCH overlap from it riding up, and was not the actual measurement I used to calculate how much return edge to make on each piece. This picture is slightly misleading, but it's all I have). That's it for tonight. I honestly feel really recharged and excited seeing some of it fit on my body.1 point
-
1 point
-
It's been a wild ride. I started this journey on November 11th 2019 and completed it (never complete) at the end of May. My little printer (Ender 3 pro) ran pretty much 24/7. I went through roughly 26 rolls of fillament. I do have a box of bad prints (haha). I will continue to work on getting his periscope to work. I can already see that I may need a larger power amp. I am currently running 20w but talking to some of the droid guys they seem to be running 50w min. I also will work down the road at adding an effect to making his arm extend and using some LEDs to make it look like a zapper. Who knows. As usual thanks to my brothers and sisters in white armor for the support. Here is a link to my facebook account if anyone wants to see him moving with some sound. I was trying to video and move him so it's a little (a lot) wonky. Thanks again!!1 point
-
Got a little side tracked with helmet electronics. I used the Ukswrath integrated helmet speakers and 4 fan system with 2 anker powercore mini batteries. I made some elastic battery cradles to get them flush with the helmet and cut out sections of the bracket for them to attach to the helmet directly for more strength. I also added 6mm EVA foam to the lens for a goggle-like fit. Getting it on is a chore but it fits fine once on. May need to round off the front right fan so it is not as pointy which can catch my forehead.1 point
-
Don't forget about the inside of your bin! I have a ton of patches, so I attached my favorites inside the lid. Also pimped out my Tusken Raider bin. (Genuine canyon Krayt skin on top).1 point
-
Don't worry, take your time Trooper, using imgur you will be able to add more photos, is it not necessary to delete or edit, just copy the imgur direct link and paste it directly into the post. Your EIB badge is waiting for you sir. Cheers1 point
-
FYI, if you trim ~1.5mm off a split rivet you can set it inside a line 40 snap:1 point
-
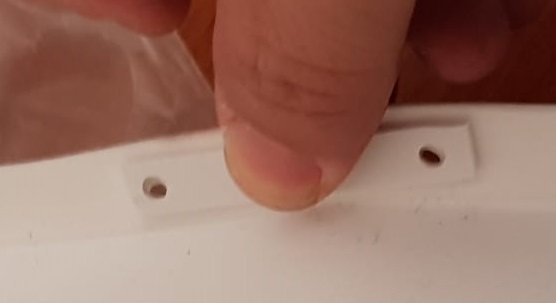
Accuracy up cont..... Shoulder (yoke) to bell connection I'm going to address the yoke to shoulder bell really quick at the request of a couple troopers. In a previous post I left off cutting the holes for the shoulder bell connecting straps. 13. Measure and cut four strips of 6" x 1-1/4" black elastic. 14. In my case the slits in the yoke would not accommodate the elastic and velcro together, neither-less a snap so I elected to sew in 1-1/2" section of velcro (hook side) at one end then feed it through then install the snap. Velcro sewed in place and fed through the slits. 15. At the other end fold the elastic over 1". Using a 1/8" hole punch, punch a hole for the female snap you'll be installing. 16. Install snap. Note: Elastic fold and female snap will be facing the armor side. 17. Install industrial velcro (loop side) on shoulder bells and install bells. 18. Something I forgot to mention earlier. If you use the aluminum plate or other metal support technique don't forget to glue a piece of ABS plastic or similar between the support and the yoke, like so.1 point
-
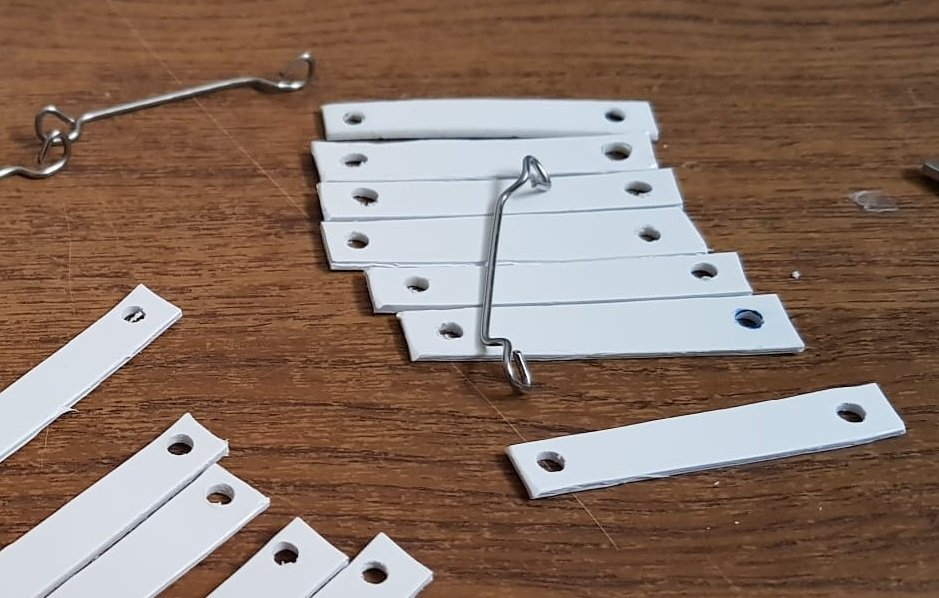
I'm 6' and Wyatt's are fine for me. Another hijack, I didn't want to add the metal tab but wanted the shoulders to float so added a piece of abs to both sides.
 1 point
 -
Here's my finished pimped out armour transport:1 point
-
I picked up the decals I had custom made. 1- VancouverTrooper 1 - TK-77824 on 3mm PVC covered with carbon fiber 2 - Imperial Cogs 8" 2 - TK-77824 labels 1- strip sample of carbon fiber1 point
-
Next I had to get my TK Nameplate ordered to fit where the Husky logo is located. The logo is embossed. In order for my nameplate to fit nicely in the space I needed to cut out the Husky logo. I tried all kinds of different things to make the space flush but cutting the whole thing out was much easier. In hindsight, I would cut this out before the painting process so as not to damage the paint job AND I would do it outside or in the garage as it makes a mess :roll:1 point
-
Once all the tape is removed this is what it looks like. NOTE: I didn't paint the entire transporter at the same time. I did it in stages, top lid first, then front and back, then sides (over a week or so). As I was still deciding what would look best. The pics below are the final version of paint application.1 point


.thumb.jpg.77bd551337f7adc46a4b151e703df6be.jpg)