Leaderboard


Popular Content
Showing content with the highest reputation on 02/25/2020 in Posts
-
For those of you who have an existing, UNFINISHED OT (Original Trilogy) TK build thread here here (started on or before 3/22/20) on the FISD and are aiming for higher levels (Expert Infantry and Centurion) the Command Staff is offering up some items to help get you there! These include: 1. A set of flexible hand guards as required for Level 3. Choice of Stunt or Hero (alternative) style. 2. A complete set of screen accurate hardware (split rivets, cap rivets, TD screws and ear screws). 3. A 6 x 9" (12 x 21 cm) hard-cover TK themed journal to jot down notes during your build. 4. Once you have submitted and been approved at Expert Infantry level, you will be sent an official FISD patch and Rocker tab. So what's the catch, you say? No catch. To win this package, all you have to do is provide a link to your build thread and guess what number we have in mind (hint- it's between 1 and 1000). If you have trouble providing a link just let us know. Here is the lowdown: 1. Must have an existing build thread here on the FISD started on or before March 22nd, 2020 (and provide a link). If you have trouble doing this, just contact a staff member. 2. Must be a FIRST TIME builder. 3. Contest ends April 23rd, 2020. Winner will be announced on April 24th. 4. Open to all future TKs world-wide. 5. You must post up your guess ON THIS THREAD! One guess per future trooper!! List of current guesses at bottom of post, and good luck to you all!! Stunt (or) Alternative (Hero) Notebook Hardware FISD Patch Expert Infantry Rocker tab (Goes right above the patch) GUESSES: 1. LEGOeatPokemon (Jonas)- 381 2. Artshot- 723 3. Dielotski- 555 4. 1nfern0- 4215 points
-
I would bet some good money that their next newsletter will say that they are delayed until Q2 due to the Corona Virus in China.3 points
-
Well, it's been another month so I assume at this point everyone heard back from Anovos and their kits have shipped? Maybe I'm the only one that didn't get shipping notification, LOL.3 points
-
For reference numbers of 501st approved TK versions.2 points
-
The raised ridges mentioned are the ones on the bottom, James (blue arrow). I wouldn't suggest the angle you have shown in red, as the points it would create (yellow arrow) could potentially poke into the back of your leg. If you need mobility cuts, I would go with something close to the blue line, but they are not a requirement for Centurion.2 points
-
You could suggest any changes to the DL @Sly11, CRL's don't always contain every correct detail, sometimes new references or details come to light, CRL's are ever evolving1 point
-
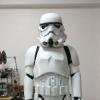
They are all canon but the large majority of Legion TKs are ANH Stunt.1 point
-
Of course! Your guess has been recorded, sir!1 point
-
I'm interested! Although I feel I am almost done and have soon anyways gotten ahold of the required things, it can't hurt to have extras. My main interest though is the patches and notebook. Can I still enter as I started mid october and is not quite done yet? If so, could the number be.... 381?1 point
-
Lots of differences: - hand painted vs decals for helmet details - black vs. gray teeth - different hand plate armor - holster is on different side, loop vs. rivet attachment - blaster differences - less greeblies Sure I'm missing more off the top of my head. Your best bet is to read the CRLs as they will spell out exactly what you need for each version: https://databank.501st.com/databank/Costuming:FISD_CRL1 point
-
Muchas gracias, iré informando de como vaya la cosa y cuando tenga la armadura hare unas buenas fotos1 point
-
Yeah, I'm quite tall so I suppose I won't grow more. Anyway, thank you for the info1 point
-
You are 100% correct, Dan. For the short-term, EVA would be ok, but would definitely get beat up and creased over time.1 point
-
Bump. Moved from Announcements.1 point
-
Now that's what I call an armour party. Great to see everyone working on kits. really enjoying these builds.1 point
-
Final paintjob will thank your extra effort1 point
-
Can't tell you how many Alpha builders hacked this section off also. Nice recovery.1 point
-
Good luck, Robert! Looking good.1 point
-
Nice shot from the Everett Collection. Here are some more HiRes versions... Sent from my iPhone using Tapatalk Pro1 point
-
Me: "Nice! These panels look really smooth!" My inner OCD: "PRIME AND SAND THEM ANYWAYS." Panels after block sanding to 600: ... Me: Also this. Was rewatching episode eight of a spiffy tv show and noticed this notch cut in the side of the barrel of a screen used Anthology suit. Going to try to emulate this cut with mine. Sorry for the bad quality, but you get the idea.1 point
-
Nope you are not alone.. Got no news well the first quarter ends March, thus we still have a month to go before they broke yet another promise1 point
-
My sincere apologies, Robert, but Brian Mentioned that: "I helped Robert with the photos and the calf halves shifted a bit when I was aligning the thighs and calves for the front photo. Normally they are closed and do not show any opening. A slight twist back in one direction and the halves line up nicely and are fully closed". Can you add an updated photo of those as well? Again, no need to get fully suited up, just the calves. THANKS!!! Side note: AWESOME job on that 3D blaster!! No print lines.. I wish all those who 3D print their weapons could see what can be achieved with some serious sanding and filler. WELL DONE!1 point
-
Just be careful leaving any paint on, it can bleed into the plastic and abs paste1 point
-
Way ahead of you guys I just didn't want to post the ugly No Parking sign I used as a backer... This was last night.1 point
-
It doesn't seem like it's nearly as common as even the Low-Profile (which isn't common haha). I found it on https://www.fastenation.com/ if that helps anyone. The armor party yesterday went great and @Oztrooper and I were able to help get several new recruits up and running, plus it seemed like everyone had a great time! I'm unsure whose shoulder bell upset me so much... hahaha More sanding this week but I'll report back soon!1 point
-
I just emailed them to myself and it gave me the option to resize! I’m I over at spec ops now too.1 point
-
Nope, me neither1 point
-
I tried to upload a photo but it was too large! I’ll scale one down when I get home and make sure and post it up! Should I start a build thread here? As lucnak mentioned I may be getting dropped in the Spec Ops. Thanks for the warm welcome! That would make sense! With it being so new and myself being new I had no idea where to start so they said this would be the best place to start. I’ll head over there and make a account too, thanks for the heads up and warm welcome!1 point
-
Looking sharp, Robert, and thank you for your Expert Infantry submission! As Mario mentioned, please include the extra photos he listed (no need to get suited up). Also, please add some side views of the thigh ammo pack. As soon as ya' get that done we can get started. THANKS!!1 point
-
Hi Robert, Nice to see you're going for higher levels. I would suggest to add some photos that I'm sure the D.O. team surely will ask you for. 1- Knee Ammo pack Outer and Inner Rivet right and left side. 2- Close Photo of Cod Rivets 3- Front, Right and Left side of your Sniper Knee Good Luck with your request. Cheers1 point
-
OK, Jonathan, I am WELL impressed (seriously) with the way the forearm fits, and SO glad to see that you removed the return edges from the tops of them! But.. those of you who know me know my feelings on return edges in general, lol. I know many troopers like the way they give our armor a "thicker" look. but in reality when it comes down to it we have to spend hours actually wearing these costumes, and return edges in certain places can make life mighty uncomfortable, especially in the area where your arms bend since we spend most of our time with our arms at a 45 degree angle holding an E-11. Having red welts from armor-bite is preventable (and totally screen accurate) by simply removing them, and I assure you that the general public will not notice. Trust me on this one.1 point
-
I helped Robert with the photos and the calf halves shifted a bit when I was aligning the thighs and calves for the front photo. Normally they are closed and do not show any opening. A slight twist back in one direction and the halves line up nicely and are fully closed.1 point
-
That came out great! Yeah that left arm side is a wonky combo between bicep and forearm. The forearm you'll have to be careful with the swooping inside piece. The bicep is easily water bathed round after assembly. Keep up the great job!1 point
-
Hola !! Tienes un PM1 point
-
Congratulations Don, well done.1 point
-
Nice work, painters tape can help pull pieces into shape and hold them while the glue is drying1 point
-
Congratulations Trooper, Welcome to the Legion!1 point
-
REPAIR FOREARM BAD PULL So, I realised that my left forearm (bottom half) suffered a bad pull during the vacuum-form. Here you can see the comparison between the correct (right) and the one with the bad pull (left). After taking off the excess ABS which cannot be used, you can see that the recessed long bullet is almost gone, and the width of the wrist opening is so much wider: So, I drew the outline of the right Forearm piece on Styrene and cut it out roughly: Then, I removed most of the ABS from the forearm, leaving just enough to make the return edge and hold the styrene in place later: Then I glued the styrene piece behind the return edge, and indicated where I should cut to match the right Forearm: Here's how it looks cut: Next, I caked the area with epoxy putty, and pressed a little recess for where the bullet recess will be, and let dry. After it was dried, a little sanding and smoothening, and after spray a coat of primer to see the results, I am pretty satisfied with this repair job: Now it looks much better!1 point
-
ANOVOS..........
 1 point
 -
Don't forget these guys: www.stormtroopershop Stay far away!1 point
-
Too bad there's such a list in the first place---1 point