Leaderboard


Popular Content
Showing content with the highest reputation on 02/26/2019 in Posts
-
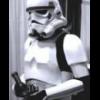
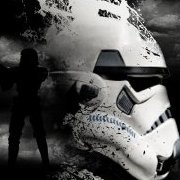
Thanks, Rat! Still alive over here. Garrison elections have finally gotten sorted and I've soft-picked my debut troop in April so all that remains is to get approved by then. which shouldn't be TOO hard, considering how much I'm beginning to look like a tk... another armor party on Saturday afforded the opportunity to finalize some strapping lengths and shave down some armor-bitey areas around the cod, as well as pass on some paint and advice to a couple fellow cadets who recently started their TK builds. Turns out I know a decent bit now, y'all... and what I can't remember off the top of my head, I can find in my reference photo album. Anyway, here's the (SHOULDER STRAPPING NOT IN) look: Also, pardon the lighting. This was before I reshaped the inner thighs. They're currently slimmer (but with the same curves). Forgot my holster hanging straps so no holster in pic. Loving the hinge on that side though! The other side, not so much. It has elastic strapping which is stretching far too readily, and then when it would go back together, the tab system provides just enough pressure to keep it spread apart. Also the lower snap hits my hip bone. I will be rethinking that closure. Ignore the black everywhere up top. Bib needs to be hemmed/tamed, had it on for sizing purposes. Think I'll trim my shoulder straps in the back. Anybody have input on how much I take off? Then I had to run upstairs to get cell signal. So I did. I sounded like a pile of Tupperware in a large mixer, but it was perfectly comfortable and I came downstairs with no problems. Only snag was that my left chest snaps came undone then, and whenever else I moved much. I'll have to readdress them. Then, when nobody was watching my potentially really really stupid move, I set up my camera on a timer and tried to sit down. And boy was it fun! I'll reinforce my butt plate with fiberglass tape and monitor for cracks. And try not to sit a lot. Maybe. Left to do: Sew in second halves of shoulder strap snaps (say that five times fast) Create shoulder bell-bicep wrap strap and bell-bicep hang strap Make elastic boot top cinchers Pad back thigh Rethink right ab-kidney connection Reshape lower calf openings Make strap from gloves to upper edge of forearm armor to keep cuffs from slipping down Repaint tube stripes with new brushes Mount ears, hovi mics, pad bucket Paint various hardware white Purchase ski mask/helmet liner Finish edges of neck seal bib And, longer term, I have to refinish my blaster and mess with helmet electronics. But the stuff above is more immediately necessary for approval. So.2 points
-
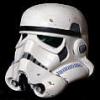
I found a wooden dowel yesterday when I was helping my son build a balloon-powered car, which gave me an idea: the dowel was the perfect diameter to put perpendicularly into my aluminum tube. I got a general idea of where I wanted to insert the dowel and marked the spot on the tube. I drilled the hole with a Dremel, then I needed to figure out how to secure the dowel inside the aluminum tube. Quick ideas that came to mind were e6000 and hot glue. But I wanted a less messy and more robust way to glue things together. Then I remembered that I had a few packs of Sugru hanging out in my craft chest! I kneaded it into two parts. One was a smaller bit that I inserted directly into the hole of the tube. Then I pushed the wooden dowel inside. From there, I simply molded the second half of Sugru into a shape that surrounded and supported the dowel against the aluminum tube. Have you tried Sugru yet? The stuff is awesome (expensive, though!). It dries into a super strong rubber in 24 hours, and it bonds to everything. I fixed a stress crack on a shelf inside our refrigerator door with Sugru two years ago, and it's still holding firm! Attaching the wooden dowel to the aluminum tube might be over engineering things a bit, but at least I have peace of mind that the grip will not be an area of weakness in this blaster.2 points
-
Meanwhile... Yeah, I know it's not part of my TK build, but while I'm waiting to submit we finished my wife Sally's Imperial Line Officer and I just had to share. A.J.2 points
-
I decided to work out a complete, comprehensive list for those about to start an OT TK armor build (ANH Stunt, Hero, etc,) to help get everything in place for when "Big Brown Box" day arrives! This list does not include soft parts, (neck seal, boots, etc.) but focuses on the hardware and supplies for building the armor itself. However, a list of soft parts can be found HERE I believe I have covered most items, but would appreciate additional suggestions/corrections to add, and will keep it updated as such. Yes, it looks a bit daunting, but some of the items you will already have, and the rest can be purchased at major home improvement stores, online, or borrowed from a TK friend! Plus, it gives you something to do while you "hurry up and wait" for your kit! This list is includes items used for the EIB and Centurion programs, (marked with double red asterisks)**. These items are not required for initial TK approval, but I encourage everyone to consider them as an option. Hope this helps, and best of luck on your build! PLEASE NOTE: Some kits come with all the hardware you will need to build to Centurion level, i.e. split rivets, ear screws, TD screws, etc., however, not all armorers supply the correct ones. If you are (hopefully) planning on aiming for level 3, please check with your armorer to see if they provide these. You can also reference the photos below to see if they are accurate. These supplies are based on using the snap method for connecting the armor. Example photos are shown at the bottom for many of the items, but not all. (Everyone knows what a hammer looks like). Items with photos have a notation. 1. E-6000 glue- Great for almost everything, and removable if necessary. Highly recommended. (Pick up some wooden tongue depressors as well, makes spreading it easier)! (Photo 1) (Please see updated information on E-6000 below, after #50 before purchasing). 2. Binder or notebook- To keep notes on your research. 3. Dremel or rotary tool- A "must have". (Photo 2). Be sure to get the sanding drum attachment and extra sanding drums (Photo 3). I suggest the 180 grit type. 4. Small plastic containers- Keeps everything organized. 5. Lexan scissors- Curved and straight, for cutting ABS. (Photo 4) 6. Small spring clamps- For holding things in place while gluing. You can't have too many! (Photo 5) 7. Line 24 snaps- For strapping. You will need at least 30, and do NOT "cheap-out" on these, but purchase quality ones. (Steer clear of Wal-Mart snaps). Tandy is recommended. Tutorial located here: https://www.whitearmor.net/forum/topic/44617-snap-setting-101/ (Photo 6) 8. Snap setting tools- There are 2 types to choose from- One is a two piece set (requires a hammer) (Photo 7) and the other is the pliers style (Photo 8) 9. Hammer- For setting snaps if you use the 2 piece style of snap setter. 10. Pliers/vise grips- 11. Screwdriver- Slotted head. 12. Rivets-** 5/16 (8mm). (Photo 9) Round head bifurcated/split rivets with washers. You will need 9. (3 for the kidney, 3 for the ab, one for the cod piece, 2 for the thigh ammo pack). You will also need 3 speed (Chicago") rivets to attach your ABS belt to your canvas one. These are attached by hand and not to be confused with the aluminum ones listed below (#19). Some like to use the screen accurate single cap rivets (Photo 10) to attach the ammo thigh pack but these are not a requirement. 13. Elastic- 1 inch wide black for shoulder bells, etc. (4 ft.) 2 inch wide white for ab/back plate shoulder connection (1 ft.), 1 inch wide white for drop boxes, (1 ft.) 1/4 inch wide white** (1 ft.) for shoulder straps. 14. Nylon strapping- 1 inch wide black, at least 6 to 8 ft. long. 2 inch wide black (48 inches) for high tension areas if you are using the double snap method. (NP) 15. Exacto knife/extra blades- For cutting, trimming, cutting nylon strapping. (Photo 11) 16. Heavy duty razor knife/extra blades- For cutting cover strips and scoring around pieces that will be removed. (Photo 12) 17. Heavy duty scissors/tin snips- For (carefully) cutting large sections of ABS. (Photo 13) 18. Metal ruler or straight edge- (At least 18 inches long). For use as a cutting guide, especially cover strips. 19. Hand Rivet gun/aluminum open end blind rivets- For putting your helmet together. Available for about $10-$12.00, EASY to use! (Photo 14) 20. Metric Ruler- 21. 2 x 2 or larger piece of carpet- Protects work surface, keeps dust down, and stops small parts from rolling away. 22. Rags/paper towels- And plenty of them. 23. Blue painter's tape- 1 inch and 2 inch widths. For keeping glued parts in place and dry-fitting your armor. 24. China marker/pencil- For marking cut lines. 25. Sandpaper- I highly recommend Sandblaster Pro Flexible silicone sanding sheets from 3M, 220 grit. You will never use anything else, I promise. They last forever! 26. Sanding block- The sponge type, 120 grit. 27. Band Aids- You will need these. Might as well keep them handy. 28. Rare earth magnets- (10 minimum) SUPER strong! I use the 20 mm x 3 mm round ones. Cover them in blue tape to prevent scratching your armor. You cannot have too many!!! Tutorial located here: https://www.whitearmor.net/forum/topic/44619-magnets-101/ (Photo 15) 29. Butane Lighter- For sealing the ends of nylon strapping. (see # 44 below for a better option) 30. Large "half-round" file- For smoothing out edges before sanding. I used this a LOT, especially in the curved areas. (Photo 16) 31. Small "Needle file" set- Very inexpensive, comes in 6 different shapes, and is perfect for the teeth and eye openings on your helmet. (Photo 17) 32. Foam padding- 1 inch thick. Great for helmet and armor padding. Available at craft or fabric stores. 33. Velcro- 2 inch wide black (various uses) and 1 inch wide white, for calf closures (about 36 inches). Go for the "Industrial Strength" kind. 34. PAINT: Satin Black: Humbrol # 85 or Testors # 1747 for vocoder, trap/ tear drop/ear bar outlines/stripe(s), ROTJ and ESB frown, TD screw heads. Gray: Humbrol # 5 or Testors # 1138 for trap/tear drop/ear bar background, ANH frown and ab-buttons. French Blue: Humbrol # 14 or Testors # 2715 ForTube stripes/ab buttons. Mediterranean Blue Humbrol (Tube stripes alternative color) Testors: No exact match Gloss white for all rivet heads (excluding cod rivet). Mineral spirits for brush cleaning 35. Goo Gone- Citrus based solvent that will remove latex and enamel paint and NOT harm your armor. (Photo 18). 36. Small paint brushes- Assorted sizes. Try to buy quality ones.. Cheap brushes =cheap looking results. I suggest picking up a "filbert" (Photo 19) style brush (photo 5) as well, as it's rounded tip works great for painting the ab plate buttons and vocoder. Another GREAT way to get clean, crisp lines on the ab buttons is to use Testors Micro-Sponge brushes (Photo 20). 37. Wire or fiberglass mesh- (Window screen). For inside the "frown" of your helmet. A piece 3 x 8 inches will work fine, and you can trim it as needed. 38. Safety Glasses- It never hurts to be too careful, especially when using a Dremel type tool. For your Thermal Detonator, (TD) clips: (Note: There are some GREAT pre-made TD clips you can buy on this site, and some kits include them, but you can use the following 5 items to make your own. 39. Aluminum strip- 1 inch wide 40. Screws- Size #6 pan-head slotted screws **, 1/2 inch long, You will need 4. (Photo 21). NOTE: The CRLs have been updated and round head screws are permitted, but they must be the slotted (not philips) style. 41. Hacksaw- For cutting the aluminum strip. 42. Drill- Electric or battery operated, with various size bits. 43. Vise grip OPTIONAL ITEMS: 44. Heat sealing iron- For making return edges. Not normally needed, but there are some great tutorials on this here on FISD. Try it on a scrap first, though! 45. Soldering Iron- For making holes in nylon strapping and sealing the ends. Pretty inexpensive, and worth the cost! (Photo 22) 46. Plasti-Dip- A black rubberized coating you can spray inside your helmet, (also available in a brush-on). Or, you can use spray paint. Just remember to sand and prime first! 47. Heat gun- Not normally needed. For shaping ABS. Use this CAREFULLY, and practice on scraps first until you get the hang of it. These things can reach 1500 degrees and melt your armor. 48. CA (super) glue- Not recommended for first time builders, as it is PERMANENT, and you can't fix mistakes. Also, if it drips on your armor it is nearly impossible to remove. It can also become brittle over time, causing connections to fail. 49. Acetone- For use ONLY in making ABS paste for filling small gaps, (see tutorials). Do NOT put this directly on your armor, as it will melt it. 50. SUGRU- This is an easy way to attach the lenses in your helmet. Tutorial located here: https://www.whitearmor.net/forum/topic/44593-how-to-attach-lenses-using-sugru/ 51. Respirator- An informative post was made by Clint, (cm325i) concerning the effects of E-6000 glue on some individuals. Definitely worth a read: http://www.whitearmor.net/forum/topic/33347-e6000-warnings-read-them-and-wear-a-respirator/ 52. Cut resistant gloves- Especially helpful if you are prone to cutting yourself. Available online for about $12.00 (Photo 23) E-6000 update: Please note that there are certain online retailers (including those in Europe) that are selling FAKE E-6000 or "knock-offs" like these: The genuine product is clearly marked Made in the USA, and has a batch number on each tube. They do not sell to distributors in Asia, so if you try to save a few bucks by ordering from a seller there it is not the real stuff. If you have any doubts, you can contact the manufacturer at www.eclecticproducts.com, and they will let you know where to get it. The fake stuff is garbage and will not hold up. 1. 2. 3. 4. 5. 6. 7. 8. 9. 10. 11. 12. 13. 14. 15. 16. 17. 18. 19. 20. 21. 22. 23. IMPORTANT UPDATE! To make life easier, Ray (Dieltski) made this into an awesome Google spreadsheet, which you can download to keep track and add notes! Just click here. Thanks, Ray! .1 point
-
I decided to go FO, I acquired some Anovos Alpha armour, The abdomen needs adjusting which I will do soon1 point
-
I will get onto that again thank you Sent from my LYA-L09 using Tapatalk1 point
-
Great point Glen1 point
-
FYI tube stripes can also go on two ways, but the correct way from back to front, they have a greater fall from the top, from back /////// front1 point
-
Almost there Lorelei1 point
-
Looking good1 point
-
Looking awesoooooome! Don't forget the white paint on the left side ab/kidney rivets. Also, a nitpick: your ab button paint is super clean but they look a bit large. Ideally they should be slightly smaller than the plastic.1 point
-
Thank you Ukswrath!!! Sent from my SM-G965U using Tapatalk1 point
-
Roughly a #2 pencil in width. If that's equal to 7mm then yes. For the record we'll never make you pull out a ruler to prove otherwise1 point
-
allrigth, here the first phots. new TD and the photo from back of both thighs greetings Lars1 point
-
Thanks might need to try zap a gap, Round 2, tried another glue with an activator pen, lasted til I flexed my hand, but this was an improvement on round 11 point
-
Normally it's just so the GML can check some details, a lot of people take images on phones and they can auto save for a lower resolution, it's very hard to enlarge those to see fine detail Nice work on the mannequin, I also made a pipe build frame, managed to find some of these adjusters which work great when putting the armor on and off.1 point
-
Shoulder bells should be inline or just below the chest/yoke, not on top A nice little addition can help that1 point
-
Even cheaper because I work at Rona lol.1 point
-
You also need suprisingly little glue, I used loctite and it didn´t stick well, then when thinking how to get them to stick I suddenly remembered Mike from Trooper mentioning on his Zap-a-gap glue "use sparingly"so I just used way less and that did the trick1 point
-
Here are a whack more. I'll get live shots of me wearing the armor again tonight or tomorrow. Got my GML email and he just requested a few clearer pics and a good action shot. I figured I'd take the Centurion list while I was at it.1 point
-
Great job looking good trooper. Good luck on your submission.1 point
-
Great job sizing that armor down! Good luck!1 point
-
Ok some updates... Done the Shins.. Shaped and trimmed.... The sniper knee was a bit of a pain I do have another one just in case.... Will glue in the elastic and hooks 3x per shin shaped to fit my weird shins measured with my imperial boots on. next up shoulder bells.. x4.... I have two sets, I messed up on bell by trimming to much.. so I got a replacement set but the plastic is a bit different color..... Elastic and popper attached as per Ukswrath tutorial As you can see the colour is slightly different I got some novus so I hope it will buff up any tips?? Did the forearms and biceps.. return edge removed and shaped and sized for my arms Thighs.. I also wanted to tidy up the helmet so frown repainted.. I am waiting for masking template and paint from trooperbay before I do the tubes Belt was a pain to do but after a clean up and polish I hope is ok. My Chicago screws arrived today not sure to use these or the rivets thru the poppers Kidney part.. had to shape this quite a bit to bit me. pan of hot water did the trick. need to do final shaping and then some repair on some thin parts and clean and polish. shaped the top part to fit me better with the hot water in the pan trick. Bottom.. only one popper so far measured the second ready TD.. Used hyper X glue from japan which was horrible... Cooked the ends for a bit and sanded the edges of the tube so it fits very tight to the tube. needs really good clean and polish. chest and ab started.. will do the belt fitting and holster fit next.1 point
-
Excellent! Well, thanks to several confirmations the consensus seems to be that that missing measurement on the holster cut out is indeed 1.5" So, I've uploaded a revised version of the template to my imgur so if anyone happens to be Googling for it, they'll be able to find it easier... So, this weekend, I set to and started making the holster. Really easy, just cut out the leather, burnished the edges, saddle-stitched the side and put in the snaps... Just waiting for some veg tan leather for the top strips (the only stuff I have is way too thick) and I intend to pop-rivet the holding strap only once I've got my E11 (Doopydoos kit is ordered and on its way) Boots-wise... I went over them with an entire bottle of Angelus Shoe Prep, left that 24 hours, then went over with acetone, left that 24 hours and then began painting... Decided to go slow-and-steady, one thin coat every twenty four hours... This is 3 coats in... Am now up to 4 coats and things are looking good, have left them > 48 hours and will wear them a bit around the house to see if there are any problems I need to touch up. I intend to go over with a coat of Fibings Resolene to put the final shine on things, but don't want to do that until I'm confident that the paint isn't going to peel/crack.1 point
-
The last email said “As there are hundreds of sets, we will be shipping out by waves while concurrently manufacturing in China starting mid-February and onward. A two month pause will occur due to Chinese New Year”1 point
-
Hello Anovos?1 point
-
Sorry to hear about the fall but glad to see you back on your feet and moving along with the build. It's funny how building one costume can then lead to others, that bug can definitely bite hard1 point
-
Sorry to hear about your accident but glad to hear you`re on the mend and back on your build1 point
-
Regarding the chest plate, to be honest I don't recall ever seeing E6000 having an adverse effect on ABS, unless in contact with less than quality snaps. Being there are no snaps in this area I'm not sure what to make of it. That said, though it might get brought up during higher level approvals I can't say for certain it would prevent you from earning those badges. Something that will get mentioned is the corners of the shoulder covers which should be squared not rounded. Here's a reference photo As for the elastic hold downs, it really doesn't matter if there off or on the back plate at L3 so long as it's there. Another reference photo.1 point
-
Prototype is finished. I'm happy with how it turned out, I just wish I was a better painter. I did some weathering because I'll be using it for the crystal patrol trooper.1 point
-
I'll take a double scoop cookie dough. I know it'll take a bit to ship, but I can wait.1 point
-
Can't go wrong with a TK most recognisable bad guy after Vader, and the second most asked for costume in our event requests. You'll learn a lot from a TK build which will help when you go on to your next build. Good luck with your decision, hope to see a build thread from you soon.1 point
-
Yeah I'm sure the DT will likely be a bit more than the ST for sure. You have a good point not sure how many people will recognize the ST. I may just half to start with a standard TK for my first kit then get either a ST or DT as my second.1 point
-
Thanks for the replies and advice guys.. steering clear1 point
-
So I made this mistake. Bought armor that was trimmed but the problem is it was built for someone else. I had to do a lot of adjustments and even after that found it was not going to be approved unless I did a whole lot more to it. I paid $1200 for my first kit which included the helmet and everything. It was the older EFX helmet from 2001. Yea back then it was approved but not now. I ended up buying a whole new untrimmed kit and built it to my body. WHAT A DIFFERENCE!! Please please please do yourself and your wallet a favor and buy from someone who we all know. I got mine from RTmod. He builds them for bigger guys like me. Best of luck.1 point
-
Hi Dan Echoing our other fellow Dan you have a very nice clean build I also have some small suggestions that I feel would ad to your awesomness - You have very nice painting on the helmet but I would go a bit thinner on the black outline to match screen used ones. Your pinstriping for tears and traps look spot on Regarding the tube stripes they look reversed, they normally lean forward, not something that will hinder any application but thought I mention it. You can read all about the tubes stripes here and compare to your helmet:1 point
-
Hi guys! So I finally managed to get my TFA TK finished and approved last week, after quite a long build time. I didn't rush it, as I had no chance to finish it in time for the premiere, so I took my time with it - and I think that paid off. This was one of my pics sent in for approval: To celebrate the finished project (apart from some of the gadgets that I will still be working on), I had my Garrison mate and photographer do some studio shots of me in the armour. While I'm still waiting for most of them to be ready, here is a small selection that I feel is worth sharing with you guys, hope you enjoy them as much as I do1 point
-
Good luck with your application Tim, the armor looks great! I think you have all what it needs for EIB but as i understood you're also planning to go for Centurion too. In this case i would attend with these two following points: - I've never seen any Hero helmet with unpainted ear bars rank, so i think it would be good to paint them. - Also on your forearms i would trim the wrist openings further on, until there's no return edges showing at all:1 point