Leaderboard


Popular Content
Showing content with the highest reputation on 02/17/2019 in all areas
-
Welcome, Linz! First, let me say that starting a build thread was a wise move. Please feel free to ask as many questions as you would like (no matter how small) and know that we have your back. Whenever possible, include as many detailed photos as you can (we LOVE photos)... they really are worth a thousand words. Also, if you are in doubt about something, always ask before moving ahead, i.e. cutting or gluing. Another piece of advice I always offer is to take... your....time. I know you want to get out there and get trooping, but rushing things only leads to mistakes. Again, welcome, and I look forward to seeing your progress!2 points
-
I also have never heard of E-6000 reacting to ABS, and unlike CA (super) glue it does not heat up while curing. If I didn't know any better, I would say that the clamps you used to hold it on while the glue dried were really tight and actually made an indentation in the shoulder tab. The only ones I have seen you use are the plastic ones (and the metal ones for the sniper knee) which usually don't have that sort of strength.2 points
-
Hi everybody! First/last name: Brendan May Future Garrison/Squad: Canadian Garrison, Vindicator Squad Armour maker: Authentic Props Helmet maker: Authentic Props Cloth belt maker: Authentic Props Neck seal maker: Geeky Pink Gaskets Boot maker: Imperial Boots Blaster maker: Quest Design Canada Electronics: Ukswrath's Hearing Assist and Hovi-Tip Mics, Aker amp w/iComm, Henry's Helmet Fans Height: 5'10" Weight: 195lbs TK type: ANH Stunt Troopers who significantly helped with my build: Bud Spaklur, gmrhodes13, justjoseph63, wook1138, CableGuy, ABS80, Frank75139, TheSwede, Scimitar, and Dan (TK2759), my IRL TK consultant! Thanks also to everyone who chimed in for support and encouragement along the way. :-D Front view: Back view: Left side: Right side: Ab plate close-up: Helmet close-up: Helmet interior: Interior strapping: Thermal detonator: Latex handguards: Action shot: Bucket-less shot: Thanks for your time, everyone!!1 point
-
Hi All, I ordered my Anovos TK kit May 4th 2017….15 months later it arrived!!! During that time I have been reading the FISD forums and patiently waiting to start my own TK build. BBB Day was August 20th, my dog Kobie was excited as I was! (see photo below) Since August I have been collecting all the required parts and materials. I officially started my build January 1st. I decided it was time to start a build thread to document progress and ask all my questions towards my goal of approval and joining the 501st and FISD family! Parts List: Armor: Anovos (delivered) Helmet: Anovos (delivered) Boots: Imperial Boots (delivered) Neck seal: Anovos (delivered) Canvas Belt: (will measure for fit after trimming) Holster: Anovos (delivered) Flexible Hand Guards: @justjoseph63 (delivered) Bracket System: Mr No Stripes (delivered) E-11 Blaster Resin Kit: Doopy Doos (delivered) Completion Kit: @T-Jay (delivered) Electronics: iPhone 6: (have) Trooper Talk: App Store (purchased – installed) Aker 1506 10w Amp: Amazon (delivered) Fans: (still reading and researching) I started my build with the TD assembly. I will post more photos of my progress in the next few days! Thanks for taking the time to read my post! Cheers! Aug 20, 2018 - Kobie is stoked!!! Aug 20, 2018 - It's like Christmas!! Aug 20, 2018 - First glance at that white armor! Jan 1, 2019 - Official Start photo I decided to start with the TD: Measured the Anovos included pipe and cut at 7.25" (ruler dim way off in photo) - Ukswrath's Anovos build printed out in the background! Beveled the edge with dremmel Sanded end caps and control panel edges. Painted slotted pan head screws with semi-gloss black. Glued end caps (didn't have to give them a hot water bath) Glued control panel. TD To Do: - Drill holes and tap threads for screws - Re-bend Anovos provided TD aluminum clips - Attach aluminum clips1 point
-
(And potential build thread???? It could happen...) Hey Silver Siblings!!!! Welcome to the FISD and our chrome Lady’s build section. I thought I’d introduce myself first. My real human name is Teresa. I currently reside in nowhereland Northern Alberta Canada in a small community of 150 people. I am a very proud member of the Badlands Garrison, and have been since April 2016. I currently am going into my third term as Garrison PR Officer, and I’m one of the Moderators on the Captain Phasma Costumers Facebook page. I also can be found sewing gaskets, neck seals, harnesses and sexy biker shorts for our First Order Family, Classic TKs, clones, Sandy’s, Snowies, as well as a multitude of other items for a good many costumes. You can find me in the Ongoing Sales and Run section in the Imperial Commissary or on Facebook under Geeky Pinks Phantastic Gaskets. I answer to TK~41307, Miss Pink, Pinky, Pink Lady, GeekyPink, SoulArt, Snow Queen, Captain Sassy, Teresa and Mom [emoji175] I joined the Legion with my Authentic Props Stunt TK, Who has been worked on and built to EIB #719 and Centurion #335 levels. I began work on my Phasma in May of 2016. A very aspiring build for my second costume. I was a newb! I joined the ranks of Captain on February 28th 2017 as the Legions 9th Phasma. My kit is an ABS KB Props, with a Jim Tripon Helmet. C3P0 fingers from Shawn Thorsson. Holster clip from Justin Lee Morrison. All soft goods except pouches on belt (cape, gaskets, neck seal, belt) were made by myself including belt. Pouches were from Jimmi as well. The finish on the armor is Spectra Chrome. I did the sanding, wet sanding, priming and sanding. The guy at the autobody shop did the actual chroming. I often can be found here reading and interjecting comments here and there, but mostly I respond privately to people. And help them build. I’m not sure why I’m like a FISD ninja, I guess I didn’t wish to be out in the open helping for fear it looked super pushy. Elitist, Or like bragging. I’ve helped garrison mates build many many classic tks, and helped in my Twins FOTK. I’m also an approved ROTS Royal Guard, Director of Intelligence Ysanne Isard, Governor Ahrinda Pryce, and am tinkering in a Mara Jade, Legacy Fem TK, TFU Black Shadow Guard with full robes and First Order Snowtrooper. The Mara and Legacy require some weight loss before I feel comfortable wearing that skin tight body suit or tailored armor. As a woman, I understand the trials of armor building around a dead thyroid, hormonal weight fluctuations, body parts spilling over the edges of your armor because you just can’t lay off the salt n vinegar chips and dip, female body parts, stress, busy single Hockey Mom life.... I had always thought I’d come back and create my build thread.... help others by my mistakes and trials and build knowledge. Vader knows I certainly took enough pictures throughout. But time has a way of getting away from us, and here I am almost 3 years later and still no thread. Until today. Maybe you all will inspire me to get my buttplate in gear and get a build thread up for you. At the very least, I’m here at the gentle request of my dear TK Twin Pyrates, (who is always trying to get me to help openly instead of privately) and Andrew/Sly to let you know I’m here to offer any help and advice I may have on this particular costume. Or as a female of our species. Although I cannot guarantee that I will get that build thread created, or be in here 24/7, I will do the best I can for you all. I will share pictures. Offer Build advice. Vendor info. Sewing and construction advice. Always have a shoulder for you to to cry on when you end up hating her and wish to throw her down the stairs or light her on fire. (It’s true. This happens.) I will always listen. Help you as best as I can. If I do not know the answer of what you seek, I will find you a Phasma that does. I shall try harder to not lurk in the shadows, but be more present, in the hopes to help you all. I’ll add some of my favorite photos and armor bits then go into build stuff as the days go on. Wishing you all happy building and trooping! Sincerely SoulArt/TK-41307 Now for some armor bits just laying around in my phone. Mostly upper body. Cod, boot, etc. Ill clean this up later and organize it by body section. Sent from my iPhone using Tapatalk1 point
-
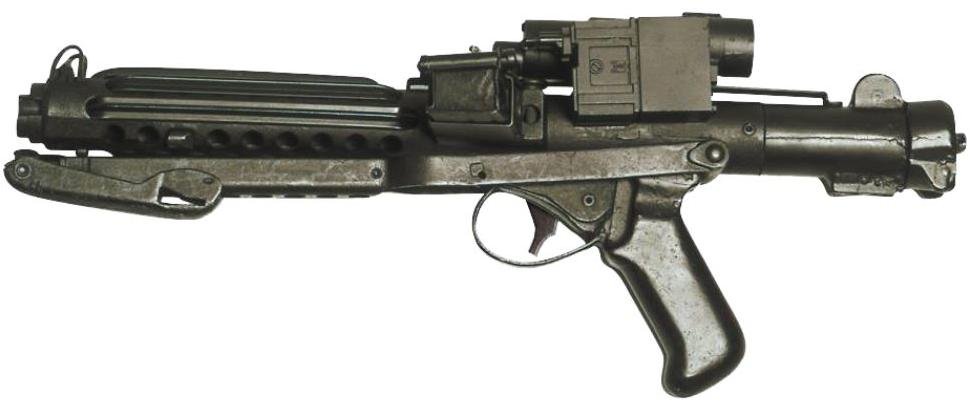
Name: Sven Müller Forum name: HSM76 Legion ID: 24576 Armor maker: RS Prop Masters Helmet maker: RS Prop Prop MastersArmour Maker: RS Prop Masters Helmet Maker RS Prop Masters Blaster: Real Sterling, real Scope, real Hengstler, PlayfullWolfCub cylinders. Height: 185cm (roughly 6‘1“) Weight: 75kg (165 pound) Boots: imperial Boots Belt: RS Prop Masters Electronics: Ukswraths Hearing aid, Troopacoola Fan system. Neck seal: Burbench Designs Holster: Imperial Supply Depot Build thread: EIB request: Front: Back: Left: Right: Left detail, split rivets, kidney notch: Right detail, Han snap, kidney notch: Butt / Kidney seperate, internal strapping: Hand plate latex: Shoulder bridge front: Shoulder bridge back: Thigh pack attachment, single cap rivet: Sniper plate: Drop box back: Cod / butt attachment, 2 snaps, brass split rivet Wrist left: Wrist right: Helmet front: Helmet back: Helmet left: Helmet right: Helmet Hovi Mix detail: Helmet lens colour: Helmet S-trim: Blaster right: Blaster left: Blaster O-Ring: Neck seal: Thermal detonator: Holster attachment: As stated in my EIB threat, I will see what I can do with the return edges of the Helmet eyes and if it is possible to reset the ear. But that will be something for spring or early summer :-)1 point
-
Gonna try this thing and see what happens and how well I do with it. Sent from my 5054N using Tapatalk1 point
-
Hello and welcome aboard, you'll find some info in this thread Ultimately it will be your GML (garrison membership liaison) who will be looking over your application so I would advise contacting him/her in regards to it's approval, to find your local garrison head here1 point
-
Great to see another AM Armor build! Good luck! A.J.1 point
-
No worries, Eric. Sometimes these areas are easy to see in the checklist pictures but other times it’s not quite possible to get the detail we need. Thanks for guiding troopers towards their higher clearance. :-)1 point
-
Hi Eric, You’re correct about the check list and we will hopefully have that updated soon, however, the sniper knee alignment and thigh ammo pack fixings are requirements at L2 so we need to clearly see those areas for the review. Below are excerpts from the CRL; Level two certification (if applicable): •Sniper knee plate must be aligned with the ridges on the shin Level two certification (if applicable): •Thigh ammo belt is attached to thigh with a solid head rivet, painted white, in the upper corner and fastened to the lower thigh ridge. •The rivets used shall be single cap, double cap or split rivets. No pop rivets allowed. Hope that helps a little. :-)1 point
-
I'm in Australia. And like gmrhodes13 said ''They can only be purchased in small tubes here''. So I'll either buy E6000 in small tubes at a local craft store, or online like Amazon.1 point
-
Hey Dave, some great progress here and looking good. As to the return edge, it really depends on how much you want to try and reshape that but plate. The less return the easier it will form fit. generally anywhere from 3 - 5 mm return edge is plenty, and in some cases we have troopers that remove it completely to better shape various parts. The screen used armour had virtually all return edge removed, most probably so the various plates could flex a little more when worn by the actors, but that choice is up to the individual. Keep up the good work1 point
-
I have 2 sets of Imperial boots, and after countless troops I have had no problems and could not be happier, and these things have been through hell. With Imperial, I suggest ordering a half size larger than you normally wear, as they run a tiny bit on the small side. As for the lower leg armor coming out of place, it's a matter of how you trim the calf (lower leg). The boots should not affect the bottom of the calf at all. A common problem some have is that the boot pops out from under the calf, but this can be prevented by not cutting the bottom too narrow or too short. If you should have that problem, there are a few ways to fix it. Some add Velcro to the bottom of the inside of the calf and at the top of the boots, or you can make stirrup style setups (easy to do). With all the knowledge here at the FISD, we can help you fix any problems you may experience... all ya' gotta do is ask and we have your back.1 point
-
The 4 inch in the tutorial was just for an example, and I should have clarified that, John. I use the 4 inch length on my side kidney to ab connections, which gives a little room to work with while snapping them together. The other strap lengths can (and should in this case) be shorter as needed. This is actually a pretty straightforward fix, though. Just cut the strap as seen below and insert 2 new male sides, that way you don't have to remove the bases that have been glued to your armor.1 point
-
Hi Linz welcome. Just a little helpful suggestion regarding your blaster. The Hengstler counter should be located a bit lower. Here's a reference photo

 1 point
 -
Regarding the chest plate, to be honest I don't recall ever seeing E6000 having an adverse effect on ABS, unless in contact with less than quality snaps. Being there are no snaps in this area I'm not sure what to make of it. That said, though it might get brought up during higher level approvals I can't say for certain it would prevent you from earning those badges. Something that will get mentioned is the corners of the shoulder covers which should be squared not rounded. Here's a reference photo As for the elastic hold downs, it really doesn't matter if there off or on the back plate at L3 so long as it's there. Another reference photo.1 point
-
I personally would not take issue with it at L1, but that is a potential question for your GML. For L2 and L3, perhaps we can get a DO to chime in. I don't recall this ever coming up in an application. @ukswrath @justjoseph63 @CableGuy @shashachu I will admit that I have found that those elastics can easily slide around and haven't thought of a good way to keep them in place. You could secure them to the strap based on your photo in some way, but you would then have to ensure that the bridge slides in under it every time you suit, which could make dressing on your own difficult (in case you anticipate doing so on a regular basis).1 point
-
Hi John, catching up on your thread. For the raised part in the front, I'm not sure what is the best advice. You could sand and then polish but the armour will never shine quite the same if you do. You could leave it and very few people would ever notice. Your shoulder bridge elastics are in the right spot. They slide out of the groove of the shoulder bridge or does your whole shoulder bridge move forward and back and then the elastic slips off the back plate while sitting in the same groove?1 point
-
Had a great armor party with some local garrison members. Made my first cover strips and even small cuts to the armor. I will put a trench ( gap ) of roughly 5mm in front and 10mm in back of each forearm. This gives my hands enough room to fit and still keeps a fairly snug but comfortable fit. To add strength I will likely fill the trench with a smaller strip between the gap and the inner and outer cover strips, should stand up to trooping. Haven't decided how to make up the difference in length of the two forearm pieces but will start glueing this week. Starting with inside strips then posting pictures before outer cover strips.1 point
-
Very nice, just a tip but if you use an online photo host such as Imgur you can post images directly in to your thread. Here's a guide how to use Imgur1 point
-
Hey justjoseph63, just giving you an update on cod strip. I replaced strip and doubled and stitched both ends Sent from my SM-G965U using Tapatalk1 point
-
You can trim it and even it up if you wish John1 point
-
Fantastic. Happy to be here. Story so far. I have an AM ANH Stunt kit. Helmet has been built by them, I received it today and personally think it looks stunning, just going to put some additional padding on the inside as although I'm quite tall, I have a tiny head it seems. I have received the helmet and kit this week and have been busy buying lots of bits, boots, neck seal, all tools required whilst I have waited for it to arrive. The kit looks great. Somewhat nervous getting started. I have built a Doodydoos blaster too. Just going to test loading some photos of what I have. I've read lots of build threads and have an idea of how I want to approach the build and naturally would love to achieve Centurion level if I can. Any advice welcome and I'll try and get things moving on here. Thanks1 point
-
Done some polishing on a shoulder bell. Before: After:1 point
-
I have both and they both have pros and cons. IF, TK Boots were still making boots I would consider buying another set from them. Just my opinion, I believe TK Boots is a higher quality boot.1 point
-
I can definitely help you out with an exact replica, including all the correct hardware and strapping used in Luke's armour. Here is one of my hero's I built to movie specs (not a Luke replica).1 point
-
If you are looking for an accurate pre-built Luke Hero suit Troopermaster is the only vendor I’d recommend. He knows his stuff.1 point
-
Just submitted for EIB!1 point
-
Always a safe bet to experiment a little on scap pieces of abs to see how much time you have to move the two parts before the glue bonds. E6000 give miles of flexibility in that respect. I used CA glue on my first build and a little goes a long way. I think I'm up to 6 kits now where I have used CA whith great success, but always recomend experimentations before using any glue on your armour, not only for practice but to work out how much to actually use as coverage varies from agent to agent.1 point
-
Weldbond is actually like a strong white-glue/wood glue. It dries VERY hard and will not flex much. Get E6000. I looked into alternatives, went E6000, and was very very very glad I did. I'm in pre-approval and making changes as I tweak my suit. It's TOTALLY worth it.1 point
-
Also, many adhesives (especially the epoxy type and CA"super" glue) can get brittle over time. E-6000 maintains somewhat of a flexible nature which is important, especially on areas like the front of the calves which get a lot of opening and closing action. Can I ask where you live? If in the U.S. it is available at all craft stores and many Wal-Marts. If you are outside the U.S., note that there are certain online sellers (including Europe) that are selling FAKE E-6000. The genuine product is clearly marked Made in the USA, and has a batch number on each tube. They do not sell to distributors in China or Hong Kong, so if you try to save a few bucks by ordering from a seller there, it is probably not the real stuff. If you have any doubts, you can contact the manufacturer at www.eclecticproducts.com, and they will let you know where to get it. The fake stuff is garbage.1 point
-
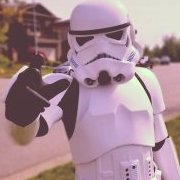
Alot of TK awesomeness can be found here https://www.whitearmor.net/forum/gallery/category/7-general-stormtrooper-reference/1 point
-
Like Sarah said, check how it looks with the torso and also, the original bells were trimmed with a curve and not straight which will help getting the bells closer to the chest and back. Bell from the Lucas archives taken for the court case with SDS Original to the left. Original to the right.1 point
-
Hello my beautiful steel Sister!!! [emoji175] Sent from my iPhone using Tapatalk1 point
-
Of course I had to get it all out a take photo, notice my meow meow curious about something new in the house Started trimming just cutting the extra flashing off and leaving plenty return edge because i was in fear. I apply here the saying, "Less is best". I don't want to buy replacement parts because I trimmed to much off. At this point in my build, i was and is depending HEAVILY on Ukswrath Anovos Build1 point