


Matneato
-
Posts
23 -
Joined
-
Last visited
About Matneato

Recent Profile Visitors
1,449 profile views


-
Hi Brendan, I agree the under suit shirt is a bit baggy, I have another one on order that should look a lot better and not bunch up! Thanks for the support! Cheers!
-
Thanks!!! Yes I agree, I think it unsnapped during adjustments for the approval photos. I will make sure it's correct for the next photos and when I'm trooping!
-
Thanks T-Jay!!! It feels awesome! Now to start my E-11 build with your completion kit! Cheers!
-
 TK-14455 Requesting access, please. Outer Rim Garrison https://www.501st.com/members/displaymemberdetails.php?userID=30361 Thanks!
 -
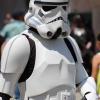
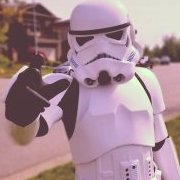
Matneato changed their profile photo
-
BUILD UPDATE: After 4 months of building my ANH Stunt TK, I finally suited up and took photos from my GML. My goal for my TK armor is to reach Centurion status with the FISD. Part / Status: Neck Seal - Adjusted neck seal as it was too big, re positioned velcro for tighter fit. Torso - Rivets to be painted white Right thigh - Rivets to be painted white Helmet - Repaint, align ear piece, fans to be installed, chin strap to be installed E-11 - Husky Travel Case - Interior padding with Star Wars material, 3D printed imperial cogs Front Front - No Bucket I received feedback from my GML that my neck seal was too loose. I have since re positioned the velco and sewn the neck seal for a tighter fit. Left Side Right Side Back THUMBS UP - I was so excited to finally take this photo after all my hard work!!! Thanks again for reading my posts! Matt
-
Thank you sir! I will make this modification tonight!
-
BUILD UPDATE: This will be a big post! Thanks in advance for checking it out!! I have been hard at work for the good part of March trying to complete my build! Part / Status: TD - Complete Belt - Complete Shins - inner cover strips are cut, to be installed I found the shins to be one of the most challenging parts of the build. "Shin Gate" almost got me a few times LOL. It would have been impossible to complete these without a helper to measure a million times before I made the first cuts. I went with the elastic and hooks method for the closure. These are very challenging to try and fasten up, I may swith to velcro down the road. Thighs - Right Thighs still needs the rivets painting white I went with interior cover strips on the thighs to make them more study and they do get moved around a lot while I am trying to fasten the shins. Shoulders - Complete Biceps - bicep to shoulder snap connection to be installed, installed bicep hook for shoulder connection Forearms - Complete Gloves / Hand Guards - Complete Torso - Rivets to be painted white Helmet - Upgrades needed, electronics to be installed, chin strap needed TD: I finished off my TD! Drilled and tapped the holes for the M4 pan head screws. Complete assembly. Pan head screws. TD - Front View BELT: I receive my new canvas belt for imperial issue. Measure the center and then marked the location of the female snaps. I riveted the ABS part of the belt to the canvas, then installed the drop boxes and covers. Lastly I punched holes for the holster and install it with the Anovos supplied Chicago screws. Complete. SHINS: I wish I took more photos of each step to complete the shins! I think I was ninja focused on getting them done. Test fitment after cuts: Side: Back: Looks slanted on the right...it was just pushed over, i corrected this before gluing the rear cover strip. Cover Strips clamped and glued: Shins Complete: THIGHS: After completing the shins, I applied the same technique to the thighs. These were relatively easier than the shins and came together in a few days. I have installed interior cover strips to both thighs for stability. i have also installed snaps for the 3" elastic which will attach to a waist belt to get them up! i will be updating this post with photos of the interior cover strips and snap system. Clamped and Gluing: Right thigh complete with riveted ammo pack: I still need to paint the rivets white!!! Left thigh complete: The cover strip at the top might be a bit to tall. SHOULDERS: I installed the elastic for both the shoulder bridge connection (complete with sew in snap) and the bicep loop which will work with the hook from the bicep. Complete: BICEPS and FOREARMS: Completed the biceps and forearms. I decided to glue the elastic to each part rather than a snap system. GLOVES: Completed the gloves with the flexible silicone hand guards from justjoseph63! Flex!! TORSO: The torso just needed a few minor updates; - installed side snaps - installed 2 male snaps on posterior - re-painted small bottom plate - installed should straps and sew-in snaps - installed split rivet and strap with snap on cod section I still need to paint the 6 side split rivets white! Small button plate re-paint: Open: Closed: Back: HELMET: I have many upgrades planned for my helmet, starting with the re-painting of the frown! I wore the helmet for about 5 mins around the house and I was sweating in there! I need a fan system ASAP haha. I took a quick photo of my helmet for the start of a before and after helmet build comparison: Thanks everyone for reading my post! Regards, Matt
-
Thanks!!! Yeah I was looking at the other day, I will be doing fixing that up very soon!
-
Hi Jay! Yes I'm in BC! I live in Abbotsford! I'm hoping to join the Outer Rim Garrison soon!
-
BUILD UPDATE: BACK PLATE, KIDNEY, POSTERIOR CHEST and AB My build has been heavily influenced by @ukswrath Anovos TK Stunt build. I decided to go the same route by installing the bracket system. I purchased a bracket system from Mr. No Stripes. I have tried to follow and use the same methods and materials as the movie armor where possible. I got carried away and unfortunately didn't take photos of the trimming and sanding process of the torso parts. I also, missed some "BLUE TAPE" fitment photos. After drilling the 7/64 mounting holes for the M3 screws, I didn't like that they stuck out of the ABS due to the beveled head on the screw. I decided to countersink all the screws; in order to do this I CA glued 1.5mm shims on the inside edge of all torso parts and then drilled through the shims at the same locations as the previously drilled mounting holes. I then used a drill bit the same diameter as the screw heads, and carefully by hand; created the countersinks. I also made the following modifications to the bracket system: - replaced the 8mm M3 provided screws with 10mm ones (for washers and so the screws passed the nylon locking nut) - made 6 new 1" elastic loops with line 24 snaps installed (this is so I can detach the Back Plate, and Chest from the rest of the torso - easier to transport) - added M3 flat washers to either side of the bracket (this was mainly to added height to the bracket so I could fit a line 24 snap under the bracket, photo and description below) BACK PLATE, KIDNEY, POSTERIOR Trimmed, sanded, mounting holes drilled, shim glued and drilled, countersink, and bracket system installed on all 3 pieces. After a "BLUE TAPE" fitment, I made the shoulder straps and glued them in place. New 1" elastic connection loops installed for the kidney to back plate. I missing a snap on the posterior, I have to go buy some more haha. Kideny to Posterior bracket system with new 10mm screws and flat washers. Kidney to Ab connection. I used 1.5mm ABS to reinforce this connection, I then drilled the holes for the split rivets and installed the 1" webbing and washers. Assembled Back, Kidney, and Posterior. CHEST and AB Trimmed, sanded, mounting holes drilled, shim glued and drilled, countersink, and bracket system installed on Chest and Ab. I glued the ABS shoulder straps to the chest, and installed popper snaps to either side of the chest. I decided to use 2 snaps on the left side rather than gluing the elastic to the chest as per the movie armor. Chest - Right connection Chest - Left connection Chest to Ab connection with new 1" elastic connection loops installed Chest to Ab Connection - Full view I installed the popper snaps for the belt and upper right hand side L3 required snap on the Ab. I painted the button plates (had to do this twice LOL) Glued Large button plate to Ab. All for now. Thanks again for reading my posts and updates!!! Matt
-
Hi Brendan! Thanks for the awesome feedback!! That's a great idea with the ABS in between the elastic, I think I will go that route when I use snaps. I feel your pain with trying to set snaps through plastic and thicker material, I have also broken quite a few snaps on other projects, I might just have a heavy hand with the hammer LOL. Haha, I think I should make him his own armor!
-
Excellent! Thank you! That diagram is very helpful!
-
QUESTION: PS Thanks in advance!! Any advice on how to connect the biceps and forearms with elastic? I have read that a 0.25" gap between the town parts is ideal. I will take some reference photos tonight to upload. If anyone has any reference photos, I would great appreciate it!
-
Build Update: FOREARMS: Sized up my forearms for each side and blue taped together: Cut the cover strips, sanded, glued, clamped, magnetized, and hydrated : 24 hours later: Forearms Ready! LEVEL THREE REQUIREMENT - No return edge at wrist: Now to add the elastic between the biceps and forearms.
-
Thanks for all the great comments and support everyone! Build Update: BICEPS Started construction of the biceps: trimming, sanding, and measuring cover strips Trimmed the cover strips and started to glue them together: magnets are great for this! I decided to glue both cover strips and biceps at the same time, had some help to align all parts. 24 Hour later.... I tried a test fitment and the piece sticking out at the top was digging into my armpit: I rounded the edges to make it more comfortable:
