Leaderboard


Popular Content
Showing content with the highest reputation on 10/03/2018 in all areas
-
MUCH better, Lou... really nice job! When doing the ABS paste thing, here are a few tips... 1. Remove the ear. This will give you better access to the area. 2.. Place a piece of painter's tape on the inside of the hole to seal it. 3. Mask off the area on the front as close to the hole as close as you can get. This will keep any excess from the rest of the area. 4. Put in just enough paste to fill the hole, and try not to over fill it. I suggest using a sharp implement, dipping it in the paste and letting it drop in. 5. After it dries/cures, use a super fine grit sandpaper to smooth it down. Keeping the tape on (or re-taping it) will keep you from making scratches outside the repaired area. You really shouldn't need to polish it as it is so small and will probably not be noticeable, but that's up to you. 6. Post up a pic of your work!3 points
-
Hello again! This tread is combined for me and my brother (Ase95 here on the forum) as we'll work both our armors together. My brother want's to make an Executioner armor, i'm going for a normal TKFO from TLJ instead The armors are made from Fan Made (Carlos Estrella), i'll post some pictures. We don't have any experience in building TK armors, so we're currently looking at some others build/guide to learn how to assemble all. If you can suggest some very dettailed guide to follow, we'll be glad! We've saw that some pieces (biceps, things, shins) can be overlapped in the seams, and we saw that our pieces have the extra plastic to allow that. PHOTO: We've put kinda all of the TKFO's kit parts on the table also, but with only 1 side for leg/arms for space issue DUCKTAPE FIT TEST2 points
-
Here are two threads that I found very useful when it comes to FOTKs, both pinned in the TFA FOTK build thread subforum. There are good bits and pieces all over the subforum, but I'd say these two are very complete and detailed builds that should help. Of course, these are from different vendors, so you will have to adapt to your build. @TheSwede has also been documenting his build really well and though it's not complete, you may find it helpful to read his build thread too.2 points
-
Shout out to @zv288bot for the two challenge coins!! Thanks for helping to feed my coin addiction!! The patch came from a Kylo Ren in the GA garrison (IG21826) who actually lives in my neighborhood and we had no idea until Cricket's armor party. Haha! He made sure he gave me my first Georgia Garrison patch. This community is nothing short of awesome! Troop #2 yesterday went flawlessly and I had zero issues with the armor. As soon as I get some free time I'll be shooting my EIB application pictures.2 points
-
Easy basic pass! Great job there, trooper! I spy a lot of Centurion details, and I don't see anything major jumping out at me that would prevent that. Those ears are just a royal pain- there's no way around it.1 point
-
Nice “shed” [emoji23] First step though, take that heat gun and put it away. It’s far too harsh for the ABS kit and all it will do is ruin what ever you point it at. As for the fitting, get everything rough trimmed then before fitting get your under suit and boots. They do make a surprising difference to the end fit. Once you have that all sorted it’s much easier to make valid sizing decisions.1 point
-
Thanks a bunch Dan - my heart still weighs heavy without the BlastFX ... wounds mend in time. Thanks for the encouragement though, means allot.1 point
-
I worked on the helmet for about 2 hours yesterday and have almost finished shaping the right ear to fit. Left ear will be worked on today. Teeth are still fully intact, but those will be easy to remove. I still need to fill in the extra teeth with ABS paste and sand smooth in order to properly convert this Stunt helmet to Hero. I haven't begun the painting process yet, but that's the easiest part of the build for me. And now... feels like I'm hitting burnout today. It took me about three hours of trying the torso on with one leg at a time in order to trim the thighs down to fit me. It's lots of try-on-take-off, trim, repeat, repeat, repeat.... The thighs are finally at a point where I can permanently glue the 3" elastics to them and have them ready for the garter belt. There are still some minor trims to do, but they're mostly in the back and inner areas of the thighs. My hubby was up in the kitchen for a quick snack, so I had him take a few pics of me before he went back to work. Which is why I only have photos while wearing one leg. I'm happy with the front. The right thigh looks like the top part is cut off, but it's just some black gaffer's tape that was keeping it stuck to the garter while fitting. I don't really ever see the back, so I was disappointed when I saw the back view pic. It's not entirely awful (the butt plate was shifting because I'm standing on my tiptoes with my left leg), but I immediately saw that I need to make some adjustments back there. It's not all that visible in the photo, but I needed to shorten the elastic connection between the right side back plate and kidney. So off it went and is currently being reglued. The other thing I noticed is that my cover strip on my shins was not lining up with the thigh. I asked my husband to adjust it, and he said, "I can't. That's just how it is." I took it off and gave it a closer look. Turns out that it had shifted when I glued it on. I never noticed it before gluing the magnets in there. GAH!!! Sensing my frustration, my husband was nice enough and said, "Well, it's not all that apparent, really." To which I exclaimed, "But it's not straight!!!" Next thing I know, I'm ripping the cover strip off the shin. I know it can be easily fixed, but I thought I was almost done. Grrrr... I will need to do some reattachment of the magnets inside of that shin now as well. So annoying. At least the left shin's cover strip is straight, so I don't have to worry about that one. Time to get back to work.1 point
-
Biceps needed a Hot Water bath to make it fit my arm. Used an old paint can to help keep the shape. Yes, Im a hoarder, I hold on to everything. You never know when you might use it. Thus the old paint can used for something!
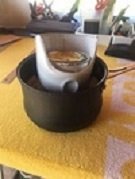 1 point
 -
Wow your shed is so clean!, mine often looks like a war zone![emoji23] Take your time and check others build threads, always ask if unsure on any fitment. Before any final trimming see how it all fits on you to check how parts relate to each other in terms of proportion. When I build armour I generally leave enough gap to fit a finger between skin and armour, a little more at the top of the thighs and maybe biceps to allow for muscle flex. Always check shin pieces with your boots on. Take your time and you will get there, slow and steady wins the race![emoji4][emoji6] Sent from my SM-A310F using Tapatalk1 point
-
Light on F11D and repaint end cap1 point
-
A few things regarding feedback you've received/your post on fixing things: You shouldn't switch the shins as they are oriented L and R. You will need to remove the back cover strip with the closure and change which side it is attached to. You can bend the shoulder straps using a hot water bath (boil water, remove from heat, dip part to bend in for 25-30 seconds, bend, cold water). Drop boxes at ends of belt - this is a suggestion for you to look your best. Won't hold you back from basic, but is quite easy to secure in place. Gap between ab and kidney will not hold you back from basic - I believe Glen was suggesting it as a way to improve your overall look. Yes the helmet does look a bit small, so a switch to an adult-sized helmet from WTF will do the trick! Elastic in shoulder bells - this should sit at the bottom of the shoulder bell and in most troopers, the elastic becomes partially visible where it overlaps the biceps. You mention your straps run under your armpits. Sounds like you may need to reposition these lower (see ref pic from Glen)1 point
-
UPDATE AB buttons : Ammo knee blet alignment:1 point
-
Hey Patrick I have a few suggestions to improve the overall look of your armor and take you closer to approval. I can see you don`t have alot to work with but try and bend those shoulderbridges so they curve from the chest onto the back plate. (see ref pic below) At the knee the cover strips should stop at the ridge as indicated by the blue lines. However as you mentioned triming for mobility we`ll get to that. Here`s how you can trim the backs and still be approvable and at all levels, I know your going for basic but in case any one else is reading. You can trim from both the thighs and the shins or choose one or the other, since you have a gap on the left thigh I would start with the thighs. And, if you decide to trim on all pieces then you will at the same time fix the coverstrips as you cut it down. Looking at the shins I noticed they open from the outside when it should be the other way around And I don`t see any elastic that goes around the biceps? You can also remove some more of the lower return edge on the shoulder bells and that will help them come closer. Good luck on approval1 point
-
Fine-tuning in this case means methods of use with the steel bucks, and with how the pieces are prepped. That forearm piece had a minor tear in the plastic -- don't know if that came from pulling it off when it was still too warm, or at the wrong angle, or if it got overstressed in trimming, or what. But something went wrong, there. I'd rather they get that sort of thing straightened out before committing. And yeah, the kit comes with shoulder, elbow, and knee gaskets, belt, and pouches. How good they all are we'll have to wait and see. But as far as I know, no strapping or buckles or other such stuff.1 point
-
with summer ending my friend Ill be getting more free time for trooping man ive missed it1 point
-
Good job on that armor !! Easy pass basic approval !! Head on to EIB !!! Goodluck an godspeed trooper !!1 point
-
Great work, only one thing worse than waiting for glue to dry, it's waiting for BBB's to arrive1 point
-
I use an Aker 1506 and an Icomm like many others, no issues with the Aker after 6 years but I did have to replace the back up battery in the Icomm. A really good system and if you add a speaker output to your blaster you can also run a cable to that into the Aker and really get some blaster sounds blaring (or a baton, laser ax )1 point
-
Ahhh, my bad! Yeah, we used the hot water bath method before trimming and glueing the rear. Sent from my SM-G950F using Tapatalk1 point
-
When it comes to removing excess glue, the properties of E6000 make it among the easiest. In fact, it's so easy that I make no attempt to limit the amount of extra that squeezes out (to a point, of course). Here's what I did with my build. First, I used a razor knife to cut through the excess, using the edge of the cover strip itself to guide the knife for a nice, straight cut. Make several light passes with the knife to avoid scoring the plastic itself. The idea is to just cut through the glue, and not down into the ABS. Then, pry up one end of the glue using a fingernail, toothpick, the tip of the knife, whatever, and just pull it off in a long solid "string." E6000 dries firm, but rubbery, rather like silicone caulking. You may find that if you cut through it all the way that you can pull all the glue from the edge of a cover strip in a single string. However, since you're being careful not to cut through the glue all the way to the plastic, you're bound to leave lots of little bits of glue along the edge of the cover strip. Any sharp object will easily scrape those out, but be sure to use something that is not harder than the plastic or you could scratch it. A sharp metal object would be bad, but something made of wood such as a sharpened popsicle stick or toothpick, or plastic, like this scrap of cover strip cut to an angled point, is perfect: This will loosen almost all those little bits. For any tiny stragglers, you can get them with a fingernail. If you want to really be fussy, a pair of tweezers can grab those little guys nicely. Still, rubbing a fingernail along the edge of the cover strip will most likely get the little bits loose. You might still have a bunch of tiny loose bits in the crevice along the edge of the cover strips. Although not really "stuck" to the plastic, the loose bits are still rubbery and tend to stay put on glossy plastic. I found that once you have all the big pieces pulled free and the little bits loose, wiping the armor along the length of the cover strip with terry cloth -- old towel material -- wipes those little bits off. Shake out your cloth periodically to get rid of the bits, and just wipe down the cover strip till it's as clean as you want. A.J.1 point
-
Parquette, I agree and have made plans to get some of the Vac Formed ROTK stuff that NaturalBorn and Head Shot Props are working on. BTW, I just got a black Series helmet so is there any change you can fix the pictures on your how to modify thread? Most of the pictures of what you have done to modify the helmet are not showing up. Update, Ok, the repair has commenced. First, I found some white craft foam that is slightly wider than the inside of the drop boxes. I am confident that the drop boxes are causing all the damage to the top of the thighs. I cut and glued some of this foam inside the drop boxes and this should fix this. I will add the Velcro straps soon. Next, I glued a piece of HIPS to the inside of the back plate to fix a crack. I still need to sand this and add more Velcro to this part. With the cracking of the shoulder strap, I have decided to attempt to make some rubber or foam shoulder straps. First, I needed to make a flat version of the shoulder strap. I used some ¼” plywood and I cut a lot of these ½ rounds then glued them in place on the plywood. I framed out a box and glued the shoulder strap inside. Then I filled it with Smooth-on Rebound 25. I would have used OOMOO 30 but the OOMOO I had, went bad and solidified. So Rebound -25 is a bit thicker but its still silicone. Once the mold cured, I pulled it out of the frame and removed the shoulder strap. So far it looks good. Well that’s it for the update so far. Thanks for the interest.1 point