Leaderboard


Popular Content
Showing content with the highest reputation on 03/15/2018 in all areas
-
Officially now known as TK75139 Sent from my iPhone using Tapatalk4 points
-
And finally arrived the ID now I’m TK30977 happy trooper[emoji23][emoji23][emoji23][emoji23] Inviato dal mio iPhone utilizzando Tapatalk3 points
-
Thigh Holster: KB came through and delivered the holster rail yesterday! Time to get down to business. I trimmed the rail down to about a 1/2" on the front facing side and slightly longer on the rear facing side to account for the slight curvature of the leg. I had marked where the greeblie will go previously but I double checked the distance. Mine was 44 mm from top edge to the marked line. Others have said 2 inches down from the top but it just looked a little low for my liking. 44 mm is just about 1 3/4". Somebody correct me if I'm wrong about that but I think as long as you are in that ball park you are good to go. All that to say that I measured down 44 mm from the greeblie demarcation to install the rail as well. I then applied some devcon glue to the edges and affixed the rail to the thigh. I opted for the devcon glue because A) It could be applied to a smaller ledge more easily than the Weld-On and B ) I had a good amount left over still, might as well use it! It should sit as close to the seam as possible, without covering it. KB provided a 3D printed holster with the kit and I'm content to use that since I'm not aiming for a functional holster. I cleaned it up a bit, applied more devcon and affixed it to the rail.3 points
-
Here is what it looks like when it is closed. It sits flush against my neck when I'm wearing it. It is very easy to put on, I can close it from the rear. I started working on my belt but my sewing machine just broke down. Uggghhhhhh!! Sent from my SM-G950U using Tapatalk2 points
-
Thanks, James! I followed the same tutorial; the seal part went great but the fabric was kicking my butt. Here is what I came up with. I tried Velcro but it was really stiff on the back of my neck and it was freaking me out, so I used some plastic snaps I had and a piece of 3 inch black elastic. The elastic allows my head to bend more comfortably and the snaps are really simple to work with. I am hoping adding snaps will not affect approval, but if it doesn't work I have enough material to try again. Sent from my SM-G950U using Tapatalk2 points
-
That weird flaring on the top right side of the kidney was bugging me, so I dealt with it today just so I could be done with it. I taped the side together and decided that I could get away with just dunking the top corner of the kidney into boiling water. I made sure to tape off a "submerge point" as a guide so I would know how deep to submerge the piece. I just needed that top corner to soften a bit so I could flatten it out. Here's what it looked like in the beginning. Well, hello there! After a few dips into the boiling water and shaping, I brought that kidney in line. It was better. But I still had some weird lumping going on at the end of the kidney's return edge. Can you see it? Looks so sloppy. To smooth out those extra lumps in the returns, I used a heat sealing iron. For super small areas like this, the heat sealing iron works well because it only heats up the areas that it is in contact with. I don't use a sock or anything on it, but just put the iron on the plastic. I don't use much pressure at all, but rather, wait patiently for the heat to soften the ABS just a little. I use my paint stick piece to smooth and cool things. Here's a before and after. The before shot is before the hot water bath and heat sealing iron. The after is, well... after it all. Before and after: Better, isn't it?2 points
-
The shins were not bad. Pretty straight forward actually. Just remember to assemble the back cover strips (25mm, the fronts are still 20mm) so that the opening is facing towards the inside of your leg. I used Velcro at the back and that seems to hold them together pretty good. As for the sniper knee - it is more a case of letting the OCD go. Raising the outside of the left shin will help with fitting the sniper knee plate in the right spot. I would recommend test fitting the sniper knee as you go along - hot bath to get it as close as possible - then glue the middle part first (position it the best you can - the left and right sides will be a little off unless you did an amazing job with the hot baths - and it may be a little off centre). Wait two days for the E6000 to really harden up. Then glue the sides down with the use of many clamps - and probably keeping a clamp on the front for good measure. If it isn't to your liking, you can always take it off and try again. It fits much better the second time around - especially if you hit it with a heat gun or hot bath it before you take it off. Here are links to what I did: putting front cover strips on shins - you can see the offset of my left shin (scroll post ammo pack stuff) https://www.whitearmor.net/forum/topic/43437-wooks-first-build-anh-stunt-tk-ap/?do=findComment&comment=592264 Trimming my shins https://www.whitearmor.net/forum/topic/43437-wooks-first-build-anh-stunt-tk-ap/?do=findComment&comment=592958 Shin closures https://www.whitearmor.net/forum/topic/43437-wooks-first-build-anh-stunt-tk-ap/?do=findComment&comment=594522 First go at sniper knee https://www.whitearmor.net/forum/topic/43437-wooks-first-build-anh-stunt-tk-ap/?do=findComment&comment=592961 My second go at the sniper knee plate https://www.whitearmor.net/forum/topic/43437-wooks-first-build-anh-stunt-tk-ap/?do=findComment&comment=594874 I don't know if this helps, but... there you go.2 points
-
Today is my BBB day, and I had a great time taking out each piece and observing each one. My 2 year old was excited too, she loves stormtroopers and kept asking "Where'd Darth Vader go?" Definitely overwhelmed right now but most of those feelings are probably frustration at my computer as my hard drive appears to have died. Sent from my SM-G950U using Tapatalk1 point
-
My guess is MEPD will....not. Unless, those dirty FOTKs *want* a different CRL and have it all on MEPD. And, the LMOs approve a CRL that is identical to ours. But with dirt.1 point
-
If you read the ROGUE ONE E-11 BLASTER REFERENCE thread you'll see that the screen used flashlight is actually an airsoft replica of a 'SureFire' tactical flashlight. It's called an Element M300A Mini Scout Light. The difference is the real thing is worth around $300 while the airsoft knockoff costs around $50 or so. One thing to be sure about is that you buy one with the correct button guard variant. It should look like the one in this photo, the other kind with scalloped cut-outs is incorrect and not screen accurate.1 point
-
The screen used vertical black lines in the Tears and Traps are very clearly recessed. So as long as the bottom of those recesses are black in color I don't see why fabric wouldn't be allowed, at least for basic approval if not higher.1 point
-
Well done, Tony. :-) Sent from my iPhone using Tapatalk1 point
-
Wohoo! Congratulations Tony1 point
-
Yikes! That is a nightmare. I wish I could say that never happens, but it does. I told myself that I would do a TK and be fine, but I found reasons why I "should" do more. I now have three costumes and am currently working on TIE pilot armor. I thought I was past blue tape and clamps, but they are currently all over my work space.1 point
-
For weathering, my push has been to allow light weathering as an option on the TFA for sure, and now also the TLJ (likely). The previous LMO (Eric/Darth Aloha) was adamant in now allowing weathering for TFA, even though they are in numerous scenes of the film. I'll for sure bring it up with the new LMO and see if he is open to that change.1 point
-
Congratulations! Well deserved!1 point
-
Thanks Dave for the feedback. It is great to hear that this forum area has been beneficial all around: Win for Jared, win for you as a GML, and a win for the detachment as it uncovered a loophole in the CRL that has gone unnoticed for years, and will soon be fixed. Three beers!1 point
-
Hi Bob welcome to FISD, can’t wait to see you sit around and get built on. Sent from my iPhone using Tapatalk1 point
-
wow, beautiful head!!!1 point
-
Exactly what Dan said. Screen used counters fell off, as they were only hot glued. Scope rails with L-brackets are much better for our purposes. And the mounting, you got it absolutely right. About only running one screw into the counter: working with only one screw here, allows to align the counter with the rest of your build. Once done, you can feel free to add a second screw to make sure, it stays in that position.1 point
-
Here is an update on the mannequin I have named Bob!. Didn't get a photo of the inside but will tomorrow when im done with spray foam. looking good so far. @Ripper_L how is my head now!?!?
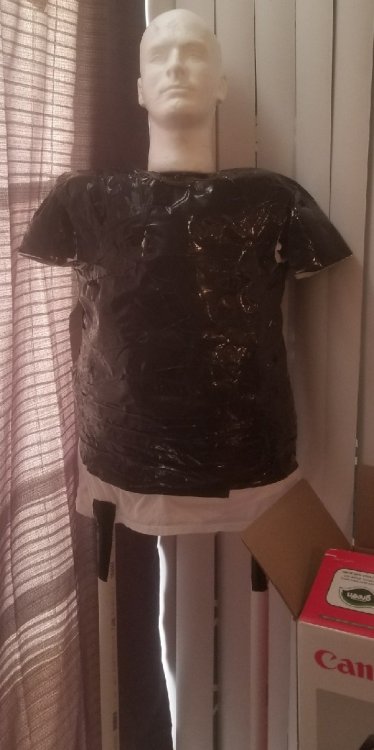 1 point
 -
Congrats Greg!1 point
-
Thank you so much for the observations will do my best to further improve on all the mentioned points!1 point
-
The canon spats at glued to the shins or at least held in place with some type of epoxy. I use 3 small strips of Velcro. A 1/4" x 1" in the front and the other two left and right rear, evenly spaced. Place the Velcro at the top edge, obviously On another note I'm not THE Guru, there are plenty others but thanks for the kind words and feel free to ask as many questions as you like.1 point
-
Superb, mate. Those gaps at the wrist look much better. [emoji1303] Looks like your back gap is smaller too. Great work!! [emoji1][emoji1][emoji1] Sent from my iPhone using Tapatalk1 point
-
Ok I’ve made a few adjustments. Went with the Velcro on neck seal and under the back plate. Worked well. Updated front Rear Lid off Hopefully improved. Thanks all for advice. Sent from my iPhone using Tapatalk Pro1 point
-
Order a size up and they'll fit perfect! Great job on the fixes Future Centurion!1 point
-
Was planning to. And thanks for the advice.1 point
-
Hi Mark, I also used Tino’s kit and attached using the L-bracket and 3 screws. Not the easiest part to photograph once it’s all painted and hidden behind the scope, but, hopefully these help a little. The L-bracket is attached under the scope rail, below the front foot of the scope, using the same screw as the scope. A single hole is drilled into the side of the counter, allowing a screw to pass through the downward part of the L-bracket and into the counter. (You could probably do two holes if you wanted, but I think Tino only did one in his build - if it’s good enough for him, .... [emoji1]) You can just see the L-bracket under the scope rail, below the front foot. I read that the originals where attached with hot glue, hence many being missing. I think the bracket and screws option is much better for trooping. ;-) How that helps a little. Sent from my iPhone using Tapatalk1 point
-
Love the PVC pipe trooper! I need to make myself one of those now! Good luck with the build. You're definitely on the right track- stay on target!1 point
-
1 large front tab, 11 thin strips and 1 medium end tab.1 point
-
some screen caps. I can't speak for the length, but the larger back tab seems to missing more often than not.1 point
-
Clamps at the ends will help keep pieces secure and then tape/magnets will do the rest! Hope that helps.1 point
-
Hey Jordan and great to have you here and if this is your build thread I suggest you post it here in ANH build threads and, like Dan said, we will help you get that Centurion award1 point
-
Seam Filling-Arms, Shin Boxes, AB/Kidney: With initial assembly mostly completed, it was time to fill in the seams that shouldn't be there and smooth them out in preparation for painting. To do so I used PPG DFL1, a one process automotive spot putty. I strapped on my ventilator and got to work. The application process was pretty simple, apply just enough to the putty spreader and apply it evenly along the seams. Try your best to thin it out as it will make the sanding down process easier. I then left it to set overnight. NOTE: This is the first time I have ever used something like this so it may look a little messy to those more experienced with the substance. *cough* Tony *cough* The next day I began to sand down the seams with a bucket of water and Wet/Dry 220 grit sand paper initially and then W/D 400 grit for the fine tuning. My goal was to sand it down such so that A) There was no seam and B ) I could run my finger across the surface and not feel any bumps. After I was satisfied with the work, I sanded down the rest of the pieces with W/D 400 grit sand paper and taped off the areas where I will affix the greeblies. Recall that I had to fix the upper forearms with some shims, as such I needed to fill in those parts as well. Here they are after being sanded down.1 point
-
Today was a bit rough. It was hot water bath day and the thighs gave me quite a bit of trouble. When I tied them shut and put them in the bath the cover strips popped off both from the tension and from the fact that I didn't let the e6000 cure long enough. However, the thighs came together a lot easier after the bath. My fingers ache after rubbing off all that e6000 and I dropped a freshly coated cover strip on my jeans > Tomorrow I'll don the whole under suit and test fit the torso with the arms and legs in place. I want to keep working but I'm at a standstill right now and my 2 year old has been into all sorts of trouble today, including standing on her potty stool so she could play in my fish tank and dumping the salt from my Stormtrooper salt shaker all over the floor. I'm out of e6000 anyway and I'm too tired to make a home depot run tonight. *sigh* Sent from my SM-G950U using Tapatalk1 point
-
Hi all, I've been on this crazy magazine clip / housing adventure for quite some time and I am pleased to share how I've finished allot of this so to continue with the trigger group with BlastFX components that I've started already. The craziness was in high gear when attempting to scratch build the magazine clip. Although initially, had settled on using spot putty for the final surface material for the magazine clip, it proved not effective as it was susceptible for cracking over larger areas so resorted to good old green stuff. I applied green stuff 'skin' overtop the styrene / spot puttied surface and it worked out good! Dries hard and sands well! I follow through on this update with this modification along with getting the magazine latch and cap (with T-Jay's LED button) along with some magazine cap internal components like the cap bottom mechanism with compression spring as well as install of the five magnets that came T-Jay's completion set. Created styrene plastic magazine latch loosely following SMG references. I choose screws that were the style I wanted but I didn't have a smaller size on hand so I created the latch slightly bigger than how it is for real. Relative to itself, it's accurate enough for me - template cut and fitted Green stuff applied to styrene plastic magazine latch to fortify Custom magazine cap created using styrene, fortified with green stuff, aluminum sheet formed underneath with guides for attaching on to magazine clip opening. Letter punch to be applied to green stuff to capture text Template applied and button position on magazine cap placed Text captured on magazine cap - done so before green stuff fully cured - sanding to follow Magazine cap guides installed on body - bent aluminum sheet, following after Tennatlim The locking guides for the magazine cap glued into place. I would later get green stuff into the open grooves between the plastic and the aluminum on the side Created green stuff ‘skin’ for 1-1/2 Wave side of magazine clip - details cut out and pressed / molded into place with close attention to application so to capture relief Various views of custom styrene magazine clip with green stuff ‘skin’ and end cap installed Magazine cap attach brackets installed Magazine cap - under plate locking guides in place, text added. Green stuff added to hide gap on the sides. Press button on top still need install Test fit of latch and cap on Magazine Clip inside Magazine Housing Magazine latch - detail with screw, two cut to length and held together with heat shrink. Still need to place in concave shaped plate on the top Custom Magazine latch with cover installed. I turfed the idea of using screws to attach and simply used E-6000 Added button to magazine cap - T-Jay LED part has bottom lip so made hole to later be kept in place with elastic fabric. Magazine end cap with push button installed - elastic fabric installed underneath to enable push and return to original position. It would later be up against the bottom mechanism and get tension for the compression spring to enable good push tension and return on the button Carve into magazine well to install two magnets using Dremel tool and glued with quick set CA glue Magazine clip magnet housing - shallow plastic channel used with styrene plastic cover. Hole added to enable spring contact Magnet housing on underside of magazine clip - three magnets installed - the plastic on the underside just so happens to mimic the rollers of the follower much like the real SMG Magazine clip magnet housing is topped with styrene plastic sheet to provide flat surface for the bottom mechanism compression spring to magnet to and have a flat surface for it to stay upright. The plastic housing pushes against the inner walls pretty tight, more so than the force of the magnets so it is able to keep in place Magazine clip bottom mechanism with compression spring installed with magazine cap overtop. The details of this bottom mechanism was obtained from studying Tennatlim's post View of installed magnets on magazine clip and magazine housing Aerial view of custom built and/or modified components of magazine clip and housing Various views of magazine clip and housing - completed!!! Thanks for reading! Cheers and happy building!1 point
-
Been trimming like crazy the past couple of days. Got all major trimming done, next step is to start sizing the forearms. Need to find an undershirt that fits, had no luck shopping today. My cat thinks I should use "bite and chew" instead of score and snap... Sent from my SM-G950U using Tapatalk1 point
-
At the end of the day, it is a simple matter of what do you want to achieve with your costume? If your goal is to join the 501st as a Stormtrooper variant, you must make the decision as to which one you want to replicate, and follow that particular CRL. If however, you choose to build a screen accurate (and for the record, Legion TKs aren’t really screen accurate, as mentioned above, too many variables) Stormtrooper for your own personal enjoyment whether that is for display purposes, or for a Halloween costume, or whatever you choose to do with it, then pick one on screen, and knock yourself out. People here will support you and help you as best as they can, but in order to do so you have to say up front what it is that you are doing, so that they know what type of help and which references they should use to offer their help. You will find no shortage of experts here. There are experts in screen built/used costumes who will definitely chime in should you say that you’re building one for a replica for display purposes. They’ll be able to tell you exactly which type of snaps were used in various connections even. Far more numerous are experts in the costume requirements for joining the 501st Legion, who will be happy to assist you in either endeavor with a positive attitude and support. Please recognize the difference in who is making Which comments, and apply their advice as it suits your needs. There is no need for bullying, bashing, or putting down of either group, as each has gleaned their individual expertise by their own merits, and each can offer you advice that is tailored to helping you achieve your goals. Regardless of your intended purpose, I wish you the best of luck with your build!1 point