Leaderboard


Popular Content
Showing content with the highest reputation on 01/11/2018 in all areas
-
here you go ebay http://www.ebay.com/usr/vmusicstore http://www.warmachinepaintball.com/ http://www.warmachinepaintball.com/online-store-replicas/ http://www.therpf.com/showthread.php?t=267831 Email me at [email protected] and [email protected] http://www.tshirtgun.com/2 points
-
Hengstler inner boxes in from the casting guy2 points
-
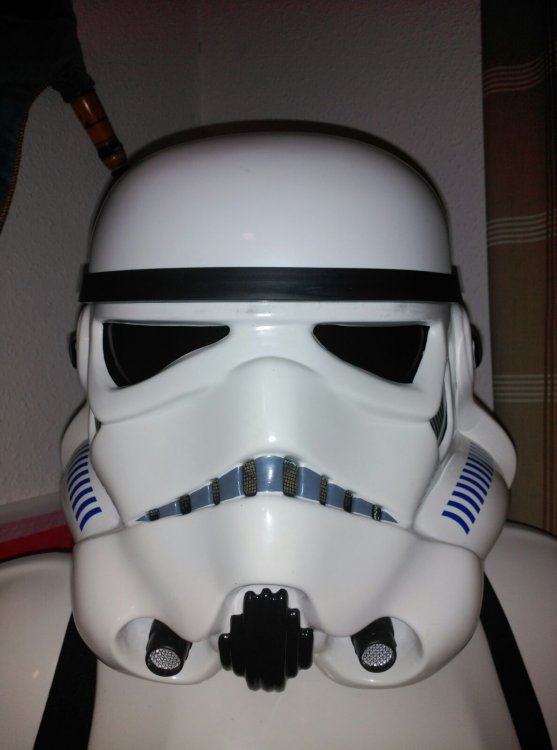
Hey all, December was a crazy month for me and I’ve only just got around to finally starting on my project. Still been researching when I can though. Unpacked the lid today I did notice this rough cut on the top piece and was wondering if this will cause issues? Or will it be covered by the brow? Typical I go to cut out the eyes and my dremel’s battery is flat. I’ve marked out the eyes with pencil, just wondering on your thoughts? I know I’ve probably left a lot but I’d rather sand them down then take a chunk out straight away. I plan to try and document my build as in depth as possible. As a newbie having to research countless threads and seeing the pictures etc it’s a daunting aspect. I may make mistake along the way but I’d rather ask twice and cut once. Gwithian ( Stephen ) has been a massive help and going through his thread really helped as well as other people. So appreciate all those I have spoken with. Sent from my iPhone using Tapatalk Sent from my iPhone using Tapatalk2 points
-
Good morning, Please find enclosed my request for EIB. Many thanks for your time PERSONAL DETAILS Name: Lionel Noronha Gallardo FISD Nick: Pipertrooper TK ID: TK-27056 Armor: SDS ANH stunt Garrison: Spanish Garrison ARMOR DETAILS: Armor maker: SDS Helmet maker: SDS Blaster type :SDS Height: 170 cm Weight: 80kg Boots maker: CK Canvas belt: traumtrooper Hand plates: SDS Electronics:1506+ICOMM Neck seal: traumtrooper Holster maker: traumtrooper PICTURES: Aker
 1 point
 -
Basic Information Name: Paul Vezgoff FISD forum name: Mr V 501st Member Page: http://www.501st.com/members/displaymemberdetails.php?userID=22255 501st ID: TK-42145 Garrison: Southern Cross Garrison Approval album: https://flic.kr/s/aHskyaRUiT Build album: https://www.flickr.com/gp/152422872@N02/79SN7q Mandatory Information Armor Maker: RS Propmasters (Self build) Helmet Maker: Canvas Belt (Self build) Blaster Type: E11 Hand guards: Latex (Self cast)1 point
-
Name: Simon Dawson 501st TK ID: 89135 FISD Name: Benny22 Garrison: UK Garrison Profile Page: http://www.501st.com/members/displaymemberdetails.php?userID=26455 Armour Maker: RWA Helmet Maker: RWA Blaster: ShearTech Height: 175 cm approx Weight: 55 kg Boots: Imperial Supply Depot Canvas Belt: RWA Hand plates/gloves: Imperial Supply Depot, Latex Electronics: Aker amp, Troopacoola Neck Seal: RWA Holster: Imperial Supply Depot Link to Armour WIP: http://www.ukgarrison.co.uk/forum/viewtopic.php?f=126&t=66136 Link to blaster build: http://www.ukgarrison.co.uk/forum/viewtopic.php?f=139&t=676251 point
-
General Information Name: Tom Harvey FISD Name: Poseidon Legion ID#: 52811 (http://501st.com/members/displaymemberdetails.php?userID=26438) Garrison: Garrison Titan Mandatory Information Armor Maker: Troopermaster Helmet Maker: Troopermaster Blaster Type: E-11, Resin cast, Doopydoos Additional Information Height: 5' 9" Weight: 165 lbs Boots: TK Boots Canvas Belt: Self made Hand Plates: Trooperbay Neck Seal: Self made Holster: Trooperbay Centurion Level Rivets: Trooperbay Centurion Level Screws: Justjoseph Build Thread: EIB Submission Centurion recommendations from EIB [X] Trim down shoulder bells [X] Fix Thermal Detonator screws [X] Correct holster mounts Photos Body Action Ab detail Cod detail Interior Strapping Closeup of shoulders with 1/4 elastic Legs - Thigh with ammo box Knee with sniper plate Arms Hands Belt Thermal detonator Helmet E-11 Neckseal Boots Helmet off Thanks for your time and consideration!1 point
-
Not a fan of high high the T-track sits on the barrel, so time to modify. Cut in two and use plastic card stock. Now after painting I can glue it to the barrel.1 point
-
Good luck in this journey to the glory of being Centurion! Good job bro1 point
-
Great work my brother! I will welcome you to the rank very soon. Cheers1 point
-
Ahora he podido verlas...enhorabuena campeón!1 point
-
Looking at the capacitors and the build threads (so many lost images, thanks again PhotoB). I have the Doopy and Master Blaster, leaning towards the Doopy to be rebuilt with Tino's kit.1 point
-
Right I became Impatient waiting for the dremel battery to fully charge so had a little go with it ( first time using a dremel ) Surprisingly easy once got over the ‘oh god going to cut the lid in half’ You can see by the below pic I was very cautious....almost like bambi on ice!! Plucked up the courage and after referencing back to other people’s lids I changed heads and had another go After Stephens advice and getting a little diamond filing kit the teeth are coming on a treat. And here I came to the end of today’s work (that and I am just getting over the flu so hot/cold sweats are still happening) . With regards to the eyes how much more can I take it back? I’m terrified of ‘slipping’ and nicking into the lid. Oh and I decided to start on the lid...why? As once complete it will act as motivation and will sit proudly on my workbench whilst I build the armour. Now I am a perfectionist so may go a lot slower than the normal person but I aim for centurion from the off Sent from my iPhone using Tapatalk1 point
-
Already got a set of those, really excellent! Will be waiting on a few amazon orders in the next few days but hope to have most of my research and tools ready for a nice long weekend!1 point
-
What sites have you put the parts on, any links? Cant wait to get my hands on these pieces.1 point
-
Congrats trooper! Welcome to the ranks!1 point
-
I should have checked that myself. So I just did. It looks like the Anovos supplied is 1" elastic: That clears up the confusion. Hope it helps clear up any confusion for someone else. -Dana1 point
-
Congratulations Sean! Centurion is within your grasp!1 point
-
Sorry for the late, early to bed last night. 1/2" or 5/8" x 1/8" thick rare earth magnets. Most have the same strength rating. The larger the higher the strength obviously. https://www.ebay.com/itm/50-Large-1-2-x-1-8-inch-Neodymium-Disc-Magnets-Super-Strong-Rare-Earth-Magnet/251665625934?epid=807187938&hash=item3a9870b34e:g:R5MAAOSwv9hW6aCf Ahhh the smell of new plastic, very cool. Advice? Read, Read, Read. Visit the build threads section and check out more than just my build. Different strokes for different folks . Start your own build thread where experts can chime in with advice and others can follow along with you. Follow safety guidelines noted on page one Remember to "measure twice, cut once". Many other are here to help and chime in, even on this thread here.1 point
-
It's officially late for me. Though managed to rough trim a shoulder bell and part of the biceps. I'm calling it a night. Sent from my VK815 using Tapatalk1 point
-
Cheers bossman! Enviado desde mi Aquaris E5 mediante Tapatalk1 point
-
That would be ideal, and is what Tony did first in this thread.1 point
-
Good luck with the painting, take your time, don't rush it1 point
-
Congratulations Sean1 point
-
Welcome to the ranks!1 point
-
Congratulations! We can always use more Hero's1 point
-
Congratulations! Welcome to the Ranks!1 point
-
Congratulations! Sent from my XT1254 using Tapatalk1 point
-
Congratulations! Sent from my XT1254 using Tapatalk1 point
-
Hit it with some sandable spray paint primer. Then the paint. Almost done!1 point
-
Congrats Trooper! Now on to the next level!1 point
-
You can see how the tabs on the belt have a slight angle to them. I tried to recreate that by sanding mine down. But only to the plastic I added. Belt is done! The elastic is pushing the box on the far left a little bit to far out. Maybe when I get some more time I'll fix it, but it's fine for now1 point
-
Kb props and Jim tripon are only other two I know of. I have kbs pilot and it's been fun to work on Sent from my SM-G950U using Tapatalk1 point
-
Sweet! Congrats1 point
-
Congratulations!1 point
-
Congratulations and welcome to the ranks trooper1 point
-
I'm not tying to be a narcissist by quoting myself... just sayin'.1 point
-
Hey Ralf Happy New year and thank you for your EI application. CRL and EIB Application Requirements: All the required submission photos have been posted. Beautiful job on your TM build . Your armor meets all EIB requirements, Andrew and myself are delighted to welcome you to Expert Infantry. Congratulations Other-Armor Fit/Assembly: In this section we review observations made by your fellow troopers and ourselves. Some observations may lead to suggestions to improve the overall look of your armor and accuracy. If any suggestion affects any application, it will be listed separately in the above or below sections. Again, these are suggestions and recommendations. The accuracy is ultimately up to you. Starting from the shoulders, bell gap. There should be minimal gap between the shoulder bells and chest/back plates. Were suggesting you can to bring these in as close as possible. Tightening the straps and removing any lower return edge tends to help the most. Reference phoito Next up Kidney to Ab gap. Not a huge deal here but there should be very little to no gap between the armor sections. Your's isn't too bad but worth mentioning none the less. Reference photo And finally another minor area but worth mentioning is the center Ab plate lowest button is considerably larger than the rest. It should be slightly larger, maybe 1mm larger. Take a look a the reference photo provided. Reference photo Centurion Suggestions: Because Centurion photos show much more detail than EIB, items pertaining to Centurion might be seen there and not here. We try to point out all we can from what is seen but the final accuracy is the responsibility of the trooper. We are pleased to say we have nothing to add here at this time.1 point
-
I got my EIB today. I'm pretty happy about that. I only need a little more glue on my drop boxes to keep them in place better for my Centurion application. Sweet!1 point
-
Looking great trooper! Good luck!1 point
-
Great job!!!!! Mark (AP)1 point
-
Looks like you're moving at a pretty good pace! Keep it up and don't rush. Check your reference often and you'll do great! I didn't realize the new kits had copyright information printed inside each piece. Interesting! I wish they would have printed something more useful inside like the part numbers so that they don't get lost when you take the protective plastic film off the outside Good luck, -Dana1 point
-
Great start! Keep up the good work!1 point
-
Very nice work. Good luck on the approval trooper!1 point
-
Good luck Ralf! PS: your belt (and this never happens, it's always the opposite) looks a tad high, it should be right below the first button, while yours appears to be covering it.1 point
-
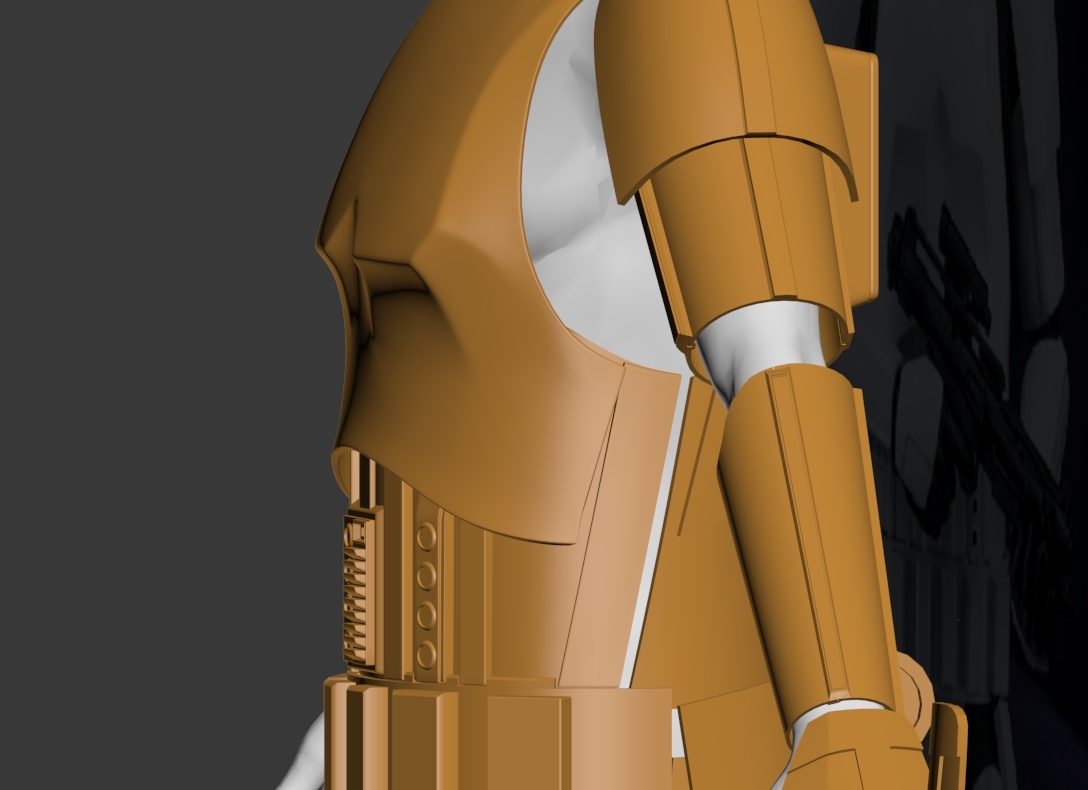
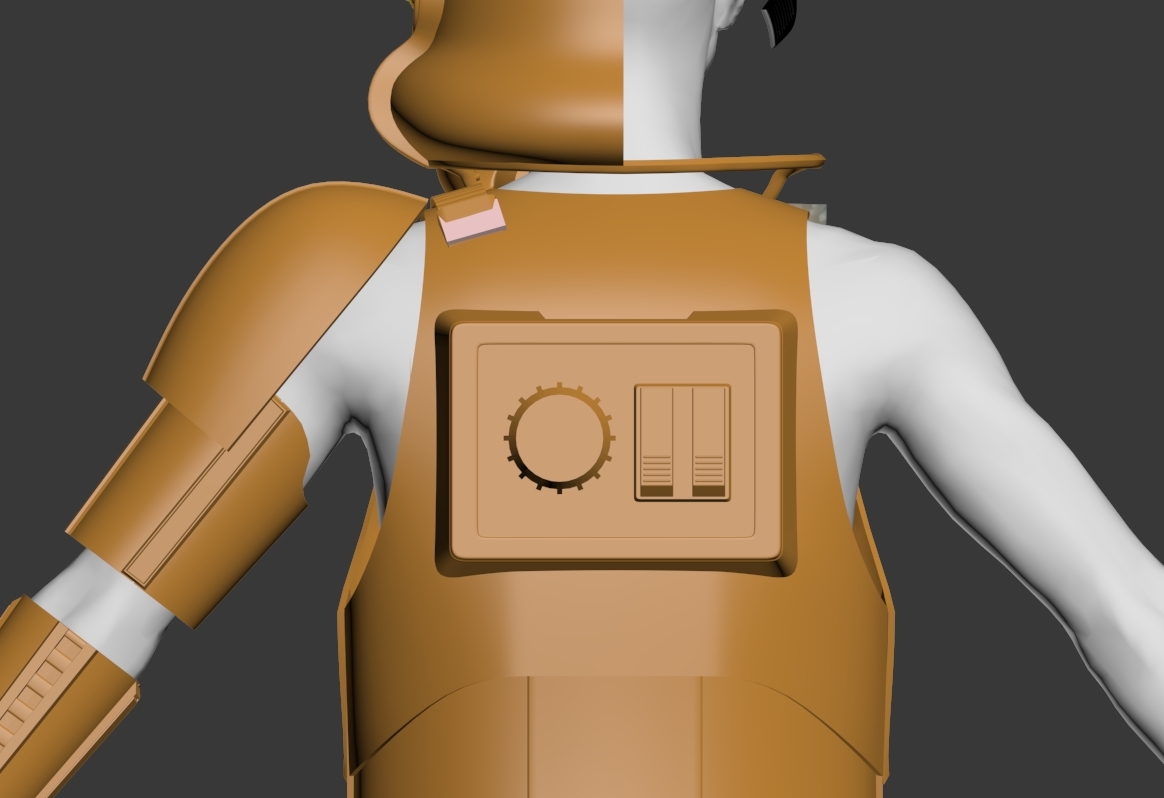
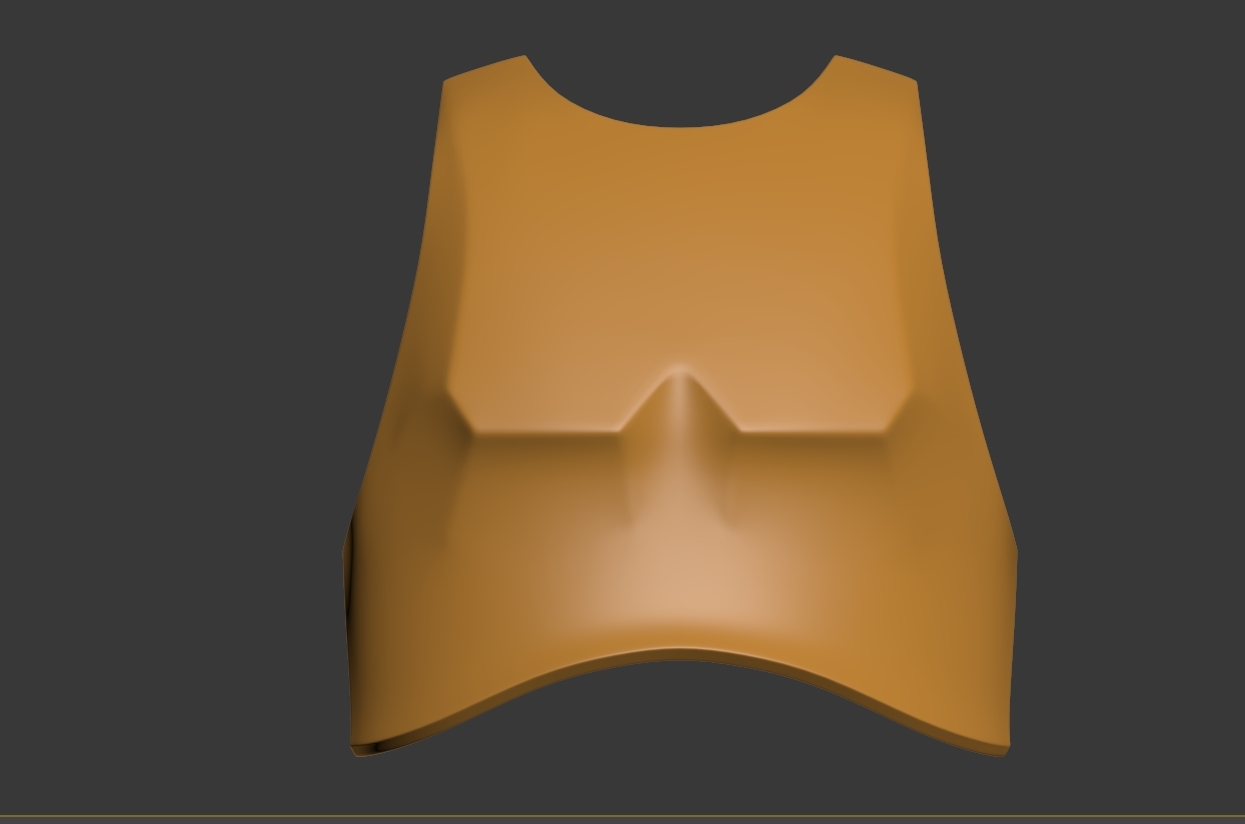
We finally come out from our other order and continue to finish Stormtroopers So some new progress according to priveous posts IMGUR albom on link https://imgur.com/a/4kYEF Have equation about angel of front piece^ not sure how it must be correctly look. But think that it is too high angel
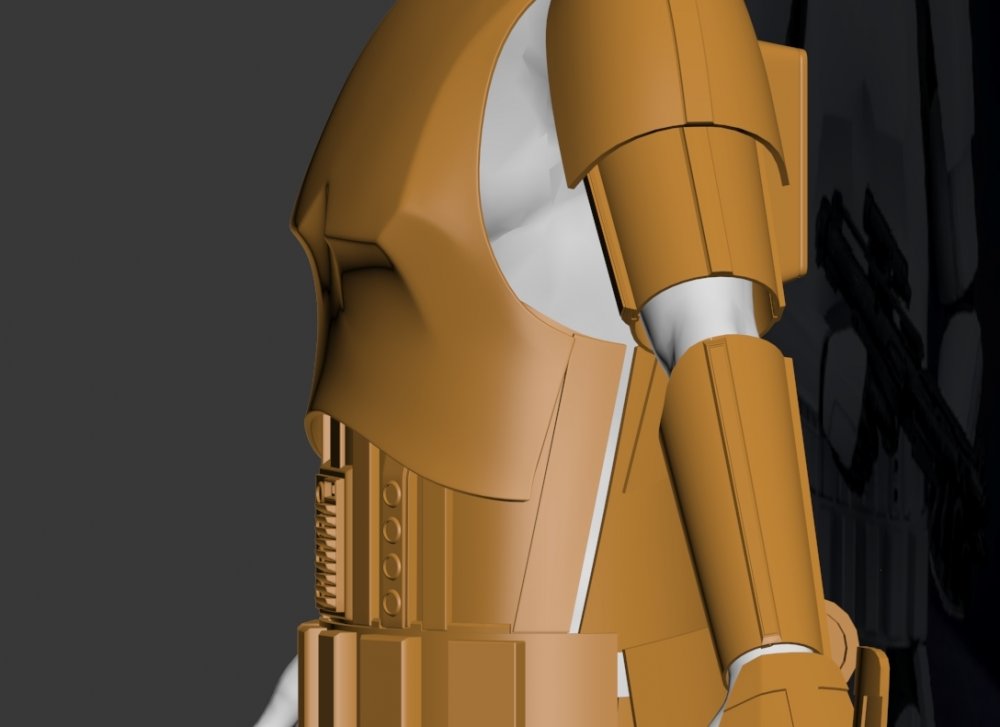
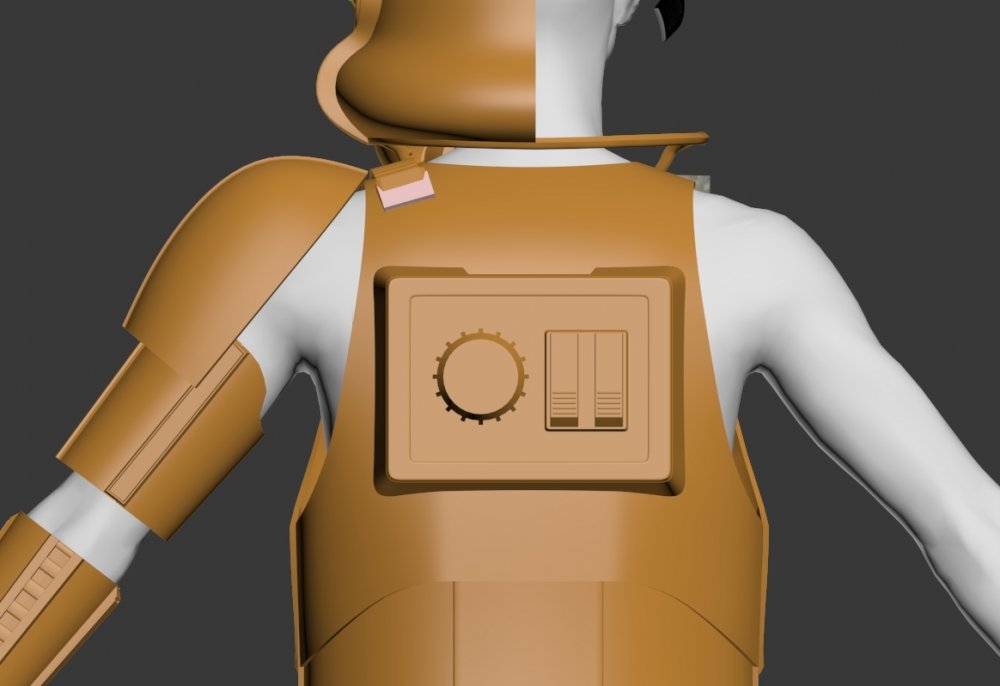 1 point
 -
I used a white version on my build and didn`t have an issue but you could tape it on the inside just to be safe And you don`t have to taper it if it restricts your movements, it looks fine as is, from the pic it looked like there was some room for it which would help in giving that sleek "movie-look", however doing so wouldn`t make the top to flare out, just make sure it`s securely taped in the back, at the very top of the thigh keeping it together as you reduce the eventual gap at the knee. AND...You might want to wait in doing any final cutting until you got your shins taped up to see how it looks together---it`s all about the look Which brings me to mobility well...it sucks..plain and simple someone wrote somwhere on this forum that "all the rebels had to do to prevent the stormtroopers to charge their secret base was to ad a step or two" If you want/need to you can cut some out of the back of the tighs/shins like these troopers did (a bit hard to see) Personally I want to minimize the black showing so I didn`t cut any and this is how I walk (sorry if I clutter your build with all of my stuff)1 point
-
Howdy. Ran into the mesh problem on my BSP and KB props helmets so spun up this hexagon mesh file to replace them. I'm probably going to back mine with a fine mesh but you could also back it with a sheet of plastic or print with a raft. *Updated* Changed the file to have wider walls. BSP FOTK Mesh.stl1 point
-
Congrats on Big Brown Box day, Frank! I know what you are thinking right now... You wait and wait on your kit and then when it arrives you tear into it like a kid at Christmas... that's when the terror sets in. "Holy cow.. I have to put this thing together"? Not to worry, brother. There are literally hundreds of Troopers to help you out and dozens of fantastic build threads you can follow. Hopefully you have all the build supplies you will need on hand. For a complete list, here is a thread that may help: https://www.whitearmor.net/forum/topic/31404-supply-list-for-your-tk-build/ The best thing to do is decide on a place that you will be assembling it. Someplace (hopefully) quiet where you can keep all the parts together in one area. An outside area for letting the E-6000 glue dry is recommended. (It can be pretty noxious). A lot will depend on the strapping system you decide on. There is the "classic" (brackets) or the "snap" (preferred by many). An awesome build thread can be found here: https://www.whitearmor.net/forum/topic/35086-ukswraths-anovos-tk-build/ The biggest thing though comes down to a few things: 1. This is not a race. Think of it as a marathon, not a sprint. (Take your time). 2. Measure twice (3 times) cut once. 3. Research, research, and a little more research. (Study the build threads). 4. When in doubt, ask before moving ahead. 5. Start your own build thread. You can (and should) ask as many questions as you want there. We are here to help you every step of the way, and posting photos will help immensely if you should have any difficulty. (We LOVE photos). 6. Remember that many of us had no experience building armor and were in your shoes (boots) once. 7. There is no such thing here as a "silly" or "inane" question. We truly want you to succeed and become a part of the FISD family, and will assist you wherever we can. 8. Hopefully you are thinking about taking your armor to the highest level, (Centurion). Aiming toward this is easier during your build rather than after, and I promise you it's not as difficult as you think (and well worth the effort). Here is some more info. on that: https://www.whitearmor.net/forum/topic/35371-eib-and-centurion-what-do-these-terms-mean/ Best of luck on your white armor journey!1 point


.thumb.jpg.a76e0f48e0bb54184765760e710c5f96.jpg)


.thumb.webp.27f7939d37871f319ff836257d4a3668.webp)