Leaderboard


Popular Content
Showing content with the highest reputation on 12/19/2017 in Posts
-
Thanks everyone, I was very chuffed with the completed kit, I will wait now until after Xmas to get the garrison approval. On more interesting note I wrangled for the Sydney garrison the other night at the opening night for Star Wars here in southern Sydney more specifically for Lord Vader and I had a blast. Can’t wait to do it in a full kit. i will post up my approval when it’s done. matt3 points
-
No glue but I accidentally drilled a small hole that I quickly filled without my wife noticing it or I would have been out the door with the armour.3 points
-
Looks great Tony! Sly or myself will be with you shortly. While you wait we ask that you change that blue coat hanger to a black one! Thanks!2 points
-
Ackbar didn't get the send off he deserved. He should've replaced Holdo and sacrificed himself to save the rebellion in epic fashion. Not just flew out the window, "Oh yeah by the way, Ackbar just died, oh well". Goodbye my Fishy friend2 points
-
Hey everyone. I thought it was high time I started a build thread over here as well as my Garrison. I couldn’t pass on the 40th anniversary deal that RS had going earlier in the year. After finance officer approval my BBB was on its way and I received it just in time to deploy overseas for six months. That’s a long time to do some research and make a bunch of online orders for parts and other bits and pieces during limited time off. I decided to go the HWT route via ANH Stunt with the aim of making the two interchangeable with belts, pauldron, cleanup etc. I’ve posted here rather than HWT, but will probably start a backpack build over there soon to seperate the two. ANH Stunt first then HWT. Anyway, I’m back now and have been making some progress between much needed family time. I pretty much came home to this. There are a few bits of merch in there in case anyone is trying to identify everything. Bucket partly assembled and painted here. Stepping back a bit, I should start with the bucket. I marked out the cut lines for the eyes and used a Dremel to carefully remove the material. The eyes was a combination of drill, Dremel and files. Being an RS kit there are many bumps and wrinkles but I love it. Did I mention this is a PVC kit yet? Once I was happy and had trimmed the parts a little I fitted the two together. You’ll probably notice that I’ve made them a little loose and there’s a gap between the faceplate and brow. That’s the issue with blinding using the hole marks in an RS kit, folks. I fixed this up later on after some good advice from the guys in the SCG (that’s the Southern Cross Garrison, not the other one I see around here a bit :P). Next up I began painting. The frown first followed by the tube stripes. I used some stencils from Trooperbay as I didn’t trust myself. A little bit of cleanup to do... ...followed by the traps and tears. Black first, then carefully laying down the gray. I really tried to take my time to get it right. You don’t realise how much your hands shake until you try to paint perfectly straight lines, and fail. More templates for the lines... again I have some clean up do to but I’ll do that later. Now its time to do the dreaded ears. I really didn’t want to do these as I was sure I’d mess them up. I went nice and slowly, trimming a little at a time, just the high points until I had a nice fit. Now I’m not entirely happy just yet but I’m leaving them for now. I think overall they should be thinner. I then fitted the lens. This was also from Trooperbay as I wasn’t at all happy with the film-like stuff that RS provides. (I know, I know, I haven’t finished the vocoder - waiting for a better brush to arrive because it’s nearly Christmas and going anywhere is crazy right now lol. Also, yes the brow is high, it works for me right now. I may alter it later but I know that will take some work at this point) And lastly, just last night in fact, I painted the black for the ears and fitted the mic tips - I forgot to take pics of that process sorry. And that’s where I’m up to. I’ll try to post things as they happen from now on, rather than playing catch-up. Having fun so far and that’s the main thing in my book.1 point
-
Finally got round to posting here [emoji4] Have a wip over at ukg. Had my armor from ross at RWA for just over a week now and making good progress i think . Well i think i am lol . ANH E11 from rs propmaster earlier in the year . Also where im getting my boots [emoji4] Helmet came pre done by ross and gotta admit his work is amazing [emoji4] Also got his strapping kit Neck seal Holster Trimming done Legs front cover strips done . 20mm Thermal detonator done Forearms top 15mm cover strips done Will add more pics when home of thighs and shins done Trimming done on all pieces [emoji4] maybe just a final sand here and there So here a few images so far [emoji4] Any help is much apreciated . Comments . Advice all welcome [emoji4] Below is a few pics . More has been done but will get some more later when home Only issue im having now is that the forarms although plenty of room at the elbow end . Just below its snug against my arm . Tried to show parts of my arm that are causing this . Its been suggested to pad this part out so will try that later . Sent the wife out to grab some sponges or pipe lagging foam stuff [emoji6] to cut into strips . Altleast i dont have to worry about my forarm twisting though can twist by hand [emoji4] Only issue ive realy had so far . Everything else has gone well ( need smaller arms ) hands not too small either but have got a fairly small opening at the wrist end that i can get my hand through . Just leaving a final finnish sand once complete and sized Again all comments and advice are welcome Love the build so far [emoji4] Even the thumbs up from the wife Dave Sent from my GT-I9505 using Tapatalk1 point
-
Hi guys, And the moment you’ve all been waiting for.... So, the rubber blaster IS lighter, but not by a massive amount. I tried a little tidying tonight, however it’s not a material I’m enjoying ‘working’ with. Resin is so nice to modify and adjust, whereas this is a bit awkward. It gives me extra respect for the work that Ryan did when making it. As such, I’m not really going to modify this past what is done. From a few feet away, it holds up well against my Doopy’s and, as intended, gives me a lower risk item for trooping. Here’s a few more shots, just for fun. I’ll get a few action shots too, next time I’m kitted up. Thanks for following guys. I’ll update if I make any more changes. Again, big thumbs up for this. Lovely piece from Imperial Warfighters. :-) Dan Sent from my iPhone using Tapatalk1 point
-
1 point
-
Oops rookie mistake, let's use this one
 1 point
 -
Congratulations Taylor!!! Well done indeed!1 point
-
Blaster. I purchased a resin blaster from Quest Design Canada off Etsy after a conversation with members from my local garrison. This being my first build I wanted to purchase a completed blaster. This is a really nice blaster with great details. The rear sight on the scope is blank. It needs detail. I will also need to bore it out a little to install the lens I want to put in it. I purchased a head lice removal kit from my local pharmacy just for the small magnifying glass. FYI, I'm bald. I can't get lice. I cut the handle off and covered the lens with painter's tape to protect it while I sanded the edges off. The sanding took about 15 minutes. You can see how shallow the scope is at this end. The lens fits nicely. I found these crosshairs on the forum in a post from October 2009. There are several to choose from. I did a quick sizing and a rough draft print to see how it would look. I think this will look great when it's done. The lens needs a fine sanding around the edges to clean it up. I know most people won't even notice this, but I will.1 point
-
Looking Great Sean. Nice detailing on your bin too! You'll be trooping in no-time.1 point
-
Would order the blaster just like you did (only with black paint), then clean it up and install as much items from a completion set as possible. Then weathering and done. Well, at least that was what I intended to do a while ago, when I was on the fence to order a rubber E-11 from Praetorian Blasters. Wanted something light-weighted for my mannequin to hold and thought a rubber blaster would be a good choice in case it accidentally drops on the floor. But that rubber thing was even more heavy so no good for my purpose...1 point
-
Well done Stephen, I’m not far behind, it was good having someone to build with and with the same type of kit. matt1 point
-
Thanks Guys. I registered for MEPD forums yesterday morning and am just waiting for it to be authorised over there. Once approved I'll heed your sage advice and duplicate. Thank you all for the guidance, I really appreciate it. Last night I cracked open the scissors again and really started going at the kit. It being 2mm didn't make it the easiest of tasks and after around 2 hours I started to notice that parts of the protective film on the armour were going a dark pink. After looking closer I realised my fingers were bleeding. I pressed on until my thumb went numb. All bits need to be sanded (in every sense of the word!) to make them smooth. More cutting tonight. My wife has a day off work so I've told her she can pick up on the trimming where I left off. She laughed which I'm hoping translates to "When you get home from work, it will be finished"
 1 point
 -
First pass with the the grey by MrShaky WIP1 point
-
I snap it in and then step into the clam-shell pulling it up1 point
-
I just got one too and like Dan said they are great to work with..I have a DLT19 but wanted the E11 for TRLJ so contacted IW and they rusched pruduction (withouit compromising quality) in order for me to have it in time...the postal service however did not anyways, it`s a great looking blaster at a very good price and they also have the R1 and a foam blaster that looks good1 point
-
Overall, seems a well made rubber blaster. At first I thought it was the Rogue One E-11B from Praetorian Blasters, since that's the only hollow scope rail one I'd known of.1 point
-
YOU ARE AWESOME! CONGRATULATIONS SHA SHA!!! WOO-HOO!!!1 point
-
Ah yes! Another year went by and I haven't even got to the 50% mark. Happy Holidays to the FISD community and staff! See you all in again 2018!!! Walter1 point
-
Some glue elastic to the inside of the hand plate which then goes around the glove, you could also attach Velcro to the glove and hand plate, I find E6000 to hold really well. The more times you put on armor the easier it gets, I practiced about half a dozen times before my first troop, then got there and realised I had been practicing with everything set out on a table and when I got to the trooper and there wasn't any tables I get kitted up these days within 5 minutes, definitely gets easier1 point
-
Twenty Minutes of Deleted Scenes Coming on 'The Last Jedi' Blu-Ray1 point
-
Step 12: Touch ups and black details (detail brush, respiratory protection) I like to touch up the gray first, touch up and apply black details second, and do final touchups with white third. For the detail lines, apply tape *just* outside the gray trap areas. Use your thin detail brush to bias towards the tape line...to keep all the mess on the tape. Peel your tape, and you should be left with a nice, thin line. If you have an oops, we can always touch up again with gray to clean that up.1 point
-
My cast zinc Hengstler boxes are almost finished..... check out the eagle1 point
-
After going to the premiere Thursday night, I was undecided. I went back Friday afternoon, and loved it. I can certainly understand why it's caused so much backlash, what happens in this one is so shocking and unexpected, and so many twists and turns, it's hard to take it all in at once. I didn't think the humor was over the top. I personally liked the opening with Hux and Poe, Hux (not one of my favorite characters) totally being dismissed as a threat was hilarious. Say what you want about the porgs, I loved them as soon as I saw them in the D23 footage, and I loved them in the movie. I don't think they overshadowed anything. I also love that Snoke was taken out like a punk lol (go Supreme Leader Ren!!!) I was a little disappointed that there was no confrontation between Leia and Kylo, and no further mention of the Knights of Ren, but everything else made up for it IMO. I believe Phasma survived that fall and will be back. The fight between her and Finn, though brief, was awesome and I like how it showed part of Gwendoline's face after Finn whacks her with the riot baton. And of course everyone's devastated about Luke, but you know he'll be back as a Force ghost in the next movie, just like Obi-Wan was brought back as one in ESB and ROTJ. TLJ isn't the best of the saga, but it's certainly not the worst.1 point
-
We wanted to get as many apps out before Christmas as possible, and give yourself some credit you did a beautiful job on your build, and the blaster weathering .1 point
-
Wow, that was fast! Thanks Tony for the quick turnaround. What a great Christmas present.1 point
-
Getting close!! Did most of my straps and snaps. Had to try on the armour so I know where to put the last straps on the shoulder to the bicep pieces and where to put the velcros to attach the gaskets. Just have to finish the belt pieces and glue the "card swipe" pieces to the shins, then it's sanding and priming time!! Oh yeah, have to attach the lens to the helmet too! Did anyone put any straps to the spats part to attach to the shins or don't need too? Also, how do I raise the shoulder bells? It sits a bit low compared to the yoke.1 point
-
Hey Sha Sha welcome back and thank you for your Centurion application. CRL and Centurion Application Requirements: All required submission photos are present. Thank you for making the suggested improvements mentioned during your EIB application. Andrew and I are pleased to say your armor displays all the elements as set out in the Centurion CRL. Congratulations and welcome to Centurion Sha Sha Other-Armor Fit/Assembly: We have nothing to add here. Beautiful work on your armor build and nice weathering work on that blaster Good to see another Centurion in our GGG ranks. Looking forward to trooping with you some day. Carry on trooper1 point
-
I hand painted my buttons without a stencil and just eyeballed it. Your stand alone blue button should clean up nicely with the second coat. It's the only one that stands out as far as the painting goes. The rest look great in my opinion. I also have a shaky hand and old man eyes. All the hand painting was tough for me. I'm sure your shoulder straps will be fine. I think I got lucky with mine. Lots of clamps really helped. I see you have lots of clamps. Could use a few more though...haha. I had a couple clamps on the back plate joining the two side while the front dried just to make sure it all lined up with proper curve and arch. I cut off the big flat bumps on the back of the straps before I glued them on the chest. I'm still processing TLJ too. The only thing that really stood out for me...SPOILER ALERT, kinda... was how easily the Force was used. Vader had to concentrate to choke someone. Even the Emperor had to gesture to make things happen. Wasn't the case for Old Ugly when he moved Ray around. Seemed too easy to me. No effort involved. No concentration. Not Force like. More magical. Totally rubbed me the wrong way. Lots of other great stuff though.1 point
-
So I snuck away from my fatherly duties and put a first coat of blue on the buttons. did a second coat of grey - I've never seen these things in person - is this okay or should I clean it up some more (the grey is done - the blue is not). I have a shaky hand and old man eyes - this was not an easy process. I also need new reading glasses - apparently. Glued the ABS shoulder straps on. And yes, I did manage to get a few more clamps on it after taking the picture. It doesn't fit snug to the chest so it is taking a lot of persuasion. I positioned it so that the 5th small bump lined up with the end of the shoulder extension of the chest plate (I have no idea what to call these parts). It makes the whole thing sit low on the chest where the contours are more pronounced. I hope they are lined up and look even when all is said and done - this was not easy to do so that they lined up with the back plate. There are so many clamps on it now, that I can't tell what it is going to look like. On another note... I'm still trying to process what I though of The Last Jedi. Hummm. I guess I will need to watch it again.1 point
-
Really nice! Congrats on completing your TK. Hopefully your clearance and TK ID come through quickly.1 point
-
Looks super. :-) Sent from my iPhone using Tapatalk1 point
-
Looks super. :-) Sent from my iPhone using Tapatalk1 point
-
Looks super. :-) Sent from my iPhone using Tapatalk1 point
-
Great work1 point
-
I can see how people don't like it the first time, I suggest re-watching it. My good garrison-mate Sandeman summed up the below on FB, and his notes below sum up how I feel. Personally I think it's one of the best SW movies done to date. Is it the same "fun" as TFA? No, it's different because it needs to be, and that's not bad. // After 48 hours of digesting the movie, I saw it again today... And it was a different experience. The humor never bothered me, but it seemed more subtle. I picked up on things that I had not missed, but didn't correlate, such as: The dark kelp hole - like the cave on Dagobah, it only contains what one takes with them. Yoda - the entire idea of the movie was in his words. Crait - the clue is in the footprints. To sum up my feelings; my initial assessment was it wasn't what I wanted to see, but after a second viewing, it was the story that needed to be told. It was diffent and didn't play to the expected tropes, and I think that's what bothers most people, but it didn't have to play by my rules. The Force Awakens hit the wickets because it had to. It had to be different from the prequels by being the same as A New Hope (which some call derivitive). The Last Jedi had to be different also, and Rian Johnson took that idea and didn't remake The Empire Strikes Back. He did his own thing, a much more introspective thing. While I still don't agree with some of his choices, I don't have to. I get the message. I've made colossal mistakes while trying to do what I thought was right, and every main character in this movie is a victim of their own hubris. I think it helped that I watched Empire last night and saw the paralles from Luke's time on Dagobah. It's actually a pretty good entry to the saga, even if it's not the movie we've all made in our heads.1 point
-
I spray painter the inside of mine with truck boot liner, it has a strong gloss type of smell for a few days but coated lovely. I used masking tape all round the edges and foam in the teeth. I’m in UK so used a Halfords spray £10 a tin. Cleaned off any spray excess whilst still wet. Came up ok I think. Sent from my iPhone using Tapatalk Pro1 point
-
Really cool of them to give you some links for free! Looks like you have been doing your research, I suggest buying twice as many snaps and magnets as you think you’ll need. Good luck with the build!1 point
-
Decided to paint ab buttons How the ab buttons looking ? Ok and leave as they are ? A little more ? A little less ? Used a cotton bud to straghten edges and remove any excess Sent from my GT-I9505 using Tapatalk1 point
-
Just received notice of a major milestone in my kit build.... I am officially EIB [781] !!!!! I want to give a major shout-out to Tony for answering my multitude of questions, Joseph for chiming in as well (plus the awesome handguards), all of the FISD liasons that are contantly helping, plus the entire, fantastic, online costuming community that we affectionately call the FISD ...now on to the minor touch-up and corrections (and a new blaster) for Centurian1 point
-
First few pics with e11 Sent from my GT-I9505 using Tapatalk1 point
-
Congrats Asa and welcome to the centurion rank!1 point
-
Congratulations and welcome to the ranks trooper1 point
-
Here's some reference photos1 point
-
I've been following up with my five recruits in my area all Spring and Summer and sometimes it feels like pulling teeth. I've been trying to inspire them to continue with their kits (all Anovos). I had two abandon their TK kits for Shore Trooper builds. Ugh!1 point
-
This is so damn cool1 point
-
Oh man. Paul, it looks even more amazing than the blue. I see you were able to center it more as well. Fantastic work on these displays. PM to be sent.1 point
-
As for strengthening the overall helmet itself, I have relied on Plasti-dip with cheesecloth embedded into it then another layer on top. Because this helmet is so thin, I might go with three layers just to give it more strength. Here is an example what two coats looks like.
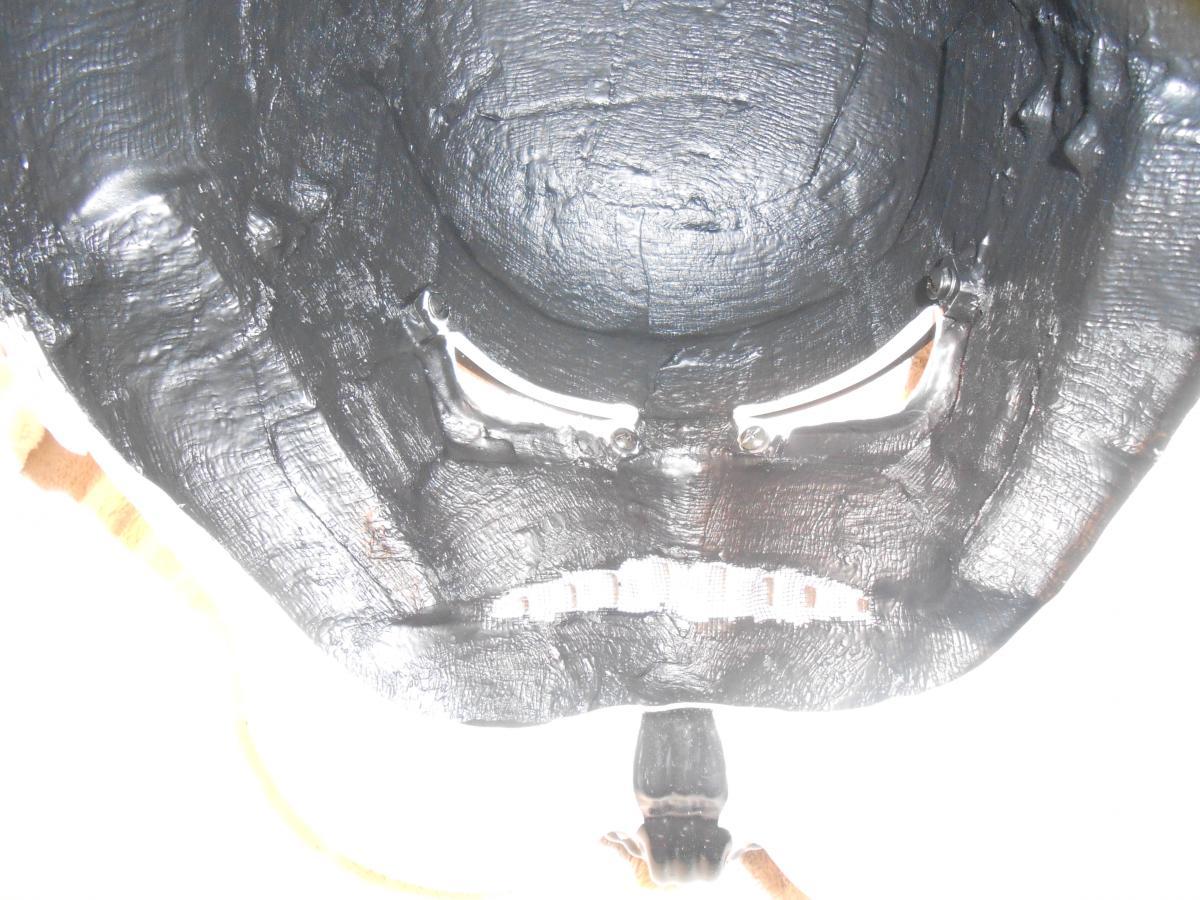 1 point