Leaderboard


Popular Content
Showing content with the highest reputation on 12/04/2017 in Posts
-
ARMOUR APPROVED[emoji1303][emoji1303][emoji1303][emoji772][emoji772][emoji772] Inviato dal mio iPhone utilizzando Tapatalk5 points
-
Little break for some Holiday decorations. Always do a Star Wars theme on the side of the house. Sent from my iPhone using Tapatalk3 points
-
Hi all, Decided to put together a simple slide show of my build, featuring some of the highlights of the build. Saves trawling through the whole thread for pics. Hope it helps any prospective builders. :-) Best wishes, Dan Sent from my iPhone using Tapatalk3 points
-
I have talked to Joe in the past. I went ahead and sent him this email. I'll update you if he sends a reply. "Hey Joe, Reaching out to you since customer service is lacking when it comes to answers on where a product is. Myself and others are a bit upset on the slippage of the release date on the First Order kit I would like to see if you can answer any of these questions to help put everyone at ease when it comes to a date that these could be done. The first notice sent out in September made it sound like you were just trying to produce these when the ship date was less than a month away. Were you made aware of this issue prior and waited till then to inform us? I know I made my pre-order last December. Is there a reason why this issue took 9 months to notice? A lot of us would be a lot less upset if you were more forthcoming on ship dates up front and more frequent emails about where you are at in the process. We are a tight nit community due to forums and such. If you made the community part of the process in where you are at and the struggles you encounter. I think more of us would be okay with the way things are going as long as they are issues and not just poor timing or putting new projects ahead of ones that have already been done. May I suggest having a person from your company part of the forums. A big one would be whitearmor.net. There aren't a lot of companies doing what you do and as a community we want you to succeed. However the vibe we are getting from the infrequent communication, customer service giving vague answers and reps at cons promising ship dates that you can't deliver on is putting ones that have ordered trying to decide if they need to cancel an order and go elsewhere and putting off those that are looking to purchase from you into looking elsewhere. From the hands on demos you have shown me at cons gives me high hopes that you will deliver the best product at the highest standards possible. Though with the poor customer service that I have felt you have given me and the community I am going to give other options a harder look next time I look at your products. Sincerely, Gavin Black"2 points
-
Not required. People do it for various reasons. Mainly, it looks cool. It can also darken the interior of the helmet - less likely for people to see your eyes.2 points
-
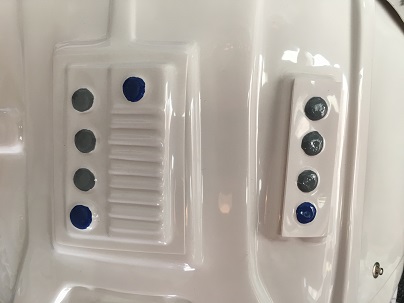
Regarding the magnets: if you use all 5 of them and do not use any clay to cover them, their strength should feel fine.2 points
-
Today's updates: started work on the power cylinders, chopped down to 23mm each, rounded them off a little bit and getting ready to green stuff the wires on. Scope: started hollowing this out yesterday, but had a wee problem with the space bits. When sizing down from the 25 to the 20, it started to go off centre. This was probably just me being me but oh well lol. So, stuffed half the hole with white stuff, and redrilled today, much straighter! Drill is charging up at the moment so couldn't quite get it done haha I actually hollowed it the full way through, meeting at the other end. Scary stuff really! Will have to redrill through again but that'll be easy as the hole is already there Mag: installed magnets here. Filled it up with white stuff to do then later drill holes for the magnets as the mag was hollow. Thing is, it feels a little... liable to come off... Will probably put another pair of magnets in... Sent from my SM-G925F using Tapatalk2 points
-
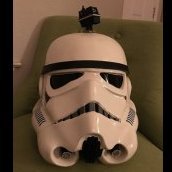
Ok. Pretty happy with how this turned out.2 points
-
I want you to troop more so that I can finally meet you and shake your hand for all the help you gave me and everyone on this forum on our builds.2 points
-
Its a cover plate for your Illudium Q-36 Explosive Space Modulator, all the best Stormtrooper kits have them! j/k I am looking forward to watching your build.2 points
-
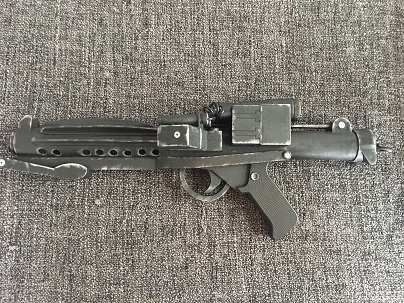
I hate to say right now WHEN ,, doing the trigger frame for a few weeks and waiting on some castings to get completed... You all know this is not a easy gun to build. Most of you have scratch built or have made resin casts understand... the main body tubes are under way as i speak. Soon !!! LOL2 points
-
let's say that without a guardian angel like you, work would not have come so well, your patience is infinite, thx buddy Inviato dal mio iPhone utilizzando Tapatalk2 points
-
That is exactly, what I had asked myself. During the last 3 years I had been in contact with the Hengstler main site in Germany, with industrial representatives and with a lot of industrial end users. Absolutely nothing. A funny thing was, when I first called Hengstler and got transferred to "THE" contact person for the 400-series, he immediately was aware and asked, if I belong to a Star Wars club. Looks like he had already received a few calls before. A funny guy though and we had a nice discussion. All machines and tools to build the metal versions from the 400-series are disassembled and removed since decades. They are not able to produce any of the old hardware again - even if they would want it. This makes Chris' metal brackets even more valuable.2 points
-
That is a very good idea and a nice summarization of your build. Well done, Dan.2 points
-
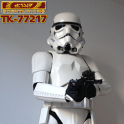
Troopers assisted, officially (hands on) L2 or L3: 1) Carlos Quezada: EIB - Centurion - 2) Charles Holmes: EIB - Centurion - 3) John Cambra: EIB - 4) Reno Rodriguez EIB - Centurion - 5) Brian Peters EIB - Centurion - 6) Thomas Alexander (Death Trooper)1 point
-
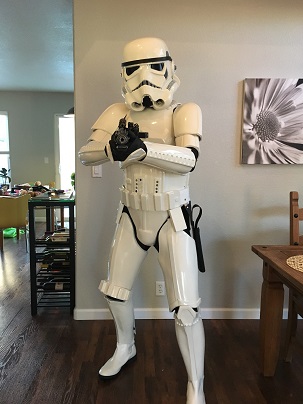
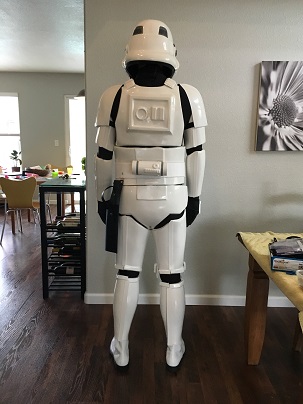
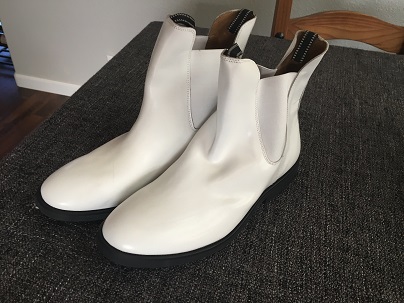
General Information Name: Jeff Pitts FISD Name: Droid Runner 501st I.D.:19232 Garrison: Central California http://www.501st.com/members/displaymember.php?userID=26466&costumeID=124 Mandatory Information Armor Maker: RS Prop Masters (build kit) Helmet Maker: RS Prop Masters (commission) Blaster Type: Rubies Modified (I know it will not be allowed past EIB) Additional Information Height: 6'-1" Weight: 170 lbs Boots: Totally Killer (TK) Boots Canvas Belt: RS Prop Masters Hand Plates: RS Prop Masters Neck Seal: Trooperbay Holster: Darman Props


 1 point
 -
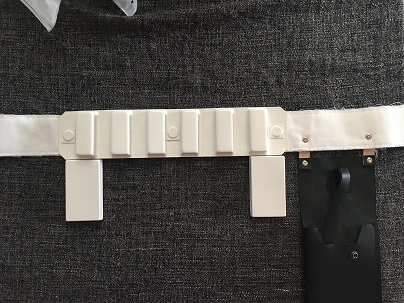
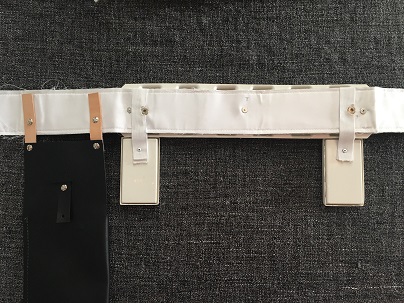
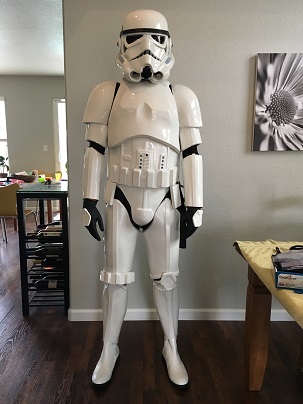
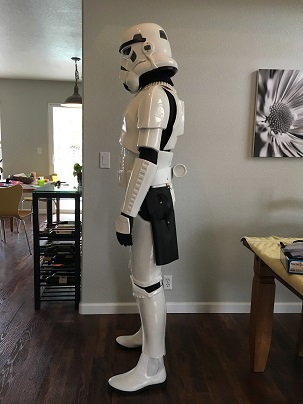
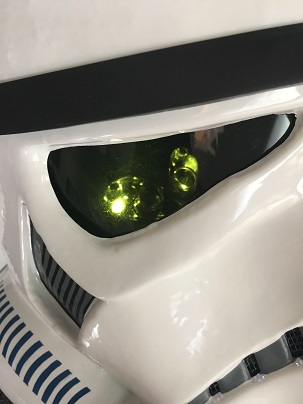
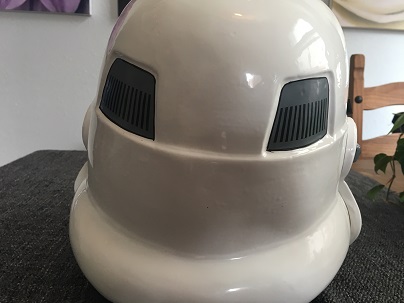
General Information Name: Sha Sha Chu FISD Name: shashachu Legion ID#: 19233 (Legion profile page) Garrison: Golden Gate Garrison Mandatory Information Armor Maker: WTF (Walt's Trooper Factory) Helmet Maker: WTF (Walt's Trooper Factory) Blaster Type: Hyperfirm B-Grade Additional Information Height: 5' 3" Weight: 125 lbs Boots: TK Boots Canvas Belt: Rob Kittell Hand Plates: n/a (these pics are with the ABS plates) Electronics: iComm & Aker amp, self-made fans Neck Seal: Soulart aka Theresa aka Geeky Pink's Phantastic Gaskets Holster: Darman's Props Centurion Level Rivets and Screws: justjoseph63 Build Thread: (still in progress) Photos Full Body Front: Left: (I cleaned my armor after these pics...) Right: Left arms raised: Right arms raised: Back: (green light is the light from the USB power source for my fans; I'll put a piece of electrical tape over it) Right side detail: Left side detail: Action shot: Helmet off: Armor Detail Abdomen detail: Cod + Butt attachment: (uses the split-rivet-in-snap method) Interior strapping: Left side rivets: Shoulder bridge elastic: Thigh ammo box: Sniper knee: Forearm wrist ends: Helmet Hovi tips: Green lenses: Helmet screws & ear bumps: S-trim: Blaster Accessory Details Neck seal: Thermal detonator w/ pan head screws: Holster attachment: Boots: Thanks for your consideration!1 point
-
Awesome! WIsh you all the best for approval!1 point
-
Hi Dan, you kept your word. I am keeping fingers crossed for you...1 point
-
Congratulations! Looking foward to seeing you at Centurion soon!1 point
-
Congratulations and welcome to the ranks trooper1 point
-
Specifically this pic. It matches everything I see in the movie and the video game, all except for the peculier orange ring up at the top...1 point
-
Yeah, will get to it this week. FWIW, it will not impact MEPD as none of the deployed troopers have a baton.1 point
-
Looks like this is gonna be on hold for awhile, haven't got anything shipped yet but looks closer. In the meantime I got my bucket and armor in for my First Order Tie Pilot. So getting some familiarity with the first order build, 100% different materials though. Already getting a headache from some of the parts and more than thankful mimics is coming together. First order tie will be a nice 2nd costume to use for cons, and troops where I don't have a lot of help dressing. I wanted my shoretrooper because I thought I'd have more movement but the hip armor I have right now doesn't allow movement. I might sell that kit down the road, maybe 3 kits seems like a bit much right? (technically 4 with my fun green and gold TK) Gonna run out of places to store armor bins sooner or later.1 point
-
That's a tough call. Since their shipping estimates are for their customers and their refunds are for ex-customers you can imagine where their priorities lay. My 14 day refund took around 10 weeks if that helps. Others have received it faster, other slower. It's almost like scheduling isn't their forte.1 point
-
It's not really another couple months of work for Centurion in my opinion. Other than the flexible hand plates and needing to procure a blaster, it's more about how you build everything. I built my kit in 5 weeks (granted, I bought it second-hand and most of it was already trimmed) with Centurion as the end goal (still have a few last-minute things, to be fair). PS: Molds were built for an actor 5'9"/5'10". Most taller guys just need longer shims, it just means you'll have longer gaps between limbs. If you have a long torso you might need to tweak some things, but you'll find out on your first test fitting.1 point
-
Wow, thank you Tony and Andrew [emoji4], that’s amazing. I am glad you, the experts, like my armour. I will remove the lettering on the TD and apply for Centurion. I really could not of achieved this without the help, support, advice and encouragement from both the UKG and FISD, I can never thank, all the people who have helped me, enough... you are all truly amazing people.... Troopers helping troopers really sums this up Thank you Stephen [emoji4] Sent from my iPhone using Tapatalk1 point
-
Oh man......I wonder when they will learn. Don’t get me wrong, at this point, im just gonna leave my preorder as is and see how long this takes. I am honestly more curious about how long this will take than how good the pulls will be. Sent from my iPhone using Tapatalk1 point
-
Woo-hoo! You'll be at Centurion in no time at all. Congrats!1 point
-
Great job mate!!! And just an easy fix for Centurion! :-) Sent from my iPhone using Tapatalk1 point
-
Great job mate!!! Sent from my iPhone using Tapatalk1 point
-
Hey Stephen thank you for your EIB application. CRL and EIB Application Requirements: All submission photos have been posted. Beautiful looking RS armor you have there . Looks like are required submission photos are present, Andrew and I are very please to say your armor displays all the necessary elements to qualify for Expert Infantry. Congratulations Trooper! Other-Armor Fit/Assembly: In this section we review observations made by your fellow troopers and ourselves. Some observations may lead to suggestions to improve the overall look of your armor. We have nothing to add here except for please remove the pipe ID info lol. Reference photo Centurion Suggestions: Because Centurion photos show much more detail than EIB, items pertaining to Centurion might be seen there and not here. We try to point out all we can from what is seen but the final accuracy is the responsibility of the trooper. At this time We have nothing to add. Congrats again and hope to see you at Centurion.1 point
-
That's looking good and ammo pack will cover up front misalignment.1 point
-
Thanks guys. Yeah, but that was whiny Ep III Vader Yes I did. I wasn't going to remove anything from the front of the thigh (or shins for that matter). Just the back for mobility. Sean, I can't believe I hadn't checked out that thread before - there is a lot of good info for first timers (I just quickly went through it this morning - I'll have to go back and find the pic you are talking about). I'll probably leave it alone for now. I can always cut later - but the ABS doesn't grow back.1 point
-
What kind of repair shop would have these?1 point
-
Congratulations on a job well done, Tony! Now the fun really begins1 point
-
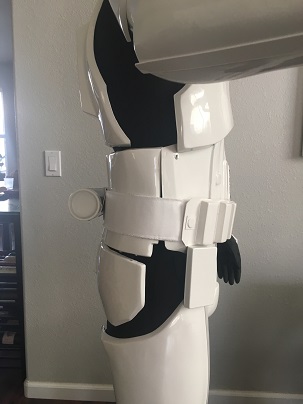
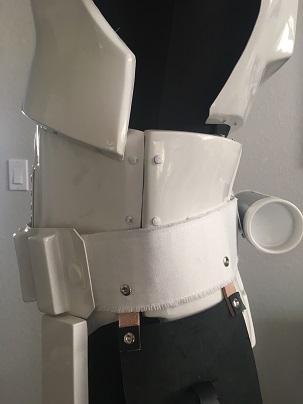
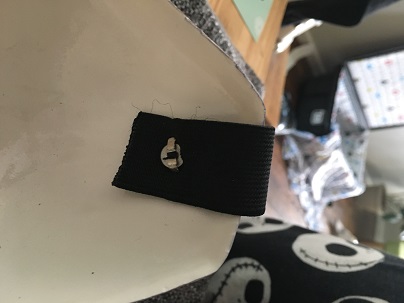
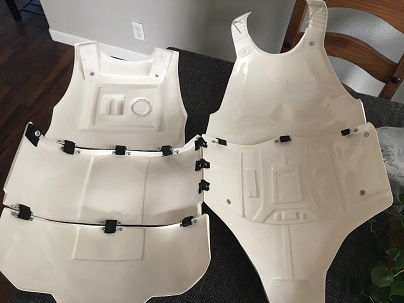
Shoulder Bells and Shoulder Bridges For the shoulder bell trimming, I went off of Cricket's build and trimmed 12" from the bottom of the spine for length, and 5" from the edge of the spine for width. I didn't document it, but I closely followed Ukswrath's build for doing the strapping (black elastic + #10 sew-in snaps), but I attached the elastic to the shoulder bell with a snap/snap plate instead of gluing so that I have the option of easily swapping out shoulder bells. For positioning, I basically freehanded it by taking several photos from the front and the back until both the gap in the front and back was minimal, marked that position with some blue tape, and sewed the female snap in place. The shoulder bridges that come with the WTF kit come flat, so after trimming, I had to heat bend them. At the point I was pretty comfortable with the heat gun, but most people use a hot water bath. After bending, it was just a matter of gluing them in place. The one thing to be aware of while positioning the shoulder bridges is to check their positioning from both the front and the back before gluing - smaller/shorter troopers might have problems with the backs of the shoulder bridges touching the top of the O/II back piece. I don't currently have any reinforcement on the shoulder bridges, so we'll have to see how they hold up; I know many people have had issues with them cracking or outright snapping in half. (Note that I didn't do a very good job bending the left shoulder bridge; this was pointed out in my EIB application as something to correct.) I considered using the bicep hook method to keep the biceps in place, but it seemed difficult to get right, so I did the simple thing and attached the biceps to the shoulder bells with elastic and snaps: After the shoulder bridges were in place, I could finally see the entire torso together: (This photo was taken before correcting the belt position.)1 point
-
From my opinion, this should be everything you need. Hopefully Tony will review your build and approve it until Wednesday. In every case, we will meet as Centurion both on Episode VIII premiere at cinema next week.1 point
-
Congratulations!1 point
-
Some fine work there, most impressive1 point
-
We don’t have snowmen in Texas so this is the best my kids could do. Sent from my iPhone using Tapatalk1 point
-
Its sad to read so many comments about how poor their customer service is. As a result of the delay times and just the lack of communications they lost out on me being a customer. I wonder how many more people have been put off and take their hard earned cash elsewhere. In this day and age I'm surprised they can still get away with it. Would be very interesting to hear from someone from behind the scenes at Anovos. I predict its utter chaos with no one having a scooby doo whats going on.1 point
-
SQUIRREL! My bad1 point
-
You can troop with us almost any time, just contact one of our staff to coordinate events. Golden Gate Garrison1 point
-
It may be a while, I have much more I just don't feel it's proper to include them lol. The above are built or rebuilt from the ground up, those I'll claim, for the rest I assisted in hands on or other, na!1 point
-
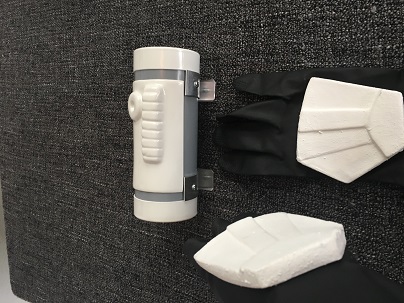
Joseph sells hand guards with cheese cloth built in. I think I have 3-4 sets. Simple E6000 works great1 point
-
Awesome! What a great start to the day. I am planning on going for Centurion if I can figure out how to get the darn rubber hand guards to stick to my rubber gloves. Really looking forward to trooping together some day, too!1 point
-
Hey Sha Sha thank you for your EI application. Great to see another fellow GGG member applying for the higher ranks. CRL and EIB Application Requirements: All your required submission photos have been posted. Beautiful job on your build. Andrew and I are happy to say your armor meets all EIB requirements. Welcome to Expert Infantry Other-Armor Fit/Assembly: In this section we review observations made by your fellow troopers and ourselves. Some observations may lead to suggestions to improve the overall look of your armor and accuracy. If any suggestion affects any application, it will be listed separately in the above or below sections. Again, these are suggestions and recommendations. The accuracy is ultimately up to you. We only have a couple areas to mention here so let's get to it. Not a huge deal but we noticed your left shoulder cover has a heavy bend in it. It should gradually following the contour of the armor. You've done a fabulous job adjusting this armor to fit your height however, you might want to give the covers and upper back a hot water bath to contouring them to your body. Doing this may help in the next section also. Reference photo The back plate should not cover the kidney plate, it should rest on top of it. Also, the posterior should be underneath the kidney not behind or on top of it. Reference photo And lastly for Centurion, if you choose to shoot for it we're highly suggesting you paint or weather the blaster scope black. There's a little too much brass showing. Reference photo Centurion Suggestions: In this section we prepare you for your Centurion application if you choose to apply. If there were any areas of concern they would be discussed here. We only have one area that requires changing. The CRL states the hand guards are to be flexible. You'll need to replace your current plastic hand guards before you apply for Centurion. Reference photo That's it Sha Sha great job. Now its time to get out there and make the empire and our garrison proud. Hope to troop with you some day.1 point
-
Your build thread has been epic, Sha Sha, and your attention to detail had paid off big time! Should be an easy pass, Trooper... then on to Centurion!1 point
-
Anyone need some sterling gripsLOL1 point