Leaderboard


Popular Content
Showing content with the highest reputation on 08/03/2017 in all areas
-
Thank you very much . a great start to my Thursday . No problem on the mods as i will be looking at Centurion now . The Tears are hand painted and this lump was added into my mould like the originals. as you have noted it is a bit big so this is now amended in my new helmet mould . No problem on the side gaps, this armour has had a bit of use so the elastics have stretched. i will get them shortened. I will get the belt trimmed back nice and tight to the ridges. I can confirm that the drop boxes are 15mm. I will get the black screws swapped for flat head. I dont know what my drop boxes are doing there as i always insist people move them to the end . i will get them sorted. thanks for your comments everyone . i will get the adjustments done, get some more photos and then have a go at Centurion . cheers Ross4 points
-
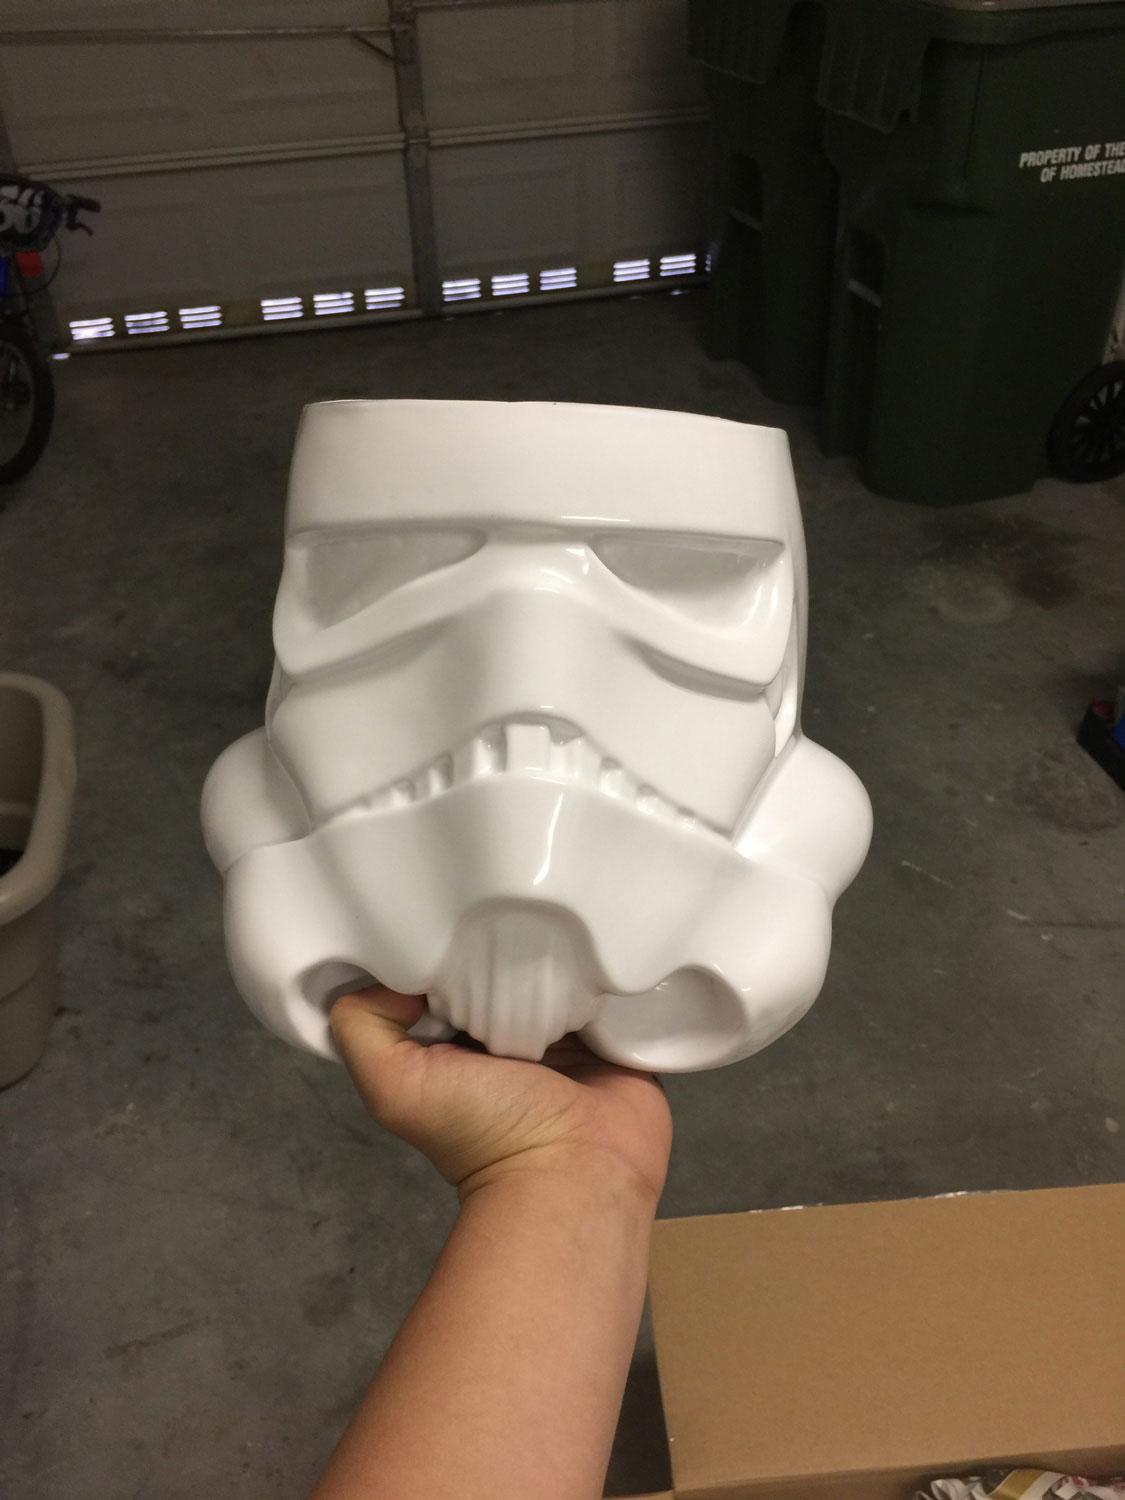
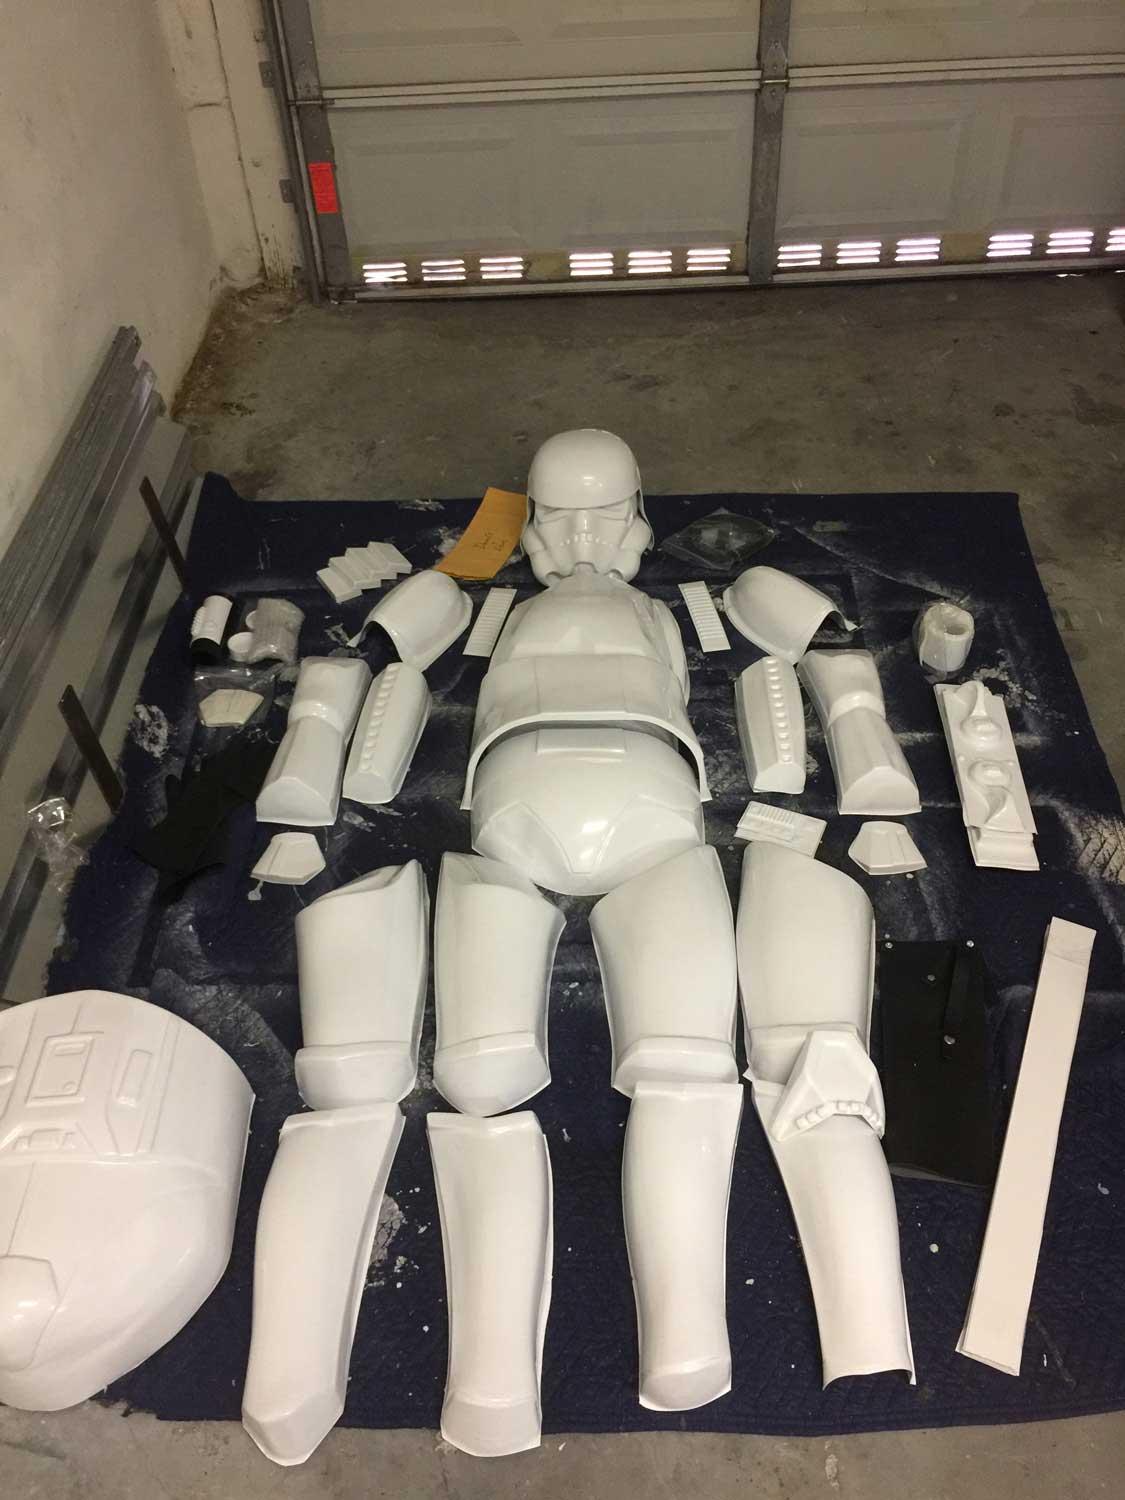
So amped to be posting my very first build thread! Like another builder who recently posted and like many of you, this is a life-long dream of mine. And no disrespect to those who order out-of-box ready armor, but I'm so glad to be building mine (at least my first one!). I want to work hard, get that centurion status and reap the rewards of that hard work like many of those before me. I wanna pay my dues, haha! And very grateful for this forum. It's a massive resource I know wasn't always available. But enough with all that sappy nonsense, let's get to the good stuff! Behold, BBB day... Huge thank you to Mark for the beautiful armor, really stoked with how it looks. Great quality! And great packing skills btw! Haha. Had to get my hands first on the helmet and text all my friends about it, obviously... And here's all the armor laid out in my garage. Mark included in his kit some applicable decals for different parts of the helmet, but I'm thinking of still hand-painting all that stuff the old-school way. Once again, I wanna pay my dues! Lightspeed ahead on the road to trooping!

 1 point
 -
1. I can't upload pictures from anything my iPhone or flicker. 2. I am not receiving any of my email notifications and have it selected to get them Whalen ever a response is left. 3. I want to change my email to my newest one am I able to do this ?1 point
-
thank u for belt shipping was fast 1week to norway1 point
-
We're glad you pushed on also. Always great to see troopers put in the extra effort to make the higher levels of accuracy1 point
-
There is a major change to the model coming, I'll let the anticipation build.1 point
-
Well done, Steve. :-)1 point
-
Hey Steve thank you for your patience and EIB application. Also, thank you for reducing the ab side gaps as suggested. Let's get you approved. CRL and EIB Application Requirements: All the required submission photos have been posted. Great job on your build. Your armor meets all EIB requirements. Andrew and myself would like to welcome you to Expert Infantry Other-Armor Fit/Assembly: In this section we review observations made by your fellow troopers and ourselves. Some observations may lead to suggestions to improve the overall look of your armor. If any suggestion affects any application, it will be listed separately in the above or below sections. We have a few areas to go over here so get to it. Starting at the top and working our way down your helmet has a few areas we'd like to talk about. The black paint outlining the traps and rank stripes could stand to be touched up. The tube strips and Vcoder also need a little TLC to clean up the lines, all illustrated below. Reference photo/s Hovi tips look incorrect. Eiher the Hovis are either incorrect or assembled incorrectly. The screen should be near the tip of the Hovi, your's look recessed quite a bit. We're recommending you repair or replace them. Reference photo Next is the shoulder ball gap. There should be minimal gap between the shoulder bells and chest/back plates. Definitely recommend tightening the top strap. Reference phoito Calf opening. It might be a good idea to reshape the closure area so that the two halves are parallel. The current angle makes it's difficult to close and keep closed. Thank you for providing the cloth belt measurements as requested. Upon further review the ammo belt appears too wide. We're suggesting you remove all but roughly 1/8" of the upper and lower return edge just outside of the ammo boxes. Take a look at the reference photo, there should be minimal material in this area. Reference photo Another minor issue is the TD screws should be flat head type. Though this won't affect any levels of approval we're recommending you replace them with the correct screws when convenient. Reference photo Centurion Suggestions: In this section we prepare you for Centurion. If there were any areas of concern they would be discussed here. The only area of concern is the drop box alignment. The CRL states the drop boxes should be aligned with the outer most edge of the ammo belt. Simply repositioning the drop box connecting strap them gluing it to the cloth belt should keep them in place and aligned. Reference photo That's it, great job. Hope to see you at Centurion.1 point
-
Nice update. I'm also going to make a special deal for those who have ordered a helmet from me before, a discount once these are up for sale.1 point
-
MUCH better! Nicely done, my friend!1 point
-
Wow!! You are truly a blaster genius!! :-)1 point
-
After a LOT more faffing and adjusting, I think I've FINALLY managed to close the gap and get the plates level. Whist I appreciate these pics aren't perfect and may not be suitable (took many attempts as done solo) but I hope they can be used to clarify the issues I've had with the ab/kidney armour gap. I'll be happy to do more suitable pics if required when there's someone else around to help take the photos. Right side Left side. Many thanks for looking and I await any comments and advice.1 point
-
congrats Ross!!!1 point
-
Well done ross! Now I may be wrong, but isn't this the first EIB who cleared in their own armour?1 point
-
Congrats Ross. More RWA in the higher ranks. well done1 point
-
Picked up a storage container for my armor last night. Plan on painting it with a New Order twist.1 point
-
You are off to a great start!! I would say to enjoy the process, but I believe you already are.1 point
-
Thanks. Looks great. I'm sanding now, getting ready for paint.1 point
-
I used 220 grit sandpaper to rough up the bottom of the cover strip and the area on the forearm edge to get a better adhesion. I decided to glue one edge at a time to make sure I got a good, straight fit. Gluing the first cover strip! Use lots of clamps to hold that sucker down! ALSO NOTE: If you are using clamps that have colored plastic, I HIGHLY recommend putting a bit of masking tape over the end to prevent color stain. I have seen in some threads that there can be a reaction between the E6000 and pigment in the clamp that can stain the ABS. I didn't take any chances, and in fact, it helps to have it there as the E6000 doesn't stick to the tape very well and makes it easier to remove the clamp if there's any excess glue. I have been pretty liberal in my use of E6000, too! If you have excess, it peels off pretty easily. Just rub your thumb over it until the heat from the friction peels the glue away. In the tighter places around the edges, I have found that a scrap piece of ABS will scrape the excess E6000 away. DO NOT USE METAL! It will scratch up your ABS! After I had glued down the cover strips, it was time to put the pieces together! I used lots of tape, clamps and N52 rare earth magnets to hold everything in the right place. I used smaller magnets on the inside to prevent the arms from moving apart during the curing process. After 24hrs of curing, I was ready to see how it fit. Yep! I decided to use inside cover strips as well, just to make sure everything will hold even during heavy movement or an accidental whack. I cut the inside strips to about 4/16" of an inch so they would fit in the seam really well. After the inside reinforcement strips had dried, I sanded all the edges to be nice and smooth and sanded the inner strips to be curved to prevent snag on my undersuit. I think it just looks a little more attractive, as well. I may go back at some point later and and a bit of ABS paste to the top there to create a seamless appearance on the forearms.1 point
-
Alright, before I started cutting I read just about every build thread on the forum and watched every Trooperbay YouTube video (found here: https://youtu.be/jmcZ8J_ZECA). I was time to dig in! I decided to start with the forearms, as that seems to be the most popular place to begin. I can see why now, too. Lots of (relatively) straight lines help to get the hang of scoring, snapping and cutting ABS plastic. From what I have found, 15mm or 5/8 or an inch was the standard width for each cover strip. Trooperbay tutorial videos also recommended this width. Given that, I double checked on my own arm that this would not be too small. Luckily for me, I have little chicken wing arms and it was a perfect fit. FUTURE TROOPERS please keep in mind, this may not be the width that works for you, but I wanted to list it here as a reference at least. With that knowledge, I brought out the ruler and measured the cut lines for my forearms. Keep in mind, it's 5/8 of an inch for the entire width of the strip, so that is 5/16 of an inch per side or 7.5mm if you go with metric measurements. I am using the score and snap method for the long straight cuts and trimming with scissors on the areas that require more intricate cuts or are located curves. After trimming the excess ABS off and making my cuts for each edge, I put the arms together with painters tape to verify the fit and find the spots that needed to be trimmed to get each side as straight and close together as possible. I also trimmed the return edge from the wrist and elbow side, the wrist for the Centurion requirement and the elbow side to make it easier to add the elastic between it and the bicep in the future. And make note fellow builders: I'm not sure if this is true for other kits, but the left arm pieces are more curved. It is slight, but you will notice the contour when looking at them from the side. ALSO NOTE: This contour makes the left arm wrist opening tighter. Be conservative when trimming here. I was lucky that my arms are relatively small. Had I trimmed any further, the left wrist would have been too small. From the top view, you can see what I mean on the left arm. I've also been saving all my ABS scraps for paste just in case I get a crack or over cut an area.1 point
-
Hey fellow Trooper! The reason the pictures are not view-able anymore is because the site they were stored on before they were posted here started charging people to use their site. So now the photos can't be seen. I made a tutorial very similar to this one with new photos so people could see the magnet method. Here is a link to it as well as my build thread. https://www.whitearmor.net/forum/topic/42342-howto-using-magnets-suit-up-with-less-hassle/ https://www.whitearmor.net/forum/topic/42293-jaybens-anovos-first-order-painting-and-magnetvelcro-strapping/1 point
-
Looking good. Remember, sniper plate is on your left shin. I'm guessing it is a reflection, but just clearing it up lol1 point
-
Congrats and welcome to the ranks trooper1 point
-
Update 07: - a mannequin to display the armor After a long research, I recently purchased this dummy. It consists of seven pieces and came with additional metal base and a chromed support for the lower leg, but so far I did not use these parts. Plug-and-play all the way. Now here comes the reason for buying exactly this mannequin: Bringing all armor pieces onto the legs, meant these had to get „modified“ heavily. A step by step process began… While permanently cutting and cutting I had asked myself if this would ever work. But when I finally had all armor parts on the mannequin, I was quite happy with the result. Tried to add a blaster, but even the 1.1 kg resin version requires some kind of support in the arms. I am also thinking about using a rubber blaster – just in case the E-11 drops accidentally. Time will tell… Thanks for reading and have a nice weekend1 point
-
Congrats Ross! Welcome to EIB!1 point
-
1 point
-
In the words of C-3PO, "thank the maker". ;-)1 point
-
Well done, Ross1 point
-
Hey Ross thank you for your patience and EIB application. Let's get you approved. CRL and EIB Application Requirements: All the required submission photos have been posted. Beautiful job on your build. Your armor meets all EIB requirements. Andrew and myself would like to welcome you to Expert Infantry Other-Armor Fit/Assembly: In this section we review observations made by your fellow troopers and ourselves. Some observations may lead to suggestions to improve the overall look of your armor. If any suggestion affects any application, it will be listed separately in the above or below sections. We have a couple minor areas to touch on here, starting at the helmet. Though not a huge deal we're suggesting you either release the air bubble under the right tear decal or maybe replace it all together, giving the area a cleaner look. Though not bad keep an eye on the Ab to Kidney gap it should be under 1/2 for EIB and 0 for Centurion. Reference photos Thank you for providing the cloth belt measurements as requested. Upon further review the ammo belt itself appears too wide. We're suggesting you remove all but roughly 1/8" of the upper and lower return edge just outside of the ammo boxes. Take a look at the reference photo, there should be minimal material in this area. Reference photo While in the area we notice the drop boxes look a bit too wide. It may be a photo think but they shouldn't be more than 15mm wide, maybe you can double check this when you get a moment. Another minor issue is the TD screws should be flat head type. Though this won't affect any levels of approval we're recommending you replace them with the correct screws when convenient. Reference photo Centurion Suggestions: In this section we prepare you for Centurion. If there were any areas of concern they would be discussed here. The only area of concern is the drop box alignment. The CRL states: For level three certification (if applicable): Drop boxes are vertically aligned with the end of the ammo belt with minimal gap between belt and box. This is an easy fix, if you glue the drop box straps to the waist cloth belt you shouldn't have any more issues with alignment. Reference photo Welcome again to EIB and fantastic job on your build . Hope to see you at Centurion.1 point
-
Hi Germain! We meet again Indeed I'm not striving for a screen accurate configuration, but it would be ideal to check off as many boxes as I can nevertheless. Thanks for your information. I'm going to scan through my bluray video and see if I can get a better look. I understand there were at least 4 ways the rails were attached, so it's a matter of picking one I guess. It's a shame many build threads here have been ruined because of Photobucket. I tried searching and kept seeing invalid image boxes1 point
-
OK, just a little update. And by little I mean just that. While we can't always get to do some meaningful sized work, it's always good to do something, no matter how trivial! Ab plate buttons done... And, I went ahead and thinned out the rank bar on the ears as recommended earlier (thanks for the catch David!). Hopefully later this week, we get to make some serious progress on the thighs after completing our fittings this past weekend. Once those are done, then the final push starts on the torso pieces, belts and strapping!1 point
-
Thanks for the kind words! I need it lol, seem to run into small problems all the time, but nothing is impossible! Totally uncooperative weather and working shifts make it really difficult to paint outside, I wish I had a garage!! Primed some parts to show all the beautiful pinholes and surface imperfections. This is the part where I go crazy isn't it? I am starting to hate sandpaper. Before priming I wetsanded the parts with 320 grit along with an IPA wipedown. Reason for wetsanding is mainly residue control, makes the sandpaper last way longer and dust doesn't fly everywhere. Filled some parts with Gelcoat Filler The right thigh I got was very thin, and I didn't feel confident it would hold up (this is where the cracks on the thighs were) so I went out and got a repair kit for boats. This kit includes polyester resin, hardener, fibreglass mats, some applicators, and a cup. Cut up the mats to fit the thigh Here it is applied I really gooped it on there, you need to completely soak the mats and the surface below. What I SHOULD have done is lay down a layer of resin on the thigh itself, put mat on, then soak the top, to ensure full coverage. As I put so much on there i'm pretty confident I got it pretty soaked. Cut off the excess with a cutting wheel on my dremel and then sanded all the insides with 60grit then 120grit. And wow did it harden up, feels way more sturdy now! PS: It gets hot when curing, be careful! Sanded the insides of the holster a bit to fit the screws i'm planning to use to secure the weapons to the holster. Made the bicep details and glued them on I've been researching the bicep detail a bit, inspecting the movie and pictures of screen used armor, and reading posts from the wonderful people here at FISD. Using that information (super thank you guys!!) this is what I believe to be the screen used method, not to scale: Do not cut up your biceps and velcro them together as the CRL states them to be seamless (yet to be changed I guess?) Oh and here is an older testfit of the armor when I had done all the strapping. Without gaskets, belt, or knees. Shoulders are sitting a bit low, wonder how i'll fix that. Not too pumped on drilling those support holes that other people do. Next up is a whole lot of priming, filling, sanding, sanding, cursing, priming, sanding, filling, and more cursing.1 point
-
Going to have to agree with the masses. I have used VELCRO on day one since I have been trooping. It has not let me down once.1 point
-
Some also use a short strip of white elastic glued to the inside of the calves that stretches under the boots like a stirrup.1 point
-
Thanks for the advice and encouragement guys! Kind of frustrated with this PhotoBucket fiasco. A lot of great builds/resources are pretty much useless now. Having to find builds with images hosted on other platforms. They are out there though!1 point
-
Got my basic approval. Very happy to have finally made it. Will address a few things I know need attention, then will be submitting for EIB. Not sure I want to hear the official verdict on my build, but it can only help me in the long run. Thanks for all the comments, I'll post a fuller set of pics when I get round to uploading then to the new host.1 point
-
You'll only need a centimeter or so to build the new return. With your height, it shouldn't make that much of a difference. Post some pics with the ab/chest taped to you so we can see how everything is lining up right now.1 point
-
Nice find, definitely is showing the yoke colored black1 point
-
I would reccomend using weather stripping as the neck hole trim to make it more realistic and rubbery You beat me to it! This helmet actually looks similar to mine! I'm glad someone else went the same route with the brow that I did. Still need the eye bump1 point
-
Update #27 - Cables without labels We now come to the last chapter of this build, which covers the electronics. As shown in update #08, I had planned to run the wires like this: Meanwhile I decided to place the speaker inside the end cap, because this is easier with the wiring and will hopefully sound better inside the receiver tube. Also swapped positions of the LEDs (as the lower LED is easier to see in the front muzzle). Placed the circuit board in the middle, because all cables had to meet there. Starting with the LEDs on the front, I wanted to run the wires along the inner barrel. To get it out of the receiver tube, I had to remove the magazine and bullets. After these were out (and broken) it was still not possible to remove the inner barrel, because the curved ends of the T-tracks prevented it from sliding anywhere. That means I had just damaged my magazine for nothing Had to find a way to install the cables while the barrel is inside the receiver… Prior to the permanent installation, it was time for a quick test to ensure everything is working correctly. Used these nice thin wires because black is best to hide in the blaster, but ended up with a lot of “cables without labels”. However, it worked and that really made me happy As a last step, I completed this blaster by (again) adding the rail with scope and counter. Then suddenly it was all done. Here is one last short video that shows how the electronics work. The rotary switch clicks nice and although the light from the red and blue LEDs is hard to see, it is very bright as a matter of fact. So, this is it. We’re done. I would like to end this update with a little addition that has recently been given to me by Stefan (Turrican). A very fine gift which perfectly fits to this Lucky#Eleven. Thank you very much. Enjoy your weekend, Stormtroopers and Cadets Feel free to leave any comments and questions.1 point
-
Update #04 - Dark side of the bolt The idea of a movable bolt causes more problems to take care of... Not sure yet if there will be another update this year, but latest in early January. Thanks for reading and/or following1 point