Leaderboard


Popular Content
Showing content with the highest reputation on 07/27/2019 in all areas
-
Hi folks, Hand painted details now underway. My previous build I used templates for the trap and tear vertical lines - this time, I went totally freehand. Whilst I’ve got a little touching up to do, I’m really pleased with how they came out. Vocoder tweaked a little, too. Thanks Daniel. :-) Please excuse the lighting - it’s not actually yellow in the flesh.2 points
-
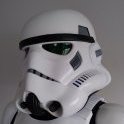
So I'm about to buy my first kit. Problem is I dont know where to start and who to really avoid. I want to start with regular OT TK Armor, my price range is $1,500 to $2,500. So my question for anyone out there is where did you get your armor. Last thing I want to do is get something low quality and have to put more work into it. So if you could drop some links so I can do some research that would help me alot! Thanks!1 point
-
A few years ago, I bought a Sterling SMG Mark IV L2A3 parts kit. My plan was to create molds to reproduce accurate parts to build a few blasters. My efforts were only partially successful. Frustrated, I abandoned the project and set the kit aside. Fast forward, and last year a friend of mine bought a 3D printer. By trade, I am a mechanical designer with access to a very nice piece of modeling software, SolidWorks. I decided the way to move forward on my quest to acquire an extremely accurate E11 blaster would be to develop 3D models by measuring parts from my kit and having my friend print them. I researched information on the accessories that transformed a Sterling into an E11. Lots of good stuff out there. I bought a replica 1943 M38 tank scope and modeled that. Same for t-tracks and power cylinders. The only thing I couldn’t find a satisfactory level of detail on, was the Hengstler counter. In full disclosure, I borrowed one from Thingiverse. I am attaching some pictures of the complete model. I would appreciate any feedback you could offer. TK-14082 Carolina Garrison Sent from my iPhone using Tapatalk1 point
-
Ready to go1 point
-
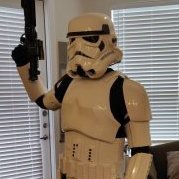
Loyal Citizens, I've recently made the transition from Cadet to Imperial Stormtrooper, I'm pleased to have been accepted and can't wait for my first assignment. My armor was made by RS Prop Masters and I couldn't be happier with the results, I highly recommend them to anyone looking to get a solid foundation armor set and a quality worthy of 501st Legion membership right out of the box. It is my intention to begin work on my armor in preparation for joining the ranks of the Expert Infantry, and eventually, to join the ranks of the Centurions. Thank you to everyone who welcomed me so warmly to the forum and a special thanks to everyone who guided me to RS Prop Masters, I doubt I would have found them at all without this forum. Long live the Emperor, long live the Empire! Best Regards, Cameron
.jpg.bfe68721ba8b02192321b40c24445a98.jpg)
.jpg.f481c5ee6351e8309b8b8cf0272d581f.jpg) 1 point
1 point -
Troop #130 Noblesville - Give Kids the World Fundraiser 7-26-191 point
-
Thanks. All fixed now, pointing in the correct direction, and even less likely to snap off!1 point
-
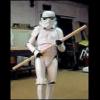
I'm doing this a little backwards, posting a picture after I reported for duty, but I could only post my submission pics so many times ... I'm on the left TK91593 is on the right.1 point
-
Another Hot Toys unboxing, has some nice details and shows the dodgy blaster attachment, I think I prefer the FOTK version1 point
-
I don't know if it's the most efficient/best method, but I've just been using some Wiss snips and a dremel to trim/sand edges. It can take some time with thicker parts, but works.1 point
-
Thanks! Yeah, I'm not sure what was going on with the brow trim in that picture. It's not glued down yet, so I can still play with it. Thighs are a definite must as I go along. Those return edges hurt, man. I'm glad things are coming along, though. Thanks for all the help thus far.1 point
-
This must be so satisfying to build, i know it's been immensely satisfying watching it come together. Almost there Dan, remarkable work.1 point
-
Time flies and i was able to do some work on the blaster build again :-). I wrote that either the speaker or the wires are done.... the speaker was broken. I replaced it with a new one and everything worked flawlessly again. So i was in a very good mood to go on, to get this build done finally! I reassembled it completely again, to do a final function test. My mood was that good that i even did a video of some functions... Right after the succesful testing i personalized the blaster a bit. My TK ID i hammered into the back of the blaster Thanks for watching and commenting! To be continued quite quickly, as i want to have the blaster available at the beginning of August.1 point
-
I meant Novus, stricken the other filthy name from the record books1 point
-
Thought you guys might be interested in my latest interview. Chatting about Star Wars and the Stormtrooper armour. Hope you enjoy it https://youtu.be/NjRzpeb2qn01 point
-
This weekend I took the time to wrangle up Mr. Cricket into his blacks and finally set forth with proper armor fitting. It's one thing to make armor for yourself, it's something entirely different when you're building it for someone else! The right shin really was a PITA, and I ended up having to re-order a new one because I didn't like the slant lines of the first one I had assembled. This delayed things for a few weeks. I ended up tearing out all the magnets and made a new shin, trying to correct that weird angular line in the back. There is still a little slant to the cover strip on the right shin, but it's a little less angular than the first one I'd built. It's the best I can do with the RS shin. This weekend we spent a marathon session of 4 hours to work on tailoring the suit. Lots and lots of "try on- mark trim lines- take off- trim- try on again, etc". I had a goal of getting everything fit and done, but we both ran out of energy for it. For example, once I trimmed the thighs so they were comfortable on him, he would notice another area of the suit that didn't feel right. So I would trim that, then something else would stand out to him as needing adjustment. It went on and on... So we're not done, but very, very close now. Some of the things that immediately jump out at me as needing work: I still need to make some stirrups for his shins, so his shins were kind of doing their own things, but they're not all that bad. Elastics to the belt boxes needs to be relaxed so they don't bind up as much to the belt (this is why they pop out a little against the thighs). I need to hit the bracket screw heads and kidney/ab rivets with some white paint. I think the backs of his thighs still need some more trimming. Everything lines up pretty well along the kidney/ab, but it seems that the elastics I bought from Mr. No Stripes seem to be too long. They really need to be shortened up about 1/8" to tighten up the armor piece connections. I compared his elastics to the ones I've got installed on my Stunt TK, and my Stunt elastics are definitely shorter. Which means that I'll need to remove all the elastics for a quick stitch-fix to reduce the gaps I'm seeing in the back. (I'll take care of this when I've got my sewing machine out to build the stirrups.) Then there's the butt plate. This was really giving me a headache! Simply put, it still needs work; I need to reshape it. The left side is fine for the most part. But the right side- GAH! It's popping out quite a bit on the right side - which tends to be a trait of the RS butt. (Or at least that's what I've noticed on all three RS suits I've built.) Once I reshape it, I'll probably install a few of those snazzy V tabs that were recommended to me by Glen (gmrhodes13). I made some of these for my Hero TK, and they really help to keep that butt in line! Then there are the arms. They're not in the pics, but the forearms and biceps are complete and strapping has been installed. Minor trims still need to be done. I'll probably make some bicep hooks as well because they tend to make the arms look better. I'm waiting to attach the plastic shoulder straps to the chest plate until the white shoulder elastics have been attached to the back plate. The final pieces are the shoulder bells. For me, these are such an important part of the suit to get trimmed correctly! I don't want to fully trim them until I have the rest of the suit dialed in and fully fitted correctly. The bells need to follow the contours of the chest and back plates with minimal black showing, and it's very easy to overtrim the bells if you aren't careful. Once they're trimmed correctly, it's an easy matter of gluing in the bicep elastics and bell-to-shoulder strap connectors. We've got plans for a final big push to finish the suit next week... after I've made all of the adjustments I can make without putting the suit on him of course. My punch list is down to a single page now!1 point
-
Quick preventive note. I noticed this new blaster reuses few parts from the First Order weaponry we already know, some of them I have modeled and shared. So just to be clear I don't want to see any of those parts scavenged on your 3D model. To be more specific, I'm thinking of the Glock frame w/ handgrips, and whole visor section from the SE44C.1 point
-
1 point
-
Rear sight ready. Links in first post.1 point