Leaderboard


Popular Content
Showing content with the highest reputation on 05/03/2021 in all areas
-
Once you put the cover strip on it should keep that from popping out like that. If you want some more assurance that it won't pull apart you can add a second cover strip to the inside from ABS scraps.2 points
-
This Contest is now closed. Thank you so very much to those who have submitted truly incredible designs, this is going to be a tough decision indeed. The staff will shortly have an opportunity to cast a vote in a poll to decide the winning design, and we will bring you that outcome in the next 24 hours. Thanks again.2 points
-
Hola Jesús. Me alegra que te hayas decidido a abrir este hilo. Seguro que vas a recibir un montón de ayuda. Además, ya se que cuentas con la ayuda de los centuriones de la Spanish . Veo que tienes muy claro lo que vas a ir haciendo, así que sigue trabajando así de bien. Creo que colocar el cinto, también te ayudará a cerrar un poco esas uniones laterales y asentar un poco todo. Esto te puede ayudar con el culete... Hello Jesus. I'm glad you decided to open this thread. I am sure you get a lot of help here. In addition, I already know that you have the help of the Spanish Garrison centurions. I see that you are very sure about what you are going to do, so keep working there well. I think putting on the belt will also help you close those side seams a bit.2 points
-
Thanks Charlie! That is an urge I constantly need to resist haha.1 point
-
Having recently done this with the forearms on my TX, I’d advise doing them separately. It’s incredibly fiddly to try to do both at once. Resist the urge to rush! Sent from my iPhone using Tapatalk1 point
-
That's the exact method I do also.1 point
-
Will do! I currently have elastic on the right side and nylon on the left and this week I'll pick up some more nylon webbing to replace the right side elastics and the left syde nylon connectors with shorter versions! Thanks!1 point
-
Thanks for the clarification on the fitting issue! Yeah the belt does help but I will also replace the straps, better to make two adjustments rather than relying on the canvas belt! This is how it looks with the belt "thrown" in place: From the front I'm concerned about the kidney plate sticking out a bit, I've seen people use ABS connections to align both parts properly so perhaps that will help me further on if the new and tightened straps don't solve it. The back looks nice, need some fine tuning on the duct tape and the strapping of the three pieces but I feel I can pull it off easily. The left side looks better, but it will still improve by replacing the straps attatched to the lower split rivets and perhaps the middle one too. This will also help keep the top corner from overlapping the ab plate and, if that isn't enough, use some ABS straps to align both pieces. The right side also looks better, but It will also benefit from installing non-elastic straps and making them really tight.1 point
-
That genius! Definitely going to do that. Thank you Sent from my SM-A715F using Tapatalk1 point
-
This is my TX kit but it’s exactly the same as the TK. If you attach a strip of Velcro vertically on the inside centre of the belt: Then a tab on the small rectangle just below the main ab button panel, just out of shot here: With the strip on the belt running vertically, you can adjust the belt position to the correct placement without having to precisely marry up two tabs of Velcro. Sent from my iPhone using Tapatalk1 point
-
Good luck, hope you have a great outing1 point
-
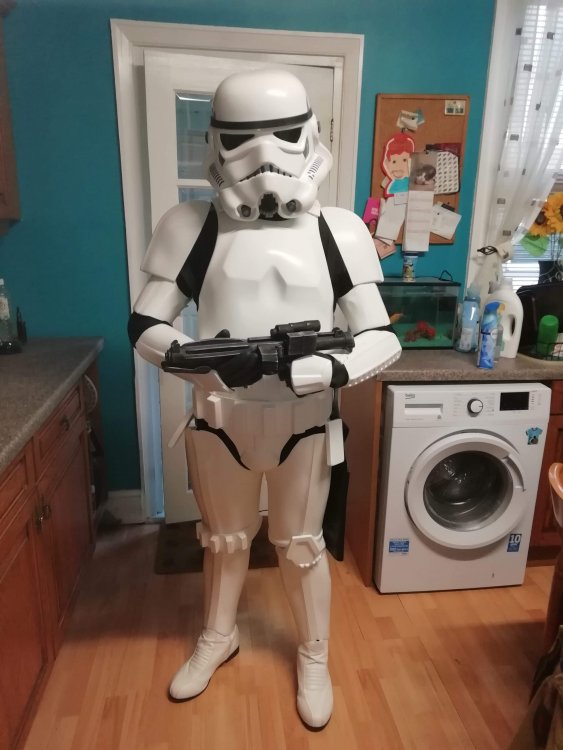
This is the result of a quick test fit.
 1 point
 -
Never seen resin T-tracks before. Surprised to see it was possible to install them. I expected resin to break on such sharp bends. Good job.1 point
-
There’s no one method for trimming return edges that works best. What you’ve done with using a number of different methods is best. For me, I start with the scissors, if I run into areas the scissors can’t reach, don’t try to force them into tight areas - that’s when you get those surface marks - instead, go wider and use the dremel afterwards to work the edge back. Clean everything up with a 120 grit sandpaper, then something a lot finer (400-800) to make the edges super smooth. Don’t worry too much about how the top of the biceps look as they’ll be covered by the shoulder blades. That being said, if you want to even up so both sides match, I usually wait until they’re fully constructed as it’s easier to get an even return edge all round if your sanding it as one piece. Sent from my iPhone using Tapatalk1 point
-
Ok, you can blame @Frank75139 for this... one more entry. This one includes a patch version too. and the patch...1 point
-
Isn't THAT an understatement!?! I see so many of these dug up photos of the screen used stuff and cringe at the thought of posting pics of work like that as my own. The images and the armor shows it age, but so many of us new guys are striving for outright perfection that in comparison to the screen used stuff, ours looks TOO GOOD! Richard, you are doing excellent work that even this OCD new builder appreciates. Keep it up, my friend! I'm also working on an ESB armor set, but from AM, here in the States. Needing badly to start my own build (progress) thread and share some of my photos as well. Enjoy the journey.1 point
-
This may be a little too abstract for most people (I know a lot of people usually want to see pics of helmets, characters, weapons and whatnot), but I liked how it turned out, so I figured I'd at least sub it. The first side takes some elements and colors from the FISD logo(s) as well as the back plate of the TK's. The second side has all the info. All using the colors and typefaces from the OP.1 point
-
I want to know how he removes the TD's from his backpack.1 point
-
You need to swap out those fans mate [emoji6] Sent from my SM-G920F using Tapatalk1 point