Leaderboard


Popular Content
Showing content with the highest reputation on 02/13/2021 in all areas
-
Hi Friends,My name is Mike. I started the journey to join the 501st back in 2015 with help from Big Gulp and Culp. Due to life being... well, life... I was not able to finish my TK kit until today (thanks to Culp and Andrew for helping me through the final touches). I am reintroducing myself to the group so I can begin the application to join DSG.Hope to troop with you all soon!Sincerely,Mike S.2 points
-
I'm really happy for this too, as FISD stuff can be traded here easily and doesn't require a FB membership.2 points
-
Also forgot to mention but whether hand painting or air brushing if you use a coat of white first it will help fill any gaps in the templates so when you paint the blue it shouldn't run into any gaps2 points
-
As a new member (less than a year) This is exciting. I just started collecting coins and I'd love to be able to get a few more.2 points
-
Hello everyone my name is Alejandro Ossa and i´m from the garrison Colombia, i´m a graphic designer and i´m so glad to be a new member of this amazing grup!!!1 point
-
Greetings all, Part of the Dewback Ridge garrison in the Roswell, New Mexico area.. Yes that Roswell! I started with an Inferno Squad but for some reason I just didn't get the right feel. I have already ordered Armor from WTF and will be hitting up a few of you guys that make soft parts to complete the build. Excited for this build and to be part of the community! DJ1 point
-
Can't quite see them in the images above, some screen helmets are quite high up
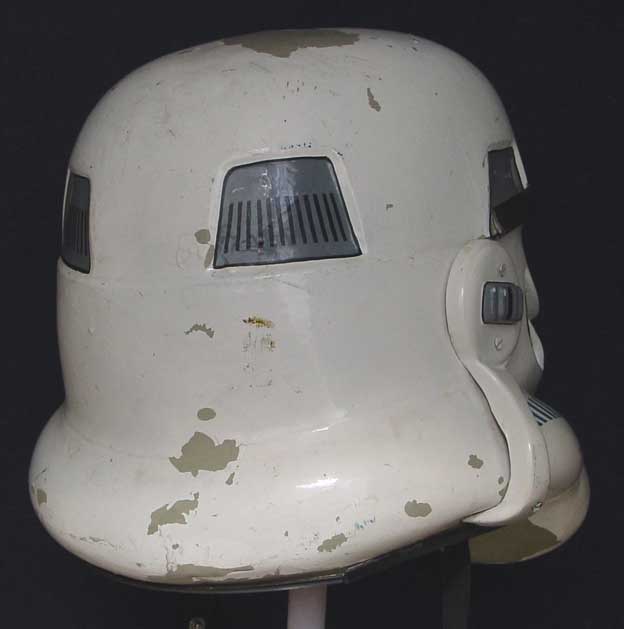
 1 point
 -
Very nice work1 point
-
Actually I didn't realize they opened up to that degree. I'll have to save that baggie of elastics if I change my mind later. I haven't had to climb stairs or matter of factly, even walked in them to any great degree. So that's all ahead of me I hope.1 point
-
Oh I see what you did there. That made me go out and double check my Torso. You have an additional snap on the right side from kidney plate to cod piece, towards the bottom. I only have 1 on the top of the kidney plate. I must have missed that memo. A second would help it look more straight. I've got the same thing going on with my main hinge. It looks a little wonky. But that could be that extra tire I've got carrying around with me.1 point
-
Thanks Dan. Yea that Industrial strength velcro would work nice with say 1 top, 1 mid, 1 bottom. I'll try that first. It's hard to get back off. I imagine especially in a full length strip. I will see how it looks tonight after the glue cures on the right shin cover strip. I've a feeling it's going to be off from the rear thigh center line. Especially towards the bottom where I had to bathe and then correct the upper edge trim. I think it's gonna look as if my center line goes off to the inside. I'd like to get back to you on the belt. I think you have an RS kit too. One problem at a time.1 point
-
Last ditch attempt with imgur and. ......it worked! I don't know why but I've managed to post pictures in the EIB section! Absolutely thrilled that it now works and to be honest, quite surprised! !!!!!1 point
-
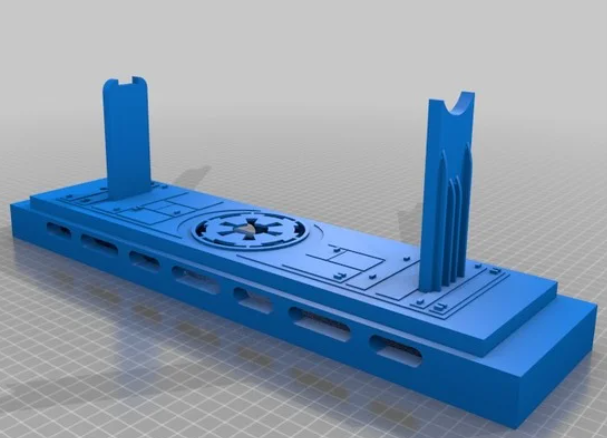
I uploaded my remixed Blaster stand arms to Thingiverse (https://www.thingiverse.com/thing:4760956/files). This allows the stand to be printed at a normal size, but these arms will fit the Sterling SMG kit. The part that goes in the base is the same size. However, since the arms are wider, you need to trim some of the top cover to allow the 'fins' on the arms to sit properly. Hope this helps other troopers.1 point
-
You should be fine. Basically "hand painting" could be re-worded as "no decals". Trooperbay used to sell decals that looked hand-painted which are fine for EI, but not Centurion.1 point
-
It's really a personal preference. I use velcro all the way up, but also don't feel bound to have it close perfectly. In ANH they do not, so I don't sweat it either. Also at my height (6'0 and long legged), I could never get TE-derived shins to fit me so simply got a set from RT and later TM instead. I'm impressed by all the work you are putting in - way beyond the usual.1 point
-
I did a RS commission and I would do it 100x over. They are amazing. I’m not much of a builder and I work long hours, and I enjoy the trooping aspect more anyways. I had my TK in about 6 weeks and the measurements you need to take are super easy to get. Plus the quality of their builds is superb. Sent from my iPhone using Tapatalk1 point
-
Ok.I'm using my mobile and it has stopped working. If Flickr works for Android then I'll give it a go. Thanks again.1 point
-
Hi Rodney, For the Velcro fixings, personally, I don’t find it necessary to have Velcro all the way from top to bottom. One at the top, one in the middle and one at the bottom is enough. I also have an elastic tab with snaps/poppers attached to the rear of the boot (attached to inside of shin) to stop the shins from twisting. However, Velcro has no give. So, I found that when I tried to navigate stairs, for example, the lack of flex at ankle could cause the snap to undo, which was a pain. So, I went for a hybrid method, using Velcro at the top and middle, then Velcro on elastic tabs at the bottom to allow some give. This is a half way house between the Velcro method and the original elastic and bra hooks method. Skip to around 3:00 to see thighs and shins with a visual look at the hybrid method;1 point
-
Your progress is awesome!! all that worry and look at you go. Thigh looks great and calf will work out just fine Rodney.1 point
-
Resizing the whole stand to 113% fits the Sterling SMG kit perfectly.1 point
-
Yes that is it. I had to resize the vertical mounts as the blaster was too big to fit in the top cutouts.1 point
-
Justin, Awesome progress. I am so stealing the adhesive foam idea. Where did you find this stuff?1 point
-
I've seen it on Thingiverse https://www.thingiverse.com/thing:2797990
 1 point
 -
Yes cover strip is glued on the outside of the shins, so it closes outside over inside, you don't see any openings them from the outside. Thighs go on first, then your boots, then your shins. "But anyways My question was did you do a few separate strips or go all the way from top to bottom with a single strip?" Separate strips?, all cover strips are full length, not cut in pieces With Velcro I prefer one piece, only a couple of corners that may pull up over time but with lots of pieces there more areas which may come up while removing, the Velcro is pretty strong. On the rear of the shin the coverstrip finishes below the top ridge section.1 point
-
congrats Trooper1 point
-
That ^^1 point
-
I found I needed to use a little heat to help get the pieces to sit right, I use a heat gun but you need a lot of experience with heating ABS to use one, many have no problems using a hot water bath to help adjust pieces1 point
-
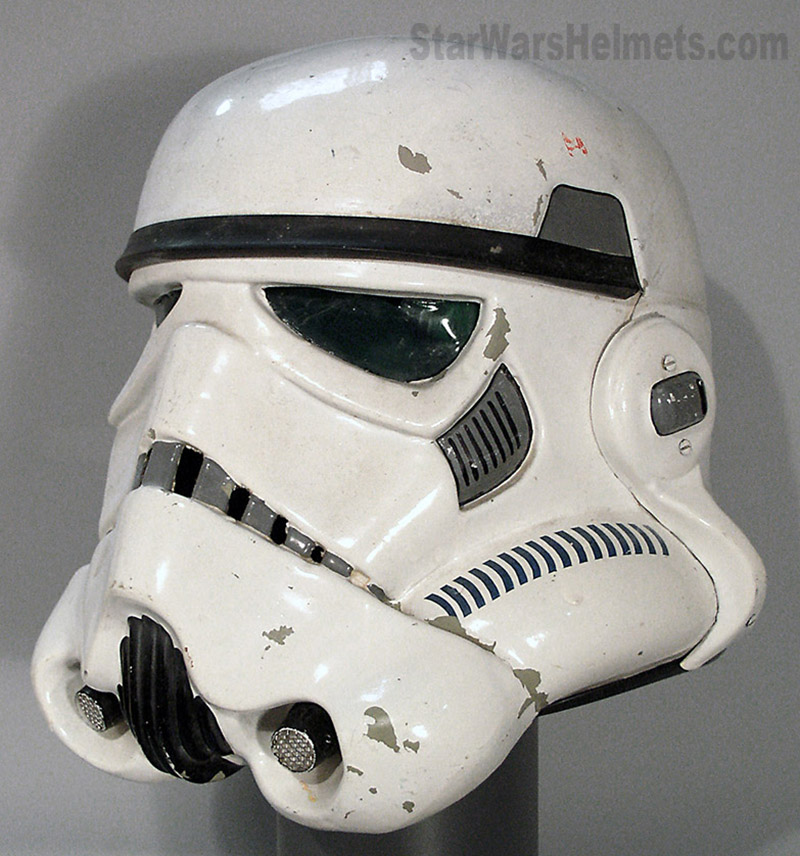
Hello again! It's been a few weeks since my last post. I did have to make the wife happy and get some interior painting done, so that is all behind me now. During that time I actually finished up my 3d printed blaster which I didn't really document. It came out really good, but lots of priming, sanding, painting. I think part of this is my reluctance to start on that other ear LOL. I also started on the TD. Now the clips. I got a set of Ukswraths clips. Now I have the common problem of a 2inch pipe being an ATA kit. I was reading MV's part 2 of his TD build on how to handle the gap (I was hoping part 3 was ready). So what I did was mounted one to a test piece. Then I bent it at the blue arrow using a 1 1/2 piece of pipe. I was much happier with the results. Now it does bring the clip a little too high up in the front. So my thoughts are to trim down the clip as shown below. I think this would be acceptable comparing it to the real example above. And allow for more of a proper placement of the panel. Though I would like to get others thoughts before I proceed.1 point
-
Okay, today we will finally see the color on that last unpainted piece of the helmet. But first to the teeth... Before painting the teeth, I first had to do the lower face. The two-toned paint job on this helmet helps to make it look like the lower section is a removable part that can be changed if damaged. I wanted this to have a metal-like appearance to give the impression of a new unpainted part and that these helmets are being made from Durasteel. A simple silver paint was not sufficient, so I checked my cans of Humbrol Metal Cote but 27001 was too bright and the rest was too dark. More weathering (later) will help to darken the silver. Hard to see on these photos but the brush strokes and the 2 layers of polished Humbrol Metal Cote really worked good. List of modifications so far: 1 - Blast Shield 2 - Black Interior 3 - Two-tone paint job Have a nice weekend Troopers and Cadets1 point
-
As far as I know, it is indeed supposed to angle up as you have it. It looks pretty much perfect to me! (Just don’t forget to paint those rivets white [emoji6]) excellent work mate [emoji1303] Sent from my iPhone using Tapatalk1 point
-
So, similar to how I started the 3D print build, I'm going to continue this one with some boring (totally subjective ) stuff. Hey, some may be incredibly entertained by a dude sewing accessories and that's cool, but in order to get this costume to the level I want it, I'm not leaving any stones unturned. Let me explain why I'm going this route first. Ahh... more solid advise from Justin @TheRascalKing. So, after completing my last build, I realized that I kind of treated strapping as an afterthought. This is a very easy mistake to commit when you're looking at a ton of cool pieces like the helmet, chest, back and abdominal armor. Yes, the strapping is hidden for the most part, but wouldn't you know, strapping is where I experienced all my immediate failures. The bulk of these failures were a result of snaps coming undone, but there were others that really made me look like a sack of doorknobs after about an hour of costuming. This is the first of two (maybe three) strapping updates I'll be posting over the next couple days. Again, I swear the abdominal armor is the base of the costume. What I mean by this statement is: If you jack up the fit of your abdominal section, everything else will inevitably get jacked up as well. For the upper body, the chest and back have to overlap the abdominal correctly, if they don't this will be immediately noticeable, especially on your side connectors. The shoulder bell positioning is relative to the shoulder straps, which are connected to your chest and back; again, if the chest and back are misplaced, so are your shoulders. Bicep armor placement follows shoulder bells and the forearms need to sit correctly with the biceps. With the lower body, the abdominal section determines the placement of your belt, which conversely dictates your cod and posterior instillation, which leads the placement of your thighs, which determines the placement of your shin armor. Some might argue that since the cod piece is separate from the abdominal section that you can make up abdominal misplacement by adjusting where the cod piece hangs. However, the belt is only so tall, so you're limited on covering mistakes. That's a mouthful, but necessary knowledge for someone building this kit. The same can probably be said about OT armor as well. Let's start with a photo of screen used (allegedly) armor, and a second of the Shoretrooper kit which is nearly identical: EDIT-- Credit to Mr. Paul's Shoretrooper build for this picture, I didn't realize it was his awesome kit... I guess it's that good. So a couple interesting things here. First, there's the closure system. I made one of these last time and it was amazing. The stretchy closure allows you to breath freely while wearing the costume and the zipper actually enabled me to put everything on without assistance. Next, the suspenders. I used a cheap set from Amazon last time and they ended up being too stretchy. As I moved around, the abdominal section began to sag, which caused buttons to snap. The system shown here appears to be more "rigid," meaning the straps don't stretch, but are adjustable. Additionally the padding likely covers the fastening system which will save the undersuit from additional wear and add a little bit of comfort during long troops. Finally, the soft belt appears to provide an anchor point for the front hard belt and a place to secure the rear belt section via velcro. Finally, I'm still trying to figure out the posterior armor, but it appears to be hanging from "bungees" attached to the ab section. I asked around in various forums and people have confirmed my suspicions. However, we still lack anything solid regarding the screen used strapping; this seems to be the best reference photo available. Though I'd like to see more before I begin, I'll go off this photo for the time being. Additionally, everything I'm looking at will contribute to solid fastening and be hidden after armor instillation. Also, I threw out this question last night to our Shoretrooper cousins: What is the purpose of the petals around the base of the armor? It can't be simply to hold the belt. If so, why not leave it solid as pictured below. What functional use comes from having the tabs underneath the belt? The reason I ask is because Jimi's team left the outlines of the tabs and if there's a no-kidding benefit to having these, I'm cutting them out. If anyone has any ideas, let me know. So, one of the things I mentioned back in November was this: Since the 3D build, I've lost over 30lbs, and about 8 inches around the waist. When I initially ordered my kit, I was nervous about the ab section fitting, but Jimi assured me that he had added enough room for larger costumers and the kit is pretty flexible. Here's a picture that showing this: So we're good there. But now that means that I have to do some cutting. So I took some measurements and determined where I'll have to make my cuts. I mocked up the abdominal armor and will get to cutting this week. Now, while I don't feel like gaining weight back, I did notice that the CRL talks about the rear opening, but no longer states that it is "approximately 4 inches." I outlined how to craft the closure system in my 3d build, so here's that link: https://www.whitearmor.net/forum/topic/49826-the-bigjasonis-rotk-3d-print-build-thread/page/4/ Also, if anyone wants one of these, pm me for the details. Here's the one I made for this kit: Not pictured is the Velcro I'll use to secure it to the abdominal section. The main difference between this and the old one is the size. I'm going to leave a 3" gap, but also some "fudge factor" on either side for fluctuation. Additionally, during my last build I extended the closure down through the belt area. This time I cut it short at 8 3/4" tall. Also, I got a little crooked on the right side because I tried using a different stitch. My bad, it's still strong. For the rear belt, I started off by taking some measurements on the mock-up and marked everything because I have a bad habit of not writing measurements down. While doing this, I also discovered that the teeth on the front belt don't fit as nice as I'd like them to, but I'll take care of this later. For mocking up the rear belt, it fits fine, but the tabs will either have to be filed down, or moved before painting and I really don't want to move them. I decided to use duck cloth for the rear belt, because it provides a thick canvas that'll do well at holding the belt in place. Steps are as follows: Square off the fabric and take measurements. The final height of the belt should be smaller than the most narrow section of the belt so it's not seen. I aimed for 85mm which is roughly .2" less than the height of the rear belt. Fold canvas and stitch around perimeter of bottom and one side using a 3/8" seam allowance. So, this means the overall height of the canvas before sewing would be approximately 4 1/4 inches. The length is determined based off your measurements. My belt was going to be 25 1/2 inches, so with the the seam allowance it ended up being 26 1/4 inches. After realizing how flimsy the fabric is, grab a piece of fusible interfacing. This is the stuff that's in the collar of button down shirts that makes it significantly stiffer than the rest of the shirt. Iron on the interfacing (preferably before sewing everything) and clip the corners of the belt, but don't cut the threads. This helps in assuring square corners when you turn the fabric. Using a yard stick, turn the fabric and use it to shape the corners square (picture below). Iron flat and sew the other end shut. I forgot to take a picture of this, but basically I tucked the open end inside the belt and sewed two stitches down the side. Grab some 1" webbing and cut off about a 5" section for either side of the belt. Sew them down and admire the cool stitching. This pic shows the squared corners and double stitched line closing the belt. I'll be adding snaps later when I begin fitting the front belt. Open up your brand new box of Strenco hook and loop and realize you ordered 1" instead of the 4" you wanted because you're an idiot. Angrily throw Velcro at the wall, but then immediately scramble to pick it up when you realize you can use this on your forearms and shins later on. Ok, just kidding about that last part, I did mean to order the 4", but this will work great for other stuff. So, I'm at a minor stand still with the canvas belt, but tonight I'll be working on the suspender system which should finish off the abdominal strapping and get me started on the arms. Also, I read through the OT CRLs and my guess is that this same process can be used to create the "soft belt proper." The difference will obviously be the height of 2.75” (70 mm) to 3.25”(83 mm) and I would highly encourage builders to use a stiffer fusible interfacing which can be picked up for cheap at any fabric store. I'll finish this stuff off soon and get to the armor pretty quick. Thanks for viewing.1 point
-
welcome trooper1 point
-
Hi there, Hopefully you don’t mind me jumping in on your thread but I’m only speaking up because I also had trouble with the thighs and shins similar to you. On my build, I actually cut the thighs wrong and had to order a whole new pair [emoji2359] I neglected to make sure that there was an equal distance from the cut at the back to the edge of the knee ridge. Hopefully some pictures will explain. So this was incorrect: You can see where my cuts were and the red line where the cut should’ve been. There was so much of your experience with thighs and shins that were the same as mine, I thought best to make sure you didn’t make the same mistake. Also, making sure you get that cut at the back in the centre of that bottom ridge will help massively with getting the rear cut in line with the front one. I also had the same problem as you when cutting the shins. I found that as much as I tried to get a straight line, clamping straight edges and rulers e.t.c, as soon as I cut - the edges weren’t straight. I thought I was going crazy, I’d always have a kind of bowed effect where there seemed to be loads more excess to trim in the centre. My method was to cut 5-10mm less than I needed to (if your cut line is red, go to green) And then slowly sand from the centre on both sides with lots of stopping to offer the edges up in between. Don’t forget, you have 12mm or so grace so they don’t have to be perfect but this method got me pretty good results. Same with the thighs. Sent from my iPhone using Tapatalk1 point
-
Wow. So it's been a while since I've even thought about updating my build thread. I have a bunch of reasons, but ultimately they're all excuses. Long story short is I haven't really been working on anything significant. In the end however, I have a feeling all this "down time" is going to pay off huge. I have been doing a lot of 3D printing for myself and others, but a lot of the stuff I've been doing kind of revolves around this build. Yes, I'm using Jimi's kit, but does that mean things can't be modified to make the costume more accurate? Of course not; I've seen others do the same. Additionally, a lot of the work I'm now doing involves resin printing and finally learning Fusion 360. Yes, I'm going to start modeling my own stuff. Let's get started. So, while watching season 2 of The Mandalorian, it was quickly apparent that Lucasfilm has gone all in on this costume. So, do we keep ROTK as the name, or is there a point where we just refer to this costume as "Anthology" or my personal favorite, "New Generation Stormtrooper?" Should there be different CRLs? I think I've broached this subject with the Remnant Stormtrooper discussion, but that was an entirely different costume. The Mandalorian has made the ROTK costume a former one-off and has established this as the version going forward... this is the way. However, I still have plans to build an ANH (Stunt)... someday. Here's the thing... many of the costumes seen in The Mandalorian have seen better days. The ones in use today were clearly used in Rogue One. As such, uniform items keep popping up such as this: Now, initially I kind of laughed at the white trap, but it led me on a long trip where I started researching the screen used costumes and really how it's all put together. This led me to the New Generation Stormtrooper Builders group on FB. This is where I started piecing together a plan for my kit. Back to my kit. This is where I started. These were my first attempts at modeling parts with Fusion. Overall, I'm pretty happy with how these turned out. If anyone remembers from my 3D build, painting the black lines around the traps actually destroyed my first helmet. Well, the oil based paint mixed with Rustoleum clear killed it. After I started digging into the "trap pieces," and asking questions on the FB group, Paul Prentice of Mr. Paul's Shoretrooper fame explained to me that the screen used traps consisted of a gray plastic piece secured to a slightly larger black backer. He suggested printing the top parts out in resin and the backers at .5mm. The picture above was not done in resin; this was my trial run. I'll discuss the white stretchy thing later. Setting one on top of the other, I was amazed at how good this looks. I need to adjust the size slightly, and print the final pieces in resin which will smooth things out a bit, but overall, I'm sold. The other thing that's good about actually learning how to model these things is that I can determine the exact size I need to fit in each area. The Jimmiroquai helmet is great, but there's still some asymmetry due to the fiberglass casting process. Regardless, these fit like a glove and look a lot better than the cloth backing I used last time. Essentially, all I did was stick the backer in there (a little crooked) and then place the gray pieces on top. When I do this during the final helmet build, I'll assemble the pieces on my workbench first. Gluing them in place skewed the traps a bit. Now, I do have to say that this is not how the helmet was intended to be finished, but once I actually do this for real, I'm pretty confident that it's going to look awesome. Additionally, as was the case in the picture earlier, these pop off if you want them to. So, if I decide later on that I want the cut look with fabric backer, it's no problem. Also, the tubes and teeth get cut regardless. So back to this piece: A few days ago, Paul Prentice posted this video of his Shoretrooper forearm armor on FB. https://fb.watch/3hH-ZWTuvW/ Video courtesy of Mr Pauls Shoretrooper Build; @totalgrunt; https://www.facebook.com/totalgrunt Mr. Paul claims that what he did is most representative of the screen used armor. I also remember speaking to a few people about the bungee cord used to secure arm pieces on the set of Rogue One. Additionally, I couldn't figure out the proper application of bungee cord as stated in the CRL. So, after that video went up, it sent off a flurry of comments with one asking what the stretchy string was called. Someone answered with Framilon, which got me Googling. Apparently, Framilon is also known as Thermoplastic Polyurethane... my old buddy TPU. So, I got to modeling in Fusion 360 and came up with these: My wife thought I made Legos, which gave me other ideas about snapping the forearms together... but I digress. Here's my simple steps using my 3D print forearm as the Guinea Pig: Forearm pieces, loop blocks, TPU, CA glue, and accelerator. I already had Velcro on one side, but will be replacing everything with the ultra thin stuff @TheRascalKing spoke about in another thread. Glue blocks in. Thread TPU through Tie it off Stretch open. So, this got me wondering if the same application could be used with the shin armor. And that's a big Yup. Also, don't judge, I don't typically walk around in sweat pants and white boots. Also, this was a very quick test, so the leg armor is nowhere close to a finished product. I did discover that the CA glue sticks a lot better to the fiberglass than the 3D plastic, so when I do this "for real" that's a permanent fixture. So that's my first update in quite a while. All I've been doing for the last two months is printing stuff off, "war gaming" this build, and trying to come up with practical solutions that'll be easier, movie accurate, and consistent with the Centurion standards. This weekend I'll tackle the foundation of the costume... the abdominal armor. Thanks for viewing.1 point