Leaderboard


Popular Content
Showing content with the highest reputation on 11/05/2020 in Posts
-
This will be the last post on the New Member forum. My next posts will be in the Build thread. TKSPARTAN, MaskedVengeance, Sly11, justjoseph63, and more.. thank you for your kindness and support to this point. I received the alert from FedEx the BBB will be here today within hours. -CB Sent from my iPhone using Tapatalk3 points
-
So what do you do when you get an armor kit and 2 weeks later Covid lockdown starts? Build the armor! Well I did and received Basic approval. Shortly after with no opportunity to troop and with the push from @justjoseph63 and a few others I was approved for EIB #981. So now I need to get to Centurion. One because I'm attempting to be in the Centurion 500, and two because it's a challenge to perfect the armor to that level. I'm posting here to get help on some of the processes - ABS paste, alignment of certain pieces and just small tweaks. I know this community is a wealth of knowledge so I'm looking for ideas, tips and tricks. So here we go.2 points
-
Thank you all for the warm welcomes and helpful starting info. It’s so awesome to come across such an outstanding community. As soon as I start my journey to piecing together a proper set, I’ll be posting about it! Mahalo2 points
-
Correct on the ‘tweaking’ , there is a bit more work to be done and Dave is taking care of me. Understand the difficulties with commission builds , can’t be easy at all going off pictures and measurements, so my hat is off to him . Wish I had the time to do this myself but since COVID hit I have had zero time to take on a project like this . We’ll get this [emoji106] Sent from my iPhone using Tapatalk2 points
-
I started by following a great tutorial from @kman on ABS Paste : here Paste seemed to come out alright.2 points
-
Started last weekend. Hyperdrive activated!!!2 points
-
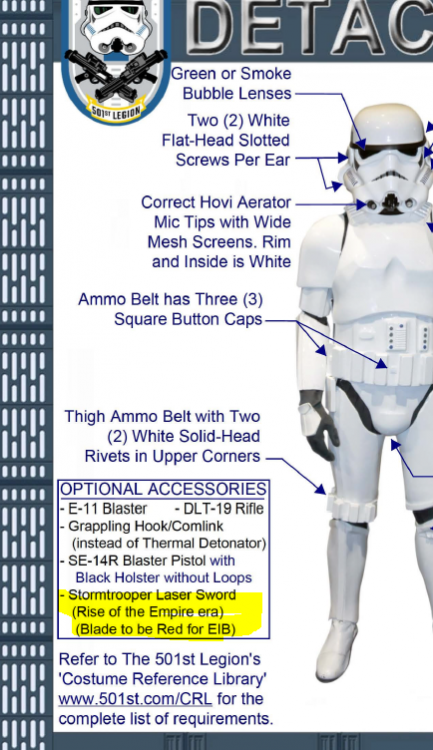
Hi Daniel, and thank you for your application for Expert Infantry CRL and EIB Application Requirements All required photos are now in and, after review, we are pleased to welcome you to EI! On behalf of myself and the entire D.O. staff, congratulations!! Other-Armor Fit/Assembly In this area we review observations made by your fellow troopers and the DO team. Some observations may lead to suggestions to improve the overall look of your armor. Note that we consider both text (CRL) and pictures (screen caps/reference images) when reviewing submissions. First, I have to say SUPER nice job overall on this build, sir... your attention to detail is fantastic! There are a few items in this section that we feel could use some of that TLC that you used on the rest of your armor, so let's get started! 1. The paint on your vocoder looks pretty good, but it should be more symmetrical with more definition on the tops of the raised ridges. Easy fix!! Reference images 2. Just a simple strapping issue here, but it looks like your right bicep is riding a bit higher than the left one, creating different sized gaps. Raising it an inch or so would make a big difference in the overall look and even out the spacing. 3. This one is a little more complicated.. The left thigh is riding up under (and over) the posterior plate (photo 1). BUT, since you do not have the space to lower it (photo 2) I am suggesting that you trim off the top a little to give you a better gap there. They also sit at different heights, so I am also recommending that you trim off some of the top of the rear of the right one and raise it up so that they sit at the same height. The front image (photo 3) shows that you have some room there to raise it and this will give you a more symmetrical look. 1. 2. 3. Reference image 4. At present, your mobility cuts are pretty angled. Not all troopers seen in the film(s) had them, but those that did had more of a rounded finish. An easy fix with a Dremel tool, but be careful not to go below the bottom of the raised ridge. Reference images Centurion Requirements In this section we prepare you for Centurion. More photos may be requested in the future that allow us to make better decisions on possible adjustments. If there are any areas of concern they will be discussed here. Because Centurion photos show much more detail than EIB, items to pertaining to Centurion might be seen there and not here. We try to point out all that we can from what is seen, but the final accuracy is the responsibility of the trooper. Since Centurion is the top tier, we look a lot closer at the small details, Daniel. Starting from the top.. You have a few issues with your Anovos helmet, but none that can't be remedied! The tube stripes are much too far away from the cheek. There should only be a "pencil width" gap between them. If you (hopefully) decide to go for Centurion and can remove the existing stripes, I will send you a set of decals to replace them (no charge, just PM me). Reference images This is an issue I have not seen before on an Anovos helmet: Normally, their ears have the correct screws on the top and center and an incorrect one (round head) on the bottom. However, in your case that is reversed. For level 3, all ear screws must be "...slotted, flat head and countersunk". The bottom ones are fine, but the top 2 on each side will need to be replaced. Reference image Although your ab-button paint is correct in the fact that it stays above the raised area of the actual button, the edges are pretty ragged and need to be rounded out more. Reference images Another easy strapping issue here... as per the CRL, there should be no gap between the ab/kidney connection. Just tighten up your belt a bit and you are golden! Reference images The fitment on the rest of your armor is textbook, but unfortunately the biceps are pretty large and will need to be reduced in circumference. Requirements for all 501st costumes are proportional to the wearer in scale, fit and size. It's just a matter of popping off the rear cover strip, cutting the sides down and re-gluing them. Should take you all of 15-20 minutes + dry time for the E-6000. As Glen mentioned, you have a lot of seepage of E-6000 in a couple of areas. This is the easiest fix EVER! Just CAREFULLY use a razor knife to lightly cut along the edges of the cover strip and then use your thumb to rub off the glue. For Level 3, your hand guards must be of the flexible type. Reference images And last up: As per the CRL, Hasbro blasters (even modified) are not permitted. As I mentioned earlier, you did a wonderful job on this armor, sir. Hopefully you can spare an hour or two to take care of the issues above and we will see your submission for Centurion soon! I have faith in ya', brother, and if we can be of any help, just ask....2 points
-
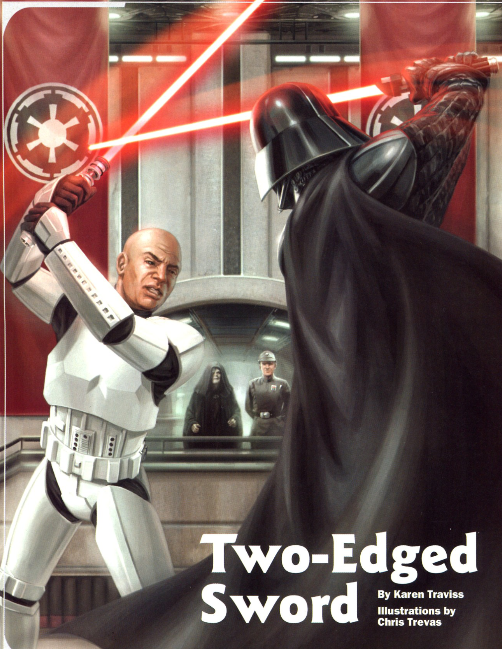
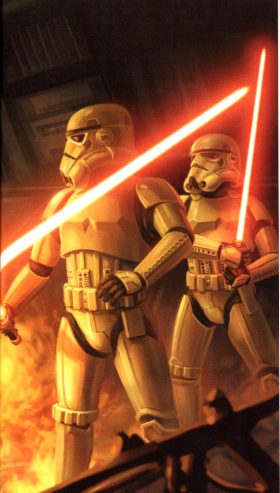
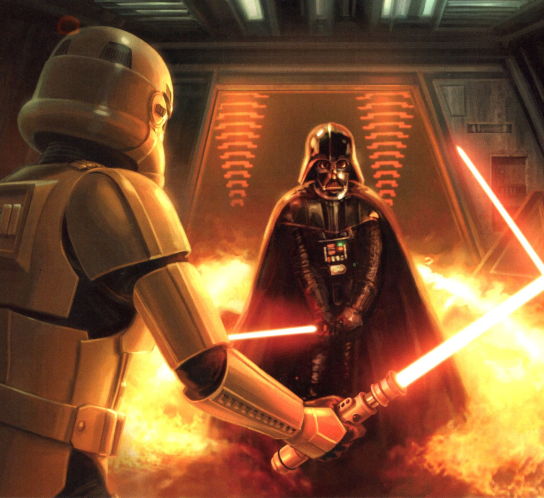
https://images4.wikia.nocookie.net/__cb20071117053960/starwars/images/1/16/CTSaber1.jpg They are seen in: 1.) http://starwars.wikia.com/wiki/A_Two-Edged_Sword Part of Star Wars Insider Issue 85 2.) The paper Back version of Betryal http://starwars.wikia.com/wiki/Betrayal 3.) http://starwars.wikia.com/wiki/In_His_Image Part of http://starwars.wikia.com/wiki/Vader:_The_Ultimate_Guide 4.) http://starwars.wikia.com/wiki/Star_Wars_Battlefront:_Elite_Squadron 5.) http://starwars.wikia.com/wiki/Dark_Empire_II 6.) http://starwars.wikia.com/wiki/Star_Wars:_Jedi_Knight_II:_Jedi_Outcast
 2 points
 -
Also the Starkiller version for TKC Sent from my LGMS631 using Tapatalk2 points
-
my first build1 point
-
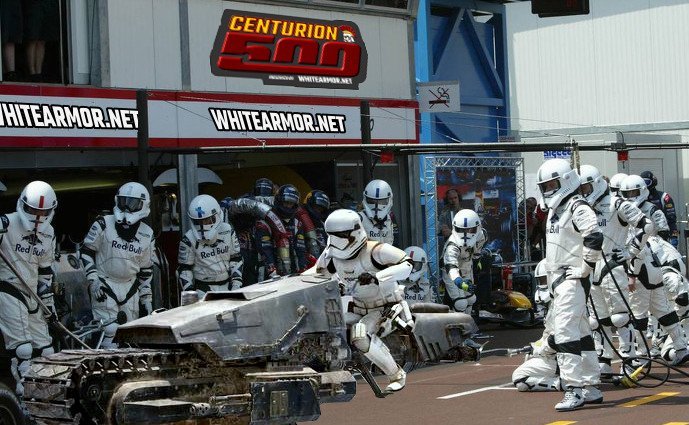
Hot off the heals of our Victory1000 celebrations, FISD are proud to bring you our next target event. We are fast approaching another milestone and another chance to celebrate victory as we hit 500 Centurions approved. This miles stone will also come with another special Centurion only piece of merch for the first 500, in the form of a pin to match the Expert Infantry exclusive. Our very own gmrhodes13 (Glen) has outdone himself yet again and put together the perfect introduction for this milestone event so without further adieu, FISD brings you. THERE ARE ONLY 7 POSITIONS ON THE GRID, SO IT'S TIME TO HIT THE ACCELERATOR, SHIFT INTO HYPER-DRIVE AND HELP US BLAST ACROSS THE LINE! Now that we have reached 1000 Expert Infantry, It's time to once again become part of FISD history and enter the "Centurion 500" We are aiming to have 500 approved Centurions by the end of the year. We only have 7 to go, so in order to reach that goal we are asking that you read over the CRLs for your particular armor, (this thread will help) make any necessary adjustments and post up your submission! Photo Checklists - Link here Apply here Questions: 1. Not sure if I have what it takes to reach Centurion- You don't know until you try, and you have not only the D.O. staff but an entire Detachment to help! 2. I need some repairs/fixes first- This is why we are here! We honestly want you to succeed and are here to help in any way we can. 3. I am happy with the way my armor looks, so why bother?- It not only makes you look more screen accurate, it instills a sense of pride and "esprit de corps"! 4. What if I don't make it? No worries, we will provide detailed suggestions on how to reach your goal! Benefits: 1 Bragging rights for being one of the "Original 500" 2. You get a cool badge under your name here on the FISD (full forum version) 3. Access to Exclusive Centurion500 pin for those in the original 500. 4. Certificate for your accomplishment. 5. You will have a more screen accurate looking set of armor. Now that the entire Staff and those who have reached Levels 2 and 3 are here to help in any way we can, you are more than welcome (and encouraged) to ask any and all questions you may have here on this thread, or contact Joseph, Sha Sha or Mario. Let's get up to speed, push that throttle and prepare for lightspeed, you can do it troopers Your Deployment Officers, Staff and the whole detachment crew are standing by ready to assist If you'd like to show your support on FB here is the link to the Centurion500 profile frame www.facebook.com/profilepicframes/?selected_overlay_id=331320651285964
 1 point
 -
dont remind me allready haha1 point
-
Looking forward to seeing the progress, good luck with those ears1 point
-
Correct, just start a new topic there and you are on your way. Troopers helping troopers1 point
-
You can post all of your questions and build into one build thread, be a little easier to track if it's all in one place, here is the perfect place https://www.whitearmor.net/forum/forum/80-anh-build-threads/1 point
-
after seeing all that im like ohh ill come back to that later.maybe im trying to be perfectt like the link said haha1 point
-
Ears are the worst thing to trim in my opinion, just take your time, take off a little at a time, less is more1 point
-
Thanks Glen. I checked it a couple of times and yeah - kinda like E6000 needs more time that you think to dry. ;-)1 point
-
Caleb, Thank you! I may call on you soon. I've let ABS dry and starting the sanding process. I'm down to 2000. Having issues with color of white paste not matching perfectly. Also the shim pieces not matching exactly after I sanded the "shine" off of them. Funny - all the ABS is from the same kit. I'll post more pics tomorrow and hopefully get some input.1 point
-
thanks alot bud1 point
-
Applied the paste to the parts... lets see how this goes. back of thighs: Kidney shims: - may have applied a bit thick here... but well see1 point
-
Checklist: DONE Upgrades: IN PROGRESS! You got this, Ken! I'm sure you've already seen it, but in case not, the thread below from Ensi will help you get your shine back to the kidney shim seam. I also have a PDF version of it on my Reference thread.1 point
-
Never use a heat gun on ABS plastic unless you have had A LOT of practice, ABS plastic can go from warm to molten mess within a blink of an eye. Here are some great threads on ear fitting:1 point
-
Looking good so far, abs paste does take some time to dry, I leave at least 24hours before trying to sand.1 point
-
Well good news , I was able to get ahold of DDD and after reviewing some of pictures there are some 'tweaks' that need to be made to the arms and legs. I cant speak highly enough of DDD and the customer service he provides with his products , it's a rare thing to find someone like Dave that takes pride in his work and stands by his product. Big shout out to Daves Darkside and the work he does. Will post a few more pics when things get trimmed up.1 point
-
Thanks for your insight, Andrew and Glen! I must admit, I have been a little uncertain about the paint job. The Testors/Model Master 1923 Gunship Gray (Hobby Lobby) came at the suggestion (HERE) of Tony in his ANOVOS build. I hadn't considered the possibility of it being too dark, and instead thought that it wasn't glossy enough. I've only ever seen that specific paint in a flat finish, but perhaps I'm looking in the wrong places, or I ended my search too quickly after thinking I had the correct one. EDIT: Later in my build I discovered that Model Master 1923 Gunship Gray is too dark for the Thermal Detonator, and more appropriate sprays are Testors 1237 Semi-Gloss Primer or Testors 1238 Gloss Gray. As for the possibility that I am simply experiencing a difference in subject lighting, I thought I would show my TD alongside several other grays together in the same shot. The first image below, taken from an earlier post in my build, shows the Model Master 1923 (FS 36118) Gunship Gray enamel paint can, alongside another gray (Testors flat dark aircraft gray) which I believe I purchased for a blaster undercoat for sanding weathering. In my paint test seen in the subsequent photos, I show how my current detonator appears alongside spare bits of ABS brush-painted with Humbrol gloss #5 and Testors 1138 gloss gray, Trooperbay decals (from back before I decided to use paint and stencils instead), and some spare flexible conduit I had around. I believe the flex conduit is roughly the same color as the standard solid straight pipe. It does still appear that my TD is darker than the decals, doesn't it? I wonder what the difference between my paint and Tony's is, other than possible user error. Interestingly, the TB decals are actually the lightest color of the lot, and don't even match the Humbrol and Testors enamel paints. Note that the Testors paint appears a bit lighter than the Humbrol, which I think is attributable to the coat thickness I applied. So I suppose I must come to the conclusion that my TD is too dark. I wonder how difficult it would be to mask the edges―particularly the curved ones―and repaint with a lighter gray... As for the OCD, Glen, I CAN TOTALLY RELATE. The screw holes not perfectly aligning with the ends of the control panel has been bothersome to me as well. When I first started trimming all the TD components I set out to use the largest of the acceptable measurements so that I could later trim them if necessary. I eventually came to realize that, due to the smaller diameter of the PVC pipe, I probably should have shortened the length of the pipe and panel (and possible end caps) to maintain the overall ratio of the larger 68mm screen-used TDs, but alas I came to that conclusion too late, and the panel was already glued. So since I can't narrow the panel any more, I have two options: Narrow the end caps by sanding 1mm off each one, bringing them down to 19mm each, which. This would enable me to spread the clips that much more, and still maintain the 7.5" (190mm) overall width of the TD. Pull out the end caps 1-2mm on each end, which would then put me that same amount over the 7.5" (190mm) width. Since I'm already using the widest (7.5" or 190mm) TD measurement, I'm not sure if it'd be better to shrink the width of the ends caps, or widen the over-all length of the TD. To me, it would seem that pulling out the caps and widening the TD would seem less obvious, to the naked eye, than narrowing the caps. Of course, depending on how much adjustment would be needed to align the screws with the panel edges, I could utilize both options simultaneously. As for the screen references, the social scientist in me wants to say that there's no such thing as too much data, but in this case your argument makes complete sense. It is definitely better to show and follow a generalized standards rather than confuse people with outliers. I'll admit that I got a little obsessed with my TD research and intention to capture and present nearly every single clearly-visible thermal detonator in ANH. At least now we can see all the instances together, and collectively observe what the common features are. *whisper* But on the other hand, @bishopdonmiguel has done a very fine job of modeling a specific infamous TK...1 point
-
Welcome and best wishes to Hawaii!1 point
-
Welcome to FISD Garret, we are here to help. good luck with your project.1 point
-
Hi Garrett and welcome to FISD, you are going to to love this new journey you have embarked on, ask plenty of questions along the way and the answers will flow. Sent from my iPhone using Tapatalk1 point
-
Welcome, Garrett! You've come to the right place for building your own set of shiny white armor! As other troopers have said, checking out the Getting Started section is a wonderful place to begin! There's so much information to comb through that it can be overwhelming sometimes, so just take your time and research research research! Definitely don't let this be a replacement for checking out ALL the resources on FISD (there is much more that I haven't listed), but below is a link to a compilation thread I made which might be helpful to you. Again, welcome to this amazing community! https://www.whitearmor.net/forum/topic/49412-all-in-one-tk-anh-stunt-index-of-resources-by-maskedvengeance/1 point
-
Welcome to the FISD Garrett! There's surprisingly a lot of information about TK's you never knew. Take your time and so some looking. Research is the key. Picking the right suit that fits you and your budget is the goal. Honestly it's not a cheap hobby. But the smile payback is huge. Any questions just ask. We're All here to help. Good Luck Future Trooper!1 point
-
Hi Garrett, welcome to the FISD. May I suggest to start with this this section, which will answer many of your questions. If you tell us about your height and body shape, we can help to find an armor that fits you. And if you tell us where you are located, we can help getting you in contact with some local people. Seeing different armors in real life is an eye-opener. Any questions, just let us know.1 point
-
Hello and welcome aboard, lots of great info in the Getting Started section which should help get you on your way. Good luck and hope to see a build thread from you soon.1 point
-
Awesome David!! Everything looks better now with the applied changes. looking forward for your full body shots when ready.1 point
-
Good evening my fellow costume enthusiasts! For this update let's start with the forearms. As you can see the insides have been reinforced with extra support strips. For the chest plate I've completely scooped out the collar all the way to the very edge. For the back piece I've kept all the return edges with the collar going all the way to the very edge. Notice that I've kept the bottom portion intact to a thickness of 1 centimeter. Thank you Joseph for your insight regarding the matter of the kidney piece riding up the back piece and using this return edge to butt against the kidney piece. Regarding the shoulder bridges I've made the executive decision to cut out any return edge/lip in the front area. I simply prefer this look sitting flush against the chest piece and I know that it's still accurate to the costume. As you can see with only two ridges and the tab of the shoulder bridge overlapping the front piece it still hangs just in front of the chest sculpt. This is where I intend to adhere it, but of course only a test fitting will truly determine that. Depending on how the tabs sit on the back piece we'll see if cutting them out is necessary. Once I get rid of any logos on my spandex undersuit via nail polish remover, I'll resume the process of test fitting. In the meantime, here is where I intend to cut along for the abdomen piece. As far as the top section, I've read where the chosen strapping method will help determine how much return edge should remain. I need to do more research but I am leaning towards the snap method vs. brackets. Either way I'm completely clueless so any advice in determining where to cut along the top of the abdomen would be sincerely appreciated. Lastly, I've marked where I intend to cut along the kidney piece. Similar to the bottom of the back piece I am thinking of leaving a centimeter of return edge to combat riding of the kidney over the back piece. (The photo on the left represents the top portion of the kidney piece.) With everyone's busy schedules and much more important obligations I'd like to express my gratitude in anyone taking the time to inspect my progress and offer your suggestions and advice. I truly appreciate it!1 point
-
Reading the visual guide for EIB and Centurion, I already found the answer. Thanks
 1 point
 -
You may want to try some padding behind your ab as the ab/kidney are overlapping on the sides. When you are skinny a little padding can make a lot of difference
 1 point
 -
Beautiful build brother. Good luck. You got this.1 point
-
Wow, I didn't realize how close this milestone was. Still celebrating the EIB 1,000 goal. I think I can push a few more troopers in my garrison to go the extra mile for this.1 point
-
Thanks Glen! An awesome addition to my profile pic once I achieve the rank! I hope to garner more interest in the 501st and our mission!1 point
-
Rudi, Thanks for the advice. I've actually just started trolling around the other forums, but really haven't been too active other than looking up Mando stuff on the BH Detachment pages. However, I just left my first post on the Pathfinders forum and saw some of your posts there. I haven't looked at the Spec Ops forum yet, but I'll definitely take a look since I've been tossing around the idea of either a Shoretrooper and Deathtrooper for my next build; I didn't realize people were printing TX kits. I'm leaning heavily towards Shoretrooper, but we'll see. Also, I have experience with UV resin, but at a very small scale. I'll dig into that a little. Glen, Thanks again for the input. Opening a case and finding crushed armor would absolutely... crush me. Stupid pun, but it's the only word that fits. Something similar happened to me Christmas 2000. I got a new guitar as a gift out in California and the airline made me check it for my flight to Virginia. As I was sitting on the plane waiting for people to board, I looked out my window just in time to see something that looked like a guitar case fall off the baggage cart. When I picked up my luggage, I opened my case to find the body of my guitar had shattered. It was replaced by the airline, but if the same thing were to happen to armor that I had worked on for three months, I'd be livid. Adding resin to the chest piece is definitely something I'll be doing in the future. One of the guys here in Inferno Squad showed me his pre-beskar Mando chest piece and he had absolutely covered the back side in resin. With my Mando build I'm not too worried about it because the armor Velcros to the flak vest, the TK armor is entirely different. Initially I was only concerned about parts that require a lot of flex, but after wearing the armor for a few hours, I understand the additional stress the parts are under. Also, after looking at @11b30b4 Jeff's Shoretrooper build, I've got some good ideas for my scrap HIPS.1 point
-
Nice work trooper, a couple of suggestions before the DO's get here. Tops of your thighs appear to be hitting your cod. Belt could just come up a bit, should cover the base of the ab plate, just touching last button. Helmet brow trim is a little low for a "Stunt" version Sniper plate is not quite following the angle of the shin behind Corner of the sniper plate should not be rounded, rivet is a little close to the edge I would try to remove a little of the paint from the gums, does appear to be going on to the gums in places/ Also add some white paint to the tips of the hovis Doesn't appear to be much of a gap between the end caps and panel on your TD A nice application, good luck with approval
 1 point
 -
It's hard to tell with some of the shadows on the top two photos in your collage, but the bottom photo indicates that more trimming should occur on all the sides. Here's a photo from the Gallery, as well as the link to the album. Hopefully this is helpful! =)1 point
-
Jeff, you've got another build thread... what are you doing to me?! I was already planning on building a ShoreTrooper, now you've just given me additional fuel for the fire. I'll start digging through this after work. So, initial look at your Shoretrooper build and I notice immediately that you grabbed the Montana Gold Saraha Beige. I picked up some cans of Montana Gold (Chestnut and Shock Brown Dark) for my Mando and this stuff is unbelievable. If I do rattle-can my next build, I'll likely use the Montana Gold Shock White and their high gloss varnish. Also, that's good to know about the automotive paint. I was thinking that with a appropriate use of hardener that the paint wouldn't scratch nearly as bad. Did you use hardener in yours? The team I used to work with used the carbon fiber filament exclusively. The stuff was phenomenal, but the things we were printing were relatively small. I might pick some up and do some prints. It's a little more expensive, but I'm pretty sure I've gotten all my kinks out. Also, I've used MEK products in the past, that's something I didn't even think of. Thanks.1 point
-
Let's goooooo! Attaches are standing by to assist as well!1 point
-
Let’s get Walter armored up! Looking forward to seeing your BB days! Sent via Imperial Tapatalk Comms1 point
-
Update: RSP have the armor complete. Waiting on neck seal and boots to clear customs. Meanwhile.. Walter has arrived. Sent from my iPhone using Tapatalk1 point
-
This is one of my favorites.. Sent from my iPhone using Tapatalk1 point
-
I said it would be converted in a few months. Well, other projects got in the way, and life, too... so it actually took a little over 2 years to complete, but this kit is now officially a Sandtrooper! Time to go find some droids!1 point
-
One thing I would do is ditch the under suit if it is from Anovos as well. There have been more than a few troopers whose armor has been stained black from the color bleeding onto it.1 point