Leaderboard


Popular Content
Showing content with the highest reputation on 10/09/2020 in all areas
-
Cheers, just the ocd kicking it. The top holes are 20mm from the return edge. Sent from my SM-A520F using Tapatalk3 points
-
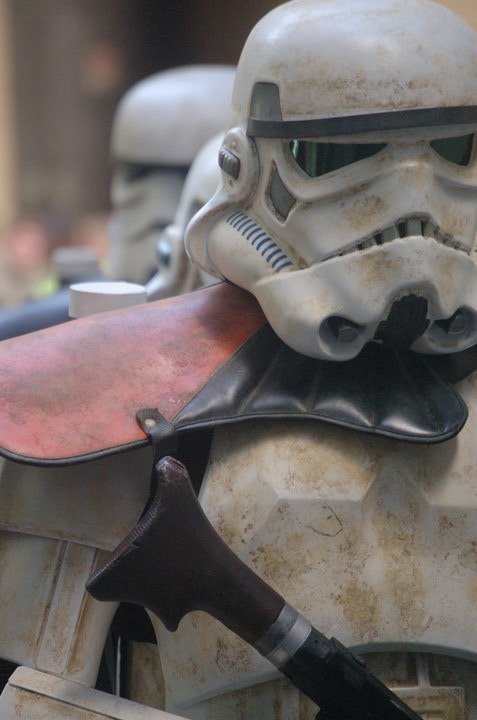
Hi Saw this on pinterest and i just LOVED it, gorgeous picture! Does anyone know where it is from? I thought a still from ANH Moss Eisley scene? Thanks! Neil
 2 points
 -
So... where's the "March to 3000" merch?2 points
-
Hi Mark, A very well thought out build - kudos. :-) Regarding the strain on the shoulder bells - I wouldn’t worry too much. With well fitted parts, there’s not as much stress as you’d think. Especially as your arms are likely to be bent for a large proportion of your time as you’re likely to be holding a blaster. With your arms bent, the weight is reduced from the shoulders. Also, the arm parts are quite light so it’s really not that bad. I had nylon straps joining my chest to back on my old suit and it was fine. For my latest suit, I’m using white elastics like the originals and it’s also holding up perfectly. You’ll see the strapping here: Regarding the bicep to forearm, I like to follow the method used for the original suits - this allows the arms to align naturally, just like the original suits did. I wouldn’t recommend nylon as this will add MORE strain to the arms as nylon has no “give”. With elastic, all of the parts have a little wiggle room. Here a video I did on the subject of arm connections; There’s quite a few other handy TK videos on there so feel free to check them out. :-)2 points
-
So, it has taken a while to get the fit sorted. When I’d made an adjustment at one point, it affected all others, but I think it’s getting there or thereabouts. Any comments before a start fitting the leg armor would be welcome. Sent from my iPhone using Tapatalk2 points
-
Sometimes you just can't put things off anymore, nice work1 point
-
I wasn’t aware, thanks for the heads up. Sent from my iPhone using Tapatalk1 point
-
Awesome. Thank you so much1 point
-
You can also use our gallery section, many miss it due to it's location on mobile/tapatalk, here is the link https://www.whitearmor.net/forum/gallery/ Also for ESB the gallery link is here https://www.whitearmor.net/forum/gallery/category/25-esb-tk-reference/1 point
-
Perfect! I will get started then. Thank you for the quick reply Sent from my iPhone using Tapatalk1 point
-
Build - purchase and assembly of armor/helmet You certainly can start a build just with purchased items, many do. You are in the ESB build thread area now so as long as you are building a ESB version you can post your build here.1 point
-
Affordable Trooper Armor1 point
-
Thank you Mario, appreciate it very much brother.1 point
-
Wow what an honor again. Thank you so so much for everything, especially the notes. Noted and all of the changes will be made before my submissions. Everything looks super simple and straight forward and thank you and the entire DO team for review and kindness as always. Also, appreciate all of you taking the time to make the notes and suggestions. Appreciate it beyond words. Thank you so much and thank you for this acceptance.1 point
-
Congratulations Trooper!!!1 point
-
Haha all DO reviews get posted in the staff area so that we can sign off on them before posting. I accidentally posted my draft review here instead of the staff area. It was very briefly but I didn't want you or anyone else to get confused if they saw it and then it disappeared.1 point
-
Hi Ardeshir, Thanks for your application and for the quick fix with the frown paint. CRL and EIB Application Requirements All required photos are now in and, after review, we are pleased to award you another Expert Infantry! On behalf of the DO team and myself, many congratulations! Other-Armor Fit/Assembly In this area we review observations made by your fellow troopers and the DO team. Some observations may lead to suggestions to improve the overall look of your armor. Note that we consider both text (CRL) and pictures (screen caps/reference images) when reviewing submissions Starting with the helmet, Anovos helmets tend to paint the vocoders a little soft compared to screen-used helmets, so if you like you could spend a few minutes sharpening up the shape. Reference Images: Next, we do want the belt to be at the button of the ab buttons, but be careful that your belt is not *too* high. Ideally it is touching or just barely covering the bottom of the ab buttons. Next, it's worth pointing out that ideally the thermal detonator screws would be closer to the end of the clips, and the ends of the clips themselves could be more squared-off. Reference Image: Finally, I noticed that the ends of your ABS belt tend to stick out a bit. It would give you a cleaner look if it wrapped around your body a bit more. This could be accomplished with a hot water bath. Reference Images: Centurion Requirements In this section we prepare you for Centurion. More photos may be requested in the future that allow us to make better decisions on possible adjustments. If there are any areas of concern they will be discussed here. Because Centurion photos show much more detail than EIB, items to pertaining to Centurion might be seen there and not here. We try to point out all that we can from what is seen, but the final accuracy is the responsibility of the trooper. I'm nearly certain this is a dressing issue or maybe even a photo angle issue, but your left dropbox seems to be not quite aligned with the ends of your belt. So for your Centurion application, be sure to double check the positioning when taking your photos. Reference Image: And that's it! Congratulations on your _fourth_ EIB award, and just one small correction and we'll see you at Centurion soon.1 point
-
[mention]gmrhodes13 [/mention] thanks for the response! I am waiting on a response from Rob from RSpropmasters first before i make any more changes [emoji4] The movement is ok for me... Verzonden vanaf mijn iPhone met Tapatalk1 point
-
Oh thank you Firedog!1 point
-
You are a machine mate, I expect this will be finished very shortly.1 point
-
Brilliant, thanks! Sent from my Imperial Communicator1 point
-
Happy to help. :-) Here’s a little more on the bicep / forearm attachment. https://www.whitearmor.net/forum/topic/49857-anh-esb-accurate-bicep-and-forearm-alignment-and-a-look-at-shoulder-bells/1 point
-
Hey trooper, I wouldn’t worry to much about that lower one as the belt will be covering it. The top ones might be a tad low compared with the originals, however, I can’t imagine it’ll be a game changer. [emoji1303]1 point
-
Wow Dan, it's really coming together now. Nice progress.1 point
-
https://www.whitearmor.net/forum/topic/4813-request-for-screen-grabs-n-visual-refs/, restored by gmrhodes13 https://www.whitearmor.net/forum/topic/2974-proposed-crl-for-felucian-stormtrooper-officer-obsolete/, restored by gmrhodes13 https://www.whitearmor.net/forum/topic/7202-mr-ce-sc-mod-battle-damaged/, restored by gmrhodes13 https://www.whitearmor.net/forum/topic/7328-tk-commander-mexican-garrison/, restored by gmrhodes13 https://www.whitearmor.net/forum/topic/9274-amptrooper-tk-commander/, restored by gmrhodes13 https://www.whitearmor.net/forum/topic/14403-new-guy-here-and-future-tkc-hopefully/, restored by gmrhodes13 https://www.whitearmor.net/forum/topic/15431-tkc-belt-rivet-question/, restored by gmrhodes13 https://www.whitearmor.net/forum/topic/14411-what-color-grey-for-drop-boxes/, restored by gmrhodes13 https://www.whitearmor.net/forum/topic/11920-zmans-commander-conversion/, restored by gmrhodes13 https://www.whitearmor.net/forum/topic/16314-belt-corners-and-handplates/, restored by gmrhodes13 https://www.whitearmor.net/forum/topic/17966-correct-helmet-pattern/, restored by gmrhodes13 https://www.whitearmor.net/forum/topic/17993-tkc-holster/, restored by gmrhodes13 https://www.whitearmor.net/forum/topic/17992-cross-into-the-blue/, restored by gmrhodes13 https://www.whitearmor.net/forum/topic/18005-side-rivets/, restored by gmrhodes13 https://www.whitearmor.net/forum/topic/18955-spring-is-here-and-tk-3967-ready-for-patrol/?do=edit, restored by gmrhodes13 https://www.whitearmor.net/forum/topic/26676-tkc-helmet/, restored by gmrhodes13 https://www.whitearmor.net/forum/topic/7136-draft-crl-for-the-tk-commander-501st-base-stds, restored by gmrhodes13 https://www.whitearmor.net/forum/topic/13483-seantroopers-tk-commander/, restored by gmrhodes131 point
-
I test fitted the lower parts of my armor today! This was a first with the cod/butt and they felt great! I think the thighs might still be too tall I have the shins as low as they'll go on my boots. For the most part, walking seems good, but bending my knees to 90* bumps the greaves into the thighs. Bending my hips also pushes the thighs up into the cod. The width of the thighs might work out, but if I decide to cut down the height, then I'll probably cut off the cover strips and fix the width. Also, the spot I adhered the thigh snaps are too far back, so I'll move, or add new, snaps about where the tape is.1 point
-
cool !!1 point
-
yeah that fit is looking nice man loving this!1 point
-
Nice work so far1 point
-
Attaching drop boxes: Using 2” wide black nylon webbing, we removed the outermost square boxes from the belt. We cut two 7” black nylon straps then punched holes in the webbing with a hot soldering iron to allow the bolts to pass through the webbing. The drop boxes were originally just over ½” deep. One of the issues I have experienced with my drop boxes on my Jim kit is that they rub on the top of the thigh armor and wear away the paint. I later backed the drop boxes with white craft foam. Knowing this, we got some ¼” thick white craft foam and cut 4 rectangles to fit inside the drop boxes. Next, we cut the drop boxes down to be a little over ¼” deep allowing the second foam rectangle to protrude from the back of the box by about 1/16” once glued in. So, we glued the first foam rectangles inside the drop boxes using hot glue then aligned the 2” black webbing and glued it to the back of the foam. Next, we glued the second foam rectangle on top of the black webbing (sandwiching the black nylon). Lastly, we mounted the webbing and top box back on the belt. There is a ¾” gap between the top box and the drop box. Forming the back belt: We formed the front belt using the same manner. First, we measured and cut a flat piece of .125 thick HIPS (Black) to 3 7/8” x 23”. Next, using gloves, heat gun, and a metal cylinder surface, we shaped the back belt. In this pic we are using a roll of metal wire mesh as the forming cylinder. Once we hade the overall shape, we used a large metal pot as the forming cylinder to finalize the shape. Lastly, once we measured the center of the belt, we mounted the Thermal Detonator. We are still working out how the back belt will mount to the front belt and torso. Most likely it will be a combination of Velcro and snaps. Kyle continued sanding the helmet and is almost at the point to assemble and fill the seams.1 point
-
Have started the fun job of pulling the biceps and forearms apart to re-trim. Have taken about 30mm off the biceps, more snug fit now, be ok as long as I keep arms straight. Sent from my SM-A520F using Tapatalk1 point
-
You may be able to bring the AB/Cod section up a little to give you some more room at the top of the thighs. On the rear it looks like the thighs are at different heights which you may be able to adjust. With your height and the size of the armor you are just on the limits of minimum size so tweaking the strapping will take some time to get everything sitting just right. You may even need to trim a little off the top of the thighs to give you more room, BUT I would definitely try to adjust your AB first. How is your movement walking?1 point
-
Me too... Submitted pics today1 point
-
Heyhey and welcome! I definitely would not say definitively that "RS is the way to go" - they're one of several excellent options, but far from the end of the discussion, especially if you live outside of the UK and plan to troop frequently in your suit. You're definitely paying extra for the name, "lineage", and shipping. As to the ABS vs PVS debate, ABS armor is more accurate to the films and by far the most popular material currently, though it can yellow from UV unlike PVC. If you go RS, there are several threads floating around with info on what changes will be required before approval and higher level submission. ANH-Stunt is also by far the most popular TK variant, but there is something to be said for ESB (mine is growing on me and it's the 40th Anniversary!). You'll need all of your soft goods most likely, so have a look around at the vetted vendors and we can always make suggestions as well. I prefer to get my boots from Imperial Boots, holster and neckseal from Darman's Props, canvas belt from Imperial Issue, and I wear a Nike Pro compression suit with thin running gloves for trooping. They make a resin blaster, but I love my rubber blaster for trooping - check out Praetorian and Hellhounds if interested. Hope that info helps!1 point
-
Hi Olof welcome to FISD. Glad to read you're on the way of becoming an Imperial Stormtrooper. You may want to check the following forum sections that can be usefull. Types of armor Differences between Ep 4,5 ,6 Armor cheers.1 point
-
Greetings everyone! It has been a very longtime goal of mine to be able to join the 501st. The reality has finally come full circle and I am at the cusp of attaining my set and applying for membership. I will be ordering a Full Commission build from Daves Darkside Depot. After treating and transporting numerous COVID-19 patients over the last 8 weeks (I'm a flight paramedic), I have decided that I need something to keep me sane. I am extremely interested in the charity work that the 501st offers and will thoroughly enjoy being apart of that (as long as I am accepted). I really look forward to meeting you all in the coming days/months! You guys and gals are amazing.1 point
-
I've been glueing snap plates to the chest plate and back plate over the last few days. I think they've turned out ok, but the test will come with fitting.1 point
-
The weather has taken a turn so I'm adding an extra day to glue curing times on the inner strips to ensure a strong bond before glueing the cover strips, which all gives me time to sew! I've opted for elastic shin enclosures. I managed to find a heavy duty hook, which I've poked through the elastic and sewn on, then doubled that back and sewn over again - I heart redundancy. At this point I'm still debating how to glue these elastics inside the shins. Perhaps an ABS anchor that a lip of elastic wraps around, then glue the whole thing down...? Not sure. This all took about eight episodes of The Venture Bros yesterday.1 point
-
NEVER USE A HEAT GUN!!!! As soon as you overheat the ABS it will instantly warp beyon repair, a customer screwed his whole helmet using a heat gun to reshape the ears while on helmet it was a costly mistake he had to buy a completely new helmet It will be pretty darn expensive to ship a new AB plate to AUS1 point
-
NEVER USE A HEAT GUN!!!! As soon as you overheat the ABS it will instantly warp beyon repair, a customer screwed his whole helmet he tried to reshape the ears while on helmet, he had to buy complete new helmet1 point
-
I made a bucket! I'm pretty chuffed with the result. I've embraced the idea that screen used armour was less than perfect and love the flaws I can see. I still need to tidy up a few rough tube stripes, but over all, STOKED. Of course, if there is anything glaringly obvious I have screwed up, all feedback welcome. Gonna move onto electronics now and see if I can fit those PLUS my head inside the thing. (The left ear appears to have swung a little backwards at the bottom. Don't know what that's about, but I may have to adjust it later down the line. The right one, though, *Italian kissy fingers*)1 point
-
Only initial ideas so far but here are some thoughts. Ideal numbers: 2 experts (one must be staff to chair the chat, can both be staff) Number of New members with questions in the live chat: (4 -6) min/max too many or to few and it gets to difficult or isn't worth the time and effort. Time Frame: based on platform used 45 minutes - 1 hour. Questions: must have your top need to know questions submitted 3 days before the event. limit of 2 questions submitted by each participant. Conversation would drive the rest of the Q and A Time zones: this is the toughest of all and would require the most planning based on country the new members were in and the staff/experts.1 point
-
I think this is a collateral damage due to the covid thing. Many of us are dealing with just the same : more TV, food, less activity. There's no way back Trooper keep it up1 point
-
I really appreciate the support, but I don't have a choice lol. I already put the down payment on Jim's armor... And if I don't finish this, then my wife can say "I told you not to buy it"! Can't let that happen haha!1 point