Leaderboard


Popular Content
Showing content with the highest reputation on 08/27/2020 in Posts
-
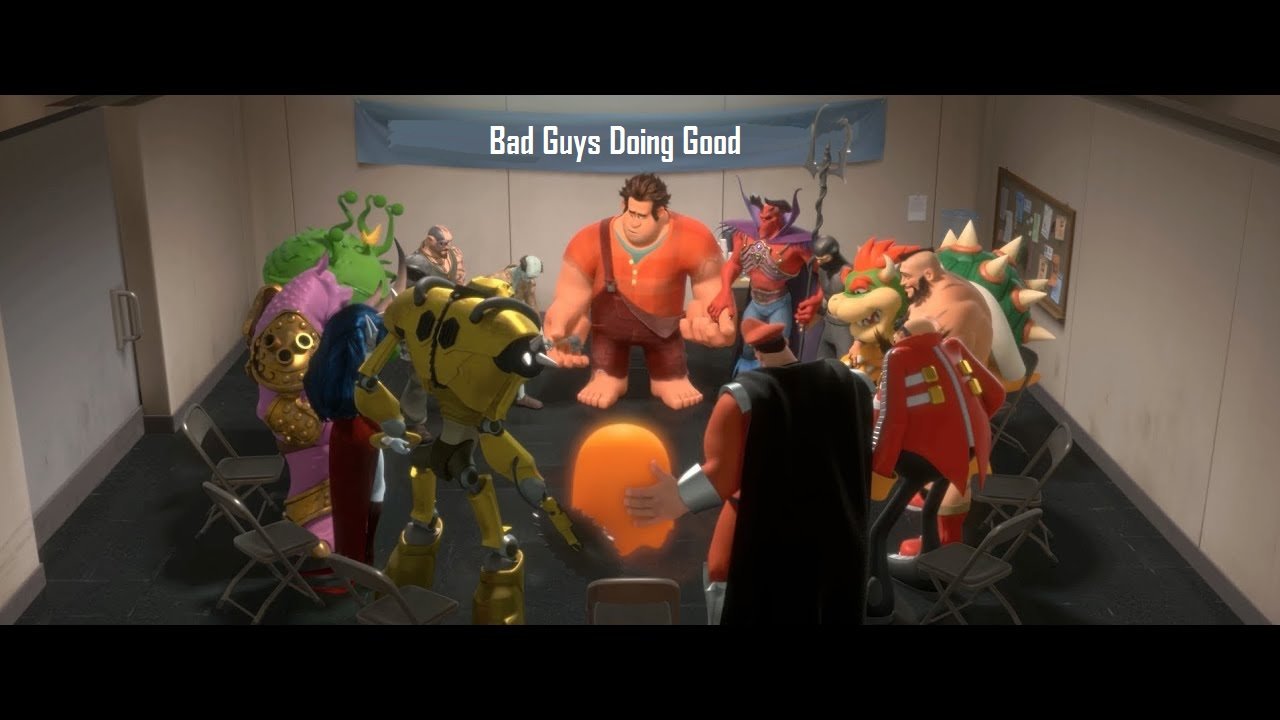
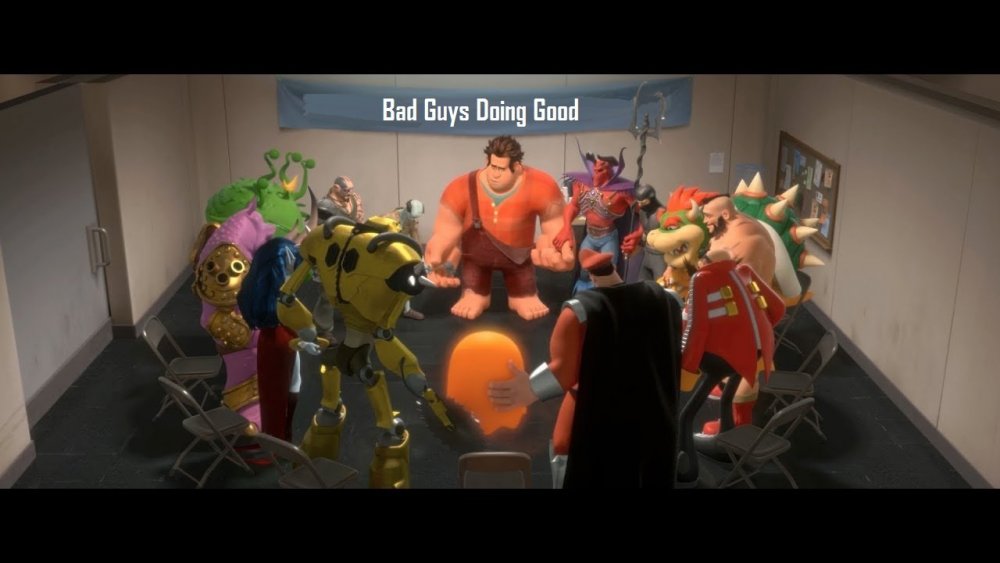
Hi all, My support group recommended this forum to help me out and I must say the advice I've been getting here has been tremendous. Having a hobby is so important and being surrounded by people who truly believe that being a bad guy doesn't necessarily mean that you're a "bad guy" is a feeling that is just second to none. I'd like to add a photo of my old support group to remember the origin of my journey here. Just wanted to says thanks again troopers!
 3 points
 -
So, I haven't updated this in a while, because I wasn't feeling like much was getting done. However, after looking at my MCT (Medium Clear Tub) I realized that there wasn't much left in there. It's not that progress hasn't been made, it's just that it's been slow. Additionally, the biggest issue with 3d printed helmets and armor is the sanding. Sand, sand, sand, sand, sand, sand, sand, sand, sand, sand, sand, sand, sand, sand, sand, sand, sand, sand, sand, sand, sand, and one more sand. While I don't have a lot of white parts sitting on my finished table, my workbench is absolutely covered in primed parts that have gone through two rounds of sanding and are waiting for their final inspection before paint. Also, I ran into a few issues I wanted to get feedback on, because I'm sure they're problems the community has encountered several times. First, since I didn't get to feel the excitement of receiving a BBB, I created the aforementioned MCT. Really, the only things I have left to prep are the legs and belt. I may have to get creative with the lower legs because after 30 years of running and cycling, my calves are kind of "bulky." I can make the armor fit (as in the second picture), but I can tell that I'll be stressing out the Velcro every time I move. Here's my first question, what is typically done in these situations? I'm sure I can shim it fairly easily, but I don't want to screw up the aesthetics of the armor. Please don't mind the Birkenstocks, that's my telework attire. Also, after seeing this, I'm glad I'm going to be tearing up the carpet in a few weeks. Back to the build: Here's some pics of all my armor greeblies and a few other items for the blaster. However, I'm not really liking how the E-11 is turning out, so I may abandon that effort in favor of a built model. I really like the idea of getting a full metal blaster, but stock seems pretty low everywhere I look. After a full career in the Marine Corps, I'm really not concerned with the weight of an all metal blaster while trooping. Any suggestions are welcome. If you look closely at this pic, you can see some print errors. For anyone else who attempts this, fix your print settings before doing intricate work. I forgot to slow down the print, so I left this stuff jamming at 180mm/sec. For greeblies, one should really slow it back down to 60 or below and decrease the layer height to .1. Also, if you look at the ab greeblies, they all separated from the build surface. I've since started using helper discs as seen below. Filament sticks best to itself, so if you help your prints out a little bit by providing a surface for it to stick to, warping in minimized. Also, since the helper discs are relatively thin, the heat from the bed seems to really keep them warm and stuck to the surface. The file for helper discs can be found here: https://www.thingiverse.com/thing:217725 Additionally, Uncle Jessy does a much better job at explaining this in his video which can be found here https://youtu.be/EIXvhJKRTU0 I have absolutely abandoned the idea of using rafts and do not advise anyone to try them. As I stated, filament sticks best to itself. Removing items from rafts is harder than needed, and typically destroys the first layer of the print. The helper discs do the same thing as a raft, but are incredibly easy to trim off. My bed was a little out of level in this pic. That's why there's so much space between lines in the first layer. Typically if you see this, you can easily raise the bed a tiny bit. This pic shows me that the bed is a little low on the front left leveling screw, and very low on the right. My printer is supposed to have an auto-leveling feature, but I never updated the firmware. Also, even the auto-level feature requires you to perform the paper shim test, so I stick with leveling tests available on thingiverse https://www.thingiverse.com/thing:2187071 and I always keep my eye on the prints during the first few layers. After I pulled the greeblies off the plate and gave them a quick inspection, I realized they weren't too bad. All the errors appeared to be superficial and could be cleaned up with putty and filler primer. While I appreciate the print volume of the CR-10s, I've determined that I really want a CR-10s Max. With a 500x500x500 print volume, a person can scale and slice their armor and then print the entire section in one piece. Typically, I'll try to hide seam lines in inconspicuous locations (such as behind an ammo box on the belt), but for large pieces such as the chest and back, these larger seams cannot be avoided. Fortunately, bondo works great, as does the Alex Flex caulk I mentioned in an earlier post. On this piece, I had fairly good results without the caulk. After I finished off my second tube of glazing and spot putty, I found a Galactic Armory video in which he mentions using Bondo Resin instead of the putty. The resin goes a lot further and does a great job at reinforcing the armor. I think the draw back of resin is that it's a little harder to sand than spot putty. I'll probably go that route with my Clone Armor. This is a small trial. If you look just above the top left portion of the middle blob, you can see a small crack in the paint. Similar to the chest armor, these were some of those cracks that just wouldn't go away with primer and sanding. As a test, I used wood filler to see how it would work, and the results were pretty good. I've seen people do this in 3d print tutorials, but I've been somewhat leery. However, after trying it out, I'm happy. I will keep my eyes on these spots in the future, just to monitor how it holds up. After I affixed the greeblies, I was very happy with the results. The 3d printed parts add a lot of detail and realism to the part. I'm almost fearful that it looks too detailed, but I'll defer to the the CRL for that decision. Also, the last few pics are a little misleading, the appropriate curves are present at the bottom of the armor and at the arm holes. I mentioned earlier that I didn't change the print settings for the greeblies which resulted in less-than-optimal print quality. But, as I suspected, the putty and primer did a good job at sealing up the gaps. I really laid the primer on heavy here. This was due to me accidentaly dropping the piece after I laid down the first layer. I caught it, but left an awesome thumb streak going across half the piece. I wiped it down and then re-primed. All it meant was even more sanding. As has become standard, I painted the back piece gold and let the particles do their magic, unfortunately, I got a little sloppy (which seems to be the norm with this piece) and created a few streaks in the paint. Additionally, if you look just below where the cat is sniffing, you can see the thumb streak I mentioned in the previous step. Here's a better pic. This really sucked. I wet sanded and coated again, but then had to stop. I've had so many paint problems recently, that I had to remind myself that less is more. This whole gold step is probably unnecessary for the armor, but I don't want any evidence of a 3d print at all. Here's my second call for assistance. When I threw down my first layer of white, I decided to hit my shoulder straps, hand plates, and shoulder clips with a second. I originally painted them two weeks prior, but as soon as the paint hit them, this happened. What causes this? This is the same thing that the clear coat did to my original helmet which had been curing for a month. Everything I read says it's caused by an uncured undercoat, but I don't see how that's possible. I'm only using Rustoleum products and have had no issues laying the white over the gold. The issue comes up when I try to add layers on top of dry white paint. After this happened, I sanded everything down and re-sprayed, but it happened again. Since they're small pieces, I just threw them away and re-printed. I really need help, because I originally intended to clear everything later, but there's no way I'm trying that now. Please help. Got these finished. I think I mentioned previously that I've been using several ROTK build threads and the CRL as my references. Jeff's 1130B4's ROTK Build has been my favorite so far. In it, he mentioned that he had received the advice that "for sizing and fitting, you start from the center and work your way out." Though I haven't included any pictures, this is actually what I did. I'll post some pictures of the abdominal in my next post, but it is entirely unfinished. I kind of assembled it and have really been putting it through the wringer. Since it's essentially the base of my project, it's really taken a beating, so much in fact that I just reprinted the kidney pieces and am reassembling from the ground up. Also, the following question/ comment from Sly11 got me really thinking about trying some new things. So, while I absolutely cannot change the scale of the armor now, I can play around with the parts and really improve the process. Laying down the resin on the inside of the abs will be critical. Thanks for getting my gears turning Andrew! Here's the base of the project. Until next time...3 points
-
He only registered a few days ago and is already trolling. He really did his homework ;D3 points
-
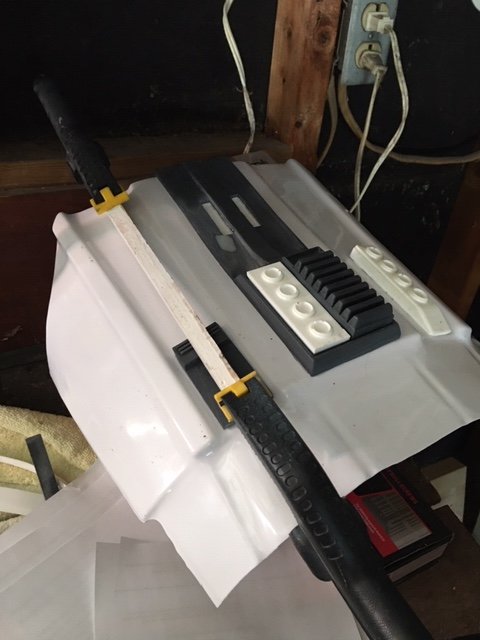
Don't use Bondo, use Poly Flex for your filling and final finish: https://smile.amazon.com/Fibreglass-Evercoat-411-Poly-Flex-Polyester/dp/B000P6US6A/ref=sr_1_3?dchild=1&keywords=polyflex&qid=1598527233&sr=8-3 Bondo has zero flex and as soon as the armor bends/flexes the bondo will crack away from the plastic surface. I'm a "Clone Guy" and have had one since my very first approval back in 2007 and can't tell you how much it sucks to have a big piece of armor crack off at an event. I found this stuff back in 2010 and have never used Bondo again. The nice thing is this can be used as the filler AND the finisher. Yes it is "expensive" but you get what you pay for here. Another thing is the small tube of hardener that comes with the bottle is blue. You can buy the same tube of hardener for Bondo, red, at Walmart and it works the same. I've used it on some of the resin pieces of my ROTK and the helmet. On my FOTK I used it on every seam and no issues 5 years later with any of them cracking apart. Plastic Clamps, Metal Clamps, and Rare Earth Magnets are HUGE to get this kit done. I have several of the big bags of multiple sized clamps from Walmart in a big bowl in my shop along with several of the smaller metal clamps with strong holding power. You can never have enough different sized and powered clamps. Rare Earth Magnets are great for areas you can't reach with a clamp like the middle of a shin or thigh. You can put 3 or 4 of these between the clamps and they'll hold the pieces tight while drying from the glue or whatever you used to put them together. A big key is to get super strong ones. A couple things I'd suggest is to have something metal to keep them on. I use a metal wire basket that is secured to wall. Next make sure you keep all the plastic rings that go between the magnets. The magnets are STRONG and it is tough to get them apart if they have attached to each other. They will grab onto ANYTHING metal so anything close will be grabbed. Also if they are far enough apart they will crack apart if they grab each other and come together. They'll also pinch the sides of your fingers. They can be a pain in the butt to use because of all that but the benefits outweigh the problems. The last thing I'll throw in with clamps is that you should have some small pieces of wood close to your clamp area along with pieces that are long enough to cover the length of a thigh, shin, or ab plate. Why? Lets say you need to clamp down something too far in for a clamp to reach and it is too thick for the earth magnets to hold tightly. I have several 1"x1" strips that are long enough to cover those pieces length wise. You can put this piece over whatever you want to hold down and clamp it at both ends. Now you have a clamp that can cover any span of your armor. If you can't see what I'm talking about this picture will show you how I use clamps and pieces of wood to secure pieces I can't with just a clamp or magnet.
 3 points
 -
Can't stop won't stop! The cancelled Star Wars Celebration weekend approaches. I believe I mentioned in the early stages of the build that the thigh armor was too small and I was hoping to drop some weight... but I like food way too much. So, I reached out to Shawn at T&A and inquired about cutting the thighs open and how to go about repairing it. He was great help and (Krennic voice) "let me share with you, some details." He advised that I should do a zig zag square cut down the flat side of the armor, facing the back. He sketched up a quick diagram and explained how the cut would assist with the fiberglass repair. Basically, cut it so it can touch the adjacent side, space the top and bottom, tape off the center, and fiberglass the interior (after rough sanding it). Looking at his diagram, I asked him to check my work and confirmed I was on track. Given the green light, I made the cut with a dremel diamond blade, and was pleased to find the parts separated without issue, and would lay flat when I move to bondo the surface. This next bit of resizing required my wife's help to position the thighs and mark the gaps I needed to create. It worked out surprisingly well, and I asked her to just mark up the armor with measurements since I was going to repaint anyway. It was a snug fit, but the gasket worked out and I got what I needed. You can see where the dremel skipped and dinged the armor. Whoops. Easy fix. On another note, you can see the rear of the gaskets! Even with the elastic, the gap is pretty well closed and I hope to have the cape disguise it further if the boot and thighs don't cover up most of it. Next was the fiberglass work. I've only done this once before and it didn't really work out the first time, but here we go anyway. I put on my trusty breather mask from Angel Gilding, but neglected to close my balcony door... and well... I (Rey voice) "flooded the house with poisonous gas!" ...so I accidentally drove my wife and child out of the house while the fiberglass is drying. Once this center mat is solid, I can remove the spacers (paint stirrers), and fiberglass out to the edges. In the same session I'll shim up the spacers for the 2nd thigh, glass the center. Last session will glass to the edge on both and let dry. Once dry, interiors will get a plasti-dip job and I will proceed to bondo the surface to fill the zig zag and prep it for paint. Then fresh primer, sand to 800, wet sand to 2k, wash surface and Uni-Coat -- back where I left off. But this time, the thighs will fit, lol.3 points
-
Whats up everyone! Long time, first time. This is my build thread for modifying the Rubies E11 toy. This build is fairly dremel intensive, and I used a bit of 3D printing. I know its not going to be a super accurate screen build, due to the nature of the base toy. But I'm hoping to make something that looks really good while trooping. I just want to give a quick shout out to all the people on this forum for all the amazing information and advice on how to go about this process. I was a complete noob when I started (and still am by most accounts), but gathered enough tips to allow me to attempt this. If anyone has any questions, I would be happy to share my limited experience. Materials: Rubies E-11 Blaster PVC pipe (3/4') Flat Gray Primer Spray Paint Matte Black Spray Paint Matte Clear Spray Paint Gun Metal Acrylic Paint Metallic Silver "Testors" Paint Metallic Copper "Testors" Paint Tools: Dremel Sandpaper Xacto knife Painters Tape Paint Brush I'm not sure about painting this though. I know I'm getting a bit ahead of myself, but I want to get the materials early so they have time to ship. I know it has to be painted black, but what finish should I use? Matte? Also, does anyone have any recommendations for a sealant, since I don't want the paint to run? Any advice or links would be greatly appreciated.2 points
-
Doing my best! I'm getting pro-tips here and there from a number of folks. Everyone has been supportive and are as excited as I am to see this thing come together. It's been an enormous undertaking but gratifying with each new step. WIPs keep me engaged and focused and I'm so stoked I've been able to keep this momentum going after a 5 month hiatus. Can't wait for the weekend!2 points
-
There is no size in the CRL, I would suggest checking with references.2 points
-
My bad guys. As I said just couldn't resist. Cheers for being good sports, giving great advice and for the warm welcome.2 points
-
Can never have enough magnets, clamps and tape2 points
-
You can post multiple image links into a single post/thread but you want to use the "direct" link option or right click copy and paste. Nice work2 points
-
Hi all, Introducing myself as per instructions. Been a 14th century re-enactor for years but my kids are way more into Star Wars and I've been a fan my whole life so I feel trooping will be more my thing now. Looking forward to doing troops with my kids when they're old enough and building a suit of my own. Leaning towards a TM or RS ANH stunt suit so far. Been reading the forums for about a week getting my head around the lingo and requirements. Made contact with my local garrison now so I guess it's just a waiting game for the armor to be delivered I guess. Can't wait.1 point
-
Garrison: Ohio Garrison TKID: 84881 Name: Bryan Labaki Profile: https://www.501st.com/members/displaymemberdetails.php?userID=32854 Armor Maker: ATA Helmet Maker: ATA Blaster Maker: Doopydoos Pipe Kit Boot Maker: Imperial Boots Canvas Belt: Imperial Issue Hand Plates: Trooperbay rubber hand plates Neck Seal: Geeky Pinks Phantastic gaskets Holster: Trooper Bay The Armor: TD: Gloves, Boots, Neck Seal: Helmet: E-11:1 point
-
Looking good. I also noticed blue in the rectangle from a few threads but I think that was before other references became available. Grey or black seems to be the way to go, still haven't seen a definitive image so I'd stick with grey for the time being.1 point
-
my new t21 new body barrel detail, restored by gmrhodes13 my new batch of T21's, restored by gmrhodes13 Yoshixs T21 spool68, restored by gmrhodes13 Incinerator plasma cannon screen grabs, restored by gmrhodes13 V3 flamethrower, restored by gmrhodes13 https://www.whitearmor.net/forum/topic/20537-my-new-t-21s-new-body-barrel-detail-and-3-stain-choices/ https://www.whitearmor.net/forum/topic/19547-my-new-batch-of-t-21s/ https://www.whitearmor.net/forum/topic/38623-yoshixs-t-21-w-spool68s-kit/ https://www.whitearmor.net/forum/topic/18342-incinerator-plasma-cannon-sceen-grabs-4-images-tfu/ https://www.whitearmor.net/forum/topic/13678-v3-flamethrower/1 point
-
Lewis manuals, restored by gmrhodes13 MG15 RT07C reference, restored by gmrhodes13 MG15 tutorial, restored by gmrhodes13 https://www.whitearmor.net/forum/topic/27023-lewis-user-manuals/ https://www.whitearmor.net/forum/topic/21474-mg-15-rt-97c-reference/ https://www.whitearmor.net/forum/topic/10709-mg-15-tutorial/1 point
-
Coming along great1 point
-
When I first read it, I felt really bad for him and was hoping it wasn’t too late to cancel his order.1 point
-
@BigJasoni i wish i had just printed this armor would of probably been done by now fiber glass sucks to work with but it is what it is i noticed the cod and the butt plates need reworking1 point
-
Wow! Lots of magnets and clamps... [emoji15] nice! Sent from my iPhone using Tapatalk1 point
-
Looks really good man! Will follow the progress! [emoji1303] Sent from my iPhone using Tapatalk1 point
-
Been making some good progress so time to post an update I finally got that sniper knee fiasco under control and got it to stick. It's amazing how pliable ABS is. One of the the things that solved my problems was that the inner leg side of the sniper knee was too long so I trimmed that a bit and that made it work. A bunch of glue, tape, and clamps later and bam: While that was drying, I skipped around to the abs and kidney section for a bit. I drilled holes for the Anovos supplied split rivets and made sure they fit nicely. Next up on that front will be painting the rivets white. And next up for the shins/calves will be installing the hook system to hold them together.1 point
-
Thanks Jesse1 point
-
Hi there, Troopers. More work over the last few days, and we now have a sniper knee attached. I used a combination of clamps and magnets to hold this in place and, thankfully, combined with the Gorilla Glue Clear, this held really well. I spent quite a bit of time checking reference images. As I’ve posted about before, the sides should be cut straight up and down, not overly curved. Reference images; The thigh ammo pack is also ready for affixing.1 point
-
Thanks! For the front half of the calf and the forearms the elastic is glued down with zap-a-gap. It holds together pretty well and I haven’t had any issues with it. Even after of taking the armor off and on.1 point
-
Oh that almost looks black...1 point
-
Nice work trooper, a couple of things you may want to address before the DO's get here, these are suggestions. Belt could come up a bit Ab button paint is a little large, you could also trim the smaller ab plate a little. Shoulder straps could use a little tweak so they are central on the rear You have a bit of a gap between your backplate and kidneyplate, not sure if you can tighten the strapping Ideally the ab top snap is closer to the edge Appears your sight is on back to front, also there shouldn't be any weathering on the grip or T tracks. Also your hengstler looks a little far back Looks as if your butt plate is overlapping the kidney, strapping may be a little tight? Your right rear calf cover strip appears to be covering the top ridge, it's should stop below the ridge like your left Also could you post some further images. both sides of the thigh ammo strip connectors and inside front and both sides of the sniper plate Blaster D ring Ab/kidney rivets closeup Good luck with approval
.jpg.cd98e3c61b0cf95832c19372f0236395.jpg) 1 point
1 point -
Hello Andrew and welcome! I was gravely concerned when I saw Rubies and much relieved after I kept scrolling. Don't scare us like that!1 point
-
I believe he was pulling our legs.1 point
-
So I taped off the barrel stripes. I used a pro tip from @gmrhodes13and sprayed gloss white first, so if there's bleed, then it's white! I did just a couple passes with gloss black, gave it 30 minutes to dry, and peeled off the tape. The right looks great! As I peeled the left, some paint from the tape stretched with it. I decided to leave it and will try to touch it up after it fully dries. No bleed though! Then I wet sanded the putty to 400 on my bells and biceps. THAT took a while. Hopefully the gloss comes out smooth... Tomorrow I'll spray satin white inside the bells and biceps. I'll also finish taping the barrel buttons and spray gray.1 point
-
Sorry mate couldn't resist. Paid my deposit to Trooper Master last night. I'm totally going for centurion. Can't wait for my BBB.1 point
-
I use a Hasbro with Doopy Doo update kit for general trooping, it's pretty light and has lights and sounds which the kids love. For higher profile (L3) I have a Doopy Doo pipe build which is a little heavier but way more accurate.1 point
-
Congratulations, welcome to the legion Trooper.1 point
-
congrats1 point
-
Thanks tarok just might do that. Was hoping for a Praetorian for trooping but can't figure out how to buy one (hoping they're just quiet cos of the rona) and something like the field marshal for showing off. Really interested in Tramp's lights and sounds too.1 point
-
Hey mate This is where local knowledge comes in. The guys offer great advice, and yes there are some fantastical accurate weapon replicas available. However, in Victoria about 90% of our troops are now weaponless. Further, one doesn’t need a weapon for basic approval. Weapons are pretty much nice props, wall decorations, for many of our garrison. If budget is a concern, and as a parent in these uncertain times myself I can understand it might be, I’d either skip the blaster, or look for a more cost effective alternative. 3D printed weapons afford that opportunity, however they do require a bit of grunt work to make ready. We’ve got a trooper/garrison member locally (VIC) who produces fantastic 3D printed weapons and armour. TDK Props. Reach out to him via FB.1 point
-
Thanks a lot @Firedog and @CoolHandLAZ I just ordered two types of magnets, from a different site tho. 8x 20mm diameter / 5 MM thick. 8x 12mm diamete / 3 MM thick. I saw at a video of RSprop masters to wrap them up in painters tape so my fingers wont get stuck in between and to get the magnets off easily from the PVC. Thanks a lot guys! cannot wait to get my costume finalized, to start trooping!1 point
-
Alright so its been a while since I have updated this... But nonetheless I have made some great progress with this project! I got back all my parts back from my painter. (Also, I don't know why these are links... I tried to get them in this thread.) First thing I did was glue the back cover strips on the thighs again. https://imgur.com/eTt6Dc1 Then I assembled the forearms using the same technique as I did for my calves. https://imgur.com/31jn5F0 https://imgur.com/NVnJQc7 Then got to it on the helmet. I hollowed out the tube strips and placed a cotton under it to help it breathe more. https://imgur.com/cyeDMRy https://imgur.com/xW68blN And the gap on the chin. https://imgur.com/YPmXNQ8 Inside for the lenses i decided to go with the default lenses that Anovos sends in its helmet kits. https://imgur.com/JZtDMBZ And finally it all comes together in a fit test! https://imgur.com/2SgsgpY https://imgur.com/r5JkiMU After this last test, I got a couple of things I need to fix... The sides of my barrel need to be cut down even more, so the tops of the side of the barrel dont peek over the side connectors. And I need to bring mt shoulder bells in a little closer. Other then all of that, I'm so close to done! Thanks for checking this out, looking forward to any comments.1 point
-
The disc magnets are definitely the way to go. The neodymium rare earth magnets are even stronger than the basic disc magnets. Most tutorials I have read recommend using them and they are very strong, so they can hurt you if you aren't careful. https://www.amazon.com/dp/B0859MHLSG?pd_rd_i=B0859MHLSG&pd_rd_w=zJDqx&pf_rd_p=e75a99cf-81c4-40cb-bc86-6efa5f44f6cb&pd_rd_wg=lnbLU&pf_rd_r=4KY2BW53MXK6ZHZXR6QJ&pd_rd_r=22e8a4f7-c100-4cef-939e-5b60b7c973c91 point
-
In honor of the number 11, as in the E-11 and the F-11, and the fact we only have 11 to go, I am revealing an extra sneak peek piece of the March to 1000 special merch item. For your viewing pleasure
 1 point
 -
I love seeing PRINTED reference folders, as I have four or five of my own! I may be obsessed, as it is an ever-growing collection. Below you'll find some images of my folders from my ANH Stunt and HWT builds. In case you'd like additional print resources, I've been compiling helpful (to me) threads into PDF format, and I have links to them on my All-In-One reference compilation thread. Links to PDF filess are marked in yellow. Keep up the great work with your build!1 point
-
I would definitely keep all the return edges on the bottom of the chest, top and bottom of the kidney, top of the posterior (butt) plate and top of the ab plate.1 point
-
Congratulations Trooper Sent from my SM-G981B using Tapatalk1 point
-
Congratulations David , Welcome to the Legion New Trooper !!!!!1 point
-
Congratulations trooper and welcome to the ranks1 point
-
Nice work on your blaster Darren. The red lights in the scope look great! Love that.1 point
-
Lets get to 1000 !!!1 point
-
Thanks, Jesse. Hope you are well, sir. :-)1 point
-
Sorry for the apparent "amount" of posts!! I'm just not very good with these photo uploader app thingies!! Cheers1 point