Leaderboard


Popular Content
Showing content with the highest reputation on 07/03/2020 in all areas
-
Thank you very much Mario and Chemi, I am looking forward to being part of you2 points
-
Hey Laura, great to see you back I’m no longer with the D.O Office so I will page one of them for you @shashachu2 points
-
I just placed my order and they do offer a size 13 US. While the site was in catalog mode, their size chart did not show this; however, now that they are open, size 13 is available in the drop down menu. My concerns appear to have been unwarranted.2 points
-
Ok thanks, that is great , as soon as I can upload the photos it's straight to eib! Well, I know it's not that easy. . Cheers.2 points
-
Torso fits! Now just the helmet is left. My wife is diligently painting when she has some extra energy (morning sickness is lasting most of the day ). I got the mics installed, as well as the amp and icomm. Here are a few pics of the sides. I know I need tweaking, see below for my plan. I think I need to tighten them slightly by moving the snaps closer to the rivets. The gap mostly disappears when the belt is installed, but it's not perfect. Ill get a suited up picture (and get pre-approval pics up) once the helmet is finished. I did make my own fan system based off of my Vader fans. I wanted an adjustable fan speed so I bought this guy again https://www.amazon.com/gp/product/B00RYKR83Q/ref=ppx_yo_dt_b_asin_title_o03_s00?ie=UTF8&psc=1 and it works very well. For fans I bought these https://www.printedsolid.com/products/ldo-5015-5v-blower-fan-df5015h05s. I wanted a high cfm fan and most amazon ones were about half of these. I bought 6 fans. 2 for the lenses, 2 for the back of the helmet, and 2 for Vader because they are a lot stronger than what I have there. , you might notice that they are 3 wire fans, but mine are 2 wire fans... I just broke the 3rd yellow wire off because it's not needed. It's a tach signal, and the PWM controller doesn't care. I do plan on cutting the wires to size once they are installed and I know their needed length. Here are the fans I bought. And here is the whole setup with a temporary battery and only 2 fans for now. I wanted to test it and make sure it worked. That battery is a 2600mAh USB battery, 5V at up to 1A. Assuming 4 fans at max speed I would be using 1.2 Amps... so I couldn't actually get max speed with this battery. I ordered a new one. The new one is 10000mAh and up to 2.4A so it should do the trick. I was wondering how long the first would last, simple math at 1A draw means it would last 2.6 hours at most. With the 10000mAh battery I could draw the full 1.2A for over 8 hours. I don't think Ill ever be in armor that long :). To connect the battery I found an old USB cable and cut it, stripped the wires (it was a charge only cable so only 2 wires, made life easier because I didn't have to guess which wire was the 5V and which was ground), and connected that to the speed controller. If you want I can provide a wiring diagram of how they are wired, but it's pretty simple. The red wire of the fans goes to the + terminal (labeled on the bottom), the black goes to the - terminal, and the usb cord goes to the + and - power terminals. With power (cables and battery) and fans connected all you have to do is rotate the knob and it works. Also, here is my wifey helping out! Everything is painted black because I'm kinda lazy, and i'm kinda OCD. I painted the edges as nice as I could, but the brush had excess paint so I wiped it off in the middle... and it covered most of it so I just covered the whole thing on the fist trap I painted... then I did the next and thought it looked funny that it didn't match so I just painted the interior of both black... and just painted them all black at that point hahaha. I know, it's not needed. I had a slight worry about the grey looking different if the black wasn't uniform, then I remembered how thick the paint was and knew that it wouldn't be a problem. Well, that's it for now. Ill see if I can get anything else done tonight but I don't really expect to at this point. Happy Independence day to those in the USA, and happy Saturday to everyone else.2 points
-
Hello all, so happy to be here after about 5 months of waiting for my BBB day! Yesterday I finally received my kit from Walt's Trooper Factory and I'm ready to go. I have had all the tools necessary from https://www.whitearmor.net/forum/topic/31404-supply-list-for-your-ot-tk-build/ and I am ready to go! I am using other build threads and am watching https://www.youtube.com/channel/UCeDunMes3e0wQn8_ns-ma4g to help with the building process. I have never done anything that has required such creativity before, so this may take awhile but I am excited. Going for centurion out of the gate! Wish me luck :).1 point
-
So after almost 5 months of waiting for BBB day, it still hasn’t arrived yet. My vendor says it should be another week or so until is ships. Decided to bust out a project I meant to have done months ago, which is a Doopydoo kit. I’ll get pictures posted as soon as I can figure out how on Tapatalk. I keep getting errors. I have most of the parts primed, and will begin gluing the parts together before I add one last primer coat (My coats aren’t exactly thorough) Edit: Pictures are working now.1 point
-
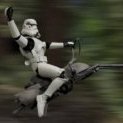
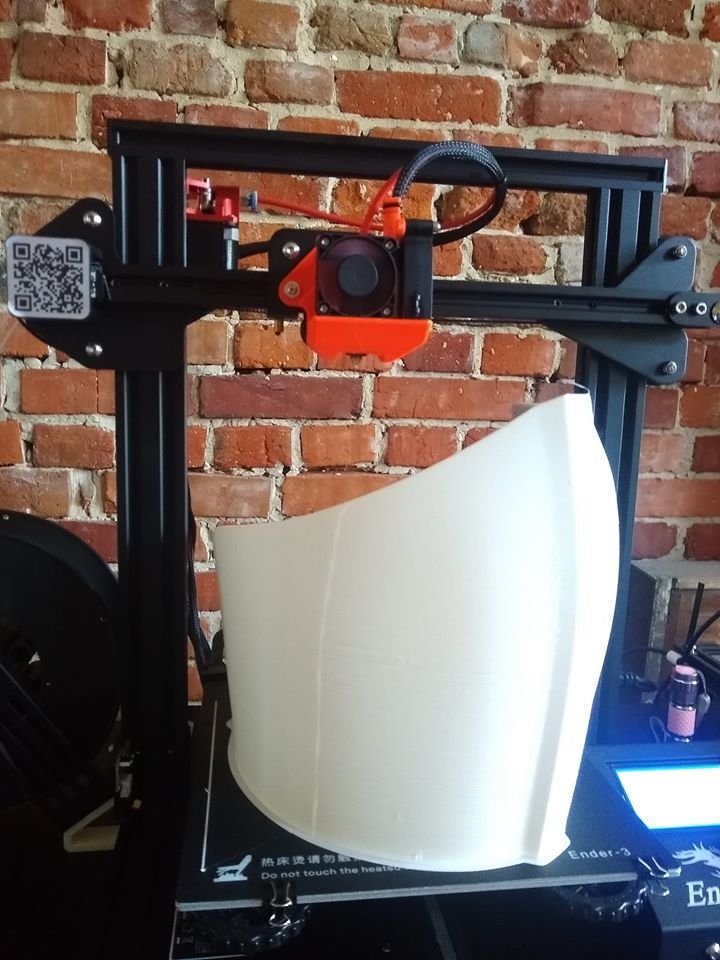
Hello all ! I am from Poland , I decided to create my own armor using a 3d printer. I have the option of professional painting, so there will be no problem with the finish. I'm starting now. I think reading the topics will be very interesting. Best regards ! Ps. Sorry for my English

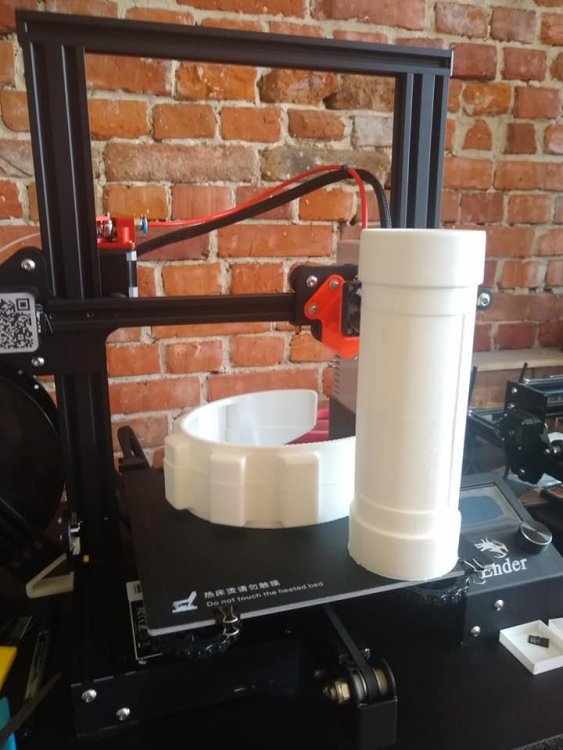
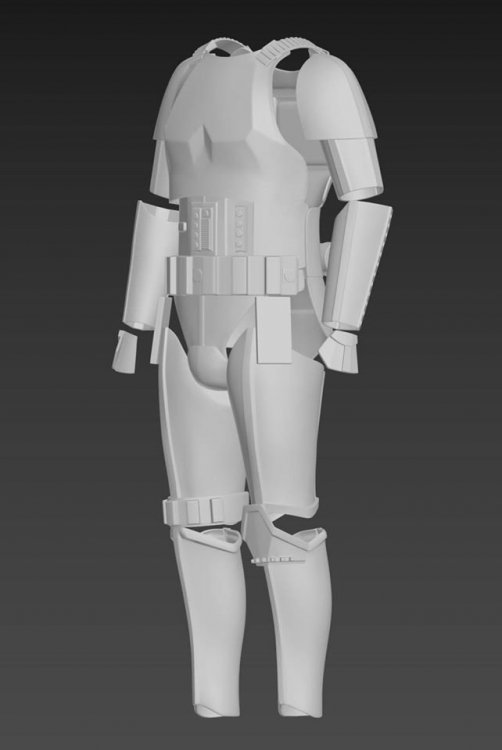 1 point
 -
Great work, one thing you could work on while you are waiting to take it to the next level is the ab plates, the bottom (large plate) button paint is a little large, also the plates shouldn't have rounded corners, smaller plate could be trimmed a little more also.1 point
-
Looking great, nice work1 point
-
Thank you very much Mario, I am impatient1 point
-
Awesome! Thanks for the heads up! [emoji4] Sent from my SM-G960F using Tapatalk1 point
-
Hello Laura...Very good work!!! Good luck with your application!!!1 point
-
@ticopowellgood pointer! I'll check it out.1 point
-
Thanks1 point
-
A little more progress Sent from my iPhone using Tapatalk1 point
-
without wrinkles and crinkles1 point
-
Hi Vin, Welcome to FISD, Great build of the E-11 Blaster !! If you haven't done yet, I would like to suggest to check the following Forum Section for set a start point. Fell free to ask questions, browse the Forum and remember : Info and research are the clue to make the best investment in armor. Good luck , We are here to help!1 point
-
Pre approval has nothing to do with EIB. It is to help ensure that your initial application to the 501st through your garrison goes smoothly. Once you are approved with the garrison you can apply directly to EIB status. I use flickr, photobucket used to be popular, and there are a few other hosting sites. If you want to find popular ones, go find a thread with pictures, click on those pictures and that should take you to their hosting site. This works best on a computer, but it's not impossible to do it on your phone or tablet.1 point
-
I appreciate you taking the time to make these vids. I watched the series and grabbed the last Testor’s color I needed today as well as some brushes from Hobby Lobby. I’ve learned a lot and can’t wait for my kit to arrive to try these techniques.1 point
-
That’s a good point. I would think the nickel plated might not be as durable as the stainless, but given the minimum amount of snapping and unsnapping that would occur over the lifetime of the armor, they should hold up. Aesthetically, they may be inferior, but as you said, who’s going to be seeing them other than the photos I place here on the boards in my build thread and myself. Harbinger also made a good point regarding the softness of the metal, which may benefit me since I’m looking at having to set at least 60-70 of these snaps for both kits.1 point
-
Yes, It's for level 3, so don't worry. I'm sure when wearing it'll solve.1 point
-
I'll pay attention to that next time I wear the armor. I know it won't affect initial approval but I'd like to fix it before I apply, and I think I have time while I wait on the helmet.1 point
-
Yeah, I've noticed that. If I perfectly center the kidney plate on the posterior plate the bottom plate is about 1/2" larger on each side. The only 2 options I can think of to fix it would be to either just cut it to match, or cut it slightly long and form a new return edge. If I slide one edge to match the other edge is about an inch off. Let me try and take a picture of it to show you.1 point
-
Hola Fernando, por favor podrías seguir estos pasos para postear tu solicitud? Usa el link que sigue: Pasos para Solicitar Certificación EIB Tu solicitud debes ponerla en esta sección : Solicitar Certificacion EIB. Muchas Gracias y Buena Suerte. Hi Fernando, could you please follow these steps to post your request? Use the following link: Your request mut be posted in this section Good Luck @Chemi for your info mate.1 point
-
So after working sixty hours a week I finally have some time. Vents covered and frown screen.1 point
-
Keep in mind the SS snaps are significantly harder to set.1 point
-
Looks awesome, great that your son wants to get involved1 point
-
More busy work...the Darman's Props holster and Hyperfirm E-11. Firstly, the holster was a might bit too snug on the E-11. I debated on options on how to soften/loosen it up. I finally settled on shoving a plastic drink cup in the top end of the holster, and tossing it in that wonderful greenhouse my car turns into in the summer time. It actually worked pretty well, although a second round wouldn't be such a bad idea. I did flip the cup around and let it spend a couple of hours sitting in the bottom end as well. On to the Hyperfirm... My understanding of the CRL and requirements for Centurion (the ultimate goal of this build), the Hyperfirm's are passable with the addition of the D-ring on the end cap. So, D-ring ordered from Trooperbay. I laid it against the end cap to figure out how much to cut out of it (the Sharpie marks) so I could attach it. Next, drill out the holes in the end caps: Cutting wheel attached to Dremel, and pliers to hold the D-ring (that sucker gets HOT!): With both cuts made, time for a test fit: I wasn't entirely happy with the weathering on the Hyperfirm, and especially the weathering on what should be plastic Hengslter counter...so rattle can time! Also, the D-ring required painting, anyway...sooooo. After a bit of research, I settled upon the Krylon Fusion as it should adhere to the rubber and metal. One coat done, and hung to dry for a couple of hours before the next coat. And...finished product. Came out pretty good, if you ask me. Pro tip...don't forget the underside of the D-ring. For a bit of fun, I added a "sight" sticker. And, in a moment of "what the heck"... So, hopefully, I can cross this part of the build off the list.1 point
-
Hi All! Between family issues and the pandemic, I had taken a long break from here. I'm going to temporarily shift my focus on research into mikes, especially anything that could be worn with a face mask. My older brother is a nurse and has been complaining of a sore throat from shouting through his mask. Off the top of my head is to either go with a throat mic, or a small mic that can be worn on the face or on the mask itself. Will still update everything else if I stumble upon it, or people suggest them.1 point
-
I had a helper today And I finally did some acceptable snaps, took me long enough haha And here is the helmet liner mounted. I got the side rivets in and painted as well. I also got my Hovi mic speaker system from @ukswrath. I got the full set with icomm and microphone. I did buy fans and they arrived today as well, as well as the fan controller. I just need to figure out a battery (5V, likely going to use one of the many USB battery packs I have laying around for now). Well, on to the list, let's see what's left. Test shoulder elastics, I glued them down better and will see if that helps them. If it doesn't I'll likely sew a small strip of fabric to them down the middle on the bottom side, that should fix them well enough. Size and glue side straps finish helmet. (finish paint, install lens and electronics) Talk to the GML Dang... almost there.1 point
-
Quick reference guide for armor used in ******** Otherwise known as the OT (Original Trilogy) ******** Whether you are aiming toward Basic 501st approval, Expert Infantry or Centurion level, the FISD Gallery section is an invaluable resource for information containing hundreds of images of screen captures and film used armor. However, searching for the exact reference you are looking for can take a lot of time, especially for those seeking higher levels of accuracy or approval. This thread contains edited versions of those images and is designed to be a quick reference. It also contains notes and CRL (Costume Reference Library) requirements as applicable, but does not contain them all. For complete info. you can view the various costumes here: CRL IMPORTANT! Please be aware when applying for higher levels that the Deployment Officers do not depend solely on the CRLs when reviewing submissions. Screen caps and reference images are also taken into consideration. When in doubt, always feel free to contact any member of the D.O. Staff for assistance... we are here to help! The costume categories are shown as ANH (A New Hope) Stunt, ANH Hero, the Empire Strikes Back (ESB) and Return of the Jedi (ROTJ). Items for Basic 501st approval will be listed as Basic Items for Expert Infantry approval will be listed as Level 2 Items for Centurion approval will be listed as Level 3 Requirements from the various CRLs will be shown like this: bold, italicized in white, and may be paraphrased for brevity. Comments will be listed as Notes: or Important: TO SEE A PARTICULAR AREA, JUST SCROLL OVER IT BELOW AND LEFT CLICK ON IT! HELMET ARMOR BOOTS/HOLSTER Brow Trim Chest/Back Plate Boots Ear Placement AB/Kidney/Posterior plates (including strapping Holster Ear Screws Belt (ABS-Canvas) and Drop Boxes Ear Bars Shoulder Bells Tears/Traps Biceps/Forearms Frown Thighs/Lower Leg Armor Tube Stripes Thermal Detonator (TD) Hovi Tips Gloves/Hand Guards Vocoder DOWNLOADABLE PDF for PRINTING: Courtesy of Caleb (MaskedVengance) https://drive.google.com/file/d/1BbwWkC8nwLgH-jvU634IUcrO2mf4Yovb/view This will be an ongoing project and more photos will be added. I have locked the topic, but if you have any reference images you would like to see added, please feel free to PM me. Thanks for looking, and I hope this helps! SHOUT OUT to Mark (sskunky) of CFO for providing me with some great photos of his screen used ROTJ armor. THANKS!1 point