Leaderboard


Popular Content
Showing content with the highest reputation on 02/06/2019 in Posts
-
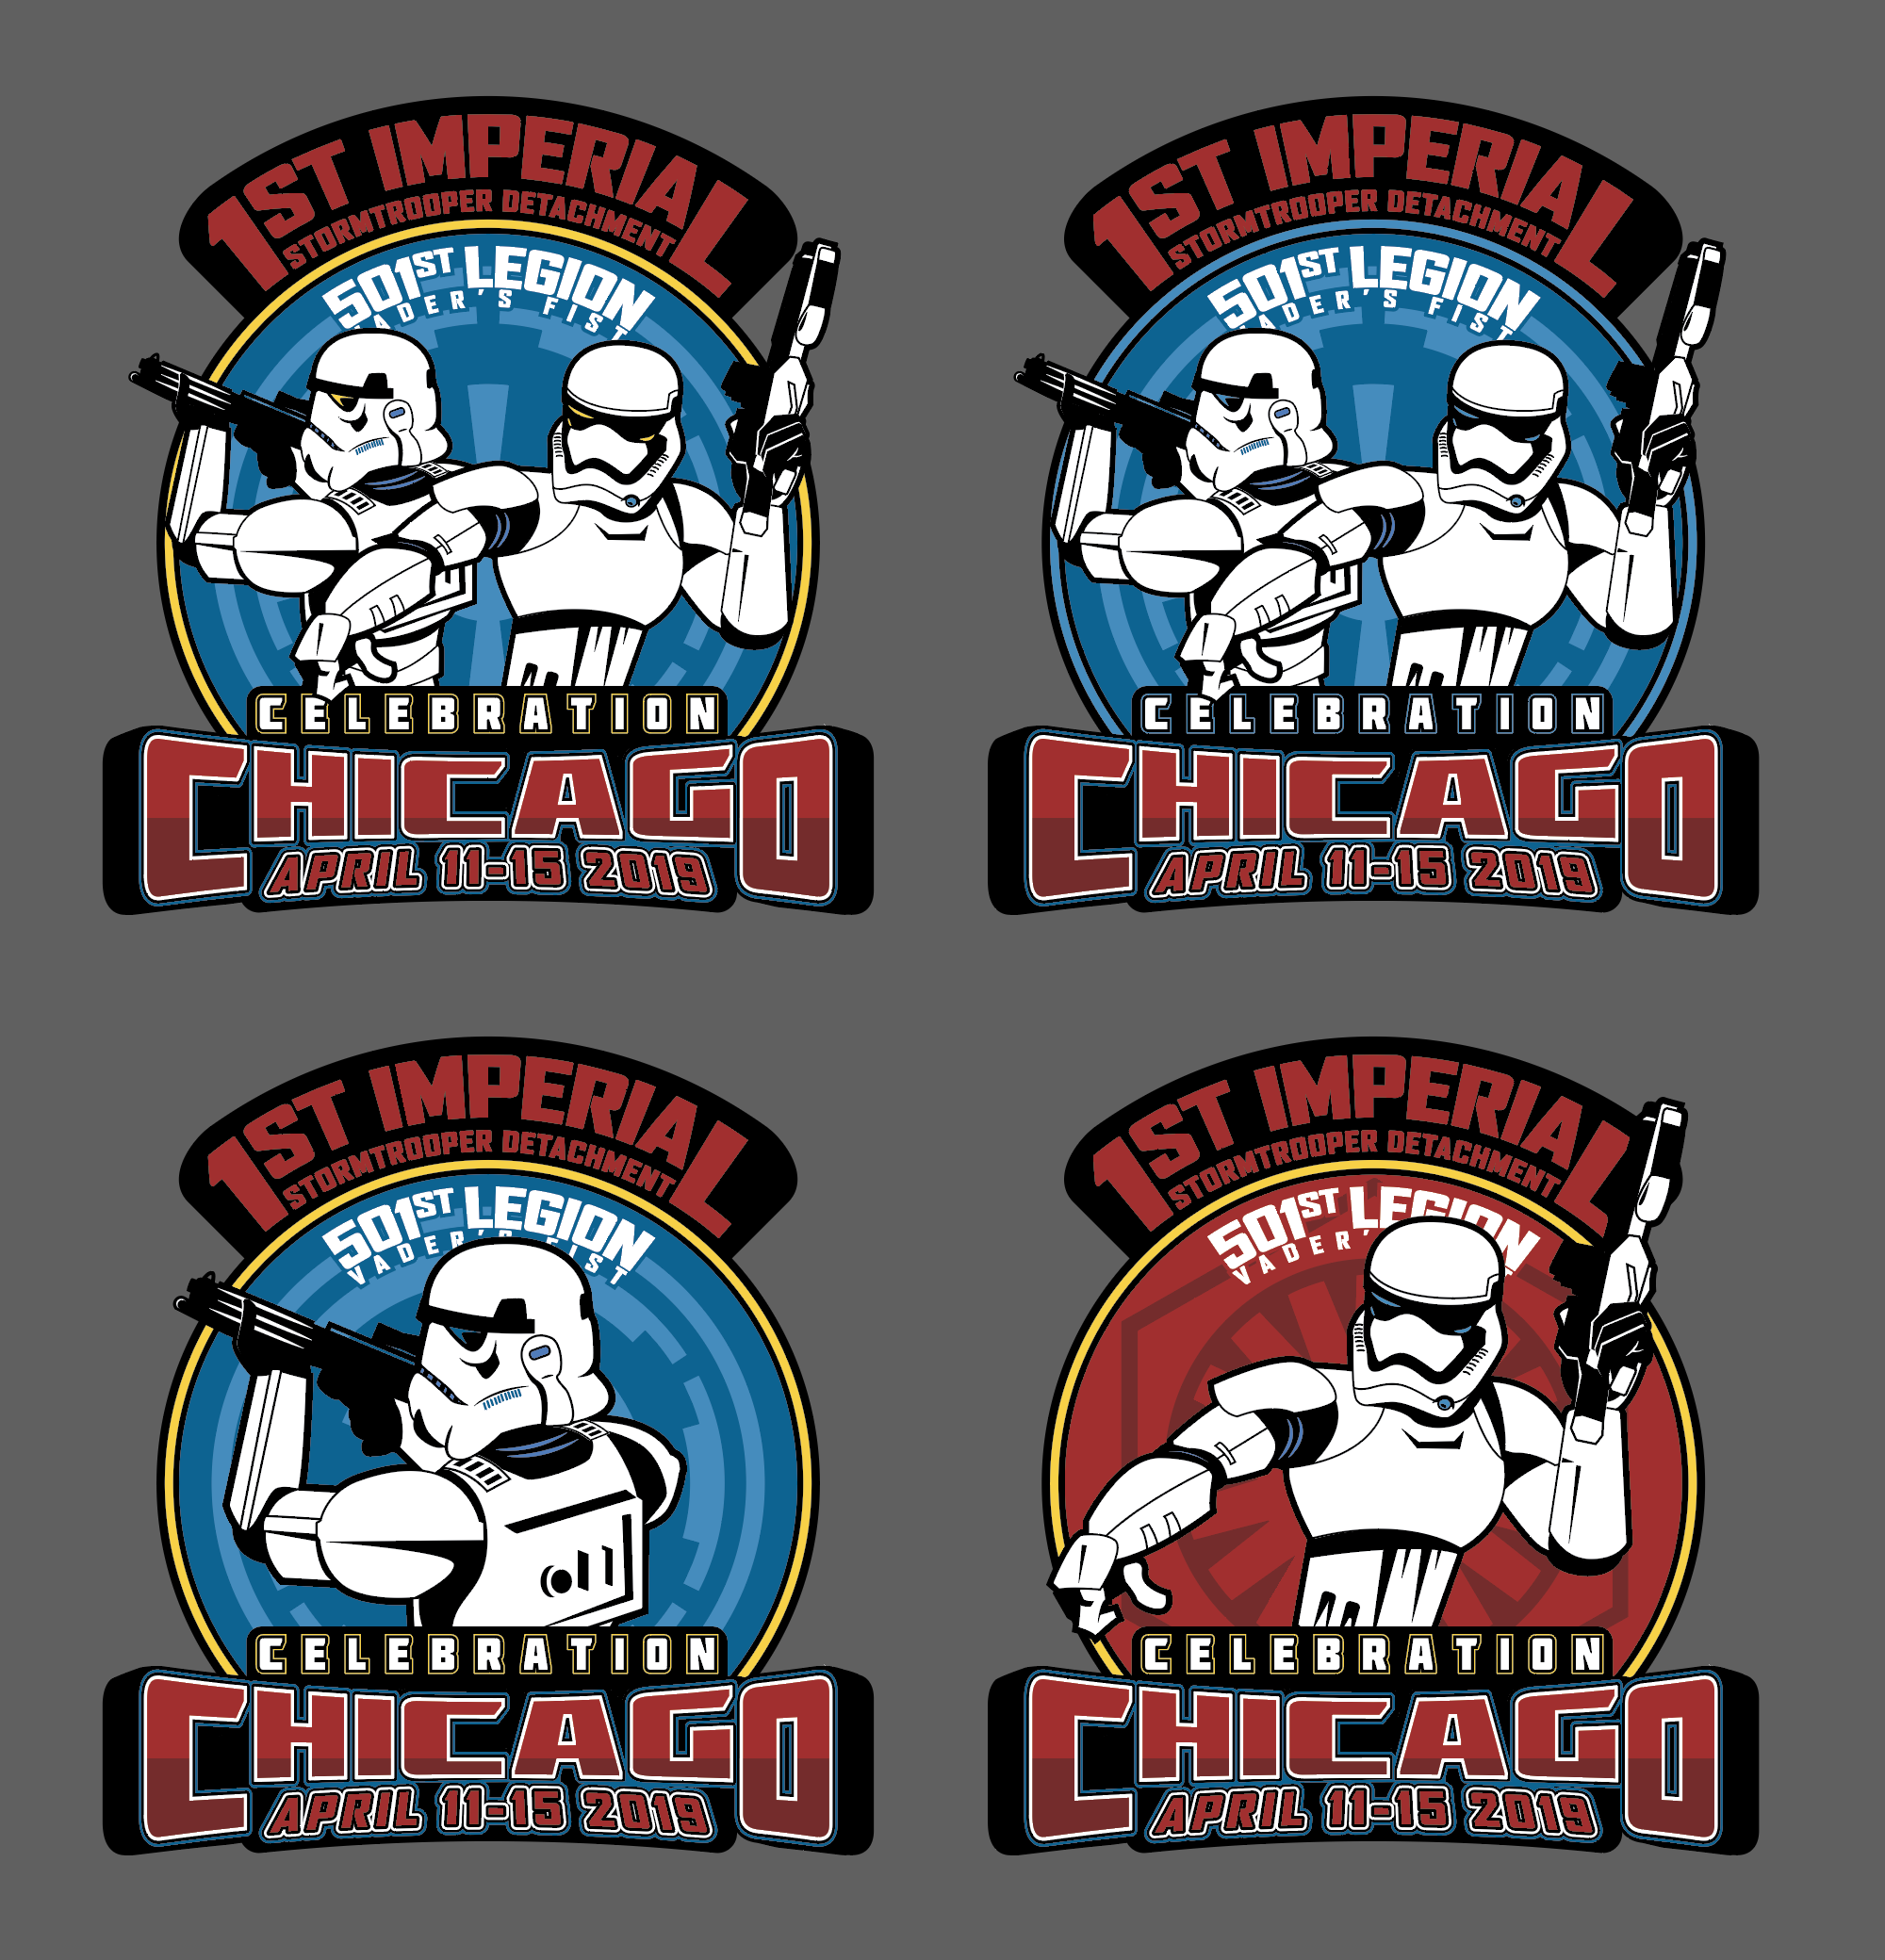
Congratulations to Jason / TK-16142 / “DeathTrap”, the winner of this contest! You had the command staff’s favorite design. In addition to mucho kudos, you will also be getting two free patches, a Kylo Ren bobblehead and a TLJ baseball cap. We’ll be reaching out for somewhere to ship these to. Thank you to everyone for entering and donating your time and talents! We hope to have this patch run for you soon.4 points
-
Okay, WHERE can I get a TK ice cream like that?? Haha. Howdy all, no, I haven't died, and you have AJ to thank for my checking back in (he emailed me, which I actually get alerts of). Just before the armor party, my honorary dad went on vacation so I had many more work things to do (the paid kind) and since I haven't touched my armor since the party anyway... but here I am. So what happened with all the rushy rushy and then nothing? Well I was trying to get approved before our garrison elections which were rumored to be "sometime at the beginning of February" - however, turns out they stop even beginning reviews in mid-January to avoid leaving half-approved apps for the next GML. When I finally got clear answers on all of that it was past mid-Jan and I was told nothing would be picked up again until mid-Feb. THAT was intensely frustrating and contributed to the leaving of the armor during the busy workweek. Also, apparently every advisor in our garrison has to approve every costume. Not just the GML. Not sure if this is how most garrisons run, but it makes all our approvals take weeks on end. So, here's my long-overdue rundown of the armor party. Several people who read my Carida thread walked in, saw me, and went "oh, you ARE a tiny Trooper. Huh." I had an incredibly productive day in large part due to the banana-Nutella crepes that a wonderful resident of our host's house made... (I call this one "cadet on crepe break") ...and because of a belt sander with which I removed excessively large return edges from almost every piece of armor (ha!), perhaps most significantly my thigh tops. I also evened out the lower edge of my forearms and shins, which was sorta magical. Had fun with some sandpaper after that, and all the edges look super legit now. Very exciting. I tried padding the bucket, was told I look like a bobblehead, fiddled with the padding some more... fun times. I tried to suit myself up a couple times and sorta succeeded. It's harder than I expected! Not many pics but did get this one, the back view of that first half-suit-up I posted before. This was before I smoothed the thigh tops, btw. One thing annoying me big time is how the right ankle doesn't want to stay closed, also why the right shin is riding so much higher than the left. I'm hoping that when I break the boots in they'll stop pushing so hard. May wear them around the house to facilitate that. You know, this would be significantly better with pictures... I'll take some tomorrow and give further commentary/updates on actual armor. Around 5, everyone but @TK45625 packed up and left. I had gotten some things done, but definitely not as much as I hoped. I looked over at my Table O' White Plastic with a small sigh, and announced that I'd best head out too. I think what I actually said was "I'll get out of your hair now" because our host said "You're not in my hair! How much did you want to get done?" and I said "Well I sorta wanted to be finished..." and she and TK45625 said "Then let's finish it!" and they rallied round in a wonderful show of friendship and we knocked out most everything else. We ended the night playing beatsaber (!! VR is pretty nifty, y'all!) and eating more pizza. All in all an awesome day with great people. To-do list in next post.3 points
-
This community is awesome.2 points
-
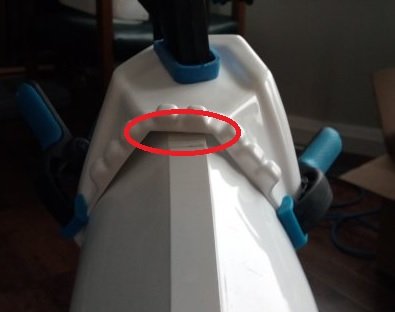
Before you glue the knee on you'll want to round those inner corners to prevent them from cracking/splitting while putting the shins on or taking them off, that area flexes quite a bit.
 2 points
 -
@gmrhodes13 @Frank75139 @Bud Spaklur You guys and the ice cream - dying here. Oh yeah, and here's 20!2 points
-
Thanks. I'll focus on horizontal level then fix the one side to get it attached. More like this:2 points
-
Thank you! I felt it was important to make sure both the OTK and FOTK were properly represented. The challenge was balancing the colors and adding as many as I could.2 points
-
It’s 38 F here so you’d have no problems. We’ll all wait for you to get here. Sent from my iPhone using Tapatalk2 points
-
I was thinking gold stitching around "Celebration" and the city since that was done on the last FISD patch run.2 points
-
Thanks to a lot of help from this forum and special thanks to Henry Slyfox Bartsch this highly detail aluminum Ell sterling build was made possible... In the next few pages i hope to go over its assembly and finishing. Refer to my reg posting for it design , machining and casting processes.1 point
-
I have tried a bunch of different systems... here are my personal opinions: 1. Aker amp (10 watt).- A powerful little amp that does change your voice a bit. Easy to use, and you can plug an MP3 player into it with TK chatter. 2. TrooperTalk- Bought an Iphone just to get this app. Never got it to work. 3. Trooper Amp (TRamp)- The remote button has 4 options for various TK responses, i.e. "Move along" etc., 2 buttons are for random responses on a "loop". You can change the responses, (fairly easy if you are familiar with computers) and they are EXCELLENT... It has an option to change your voice, but I can't seem to get it to work. Downsides- Expensive (over $200.00). Long wait time (I waited 10 weeks). A really nice setup with 2 types of mics included.1 point
-
FYI, Anovos replied to my query regarding the TLJ helmet being shown in the latest email update and what it means for us:1 point
-
This is how I did that cover strip on that thigh (please ignore the untrimmed tops and crooked cover strip on the right thigh, this was an in-progress picture):1 point
-
I am not sure how the AP looks underneath, I have an RS Suit, but it should be straight, this is how my left knee cover strip looks:1 point
-
Thigh ammo pack is riveted on and the rivets are painted.1 point
-
Stupid belt buttons won't fit flat over the fasteners as the cavity is not deep enough... Is this common? Do I bravely try to make my own slightly deeper buttons or just gap it with E6000? EDIT - Nevermind...I used CA to sick them to the head and then E6000 all around the plastic areas.1 point
-
Awesome thanks. I guess I just need an appropriate fastener for the ammo boxes and I am GTG! Stay safe today Rob.1 point
-
Your practically done! Great start. Sent from my iPhone using Tapatalk1 point
-
What's the purpose of the clear coat? It looked better with the flat finish you achieved on the dome/back plate. The same could have been done to the face plate too. I'm really digging the two-tone colour1 point
-
Great start Matt. Everything looks well organized. Good luck with this build.1 point
-
So Matt owes us ice cream. Sent from my iPhone using Tapatalk1 point
-
Anthony TK-31491 Bloodfin Garrison (Taking over for Jeff of BFG)
 1 point
 -
You should be fine with the 15 mm cover strips, but for additional strength I would suggest putting cover strips on the inside as well. You can use scraps from your build as they don't have to be pretty. Be sure to save some scraps for the inside front of the calves as well. Since they get a workout from constantly opening/closing them while putting on your armor any reinforcement helps.1 point
-
They are little disposable disinfectant/cleaner wipes that are made by Clorox. There may be a minute amount of bleach (although they don't smell like it) but if so not enough to damage plastic.1 point
-
Awesome work and thank you for the updates Rebecca1 point
-
I'll try that! Thanks! Sent from my SM-G950U using Tapatalk1 point
-
Check through a few of the ABS paste threads, some acetones work better than others, some won't even melt the ABS, I had a devil of a time finding one that would work down here, managed to finally get one from a local supermart1 point
-
Trimmed the kidney piece today: Sent from my SM-G950U using Tapatalk1 point
-
I think mine came out wrong.1 point
-
Working on the TD. I cut the pipe too short. The paint is drying on the new one. I'm using UK's guide on it.1 point
-
Bud - I read your thread like 3 times to make sure I glued the back of the shins right. Thanks for making that mistake for me or I may not have been as careful.1 point
-
Or maybe not... I'm out of clamps and magnets LOL! Guess I'll be gluing in the morning instead.1 point
-
Congratulations Devon.1 point
-
Awesome, another BBB day. Lets' do this1 point
-
The last of the cover strips are clamped and drying!!!!! Oh, and hopefully these wrists are trimmed enough for Centurion. Yes I have re-glued/clamped that one cover strip. Time for dinner. Maybe I will tackle the shoulder strips tonight too.1 point
-
Adding the ABS paste isn’t as daunting a project once you get going. The issiues I’ve found is sometimes you are left with tiny pinholes, yea these can be filled but depending with what you use it may need painting, then it’s a case of finding a paint which will match. Be looking forward to your progress good luck1 point
-
Seems like a huge disservice to not allow the hinge on the yolk, especially given some evidence of screen-worn suits having it (maybe level 1 cert?). I've owned a KB kit for years now and between the yolk cracking and the paint, it's in rough shape overall and I rarely want to troop with it. To have to paint and mold these Anovos kits means the same issues. As troopers we would look much better with clean shiny ABS rather than paint IMO and having the hinge means less repairs. I wouldn't say we should compromise accuracy to accommodate for the rigors of trooping, but in this case there is evidence of these modifications. The TD is another story.. it's just not possible to use vacuum formed ABS and have no seams. Not sure the plan there..1 point
-
If it helps with mobility (bending your arm) you can increase the size of the scoops.1 point
-
Nothing better than BBB's, good luck with the build, looking forward to the progress1 point
-
I keep a container of Clorox Handy-wipes and a clean dry cloth in my bin. I wipe the inside of each piece down and dry it before putting it in, so no musty smells.1 point
-
Keep up the great work...you’re almost done! The bucket is looking awesome and those ears came out real nice!1 point
-
Only 19 pages up to this point. I am so proud. It's looking very good at this point, so just don't screw anything up between now and approval! Also, for the sake of Matt and Frank, just give us a nice extremely close up image of that knee. I'm talking through a microscope levels of close, macrobinoculars levels of close, so they can be certain if it's straight or not.1 point
-
Looks great1 point
-
It's those niggling bits that can take some time but I'm sure you will breeze through, looking the part1 point
-
Great work so far Lorelei1 point
-
I am covered in white dust and plastic bits. I am weary. I am not finished my build, but I practically am. There are a few things gluing (shoulder straps, hand plates) and tube stripes to be cleaned up and shoulder strap snaps to be sewn in and that is - Lord willing - all. Here's one random photo of midway through today when I first put my leg armor on and realized that I'm getting to look kinda like a stormtrooper. More later!1 point
-
The Long and Winding Road Well, here we go with the last major step I need to get done on what has been an extremely long journey. Way back when my BBB arrived on my doorstep in February 2017, I never dreamed it would take this long to get to this point. But a LOT happened in that time -- moving from one state to another, changes in job status, a serious family illness, several enormous work assignments, unexpected travel (being 400 miles closer to our daughter has been a huge incentive to hop in the car and go see her whenever we want), and a whole list of miscellaneous miscellany. But slow and steady wins the race they say. (They say that, right?) So, let's wrap up this last step of adding the Shoulder Bridges. The Shoulder Bridges are perhaps the most fragile part of TK armor, so it's always a good idea to reinforce them in some way. Also, since the underside of the Bridges is basically hollow there's nothing there to glue to. Most builds I've looked at fill in all those hollow spaces with slivers of ABS glued in to add both strength and gluing surface. I decided to try something different. My plan was to cover the entire underside of the Bridges with a strip of thin ABS cut from a For Sale sign I picked up for $1.99. First, though, I needed to trim the Bridges down a bit to remove excess edge. AM armor is nicely trimmed, but there is a bit extra left on, so trimming these was my first step. The AM Shoulder Bridges are already curved (almost perfectly, for that matter), so using the score-and-snap method wasn't an option and I relied on my trusty Lexan scissors. And while we're on the subject, a small rant -- why in the hell can't you get these things with bigger handles? Do cutting for any length of time and those tiny thumb/finger holes tear your hands to pieces. The blades are fine (the small size of those is perfect for careful cutting) but in the name of all that's holy I wish someone would make them with bigger handles. OK, rant over. Notice here that I'm not cutting all the way to my line. That's because I'll be gluing ABS to the entire underside and I want more surface to work with. I'll trim them to their final size after the gluing is all done. I had already cut out the ABS -- again slightly oversized -- so gluing started by attaching the ABS to the Bridges at the middle. The reason for this is that all the critical gluing of the ABS is mostly around the edges, and I wanted a solid center all the way down the middle for strength and rigidity, and to support the thin ABS. To do this, it only takes a dollop of glue on the center of each "rib" where it'll make contact to the ABS sheet. I'll use something different gluing the edges, but I'm using E6000 here for the longer working time and adjustability. With the glue dolloped on, I pressed the ABS into place and added a series of small clamps down the center and set the Bridges aside to dry. A couple things to keep in mind if you decide to do this --- 1) First, shape the Bridges as closely as possible to the shape you want them before starting this. Yes, you can still bend them afterward but it's not quite as easy, so bend them to shape now. 2) When you clamp on the ABS, ensure that you keep the curve intact the way you want it while the glue is still wet. This is pretty easy to adjust, even with the clamps on. But once the glue is dry it will hold the curve, so you want the curve to be right where you put it. 3) I've talked a couple times about how you can work with things glued with E6000 after only a few hours without waiting for a full cure. That doesn't apply here. You want the glue down the center to fully cure before proceeding. Why? Well, E6000 is strictly evaporative and needs air to cure. The inside of the Bridges won't have air circulation once the edges are glued. So let that glue cure at least the full recommended 24 hours. OK, lecture over. To glue around the edges I'll use Plastic Weld, which does exactly what it says. This glue is very thin, cures very quickly, and makes a permanent, nearly invisible joint. It's also easy to use since capillary action does most of the work for you. Work in small sections at a time -- about three or four ribs length -- from one end to the other. I alternated sides. Dip the brush into the bottle, apply liberally to the edge (the slightly oversized ABS forms a little "shelf" that acts as a guide) and capillary action instantly sucks the glue right into the joint. Brush on a bit more in the same spot, and again it'll be drawn right in. Keep doing this till no more gets sucked in; at that point the joint is fully filled and you can apply your smallest clamps. You only need minimal pressure, and you only have to leave the clamps in place for a couple minutes. The glue works that fast. Important note: Be extremely careful with this stuff! It will instantly start fusing any plastic it touches, including your armor, so get it and anything else out of the way. Keep a cloth or paper towel handy for drips and spills -- it will also start fusing the plastic laminate on my table, for example -- and wipe up any spills immediately. Note how I keep the glue bottle in my Tray Of Isolation, plus I have it nestled into a hole in a piece of wood that prevents the bottle from tipping. Then I just kept working down around the edge, alternating sides, until I'd gone entirely around the Bridge. Done? Nope. When this kind of glue cures, it shrinks ever so slightly, and if you look at the glue joint you might see tiny gaps that look like bubbles. Go all the way around once more with your brush applicator, adding a second line of glue. You'll see it suck right into those little gaps. Once you see no more tiny gaps, then you're done. Set it aside for an hour or two. Yeah, the glue is dry, but you want it to fully cure. An hour or two is more than enough, but best to be sure. Now, I trimmed that oversized ABS right up to the edge of the Bridge plastic with a sharp knife, and sanded the edges smooth. This is a straight edge, so either use a sanding block, or better yet a full sheet of paper held flat to your work surface. I did a quick rough sanding with 150-grit just to level the edges and bring them to the final size, then followed with 220-grit, then 320-grit for a really smooth edge. And here's the magic: Because this is a welded plastic joint, there is no appreciable glue line. Seriously, take a look: There you go. The Bridges are strengthened from one end to the other, and you have a smooth, flat gluing surface ready to go on the underside for attachment to the armor. Which, by the way, we'll do after making an adjustment to the armor. Although the shoulder extensions at the top of the Chest and Back Plates are trimmed to length and shaped to my shoulders, the ends of those extensions weren't quite in the same plane. Let's go over to Barky the mannequin and I'll show you what I mean. The armor feels good on and fits just right, but no way those Bridges are going to lay correctly on that. Leaving the armor on Barky, I reshaped those extensions by heating them with a hair dryer. (I'm terrified of using a heat gun, but a hair dryer works great on small, thin areas like this and it's far safer.) Essentially, I just heated up the ends of those extensions and twisted them until they lay in the same plane with one another. Once I had the left shoulder nice and planar, I did the same thing with the right shoulder. When finished, the bridges will lay perfectly over the top. Now, it was just a matter of lining up the Bridges to center them over the shoulder extensions and making a few registration marks, then removing the armor and gluing the Bridges to the Chest Plate over on my workbench. This is another critical glue joint, by the way, so once again I allowed the full curing time for the E6000. All right, let's take off the clamps, reattach the shoulder strapping and put this back on Barky and see what we got. Nice. Now, just a little cleanup for some E6000 squeeze-out, and these are ready for the thin elastic loops on the back. At this point I have about a dozen little things to do -- put a few more pads into the Helmet, shorten the length of the Cod strap, add those aforementioned elastic loops to the backs of the Shoulder Bridges, that kind of thing -- plus some things like install the fans and sound system and such, but none of that is critical for submissions and as far as my armor goes... that's it. Can't believe I'm saying this, but my armor is done! And I couldn't have done it without all of you here on White Armor. I can't thank everyone enough. And I saved the best for last: I'm ready to take my submission photos.1 point
-
1 point
-
2nd day of 40deg celsius (that's 104 for you using the old scale) boredom won. Variant1 point