Leaderboard


Popular Content
Showing content with the highest reputation on 08/21/2018 in all areas
-
Thanks everyone! Turns out I love wearing leather accessories and getting dirty. Errr... . Anyhoo, I got bored at work and decided to play around in photoshop. Tee hee. Sent from my iPhone using Tapatalk4 points
-
Yes! Just received my TK-ID confirmation email. Tk-95970 reporting in now. Sent from my VK815 using Tapatalk3 points
-
Started painting the boots. First thing I did was to wipe them down with acetone to remove and polish so the paint can adhere better. It’s kind of hard to tell but one boot is shinier than the other. This is one coat applied. Sent from my iPhone using Tapatalk3 points
-
Final product Sent from my iPhone using Tapatalk3 points
-
And we are back.... Ok so here is what happens when the site is down for a week. Well Crap! Bad timing on my part. The site has been down since I began this build to I am typing it all up and will post everything I have done once the site is back up. In the words of that Supreme Sith Lord Jar Jar Binks, “Hello Boyos, Mesa Back”. I have decided to do this in a separate thread from my ROTK and keep this thread here on FISD rather than on MEPD for a few reasons. To avoid and confusion and/or misconceptions here are the reasons: #1. I believe, and have always believed that the (as it is now being called) Crystal Patrol Pack is NOT a sandtrooper. The Crystal Patrol Pack is clearly noted in literature from Rogue One that it is a “duty patrol” not a classification. Further, I have read that the “bottom line” is that MEPD gets the “dirty” Stormtroopers. Well, there are numerous pictures of the Crystal Patrol Pack “trooper” that are clean, clean, clean white armor troopers (ex. Celebration Europe pictures). So not all the crystal patrol packs troopers are dirty and to be quite honest, I have a dog in this fight. I do not want to “dirty” my $1,800.00 investment in the ONLY ROTK to be both EIB and Centurion approved. Regardless, this Horse has been beaten to death and it is clear that at least some of the parties who made the decision to give this pack to MEPD are not willing to change their minds at this point. Further, it really does not matter what I and numerous others think, what is done is done. So that is reason #1 why this thread is here first and will eventually be cross posted on MEPD. Please do not respond to this reason by arguing for the “why” the Crystal Patrol Pack is now an MEPD asset, it is not the reason for this thread and I do not wish to get into a “Johnson” measuring contest. #2. All of the research for the ROTK CRLs and the Crystal Patrol Pack were done here on FISD by you guys. Sure many of you are MEPD as well but this discussion was started here and since you all did the heavy lifting, the credit should stay with you here. #3. I do not know the people on MEPD as well as I have come to know you guys. All of you have been instrumental in me accomplishing my TK build and attaining EIB and Centurion. I value your input and suggestions. I do not have any issues with MEPD or the people on that forum but I started out my 501st adventure here on FISD and I just feel more at home here. Like I said, I will cross post this build on MEPD in the future. Anyway here is the link to my ROTK build if you want it. https://www.whitearmor.net/forum/topic/44463-11b30b4’s-rotk-build/ So here is my Crystal Patrol Pack Build… When I ordered all the stuff for my ROTK, I also started to collect all the parts needed for the Crystal Patrol Pack. In a very short time I had everything I needed and just required the time to build this thing. For anyone looking to build this pack or has questions about building this pack there are several build threads here on FISD in the RO section, on MEPD in the RO section, and on the FB page for the pack build. I will link everything relevant here: FISD https://www.whitearmor.net/forum/topic/39073-celebration-europe-2016-rogue-one-stormtrooper-back-pack-build/ https://www.whitearmor.net/forum/topic/38162-rogue-one-stormtrooper-back-pack-part-found/ MEPD http://forum.mepd.net/index.php?/forum/66-crystal-patrol-field-pack/ Face Book https://www.facebook.com/rogueonetkbackpack/ The Build… I am hoping to achieve a very close approximation of the Celebration Europe examples of the packs. It will not be perfect but very close to what we have seen and know about the pack. Ok so for my build the thing that I expect to take the longest is the dyeing of the Alice pack and shoulder straps so I started this first. This is my Large LC-2 Alice Pack and LC-2 Shoulder Straps. Most people who build this pack use the woodland camouflage LC-2 Shoulder Straps but I located the Shoulder Straps in OD so these are what I am using. I posted a link on where to get the OD straps on the Celebration Europe thread on FISD if you are looking for them. The LC-2 Alice Pack comes in three sizes and the pack used for this build is the Large Pack. Most military surplus stores have them and there is information on the previously mentioned Celebration Europe thread to be able to distinguish the differences between the sizes. The Dye I am using is the Rit Black powder dye and the Rit Black DyeMore liquid dye. So I mostly followed the recommendations of the Celebration Europe thread and soaked the pack in1 gallon of boiling water then mixed the powder dye and 1 cup of white vinegar with another gallon of boiling water. I then added the dye water to the pack bucket and stirred everything about every 20 minutes for the first hour then made sure everything was submerged and left it for another 2 hours. Then I pulled everything out and hung it to air dry overnight. While the pack was dying, I knocked out the six 1”x22” bed roll straps. The Celebration Europe thread says to use tan cotton webbing but I used 1” tan polypropylene webbing I had on hand. The weave was the same as the cotton straps used so I figured I can make this work. The key was to paint the webbing but leave the ends tan. For the paint, I used a can of Rust-Oleum Camouflage OD spray paint I had on hand. I did a test and it worked great. I needed the ends to remain tan so I used a Q-tip and some petroleum jelly to mask the ends of the straps about ¼” on both sides, then I tacked the straps to some card board. I spray painted the straps with a very heavy coat and let them dry, then flipped them and did the same on the other side. Next, I took the cam-loc buckles I ordered and spray painted them with the OD paint as well. When the straps were dry I used a paper towel to remove the petroleum jelly and then cleaned the tips again with some rubbing alcohol and a paper towel. Exactly the look I wanting. Next, I stitched the straps to the buckles. The Celebration Europe thread says to do this by hand but I have an industrial sewing machine and some tan thread so I did it with the machine. And that finished the bedroll straps. Next I worked on the Grande box. Following the Celebration Europe thread I disassembled the box. Then I marked and drilled the twelve 5mm back mounting holes. Then I marked and did the twelve 1+” wide hole cut-outs. And that was Day one in a nut shell. Day two… I started by taking the dry Alice Pack and Shoulder Straps upstairs and threw them in the washing machine with no soap for a rinse and spin cycle. Once they were done, I again submerged them in 1 gallon of boiling water. I then Mixed the Rit DyeMore in another gallon of boiling water and added it to the bucket with the pack. Again I stirred the pack every 20 minutes for the first hour then l let everything sit submerged for another two hours. Took everything out and hung it to air dry. While the pack was dying, I started working on the antenna. The Celebration Europe thread had identified the fishing pole used for the antenna was the Avanti Precision X 12ft 3-piece Float Rod; however, that rod is no longer in production. A very close alternative is the NGT Float Master which is rumored to be made in the same factory. I managed to find several for sale for $24.95. I posted the link on the Celebration Europe thread and on MEPD. The only significant difference it that the threads at each eye are silver on the NGT vs red on the Avanti. I will fix that later but for now I wanted to get the antenna mostly done. In this picture you can see the silver threads (yellow circle) and also notice the rod wrapping (green circle) which are exactly the same as the Avanti. For the antenna you only need the top part of the 3 piece rod which is about 50 inches. The very top end of the rod is cut off removing the top eye. The cut should be about 50mm from the top of the second eye. Using my dremel cut off wheel, I chopped off the top. Next I removed all the plastic inner rings in each eye with needle nose plyers and an x-Acto knife. For the tip I got an assortment of vacuum caps from AutoZone and used the smallest one (5/32”) cap but it was still a little big for the rod end. So I added two layers of heat shrink to the end of the rod then added the snug fitting cap. Next I threaded the ¼” rubber surgical tubing I got off amazon through the top three eyes and wrapped is for the area between the third and fourth eyes (counting from the top) then continued the threading for the reminder of the eyes. The Celebration Europe thread calls for a 4mm ID black silicone tubing but I figure my tubing is close enough. The one issue I had was that when wrapped in the spiral, the tubing compressed and looks flat. To fix this, I inserted some black para cord inside the tubing for the area that gets wrapped and this made a big difference. So this finished the antenna with the exception of coloring the threads to red from silver. Next, I made the bed roll. So on the Celebration Europe thread there is no consensus on what was actually used for the bed roll. It looks to me like they used a USGI shelter half which would be consistent with most US military stuff so I snagged a shelter half from a surplus store and cut it in half. One of my concerns with this pack was the weight and how it has the potential to damage my TK armor so I want the weight to be a light as possible. Next I took the half and filled it with some poly fill and rolled it. Presto, bed roll. And that wraps day two… Day three… I started off with taking the now dry pack and shoulder straps and running them through another rinse and spin cycle in the washing machine and then a quick tumble dry in the dryer. While that was happening I painted the threads of the antenna red. For this I used Tamiya clear red (X-27) acrylic paint. I simply applied it with a small brush on the threads and presto red threads that are a damn near perfect match for the Avanti rod. After the pack and shoulder straps were dry, I took the shoulder strap that is worn on the left side and masked it off. I should note that this is actually the right shoulder strap. For some reason they are reversed on the pack but this is the way its done so this is the shoulder strap I used. After masking, I spray painted the shoulder strap with Rust-Oleum OSHA Orange spray paint. This took numerous thick wet coats because the nylon would absorb the paint. The guys on the Celebration thread used a plastic-dip type of paint that avoided the nylon soaking up the paint but I had the Osha Orange on hand so I used it. Eventually the paint began to settle on the top. Once it was sort of dry in the thin areas, I removed the masking. Since I was spraying the paint so thick, it did bleed under the masking tape a little. Once the masking was removed I cleaned up the bleeding a little with a Q-Tip and some acetone. I did leave it somewhat messy though since it needs to have the “used” look. I also smeared some of the wet paint in the two masked off areas inside the rectangle to give the impression that they had once been orange. All this will get more weathering later on but for now, it looks good to me. Next, with a seam ripper, I removed all the straps and back pad that are required to be removed as indicated in the Celebration thread. Next, I took some 1” black polypropylene and the correct brass buckles and made the four buckles that would be added to the pack. Once these were sewn, I sewed them to the pack in the correct spots. Next I stuffed the pack and 3 outer pockets with closed cell foam, then mounted it to the M75 frame. Next, I mounted the grenade box to the M-75 frame with black zip ties. I lined the inside of the grenade box with some black spandex material I had and then mounted the grenade cover. And that wraps day three… Day four (FISD site still not up)… So I only got a few things done today. First I mounted the shoulder straps and the lifeboat hook greeble. Next I mounted the bed roll and antenna. I am thinking I may have too much stuffing in the bed roll but I can fix that later. Overall, I like how the pack looks and all I need to do now is whether it and it will be done. And that is it for the update. Thanks for the interest. Day 5 update… First, I unstitched the end of the bed roll and removed some of the foam. I re-stitched the end and mounted it on the pack. I mounted the antenna and it looks better now. Next, I mixed up some craft paints using several browns, greys, greens, and black to develop about 4 colors of mud for weathering. I applied each color with a small 1” brush using several methods (splatter, dry brush, wash, etc…). One of the colors I sued was a champagne pearl brown, this color added the effect of light glittering that one often sees with actual sand and mud (yellow circle). I am also in the process of adding some black felt to the inside of the frame to help protect my armor from wearing the pack. And that is it. The pack is mostly finished but I need to try it on with the armor and see if any additional protective padding will be needed. I am also curious if I will need to remove my Thermal Detonator to wear the pack. That’s the update so far. Thanks for the interest. Update… and this site outage really sucks since I am not getting any feedback from you guys about this build. Well I put on my kit with the pack and surprisingly everything seems to work well together. No issues with the shoulder straps, Thermal Detonator, or back plate. Walked around a bit in the back yard and I think we are a go for the DragonCon Parade. Here are some pics my wife took. Thanks for the interest.2 points
-
To Glen you listen. He is wise and all knowing Keep up the great work.2 points
-
gmrhodes13, thank you. Ok guys, well I assume that most if not all of you noticed the site outage over the past week? I was not complacent during this time. I started and finished my Crystal Patrol Pack. I would have preferred postings daily and you guys providing feedback but that would have been impossible since I could not post anything about the build on the site. I did log all my activity and post it here: https://www.whitearmor.net/forum/topic/45419-11b30b4’s-ro-crystal-patrol-pack-build/ And here are a few pictures to entice you. Next I will be starting on my T-21 and I will link the build on this thread as well.2 points
-
Yesterday I took delivery of a new DLT-19 from ProCoPrint3D. This is a resin casting with an aluminium barrel shroud. It is cast from moulds taken of a genuine WWII vintage MG34. The casts are very crisp and even have some very nice WWII MG34 markings on them (even on the separate barrel), and because it is cast from a real MG34 it assembles pretty much as a real MG34 would do, and can be broken down easily for transporting. There are several moving parts including trigger, cocking handle, front and rear sights, quick change barrel assembly (with separate barrel) and removable stock. I am aware that the layout of the T tracks is not strictly correct, and I may well alter that in the future. I did have an issue with a badly cast Bi-pod leg, but ProCoPrint3D have corrected this for me quickly and sent out a replacement by return. I have for now made some repairs to the poor casting with plasticard and Miliput putty to get the project up and running, but I will replace the leg with the new one when it arrives. This is the DLT-19 as it arrived from ProCoPrint3D, after assembly though of course. Today I cleaned up the casting a little bit and added the round greeblie on the upper left side of the pistol grip using a cut down ballcock washer with a hole drilled in its centre. After this I laid down the base colours which are largely Halfords Satin Black, with Vauxhall Steel Grey, also from Halfords, being used for the barrel. Normally I would apply primer before painting, but this blaster came painted a semi gloss black, and so I simply rubbed this down and used that as a base for my colours rather than a separate primer coat. Here are a couple of pics showing the nice markings to be found on this blaster. Once the base colours had had a suitable amount of time to cure I then dry brushed the entire gun apart from the stock and pistol grip in Tamiya XF-16 Flat Aluminium. This is to add a look of ware and tare on the blaster, although I have to say it is really hard to find a really beat up looking MG34. They are made to a very high standard and even after 70 years many retain a lot of their original finish and still look to be in very good condition. I always look at pictures of the real gun to ascertain where ware may occur, and the colours etc. that the ware causes. This is some of the parts after the dry brushing. The next step was to add an all over wash (again missing out the stock and pistol grip) of Mig Dark Brown Wash for Green Vehicles. This adds to the patina on the blaster and helps to tone down the dry brushing a little. Here are the parts drying outside after the wash has been applied. Once the wash had dried sufficiently all the parts were given 2 coats of Tamiya TS-20 Flat Clear spray, allowing 15 mins between coats for the clear coat to dry. This seals in the weathering and protects the paintwork a little, as well as helping to prevent the paint and weathering from wearing off and leaving black/dark marks on lighter surfaces. That is as far as I have gotten with this today. Tomorrow I will redo the dry brushing in some areas just to emphasise a little bit the ware in those places, and I think I will be pretty much done then. Thanks for reading this far. I will post more pics as progress continues. Paul1 point
-
Is there anyone with a spreadsheet or something like it that lists the various similarities and differences between the various classic TK armours?? Like side by side comparisons?? I honestly am unsure of the changes between ANH, ESB, and ROTJ. This may make build choice a bit easier to visualize.1 point
-
Yes I meant the corners and roger that1 point
-
I'll get there eventually!!1 point
-
Painting looks GREAT! If you want uber accuracy then the plates could have straighter edges1 point
-
Looking good, as always! Nice job on free-handing those buttons.1 point
-
I may be fiddling with the web server tonight EDT trying to improve the performance even more. If you notice a blip or two... that's all me. -Eric1 point
-
Ah alright, I'll just use velcro for the forearms and it'll be more screen accurate and easier to take on/off. For the ab boxes I misread the section about the seamless connection with the ab/kidney sections. I'll just glue and secure the ab boxes and make sure they are flush to the ab plate. It's time for a small update. I took pictures of the filled in yoke sections, the 3D printed parts for the Executioner's axe, and the new helmet electronics I received from Tony/ukswrath. Here is the TFA yoke section that I've filled in with EP-400 Epoxy Putty. I've also trimmed this sections down to fit better with the chest plate and the gaskets on. Here's the filled in TLJ-E yoke. It's filled with EP-400 as well, however I haven't fit/cut this like I have the TFA section. Here is my box of 3D printed Laser axe pieces, The dowel for the handle and the aluminum bar are not shown, They are in a different box. If anybody is interested ina build thread for this let me know, and I'll start one. Finally for this update I ordered and received a FOTK speaker system, V2 fan bracket, and the Audio system from TOny/ukswrath. I'll be putting it all into my helmet over the next few days. If I can get everything in comfortably and working properly I'll be adding this to my TLJ-E helmet and eventually my TLJ helmet when I order it. I still feel like I have quite a bit of work to do but I hope to have everything finished soon.1 point
-
Goodluck with your EIB application!!!1 point
-
Awesome!1 point
-
Congrats Rat1 point
-
Absolutely STUNNING job! I loved following along with your paint/dirtying work.1 point
-
The front "dude`s" tabs ends a lot higher up than mine...how does yours look? Oh I can go check your build EDIT: and just did, yours seem to end way higher up, a bit hard to tell from the pic but looks alot more like the screen ones. Kinda makes me belive that the shoulders are smaller on my kit.....well not a major issue as cutting plastic is somewhat a normal state at the moment...mearly curious if there were a difference1 point
-
Ah! I meant it looks like the Anovos helmets, while an improvement from previous versions, may still need some painting on the frowns. Sent from my iPhone using Tapatalk1 point
-
Yeah it's all personal preference, for sure. On screen it looks like sometimes the tabs are visible and sometimes not.1 point
-
I love it! It looks straight off the set of Rogue One, man. I want to get around to building one at some point and this thread will definitely be a good reference.1 point
-
Prepping for Fan Expo.. only one day this week and will be Command duties not suiting up.. News on my gear.. Starting repairs.. Laugh.. I moved so I didn't have time to fix it all before. Let the legend continue!1 point
-
I got a bit more done tonight...this time the shoulder straps. Here's the original AP shoulder straps. I trimmed them up... And following Mark's (AP) instructions I removed one large tab and one small tab from the back of the straps. Next I got out my large pasta pot, grabbed my daughters soccer ball and did some cooking. :-) I heated the water to a boil and dipped in a shoulder strap. I left it in for about 45 seconds then took it out and forced it over the soccer ball. Once it cooled it took the curve of the ball. Next I cut some little strips of ABS to fit into the underside of the straps. This is to fill up the voids so that there's more surface area to grab on to when you glue the straps to the chest piece. And then I glued the tabs in place. That's it for tonight. :-) Mark1 point
-
Didnt know such a thing existed!! I'll have to look it up! Maybe make my own spreadsheet someday.1 point
-
Congratulations trooper, a great read1 point
-
On the helmet. I thought that it would be a fun project to fix it up and go for EIB. In some pictures you can really see that extra flashing. I feel pretty comfortable in trying to trim those now. This is my first build so I was nervous during the whole process.1 point
-
Very nice Eric. Always good to read builders experiences. Troopers Helping Troopers1 point
-
Congratulation Martijn1 point
-
Great write up Eric, and I am glad to see your driven. I cant wait to see where you go from here, and to watch you grow as a trooper.1 point
-
My pleasure, Eric, and a big CONGRATS on your approval! So when are we going to see your EI submission? (hint hint, nudge nudge).1 point
-
I suggest using a host, Imgur.com or google photos is popular choices around here or using tapatalk For the trimming I would do something like this, you can trim less to begin with and see how you like before trimming more1 point
-
Officially a TD! Approved!! Although I'm keeping my "TK" official designation.1 point
-
Excellent news!! Many congrats. :-)1 point
-
Whoop whoop!! Received my approval last Saturday !! Adding TK to.the TI and TN designations... now mentally prepping for my first troop in TK.1 point
-
Ol betsy has been done for a while, other projects creeped in before I posted pix. I love her. Only peave is wiring and battery placement in the clip, doesnt fit as secure as I'd like with all the wires in the way, plus the clip is rather large but Instill like. Need to weater the lil red spiril things, leaving them red [emoji16] Sent from my SM-G960U using Tapatalk1 point
-
So now that I've been approved through my GML, still awaiting my official approval and TK-ID from the LMO, it's time to begin the electronics add one. Through the gracious heart of a fellow garrison member I now have this happy addition. Now to work it all out and get it installed. Sent from my VK815 using Tapatalk1 point
-
It took a while, but I finished my shins. Front... Back... I noticed that the back doesn't come together too smooth, and the Velcro doesn't hold it down that well: Any suggestions on getting the two edges with the Velcro to come together better?1 point
-
Definitely following this for my own girlfriend, she is of similar height! Keep up the awesome work, fun to watch!1 point
-
The sad thing is that Anovos is now selling their kits for $900.00 + shipping, which is insane considering you can get one made of thicker ABS for less from many of our vetted armorers in less than 4-6 weeks in many cases. For that price I would throw in another $50.00 and get an RS kit. Plus, the vetted sellers actually communicate! Yes, the Anovos helmet does come pre assembled, but is it really worth waiting a year (or more) in some cases for that? I think not. I do find it strange how much their prices have gone up, (I paid $400.00 for the Anovos kit I used for my Hero build just 2 years ago). I understand inflation, but it sounds like they are just getting greedy.1 point
-
Yup. Anyone who still needs a vest - shoot me an email at [email protected] and I'll get you taken care of.1 point
-
Hot water bath is a lot more gentle than a heat gun, sure you can use one but you do need some practice before hand, ABS goes from pliable to molten mess in the blink of an eye1 point
-
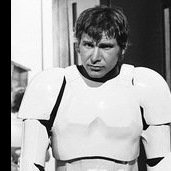
I would avoid trimming the ab plate, Ryan. The chest plate and back plate can be trimmed, though. If you look at Luke's armor in the (photo 1) you will see that since he was "A little short for a Stormtrooper" they trimmed the bottom of the the chest (and the neck) and in the second photo it shows that the bottom of the back was cut down as well. Cricket has an incredible build thread for the "vertically challenged" that will help a lot, located here: https://www.whitearmor.net/forum/topic/38416-crickets-rs-stunt-build-for-the-vertically-challenged/?tab=comments#comment-514228 The left ab/kidney connection looks great from what I can see. The line runs vertical,and the rivets should line up just right (as seen on Luke in the third photo) so I would leave the ab plate alone. You will also see in the third pic that the return edge on the sides were trimmed. The right ab/kidney connection can overlap, (but can be trimmed). The important thing is that you don't have gaps. Keep up the great work!1 point
-
Achievement unlocked1 point
-
Blue- I will try the nylon and see if that fixes it. Green- I may try to undo some the the sewing and cut the Velcro shorter. But that seems like a lot of work for so little. Maybe another day when I’m feeling ambitious. Here is where it is sitting now. I added snaps below the ones I had to bring it up. Sent from my iPhone using Tapatalk1 point
-
Well I was working on the Jedah Patrol pack and pulled out the laptop to get some reference pictures and noticed that I had a notification on FISD. Soooooooo it is official. I am not the first ever Rogue One TK to be approved for both EI and Centurion. I am very humbled and speechless. Just Wow!1 point
-
Did you test fit with all that return edge? I would remove more of that edge for comfort than test fit again.1 point
-
I think it's high time we create individual photo check lists. New armor types with new details require a new photo check list for each, or at minimum make a universal one. Also, we need to update the application required photos lists. The ROTK alone has enough changes compared to the OTTKs to warrant it's own list.1 point
-
The armor was changed in order to make the troopers look better. There is no way to explain the armor changes other than R1 was a better made movie. The OT troopers are somewhat clunky and not very uniform. The R1 troopers are more realistic and the helmets are symmetric with actual vents, not stickers. In my opinion they are 100% better than the OT troopers.1 point