Leaderboard


Popular Content
Showing content with the highest reputation on 04/26/2018 in all areas
-
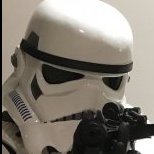
Hi Justin, welcome to Centurion review, and thank you for your application. CRL and Centurion Application Requirements: All submission photos are present. Your armor displays all the necessary elements to qualify for Centurion so congratulations Trooper! Other-Armor Fit/Assembly: Thank you for making the requested repairs, you have done a great job. We still think the fore arms can be dropped a little more to even out the large black area at the wrist end, and I would also like to recommend you change the Velcro strapping specifically between your kidney and Butt plate so the butt doesn't pop out as much . Nothing more to add. Thanks again and welcome to the Centurion ranks1 point
-
The hooks were in the initial (individual component) photos but were removed and additional straps were added for the application. He has very long arms.1 point
-
I used a combination of coarse thread screws and epoxy to mount everything from the inside. I used a different (thicker) oil pan,(photo 1) and cut out the back for access, and afterward I epoxied black craft foam (from Michaels) over the hole, (photo 2). This prevents the oil pan from scratching your back plate. Note that on the left shoulder strap that I attached a 2 snap mount to hold my shoulder ammo pack (see third photo for detail).1 point
-
Congrats! Nice job!1 point
-
I'd get all of it under just enough. The only issue you have to watch is with raising and lowering you arm. You dont want bell getting caught inside bicep. Let the experimental stage begin. Getting there!1 point
-
Congrats trooper and welcome to Centurion!1 point
-
Just updated my to do list and I'm pretty stoked. I feel like the end is within my grasp! My goal right now is just to have everything done for May 4th so I can pick my kiddo up after school while wearing it (because I'm the most awesome mom that way and she's still young enough to not be completely embarrassed). Then I'll do all those final sizing/strapping tweaks and hopefully be approved to do an Autism walk in June. You'll notice that I haven't tackled the actual DRILLING INTO THE ARMOUR part yet. Anxiety rising... HELMET - paint ear screws white - add second coat - secure s-trim - cut and secure lenses - cut/size padding, wrap in fabric, attach with velcro ARMS - add strapping BELT - attach plastic ammo box part - attach drop boxes - attach holster - snaps THIGHS - add ammo pack - use two rivets - add snaps for garter belt SHINS - add fuzzy side of velcro strip BODY - final sanding - add male snaps to chest plate - make female snap elastics - 3 rivets on left kidney, 3 rivets on left ab - 2 male snaps on butt - with functioning strapping - 1 rivet on cod with strapping SHOULDERS - glue straps - attach elastics, snaps, strapping MISC - order voice system - figure out fans/batteries1 point
-
Well done trooper, I'll also see you out there!1 point
-
Yep looks good, just try and keep the bicep tucked under the bell, doesn't have to be by much.1 point
-
Alright how does that arm gap look now? I got the spacing between the bicep and forearm down to an inch Only did the left side to make sure it would work first1 point
-
Hey Aaron welcome to you Centurion application. CRL and Centurion Application Requirements: All required submission photos are present. A big shout to you for making the suggested corrections pointed out by your fellow troopers, and fantastic job on your build . At this time Andrew and I would like to welcome you to Centurion. Other-Armor Fit/Assembly: As suggested by your fellow troopers lowering your shins roughly 1" would actually make the legs look more uniform. That's it brother, time to check in with Vader and start representing the Empire as its newest Centurion1 point
-
Well done, Nick. Excellent work. See you on the front lines.1 point
-
Hey Nick welcome back. Thank you for your Centurion application. CRL and Centurion Application Requirements: All required submission photos are present. Thank you for replacing the TD screws with the more correct type as suggested by your fellow troopers, and again beautiful job on your build. At this time Andrew and I would like to welcome you to Centurion. Great job! Other-Armor Fit/Assembly: Time to get out there and represent the Empire1 point
-
Yes the screws are painted, I used a standard white paint. Ear gaps are acceptable, as seen in a lot of screen images.1 point
-
Back in the saddle again1 point
-
Probably done roughly 12 in my time, each one is a little different, really depends how much sugar the younglings have. I have been at one that I was almost asleep in my armor to the complete opposite and have every opening between my armor probed by plastic light sabers. Don't always rely on parents to save you either, their just happy their screaming younglings are being entertained . We normally suggest a donation to a charity of their choice or if they don't have one we have our preferred list they can choose from. Always amazes me though, it seems that it is always those that are battling that don't have much that put on the best show for you kids, they also amazingly donate the largest amount. I went to one birthday in an exclusive area where all the parents had high quality costumes, there was a giant R2 cake, star wars cup cakes, an open bar, multiple entertainers, everything a youngling could ever want, YET they gave the smallest amount to charity, we won't be going back if called upon again1 point
-
Same here, the excitement begins for the BBB day!1 point
-
YAY!!!!!!!! just got my tracking info for the TK Kit from AM!!!!1 point
-
Good to see you creating a build thread Craig! Good Luck! We will be watching your career with great interest1 point
-
Craig, I think the PDF of instructions I sent you (written by @ukswrath) includes the details for EIB and Centurion builds. the only thing really holding the Anovos kit back from the upper levels is the belt and the two extra screws holding the holster in place. As Joe suggested, an upgrade to a Kittel belt will pretty much solve both problems while adding the problem of removing the plastic parts from the Anovos belt. I've been dragging my feet on putting my new belt into service, once you are ready perhaps we schedule a day and do them together.1 point
-
Don't ever be discouraged. I won't borked up some shins and had to order new ones. It happens. It's the end result that matters, and learning/enjoying as you go.1 point
-
I'd just call it battle damage. The match will be close enough that very few- if any- people would notice when you're out trooping.1 point
-
Paste will work but unfortunately the color will not match 100% even when using same exact plastic1 point
-
Yeap, ABS paste is probably the best solution to filling these holes! Here's a tutorial:1 point
-
everybody makes mistakes. I just glued the two barrel pieces of my T-21 blaster backwards.....it sucks, but definitely not the end of the world. I would do a search here with respect to abs paste (basically abs plastic chips, melted down via acetone, and used like a filler). fill the holes and sand the excess.....I've never done this myself but have seen posts with respect to the use of abs paste. So have a look see and good luck with the repair.1 point
-
Thanks Shane! Appreciate it!1 point
-
Ah, interesting. Going with both - I like that. I think that's how I will go. Thanks! I can always count on the good people here1 point
-
That is awesome! A true stormtrooper at work. Sent from my iPhone using Tapatalk1 point