Leaderboard


Popular Content
Showing content with the highest reputation on 01/03/2018 in Posts
-
E11 mage well complete!!!! and fully functioning3 points
-
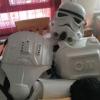
All parts ready for paint and assembly. Yeah!!!!!!!3 points
-
Perfect Dan Thanks for posting this link. Looks like all sounds are stored on the 128 MB micro SD card. Anybody having an idea, if the sounds are customizable/interchangeable?2 points
-
I didn’t a rough cut to hide the wires in the scope rail. If all goes well I will be assembling and painting this weekend.2 points
-
I do ,,, the one i scanned and copied had full knurl.... Probably for screen accuracy some of the knurl needs to be wore or sanded off..... The tab and hole on the bottom is for mounting. I have put a notch in my tube so it can be screw into the back of my front part.. Its really hard to blaze that piece on because its on the edge...2 points
-
Will do and there are a few out there but how to build is in a sense universal, meaning that you can look at any build for suggestions, some things are armor-specific but they are easy to count, the infamous misslabeling of the Anovos shins is one example....the pinned threads in the build section are all great sources for knowledge/tips/how to’s, the CRL costume reference gallery provide info on what’s required for basic, L2 Expert Infantry and L3 Centurion AND the most important of all is to do what you already done - start a build thread and ask questions because we are ALL here to help - there can’t be to many Stormtroopers in the world1 point
-
I had to make my rear thigh cover strips larger than the recommended width, so I am guessing that the rear shin strips should be the same width as the rear thighs? I know we need to make them what they need to be to fit us, but should I just come as close as possible to uniform width? ALSO, does anyone recommend a good tutorial on the bra hook attachment for the shins? I also wanted to comment about this community. You guys (and ladies) are AWESOME!!!! I lack a certain faith in humanity, but the help and positive vibes I get from people on here gives me hope. I can't wait to start trooping and meet some more troopers!!1 point
-
Hi Tino, Not sure if this video from Paul will give you your answers. :-)1 point
-
Tino if all goes well it will be finished by Sunday.1 point
-
The TRamp BlastFX seems like a good choice for your blaster. Thank you for sharing this product with us in such a detailed way. Any chance to possibly (some day) get a little video clip of steps 2 to 6 from the instructions below? Really curious to see those changes in the display.1 point
-
Keeping fingers crossed for your planned progress next weekend. Guessing we can expect another nice update in a few days?!1 point
-
Just testing tapatalk Sent from my iPhone using Tapatalk1 point
-
Replacement TD from TrooperBay is built (very easy). Used the clips from ukswrath. Looked at the specs, hopefully I got this measured and cut correctly.1 point
-
This is awesome - thanks so much! Pinned as I'm sure others will find this very useful.1 point
-
Dang that sucks are you trying to do a DT too or just checking on updates? Sent from my iPhone using Tapatalk1 point
-
True I seen that but you can reserve the DT Specialist helmet so I was thinking they were going to try to release a full kit Specialist. But I found some guys who make the kit and wait time is way shorter Sent from my iPhone using Tapatalk1 point
-
Tony yea at least the left bicep looks that way to me as well. Sent from my VK815 using Tapatalk1 point
-
For the bra hooks you could look up TK1636 on YouTube he does a quick how to with them. Sent from my VK815 using Tapatalk1 point
-
On the the barrel I placed clear disc (ordered on esty) to reflect the lights. Hopefully making a propagation effect.1 point
-
Good info Josh thanks. What kit do you have? Hope to see you at SWAT, officer #32 here1 point
-
You could have gone with 25mm wide strips both sides. 20-25mm wide front strips are quite normal on the original ANH armour and should be acceptable in the 501st. There should be no problem having a gap between the joining strips if that's what it takes to make the parts fit you comfortably. Even if you need to go much wider in the back, it looks better to have a wider front strip like 25mm or 30mm and use whatever size necessary to close the backs up. That's my view anyway1 point
-
It's hard to be specific in your case, but make it look nice. Worry less about specific numbers.1 point
-
Yes. Or slightly wider still if you need to. Normally you'd make the rear thigh 20 mm, and the rear shin 25 mm. The extra width here helps hiding the shin closure system (velcro or hooks).1 point
-
Step 19: Tube Stripes Pretty basic! Cut your two halves out, and trim parallel to the ends to get to fit better into the space. Measure out your placement. I put these at 3.5cm from the cheek crease. Dry fit, then place and press..!! You now have yourself a COMPLETED REBELS STORMTROOPER HELMET!! The only thing left is to troop the heck out of it!1 point
-
Tarde pero felicidades..........1 point
-
Haven't been able to start it yet! It's my top priority project this year... all I need to do its get my workshop tide up and prepare a nice big table to lay down the pieces while working on it. I've been keeping an eye on your build thread though.1 point
-
Great start! I would trim a bit more off the teeth, but I think that's more personal preference than a requirement. And yes I'd take a hair more off the top of the helmet so the brow trim aligns better to the bottom of the trap. Btw I also used Google photos to share my build photos and you should be able to get the direct link to the image and paste it into your posts and it will get converted to an embedded image.1 point
-
I have discovered that assembling the armor is only 1/2 the battle. Fitting/adjusting everything is a whole new endeavor. I think I finally have my arms the way I want them for now. As you can see in the second photo, I decided to lower the cod area by .7 inches. This made a world of difference in overall fit! At this point, everything is built, it’s just needs to be assembled and tweaked. Here are a couple of 98% finished bucket photos.... Thanks for watching! Sent from my iPhone using Tapatalk1 point
-
I noticed on the reference photos that these should have a slight slant to them. Again, using the figure as a reference I moved the neck line down and the sholder straps. You can see from the head on photo that the sholder straps are down lower and in fact the bottom should be about 3/4 lower below the chest details. I debated on extending it but for now I'm just going to keep it how it is. After1 point
-
There is the main body I need. Looks great. Is it available?1 point
-
Perfect shape of the part and that knurling pattern looks spot on, Chris. Just wondering, do you have a reference for the pattern covering the same area on front and rear side of that piece? And that ring on the bottom, is that a mounting hole?1 point
-
They overlap quite a bit so never an issue. Just make sure like Joseph said no logos in exposed areas. I have a UA logo but its under my chestplate.1 point
-
Here is some more eye candy1 point
-
Here is where I was able to source all my build parts Armor Sourced ANH Stunt TK Walts Trooper Factory Boots Imperial Boots - Classic 421 Imperial Boots Neck Seal OTTK recessed cut Circ: 15 1/2 Length: 3 1/2 Geeky Pinks Phantastic Gaskets Materials Sourced E6000 - two to three+ 2oz tubes, or two+ 3oz tubes Hobby Lobby Elastic (Chest to Back plate) - White 2" x 2' in length recommended) Amazon Elastic (Drop Boxes) - White 3/4" x 20" Amazon Elastic (Bells to Shoulder Strapping) - Black 1" x 12" Amazon Elastic (Bicep to Bicep around arm) - Black 1" x 20" Amazon Elastic (Bicep to Forearm) - Black, 2" x 6" Amazon Elastic (Thigh to waist belt) - Black, 3" x 24" Amazon Elastic (Kidney to Ab right side) - Black, 1" x 8" Amazon Elastic (Posterior to Cod) - Black, 1" x 12" Amazon Nylon Webbing (Kidney to Ab, left side 6 rivets) - 1" x 6" Amazon Pop rivets (Waist belt drop boxes) 1/8" x 1/8" Aluminum pop rivets. Amazon Pop Rivet Gun Amazon Paint Gloss White: Testors Hobby Lobby Gloss black: Humbrol #21 Hobby Lobby Gray (Ab plate), Humbrol #5 Testors # 1138 Hobby Lobby French Blue (Ab plate & Tube stripes), Humbrol #14 Testors # 2715 Hobby Lobby Gunship Grey (TD tube), Testor #1923 (spray paint) Hobby Lobby Internal Strapping B. Internal Strapping Brackets - http://www.whitearmor.net/forum/topic/20859-accurate-anh-stormtrooper-strapping-brackets-v-20-now-available/ Mr. No Stripes Snaps Ab - "S" snaps "poppers" (Used on the following locations: Ab to belt, Ab to Kidney right side, Cod to Posterior, Shoulder to Back plate strapping right/front) 15mm, (bag of 15 is the smallest) Ebay: Grandtobuy2 Ab - "S" Snap die punch and set tool 15-17mm, (1x) Ebay: Grandtobuy2 Thigh Ammo Belt - Double Cap Rivets - Joseph - http://www.whitearmor.net/forum/topic/34902-centurion-level-rivet-sets-for-sale/ JustJoseph63 Ab/Kidney - Split rivets (bag) JustJoseph63 Inner strapping - Line 24 snaps, nickle, 100ct (recommended), Tandy - https://www.tandylea...ts/1263-12.aspx. Fasnap - http://fasteners.fas...nap-fasteners? SteckStore.com Inner strapping Mr. No Stripes Shoulder to Bicep - Dritz Sew in Snaps, Nickle, Size #10 -http://www.amazon.co...YH1DNAAPPP1R3H1 Amazon Calf closure Elastic - http://www.amazon.com/Dritz-9506W-Non-Roll-Elastic-4-Inch/dp/B004ALO9CK/ref=sr_1_2?ie=UTF8&qid=1454439839&sr=8-2&keywords=3%2F4%22+white+elastic Amazon Bra hooks Hobby Lobby Thigh Garter belt - http://www.whitearmor.net/forum/topic/29991-thigh-garter-system/ Gloves (ANOVOS supplied) or - https://trooperbay.com/flexible-hand-guards-in-white-black-or-plain.html not sourced yet Rubber hand guards (Joseph) - http://www.whitearmor.net/forum/topic/35702-latex-hand-guards-for-centurion-level-anh/ Undersuit Amazon (DRSKIN) Waist Belt other - Kittle's belts) - http://www.whitearmor.net/forum/topic/19803-fs-white-canvas-belts/ not sourced yet, but will be from here1 point
-
Thermal Detonator completed. https://imgur.com/EymxpbV https://imgur.com/8m2N2jp1 point
-
Brilliant Dan... your armour fits you like a glove..well done young man Sent from my Moto G (5) using Tapatalk1 point
-
You can either use some spare ABS or even a heavy plastic "For Sale" sign available at Lowe's of the like. Just cut out a section about half an inch or so larger than the area in question and reinforce it from the back using E-6000. If you have the Anovos kit I would recommend this as a preventative measure on the neck and arm curves on the chest piece.1 point
-
Ross, just a quick word if I may to say that I truly appreciate the transparency and openness of your work to this community. I understand that you have a strong following in the UK, and I believe it's beneficial for the rest of the membership on FISD to have first-hand information about who you are, what you do, and how your armor came to be.1 point
-
Agreed, Christina! I didn't trim the shins any shorter, but I did even up the thighs. I may just get a new pair to fix this. I don't like how short they are. It's going to bug me, even if I can get it to look 'okay'. :/ I worked on gluing my latex handguards to my rubber gloves today. I glued these onto an old pair of rubber gloves, and I really didn't like how flat they sit on the glove. I found a way to give the handguards a little bit of natural curve that I thought I'd share. I'm sure all you old-timers know this trick already. I can't remember where I saw this originally (sorry for not being able to properly credit the OP). Stick a small towel and bottle of Novus (or similar sized/shaped bottle) into your glove and glue the handguard in place. It puffs the glove up like a hand inside might be there. Apply your glue, and you're set. It will give the handguard a slight curve that sits on the glove much better than the flat handguard does. Below, they're fully glued on. Ooh! Slightly curvy! Aaah! Another benefit to gluing the handguards on this way is that it makes for easier placement of the handguard on the glove when gluing. Okay, I'm getting back to fine-tuning my kit. Stay tuned!1 point