Leaderboard


Popular Content
Showing content with the highest reputation on 12/20/2017 in all areas
-
Name: Anthony (Tony) Jobe Height: 5'11" Weight: 185lbs FISD Name: ukswrath Legion ID#: 10116 Profile Page: 501st Profile Garrison: Golden Gate EIB application - Build Information Armor Maker: Anovos Helmet Maker: Anovos Boots: Imperial Boots Gloves: Imperial Boots Electronics: Ukswrath's FOTK Audio Neck Seal: Anovos Blaster: JJ with electronics Build Thread: Anovos TFA TK Hangar updated2 points
-
Knew I was forgetting something. I've had the flu for the last two days, surprised I'm conscious. lol THanks Glen Photos added2 points
-
I got an update from CSR. Figured I’d post it. Sadly I don’t know that we can trust it. All parts have finished being produced and have been shipped to US warehouses for distribution to customers. No further safety testing or approvals are needed. Only conceivable delay would be customs. Sent from my iPhone using Tapatalk2 points
-
My tighter compression top came today. Much better and not as thick as the original one. I put the whole suit on and walked around my house for about 15 minutes. Much cooler with the new top for sure. My submission pics are in and I'm just waiting for my GML to review them.2 points
-
Thanks Andrew and thanks to the FISD Family. As you said I built this armor to be as accurate as possible, given the knowledge we had at the time from the Alpha armor group, it was quite a challenge when it came to specific details and yet here we are. A huge shout to the Alpha group for paving the path, and for the everyone else who followed my build at that time offering words of advice and encouragement. Troopers Helping Troopers. Long live Whitearmor2 points
-
So many builds going on right now, hard to keep track on them all and I´m quite pleased - for now Me and my son at Rogue One (not 501st approved FX kits I might add) uppdated pack on the left. . Updated the Shadow-bin Now they match2 points
-
I puttered a bit today. The Loctite I ordered from Amazon arrived so I glued my latex hand guards on to my gloves (both from AP). I know people have had issues getting the latex or silicone guards to stick to the rubber gloves (or whatever they are made of). So I followed Sean's advice (which I think he got from Darthanael, who got his idea from FencingCorvetteTrooper, who got... anyway, you get the idea - this forum is great. And if you are building an AP kit, check out those threads - all really great builds). Anyway... I wasn't sure how well this would work, so I prepped my gloves in case I had to let this glue set up for awhile. I had some old rice that was past its prime, so I filled up the gloves with the rice. This is after I marked where I wanted the guard to go while wearing them, of course. The one on the left is done, the one on the right is not. By the way, the glue sets up really fast. I forgot to apply the primer to one of the guards and it did not adhere at all. I applied the primer, and within seconds the guards are bonded to the gloves - and anything else that might have some glue on it. yeah, that is a piece of the hand guard. I forgot my PPE. I usually wear gloves when using superglues - I forgot and paid the price. That is not coming off. True test for the hand guard.2 points
-
Hi guys. Just a little update for you. I’ve been informed that a tiered system for blasters will not be moving forward at this time. Let’s do what we can to help others by showing them some awesome blaster skills. :-) Thanks for everyone’s input. Best wishes, Dan Sent from my iPhone using Tapatalk2 points
-
Name: Anthony (Tony) Jobe Height: 5'11" Weight: 185lbs FISD Name: ukswrath Legion ID#: 10116 Profile Page: 501st Profile Garrison: Golden Gate Build Information Armor Maker: Anovos Helmet Maker: Anovos Boots: Imperial Boots Gloves: Imperial Boots Electronics: Ukswrath's FOTK Audio Neck Seal: Anovos Blaster: JJ with electronics Build Thread: Anovos TFA TK1 point
-
Piece of Cake! Congratulations!!!1 point
-
Today I went grocery shopping. On the way back someone asked me whether I was a TIE fighter pilot. I said, yes, I am, and he complimented me on my jacket. Fun, but not quite up to standards. (That's not a blaster in my hand, just the remote for the camera.)1 point
-
Sliding in on your coat tails Glen, thanks1 point
-
Congrats Tony, as if there was any doubt1 point
-
Shins partially assembled. I wanted to do the front cover strip on each first, then I'll line up, temp fasten with blue tape and figure out my aft cut lines. Going with industrial velcro, as suggested by ShaSha. Sent from my XT1254 using Tapatalk1 point
-
No, seriously, that video was pretty helpful in getting an idea of positioning things and how the armor sits and walks. I know the strapping will help as well, but doing this on my own with no one around to help poses a lot of challenges. Thank you for your help! Sent from my iPhone using Tapatalk1 point
-
I never thought I would ever say this in my entire life, but the close-up of your crotch was really helpful… LOLOLOL [emoji13][emoji23][emoji23]1 point
-
Start with the inner return first, a little at a time a few mm can do wonders in getting the thighs higher and it look better with some return left if possible....and like Sean said, see how it looks with the cod held in the right position...you want minimal black showing but to high and there`s a possibility of mobility issues instead as well as noise and chafing...but in my opinion it all comes down to looks.....I can just barely navigate stairs and it`s not pretty when I do so but that`s the way I like it - minimal black showing with even gaps. Here´s how it looks when I walk to give you an idea1 point
-
Yeah trimming down that return edge helped a great deal — much more than I thought it might. Latest fitting: Sent from my iPhone using Tapatalk1 point
-
I got rid of the entire return edge at the top of my thighs. I glued the front up with the 20mm cover strip before deciding where to trim/adjust at the back. This helped me a lot with shaping them. Without the return edge I was able to raise the thighs to a good height. Yours doesn't look too bad as far as height goes. Maybe a little higher? More experienced TKs should chime in here. Keep in mind the cod will rub the thighs if they are too high. Noisy and maybe even chafing. Yikes.1 point
-
I had to look even closer and maybe I see it about 2inches up from the bottom, correct? They should be at the bottom RS suit for reference1 point
-
Mmm, Shadow... next on my list (if I survive the TK).1 point
-
Lol understandable on the obvious...sometimes the obvious gets overlooked when you have all this stuff to finish. I'm moving slow on this and trying not to OCD too much.1 point
-
Thanks and congrats! Would have been a pretty horrible holiday if she didn’t. Sent from my iPhone using Tapatalk1 point
-
Awesome Sean, So glad you posted this tutorial, exactly what I've been looking for for my lens install.1 point
-
OK, OK enough fun with the DO's application lol, it's time to get on with it. Tony, thank you for your TFA EI application. Its not often we are privileged with applications from members of staff, let alone one of the deployment officers. I think we all know Tony has quite the reputation for his build threads, level of detail and quest for ultimate accuracy, so I looked at his application several times to make sure all the boxes were ticked. Did I expect to find anything out of place! no, nor did I, but as you all would expect from either of us in this unusual position, I had to make sure and looked over it for a couple of days. CRL and EIB Application Requirements: Now that he has added the action shot , all images are present and exhibit the attributes required as set out in the level 2 CRL congratulations on a beautiful build Other-Armor Fit/Assembly: In this section we review observations made by your fellow troopers and ourselves. Some observations may lead to suggestions to improve the overall look of your armor. If any suggestion affects any application, it will be listed separately in the above or below sections. I have nothing to add here, and thankfully, as ultimately we ask for high standards from the general membership so it is our job to make sure we also meet and exceed that expectation. Centurion Suggestions: In this section we prepare you for Centurion. If there are any areas of concern this is where they are discussed. Nothing to add Get that Centurion application in Tony it should be another easy pass.1 point
-
wow..............................!!!1 point
-
I think I'll use some of your parts to finish my sterling restoration. But when I build your complete kit I'll probably leave it raw to show off the machining.1 point
-
Decided to start with the tube stripes before cleaning up the pin stripes to make the helmet look some what finished...some touching-up and they will do1 point
-
I have, it`s awesome and I plan on stealing the design not the whole cabinet though, just the "rack" and incorporate something for the DLT and T211 point
-
yes,,, i feel the same way painting my metalmite cylinders too1 point
-
Congrats trooper! Sent from my iPhone using Tapatalk1 point
-
Lookin good trooper! Congrats! Sent from my iPhone using Tapatalk1 point
-
Look a similar design to The Last Jedi Although TLJ had lights1 point
-
1 point
-
Congratulations and welcome to the ranks trooper1 point
-
lol thank you & copy Dang you guys are brutal lol. I don't recall the hanger color being mentioned in the CRL1 point
-
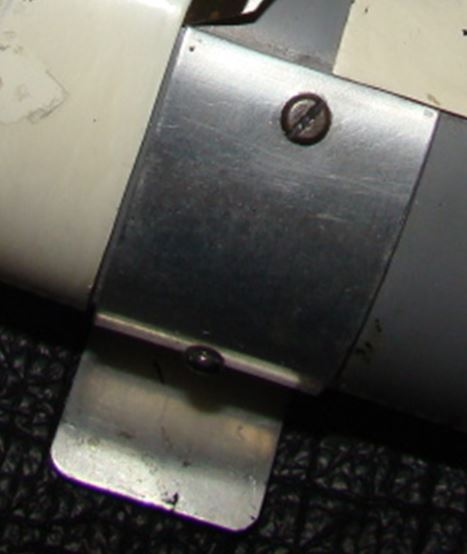
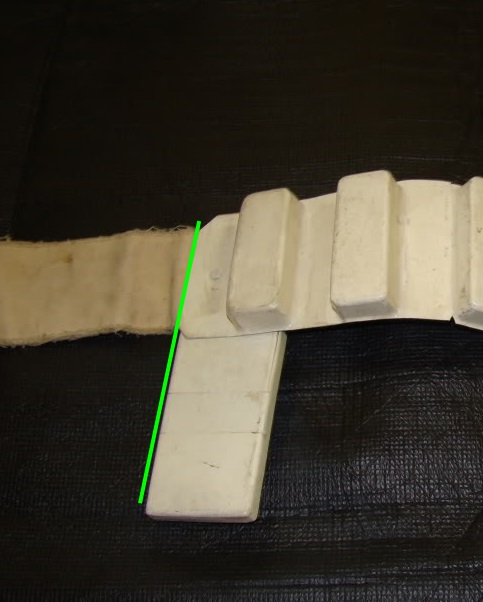
Hey Rob thank you for your application and welcome to your EI review CRL and EIB Application Requirements: All the required submission photos have been posted, and your armour meets all the necessary requirements for level 2. With that Tony and myself would like to welcome you to Expert Infantry, congratulations Other-Armor Fit/Assembly: In this section we review observations made by your fellow troopers and ourselves. Some observations may lead to suggestions to improve the overall look of your armor. If any suggestion affects any application, it will be listed separately in the above or below sections. Nothing major to fix just a dressing issues and an accuracy item to note. Keep an eye on the thick white elastic straps under your shoulder bridges. They are pulling out from under and make your shoulder bells sit further away than they should from the bridges. Reference image Although the screws you have used in the Thermal Det are close, the screen used type were Pan head slotted, where you have used domed head slotted. This will not have a bearing on any approval, it's just a further step towards accuracy. This item also has no bearing on an application but again is a finer detail of accuracy The small vertical Ab button plate looks like it has a slight overhang on the section it mounts too. I'm not sure how yours is glued, but if it can be removed there is still a little bit of material that can be trimmed so it sits like the below reference image Reference image Centurion Suggestions: In this section we prepare you for Centurion. More photos are requested that allow us to make better decisions on possible adjustment etc. If there are any areas of concern they will be discussed here. Drop box alignment. As per level 3 CRL For level three certification (if applicable): Drop boxes are vertically aligned with the end of the ammo belt with minimal gap between belt and box. It appears your Drop boxes slide in from the ends a little, these can be secured using a dab of glue or even adhesive Velcro to keep them in the correct position. reference image Here we are at the end of another successful EI approval, congratulations Rob, you deserve it. Hope to see a Centurion application from you soon.
 1 point
 -
That looks very slick. Nice work!1 point
-
Looks great Tony! Sly or myself will be with you shortly. While you wait we ask that you change that blue coat hanger to a black one! Thanks!1 point
-
Looking great trooper. Good luck on the approval.1 point
-
Perfect job on the helmet trimming! Mark (AP)1 point
-
Merry Christmas to you too! yeah and get cracking on that again.1 point
-
Ask Santa for some elves!1 point
-
Exactly what Mike just said. And it would break my heart to paint this masterpiece black - but I guess we have to...1 point
-
1 point
-
YOU ...CAN...DO...IT! Merry Christmas brother1 point
-
My cast zinc Hengstler boxes are almost finished..... check out the eagle1 point
-
inside and outside edge1 point
-
Whoohoo! Such a sense of accomplishment, getting this bucket finished. I'll probably take a quick break, and regroup with my local Garrison at an armor party, before I even touch the armor pieces. Thanks for watching, I'll be back soon. And thanks so much for the encouragement along the way... you guys rock! Sent from my XT1254 using Tapatalk1 point


.thumb.webp.27f7939d37871f319ff836257d4a3668.webp)