Leaderboard


Popular Content
Showing content with the highest reputation on 12/11/2017 in all areas
-
Some photos would be great, Sean. If there are any issues you have a lot of folks here that can help. Not only that, but those issues can help out others who may be in the same situation. Best of luck on your 501st submission!2 points
-
501st Submission and EIB Submission Finally I was ready for submission! It took a couple rounds (mostly minor strapping/dressing changes, as well as cleaning my armor) but I was approved into the Golden Gate Garrison on October 7. TK-19233 reporting for duty! Since I built with Centurion/EIB in mind, I submitted by EIB application shortly after and was approved as well: They gave me a few suggestions for Centurion, but to be honest the biggest barrier is getting the rubber handguards to stay stuck to the rubber gloves long enough to take a set of submission photos! Since I don't plan to use the rubber gloves for trooping, I don't want to attach the handguards permanently. I tried velcro but the adhesive didn't seem to want to stick to the rubber gloves, so I'll have to explore other options. So far I've gone on two troops: a holiday lights parade and a surprise end-of-chemo party for a 13-year-old battling brain cancer. They were both everything that I had hoped to get out of the experience, and I plan to do many more troops next year. Thanks to everyone on FISD who came before me for sharing all of their armor building knowledge; I hope this thread helps out a few people in the same way. Onward to 2018!2 points
-
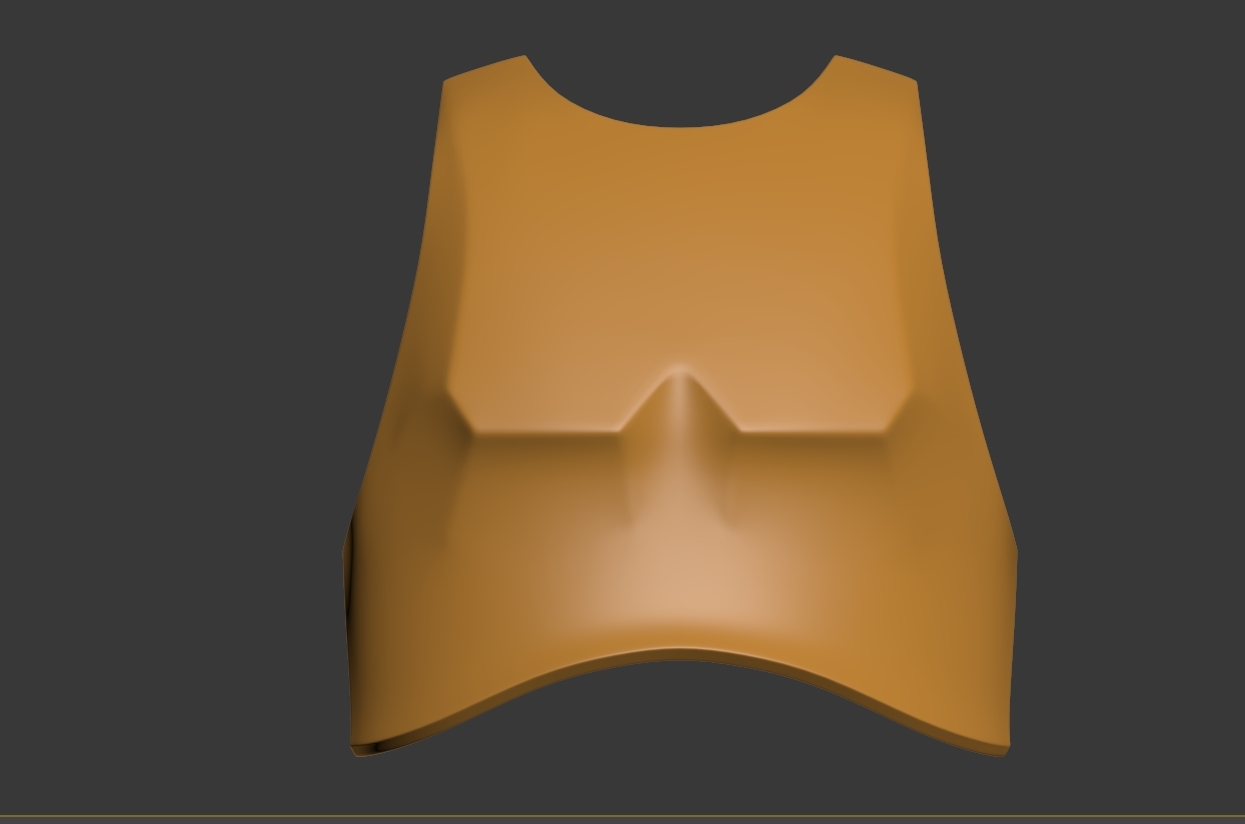
Additional Details Yoke Sizing During my first test fit, I found that the length of the yoke was problematic in that a large portion of the plastic was curled against my abdomen piece and rubbing together. To fix that, I opted to cut away some of that extra material. 1) Line up the chest plate with the back plate at the sides and tape them in place. Then, use a little bit of tape to pull the chest plate down against the yoke as it will be with all the eventual strapping. Untitled by Taylor Goodson, on Flickr 2) I used my trusted silver sharpie to trace the line of where the chestplate meets the yoke. This way, I can see how much material is needed below. Untitled by Taylor Goodson, on Flickr 3) Remove the chest plate to reveal the sharpie lines - there's a whole lot of material down there that we certainly don't need getting in the way. Untitled by Taylor Goodson, on Flickr 4) I drew a line a comfy 3" or so beneath the chest plate marking right across the yoke. The "x" marked region is extra material to remove. Untitled by Taylor Goodson, on Flickr 5) Cut right at the line to remove the superfluous material. Then, I drew and arc to round off the sharp corner of the inside of the yoke. Untitled by Taylor Goodson, on Flickr 6) Make that curved cut as well and you're good to go. I finished off the cut areas with some sandpaper just to be safe (though we'll be doing plenty of sanding soon enough :P).2 points
-
Troopers assisted, officially (hands on) L2 or L3: 1) Carlos Quezada: EIB - Centurion - 2) Charles Holmes: EIB - Centurion - 3) John Cambra: EIB - 4) Reno Rodriguez EIB - Centurion - 5) Brian Peters EIB - Centurion - 6) Thomas Alexander (Death Trooper)1 point
-
Congrats again! Going for Glen’s record?1 point
-
Ahh see this is why I need you guys! Hadn't thought of that at all lol Will take a look tomorrow. I was thinking I could chop the end of the barrel off and work from the inside, perhaps add a little aluminium lip for it to latch onto. Your idea is a much more sensible start though! Sent from my SM-G925F using Tapatalk1 point
-
This is something that I've been thinking of too recently. I'm still yet to officially troop but have been wearing it around the house and talking to my better half with my TRamp. Ive always though that stromtroopers had a bad rep. They fail so much and arent really equipped to be crack troops so I think I play on that a bit more. Once my TK number comes in I imagine I'll dig a little deeper but I like the TK421 style of being a bit useless If you get the chance check out the star wars days at Disney skits, those guys are pretty hilarious Sent from my HTC One M8s using Tapatalk1 point
-
Is the latch removable? If so, how is it attached to the folding stock inner rod? Is it threaded? If so, perhaps extend via aluminum rod? My two cents Sent from my iPhone using Tapatalk1 point
-
Thanks Glen and thanks for the stats Lol, IDK, what are we thinking?? haha1 point
-
Hope you get it to work, screen accuracy is the way to go1 point
-
We finally come out from our other order and continue to finish Stormtroopers So some new progress according to priveous posts IMGUR albom on link https://imgur.com/a/4kYEF Have equation about angel of front piece^ not sure how it must be correctly look. But think that it is too high angel
 1 point
 -
Splendid - wish you all the best!1 point
-
Thanks, Jesse! Yep, that's the same stock from Apexgunparts. Thanks for the link too! Hardest part will be getting the received tube part off, seems punkkass11 had similar problems! Managed to get mine cleaned up well with some very soapy water though1 point
-
Hey there Tom - great progress. The weight and functional aspects of your folding stock with add loads of realism to your blaster - happy for you. If you don't know already, I think you and Ardyjo had sourced the same functioning folding stock, check out his WIP:1 point
-
Keeping fingers crossed for your next level...1 point
-
Congratulations on receiving the EIB status, Dan - and sorry for being late to the party. The last weeks must have been pretty eventful for you... Wishing you a lot of fun with that armor and happy trooping.1 point
-
Brilliant mate! Will have a look at the link later Managed to clean it up a bit, it's easier to give a bath to the cat! Lol Sent from my SM-G925F using Tapatalk1 point
-
Congrats on getting this nice piece. It will surely make a great addition to your build. At the end of this chapter you can find a way to install it on your full resin blaster.1 point
-
Yep, got that fillled last night. Will give it a little sand down later and it'll be ready for painting! Sent from my SM-G925F using Tapatalk1 point
-
Very good Tom. The thin area in the middle of the backplate (where it gets close to the 3 central capacitors) is always a bit tricky. But you still have the option to fill that with green stuff before painting. Power cylinders looking good already.1 point
-
Tom pretty much covered the Anovos question, Arif. Although their armor is completely 501st approvable when built correctly, their customer service leaves a LOT to be desired. Your best bet is to check out the "vetted" sellers on this thread: https://www.whitearmor.net/forum/topic/11538-the-various-types-of-armor-and-where-to-find-them/ They are tried and true armorers, and can help you out.1 point
-
Good to go Trooper - carry on1 point
-
I would also suggest keeping an eye on the CRL (costume reference library) for the TLJ version as there may be some changes/additions made after we have all seen EPVIII1 point
-
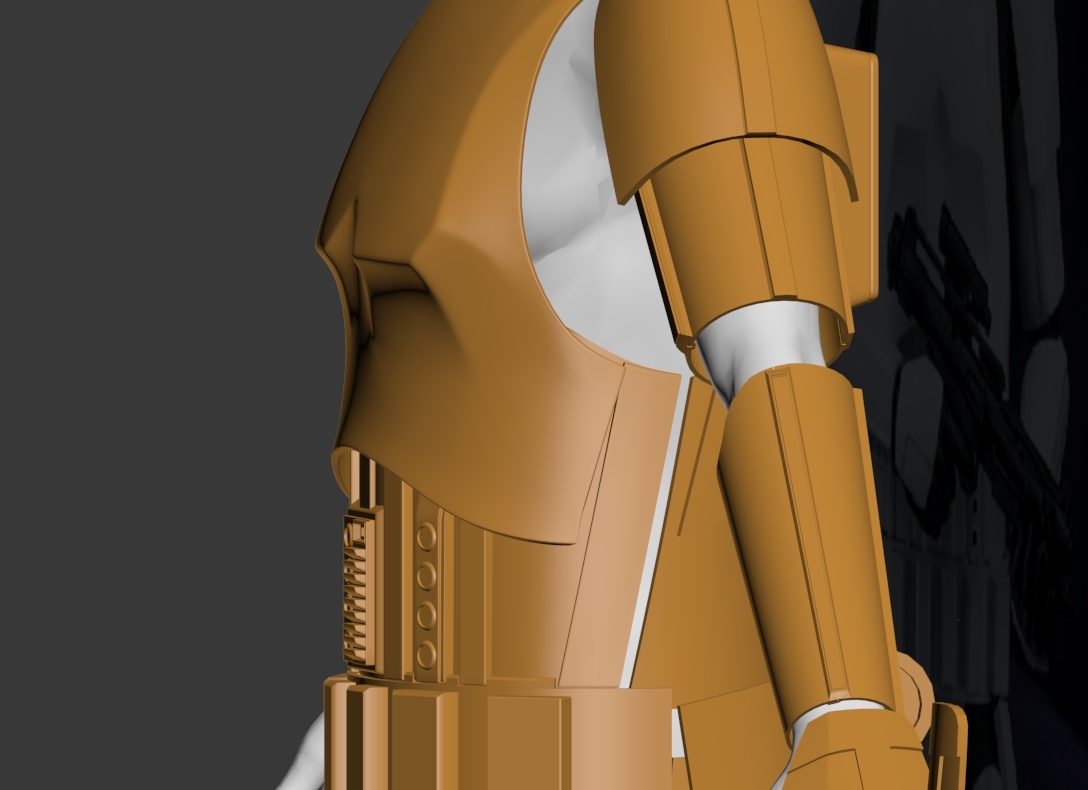
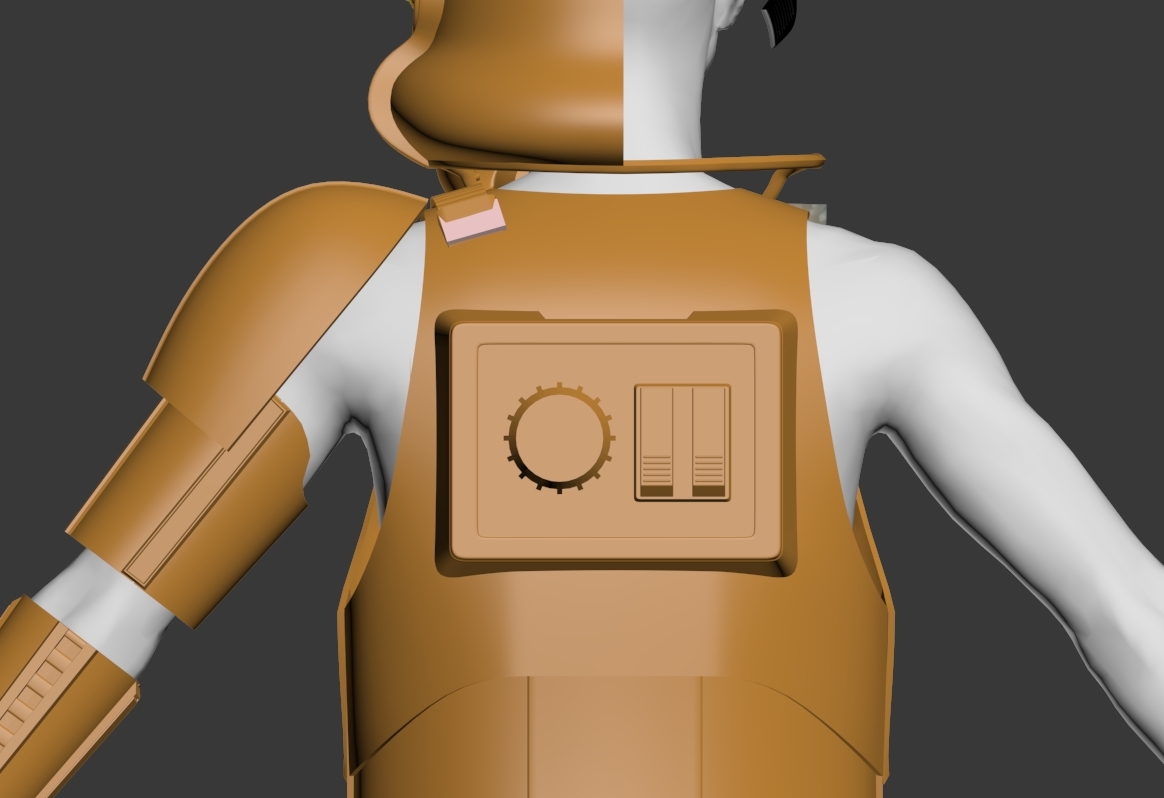
Additional Details Greeblies - Clips The detail fun continues! Time to install the resin clip greeblies. 1) Prepare the resin pieces. The parts that came with my KB kit were pretty clean already, but gently sand away imperfections. Also, I reduced the bottom edge to around 1/4" - you can see the finished pair of piece on the left with the raw one on the right in the image below. Untitled by Taylor Goodson, on Flickr 2) Once the clips are prepared, it's time to glue them in place. But before we can glue them down, we need to shape them appropriately. The clips are perfectly flat, so in order to get them to sit nicely against the curved shapes of the armour, I used a heat gun to heat them slowly until they are pliable. Then, I held them against the pieces that there were to be glued against until they cooled into an appropriate bend. Untitled by Taylor Goodson, on Flickr 3) It doesn't take much of an angle - here's a side shot to show how they look once cooled. Untitled by Taylor Goodson, on Flickr 4) Now that they are shaped correctly, glue them against the armour. I opted for E6000 to better allow for the removal of these pieces later on if they chip or break. There are six small clips - 2 on each forearm and 1 on each bicep. Untitled by Taylor Goodson, on Flickr Untitled by Taylor Goodson, on Flickr 5) The large clips on the top of the thighs and shins are pretty much the same process. The only difference is that these clips sit across the overlap seam on these pieces. To help them sit more flat, I sanded down the region of the overlap across which the greeblie sits. It's hard to see in the first picture, but you can see it a little better in the second image. Untitled by Taylor Goodson, on Flickr Untitled by Taylor Goodson, on Flickr 6) Once those areas are sanded down a bit, the process is the same as the smaller clips - just E6000 and clamp the large greeblies against the leg pieces and let them fully dry. Untitled by Taylor Goodson, on Flickr 7) The last piece that needs the clip greeblies is the spats. Once again, shape them to the appropriate bend to mold to the shape of the piece. Untitled by Taylor Goodson, on Flickr 8) Then, glue the clip down to the outer tab of the spats. Note that we are only gluing the clasp part down to the outer tab of the spat - the inner part will be held down with velcro (or a snap - I haven't quite decided on technique just yet) at a later point in the build. Untitled by Taylor Goodson, on Flickr Greeblies - Forearm Rails In addition to the clips on the forearms, the detail rail needs to be glued into the groove at the center of the forearm's underside. Clean the resin just as before by sanding away any imperfections and getting the bottom flat and smooth. I opted for E6000 here again and clamped/magneted the piece down and set it aside to fully dry. Untitled by Taylor Goodson, on Flickr Greeblies - Chest Tabs Finally, there are two tab greeblies that go on the sides of the chest facing inward away from the depressed squares on each side of the chest plate. A dab of E6000 and some clamps (again) after sanding/preparing the resin bits is all you need! Untitled by Taylor Goodson, on Flickr1 point
-
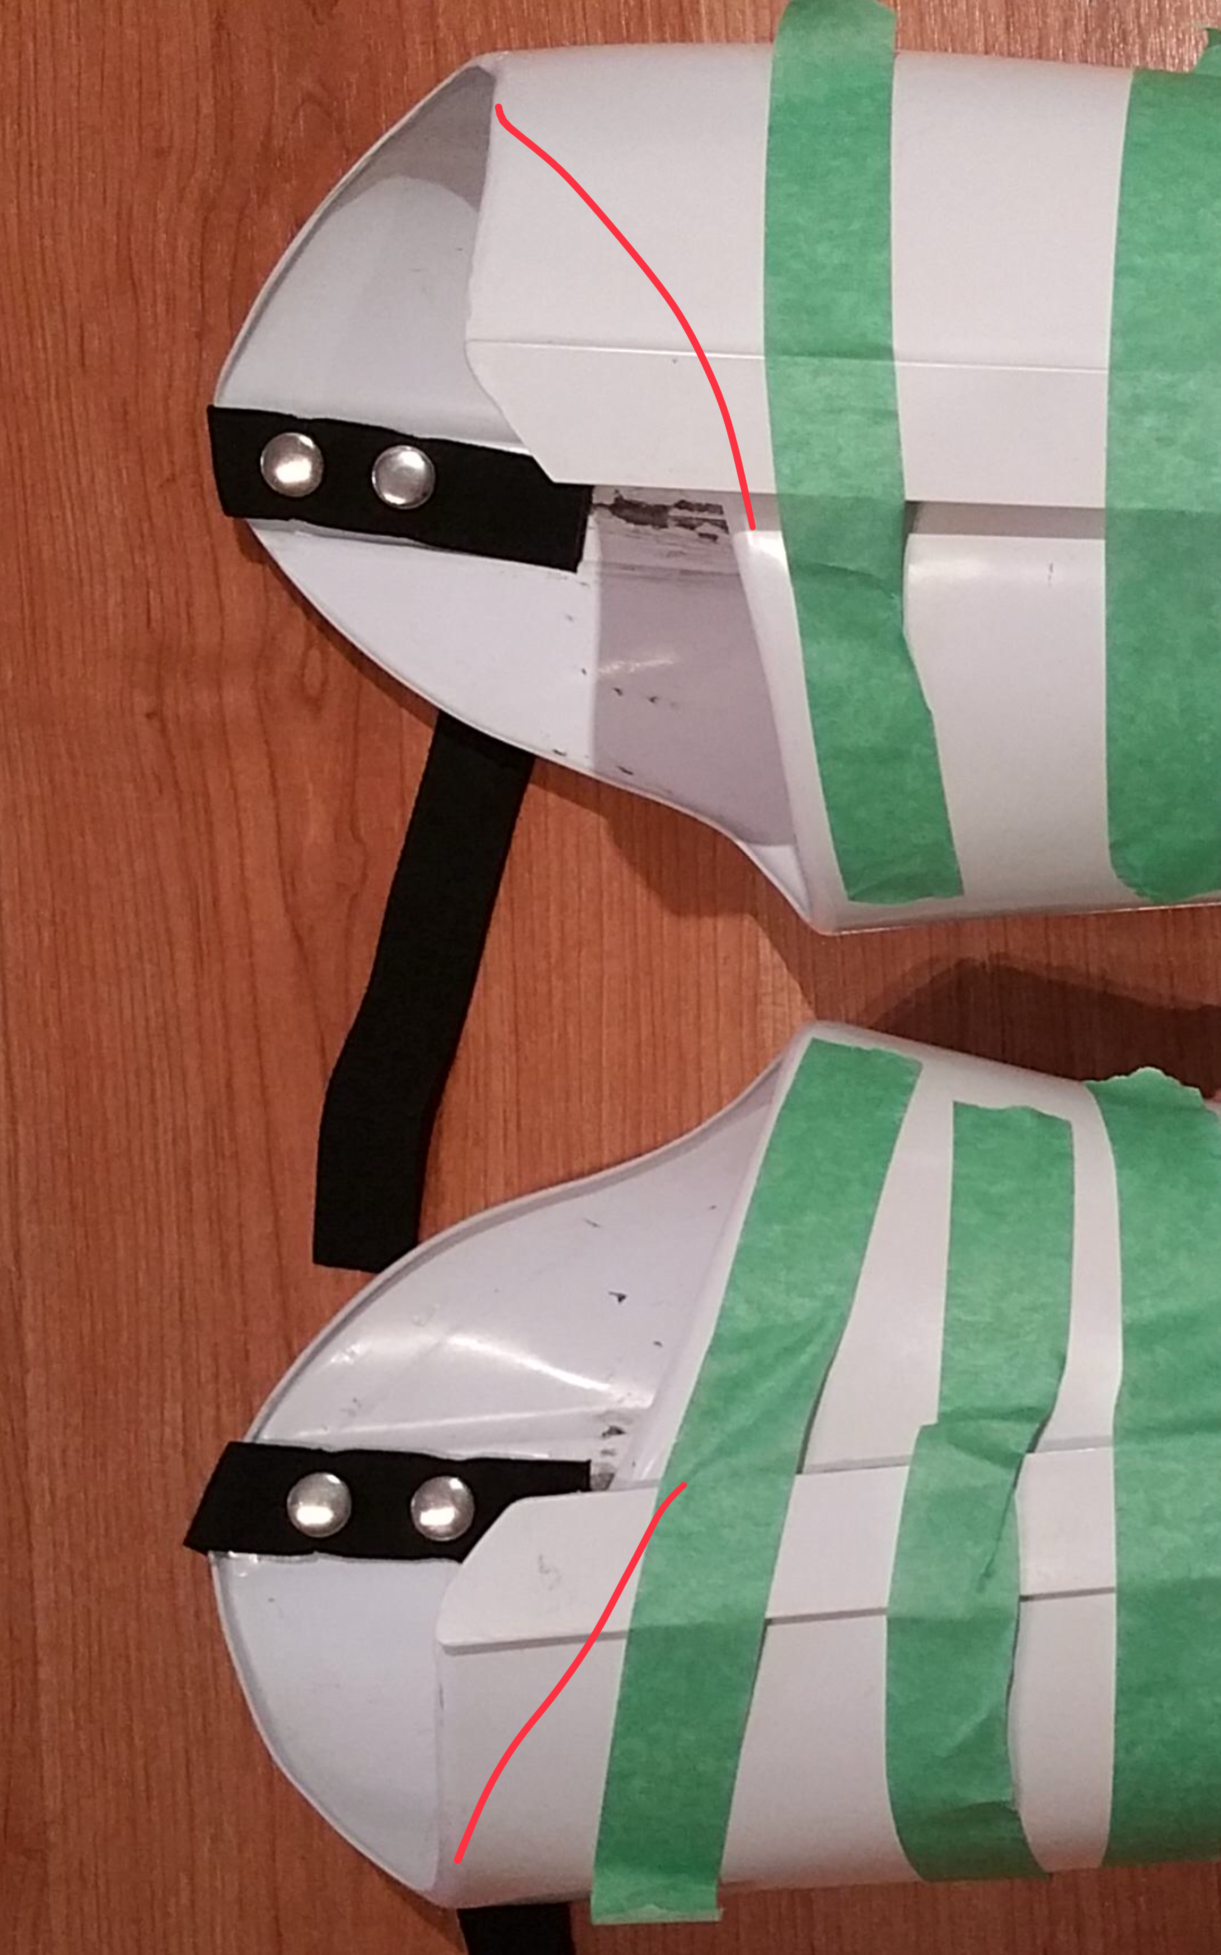
If you want to tighten the thighs at the rear, I’d recommend reshaping them by trimming that new edge into line with the rest of the thigh. The original photos you have (before adjustment) look quite nice, so I’d recommend reshaping them to replicate that.
 1 point
 -
Lol dnt worry [emoji6] Sent from my GT-I9505 using Tapatalk1 point
-
He´s been bitten by the "armor-bug" the only bug you`re happy biting you Totally know the feeling, at first can`t wait to finish...when finished...hey...I wanna start over1 point
-
Woop! How's this looking Tino? Think I've pretty much got Shape A... need to fill a few bits, was tricky already having the resistors attached Sent from my SM-G925F using Tapatalk1 point
-
Great job on your paint work. :-) Sent from my iPhone using Tapatalk1 point
-
I started painting the helmet and it’s almost done, using screen reference photos, other EIB and Centurion applications I think I am on track. http:// by -matthewwormleaton- http:// by -matthewwormleaton- http:// by -matthewwormleaton- http:// by -matthewwormleaton- http:// by -matthewwormleaton- i have painted all all of the sections except the tube stripes that I will leave to the very last minute.1 point
-
Hey Greg. I'm almost done. Thanks for your words of encouragement along the way. It's been fun building along side a fellow Canadian with the same Canadian made kit. I hope I've been able to help you out in some way the way you have helped me. I will be following your progress. Maybe, some day, when I'm passing through Saskatchewan, or even planning a visit, we can meet in person. What a great community we are a part of. Star Wars nerds. Oh yeah! Long Live the Empire!1 point
-
Thanks, Dan and Chris, trooping etiquette will definitely be a learned experience. I've been walking around the apartment with a nerf gun, remembering how to safe carry (the real thing was a long time ago). But I was thinking more about character development; who is that stormtrooper, what planet are they from? Maybe I'm the only one who writes a novella in their head when they start a project like this...1 point
-
Looking much better than I did when I “taped” up. ;-) Sent from my iPhone using Tapatalk1 point
-
Don`t worry about it, the goal is to try and cover the raised edges as much as possible. RS suit Don`t use rivets though1 point
-
Congrats Andy! It has been a pleasure seeing this build come together. Now...what shall we work on next? [emoji6] Sent from my iPhone using Tapatalk Pro1 point
-
Congratulations on your TLJE approval1 point
-
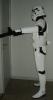
Hi SW enthusiasts! Excited to share yet another installment. Over the past two weeks, I've tackled and continue to do so, the magazine housing. Original Doopydoos Magazine Housing For this piece, I wanted to get it looking and functioning much like an original SMG piece. With some green stuff, customizing a solid aluminum rod and some aluminum sheets, I've tried to push this mod without busting this resin piece =) I begin first by looking to replace the ejector with a custom aluminum build, then I proceed to creating the component pieces that relate to the magazine release button. Grub screw used for the ejector comes from Tino's completion set. Inspiration for creating a working release button comes from Tino as well; he's been a huge influence on getting me to my level of build so far. Although I haven't completed the release button components, I'll share my progress so far. Here I measure the ejector diameter for correct purchase of my solid aluminum rod. I then proceed to using a diamond cutting blade on my dremel, then sanding drum, and finally manually sanding via square file. To get it close as possible to the real SMG part, I filled in the underside, under the ejector with green stuff. With some light sanding, I am able to achieve some of the contours of the underside. In now having set the stage, I proceeded to hollow out the resin ejector. The solid aluminum rod is approximately 8mm in diameter. In using the correct drill bit, the rod fits nicely into the magazine housing. I discovered, use of WD-40 is helpful to catch the metal shards and also good for lubricating the hacksaw blade for cutting. Adds smell to the task and drippy but with cardboard placed underneath, no biggie. Here is the test fit for the custom ejector rod, I like it! This hear comes the tricky part, trying to capture the ejector bottom that I think, Is used to individualize the rounds for firing. Hacksaw used to get primary shape. Attached my round file to my drill to shape out the curvature outlined with pencil. Crafting bottom portion of housing ejector - applied blue tape as guides after rough mark up using pencil. Cobalt hacksaw blade used Test fit of partially completed lower portion of ejector - quite happy with the contours. Here comes the final shaping of the end of the ejector - Boeing 747 jet tail, here I come! I begin with getting the tail angle then glue the fin using J-B Weld. I'm hoping with it being made with steel fragments, the glue will adhere well to the aluminum, we'll see. Ejector bottom end completed to follow up with light sanding over glue seam area Ejector with fashioned bottom I now proceed to drilling the other way, so that I can have a functioning magazine release button. I use a 5mm diameter solid aluminum rod for this. I begin by hollowing out a place for it using a drill bit. The holes more so align with the position markings on the housing - a little off but the resin around these holes all have to be taken out anyways. I then have to tackle the ejector - making the same diameter hole right through it...this was nerve racking but I managed to pull it off. Here comes the really finicky part of the ejector. If the bottom part of the ejector wasn't finicky enough, the top is even more work. I proceed here to fashion the bevel and also install the grub screw for it. Grub screw had as part of Tino's completion set. I begin by measuring out the grub screw. I needed to use a progression of drill bits. One size smaller is used than what's measured for the final hole drill out as I will be needing to manually screw the grub screw in so to etch thread onto the ejector. Here's the task ahead of me: I begin initially though to mark the bevel location to gauge the correct location of the grub screw. I then proceed to drilling out the grub screw hole. Here's that manual process I was talking about - I used an allen wrench to drive the grub screw into the aluminum to etch threading. For anyone attempting this, wear cloth covered with rubber gloves, I blistered my fingers pretty bad... I finally drive that grub screw right through! In the process, the fashioned bottom of my ejector piece lost a detail part. I will need to add that back on a later time. Now for work on the bevel, I inserted my ejector into my drill and held it against my square file. Remember to wear ear plugs; drill motors get really loud, especially when you hold your head up close to see the shavings up close. Here's the progression of my work - I like how it had come along! Here are some angle shots... I would actually now have to drill a recess for the grub screw to sit deeper - the actual SMG piece has a hole through the entire triangle part of the housing and the grub screw has a straight-long piece attached that would go through this...fyi. Now, I'm pretty happy with my ejector. The task of getting a custom catch was looming...here we go! Here is a photo taken previously, it shows the component pieces involved in creating the custom catch. The catch being that 'foot' looking thing =) Here I put together the catch, via aluminum provided in T-jay's completion set - perfect length. I then add green stuff and contour it, following SMG references. I then proceed to creating the catch rod by precision measuring the rod. Here, I begin to add thread bolt to one end to hold the foot, I mean catch. Pretty happy with the end result. I would follow through by adding some E-6000 to close some gaps between the aluminum and green stuff. I'm a fan of Terry Fox - A tribute to you dear champion!!! Here's some test fitting... Now the task is to carve out the channel for the catch to rest inside. Measuring depth of custom catch piece and taping off dremel bit 194 to gauge correct carving depth so to get ready for carving out resin catch In checking SMG references, I discovered the catch is to poke into the magazine housing channel as a way of locking the magazine in place. So in my work, revealing some hollow-through parts is a good thing!! Here are some test-fit pictures of the catch - it's sitting flush! I now have to work on the button end of things, that will have to be saved for the next update. Thanks for reading folks and for keeping up with me on this snail of a build - cheers! Have a great day.1 point
-
Loving the use of snaps Matt, what a great idea[emoji122][emoji122][emoji122][emoji122] also love the way you have shaped the lenses..... fantastic [emoji3] Sent from my iPhone using Tapatalk1 point
-
Clever, report back on how it holds up.1 point
-
Snaps, love the creativity.1 point
-
Cool solution on the lenses, never seen it before1 point
-
I'm in process of building out a series of audio files for my TK build that will play various radio chatter over my helmet comm (quietly of course as not to be annoying or distracting), and had been searching for isolated audio files of the in and out clicks on the stormtrooper comms. Well, after a disappointing search, I just made my own. Feel free to download and use at will. There are two mp3 files, one is the com in, and the other the com out. Also for what it's worth, the Shidu SD-S511 personal voice amplifier works great for reproducing that stormtrooper voice audio. Mount the speaker behind your chest plate, put the headset on under your helmet, and put a USB stick in the Shidu and it'll cycle through whatever mp3 files you have in there. I put individual chatter things in there with 10 seconds of silence or so to help give a little breathing room between chatter samples. stormtrooper com - click in.mp3 stormtrooper com - click out.mp31 point
-
My costume has been cleared, I’m now a really chuffed TK14655 I can not thank you all enough for your help, advice, support and encouragement throughout my build thread and particular thanks to Christine aka Cricket, Frank aka Fragarock and the armourers on the UKG..... you have all enabled a dream to come true A big thanks to all of you [emoji4] Sent from my iPhone using Tapatalk1 point
-
artimorty, amazing work my friend! I'm curious if FISD will allow this mod for a Centurion build. Keep up the great work. ~Andrew1 point
-
Hello Guys, By way of introduction, I am the person behind TK Armour UK and my name is David. There seems to be alot said about me and I thought I would give the opportunity for you to ask me any questions directly as there seems to be a few Chinese Whispers happening. I have been making armour since about 2004 when I started in Australia. I have studied materials engineering and am fairly familiar with plastic and rubber processing. I initially started with armour of the FX variety which I made for many years and sent out many units at a very affordable price. I guess my entry into the market at my price range was compared with Aldi supermarkets, the big supermarkets didn't like it! I later evolved the helmet to a more desirable design as the FX was considered big and not accurate enough. As I supplied larger companies directly with armour i needed to become a Limited company as many corporate buyers will not deal with some guy making armour in his shed. TK Armour UK Ltd was created with an office in central London and a Barclays company account to deal with transactions with individuals and larger companies. I spent some time in 2015 changing my molds to be closer to the ANH style of armour with all the faults. I have exhibited at a few comiccons around the world to just show that I am here and this is my armour. I was at a Comiccon in Belfast in 2015 when I met a member of the Irish 501st legion. He commented that the armour was a good effort and not far off. I asked him if he could guide me as i was open to constructive criticism. He brought across to me kits from 3 of the more significant makers and advised me to make changes to mine that would reflect similarities with the other makers making mine more accurate without being too close to the others. I followed his advice and have kept mine individual and different to the others. Whilst I was changing my molds I supplied the Britains Got Talent golden Buzzer act Boogiestorm with my first version armour. They came in 3rd and had 80 million hits on youtube. Since my changing of the armour I have also changed their armour to my new version. These guys are doing a great job with sick children etc. I have made mistakes on the way and sometimes I have disappointing some people. But I have never ripped anyone off. I have had many people rip me off. I have been all around the world to places where armour makers would never bother to go. I have gone to visit costume groups all over the world and many people know my name and many have many thanks for me. I will be at the MCM London Comiccon as an exhibitor this weekend if anyone wants to see what I am about or just to see my armour parts. You can also catch an autograph and photo of Boogiestorm at my table on Saturday as they are performing there if you are lucky.1 point
-
Sept 2015 All, As of today we have a new recipient of the FISD Achievement Award: Clint Randall (TK-61281) At some point during the development of the First Order Stormtrooper CRL I realized I did not have the wherewithal to finish what we had started. I contacted Clint and asked if he would lead the charge. And lead he did. If it were not for his diligence, dedication and perseverance the CRL would not be green today. As the Alpha 75 TFA TKs were building their kits a private forum was opened for everyone to post build photos and ask questions before Celebration 7. Clint was the binding force during the arduous and quick build. He pioneered building techniques, kept us organized, and cheered us on. While that all didn't occur on FISD Clint embodied the true spirit of Troopers Helping Troopers. He continues his thankless work here on FISD with his build thread and helping other TFA troopers get up and running. So thanks Clint for saving my CRL butt. -Eric Clint's TFA Fu is strong. -----------1 point
-
Hey mate. You may not have much confidence in yourself or your abilities but believe me, it's not as hard as it looks. I started this with absolutely zero experience and confidence, and now I've almost completed my suit and I'm ready to start another! After you make a few cuts and make a little progress your confidence will increase. Add some armour parties to that and you'll have an awesome suit in no time. Just gotta measure thrice and cut once.1 point
-
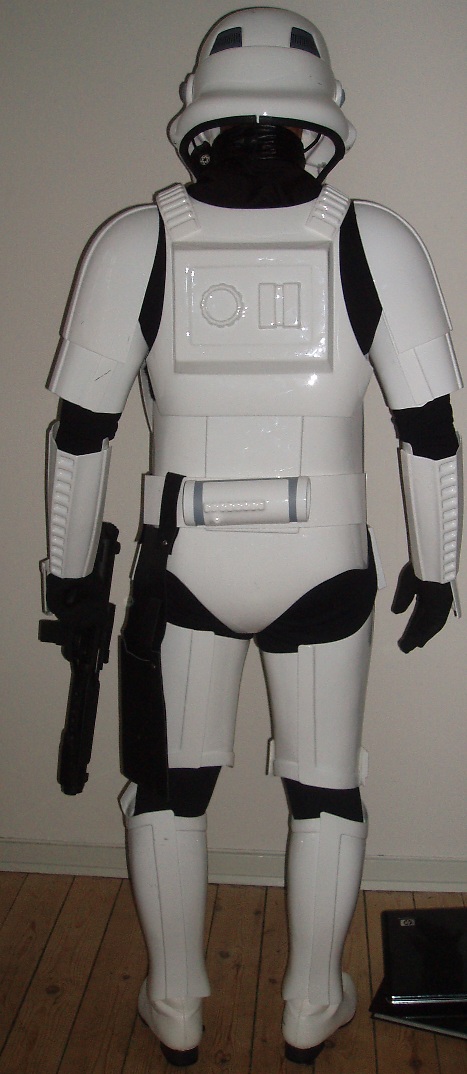
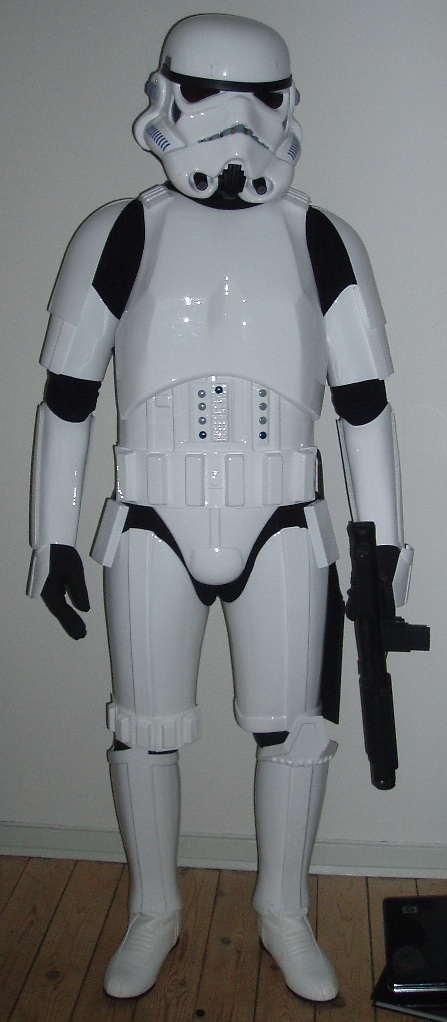
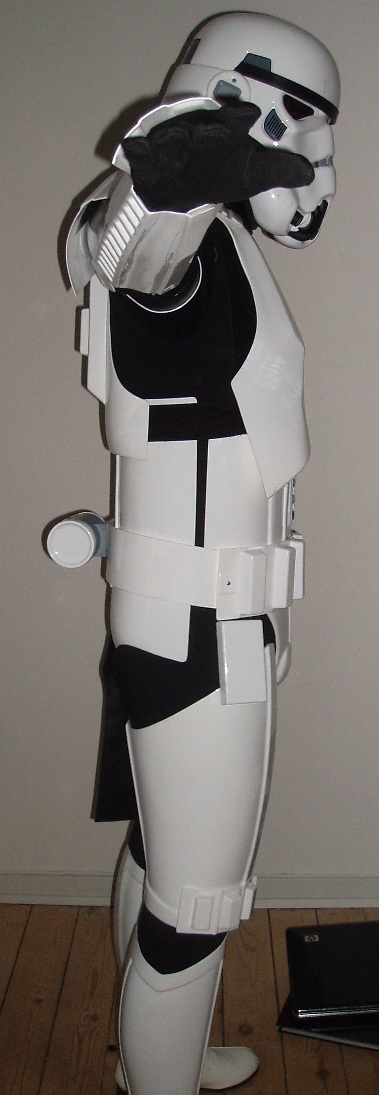
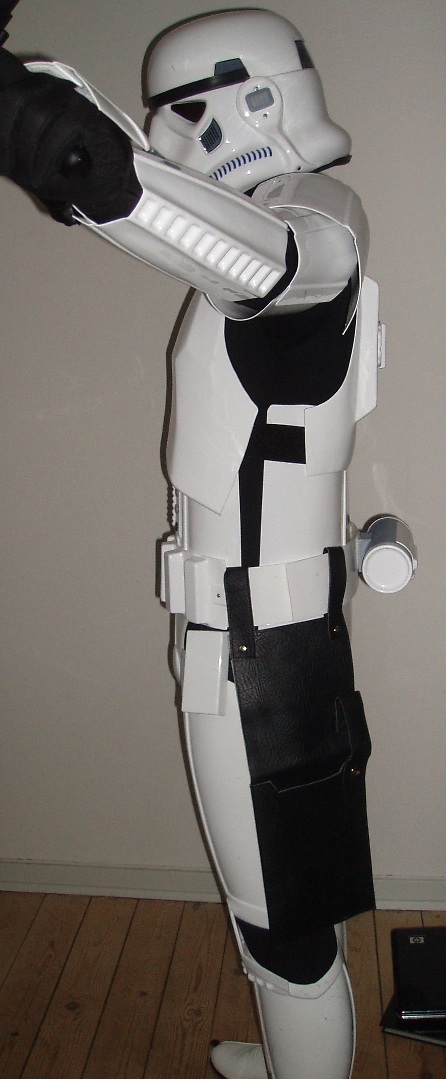
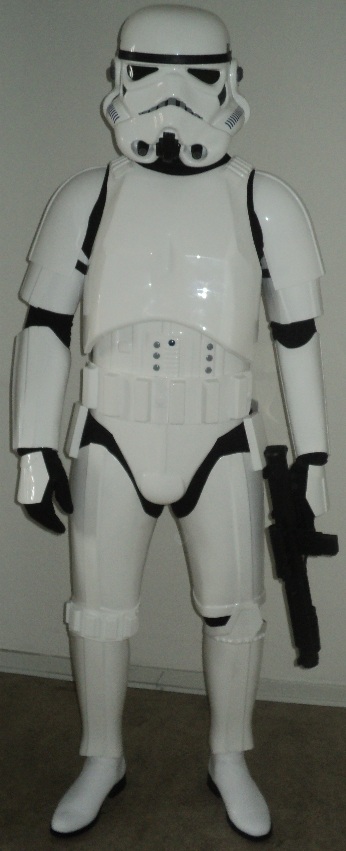
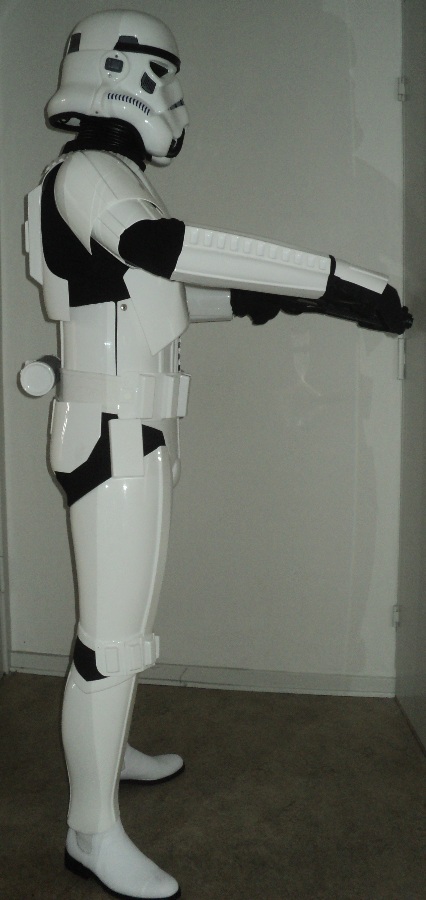
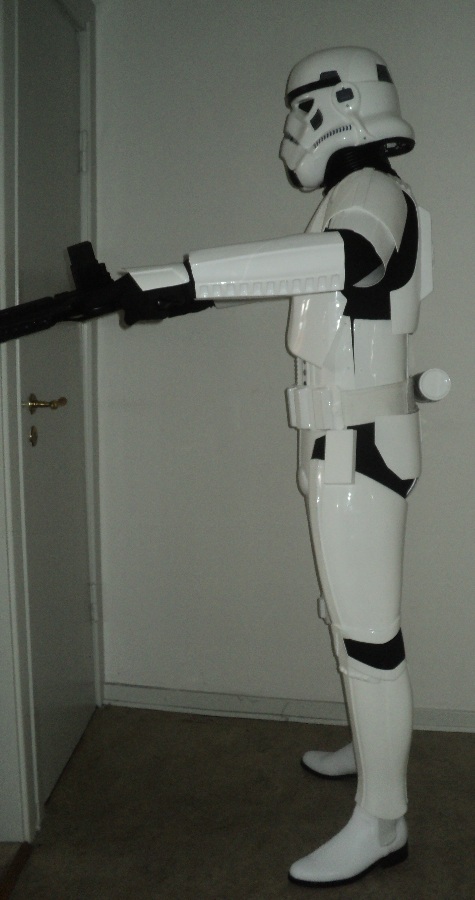
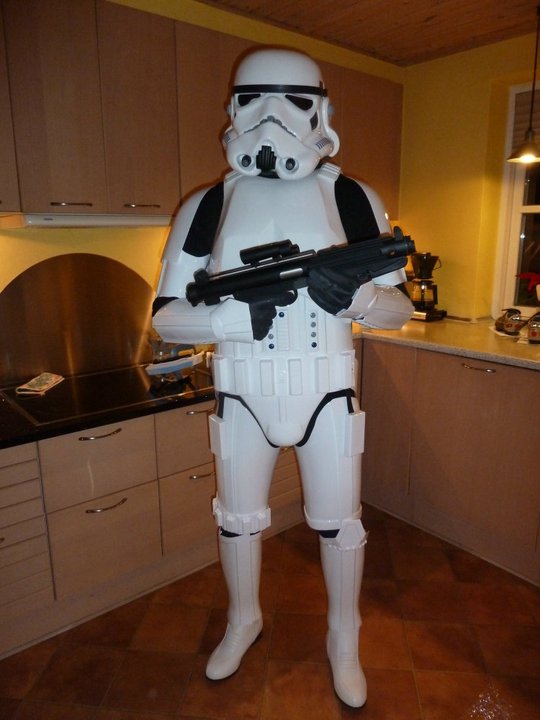
Stupid me, just need to resize the pictures Here goes. Out of the box. Everything was velcroed together, so i removed it all, except for the back of the shins, and glued all the part, and attached snap plates and straps. Also got TK boots instead of the Elvis supplied boots. So it can be approved if you do some work and buy new boots, but for the price of this kit, its better to buy a proper kit. You have almost the same work anyway, except a bit of trimming. I have learned my lesson, and i will get a shiny new TM kit around the start of Febuary Oh and just for the fun of it, then here is the first time i saw my armour. It got shipped to my parents while i was i Afghanistan, and this is my father trying it on


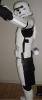
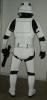

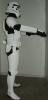
 1 point
 -
Yeah I agree with Moot. I tried looking around the other detachment forums in the legion and after at least a couple of hours of browsing through each I still have no idea how to go about getting a kit for the character the detachment represented. But here it only takes 5 minutes or less to familiarize yourself with that info. In short. The FISD. Best detachment.1 point


.thumb.webp.27f7939d37871f319ff836257d4a3668.webp)