Leaderboard


Popular Content
Showing content with the highest reputation on 11/30/2017 in Posts
-
Thanks Christine, it was your build thread that made me think, perhaps I can do this, and I’m so glad I tried.... mine you both you and Frank and the guys on the UKG gave me so many tips on how to do things, and encouragement when I hit the inevitable brick walls, I really couldn’t have done it without you all.... thanks Haha... riding without a crash helmet on is illegal over here, might try it in the garden when it’s warmer In the mean time.... my impression of a biker scout..... I don’t think it will get clearance Have applied for EIB... so fingers crossed Sent from my iPhone using Tapatalk3 points
-
You can troop with us almost any time, just contact one of our staff to coordinate events. Golden Gate Garrison2 points
-
Thank you very much, Shane. I see, you went through all this as well. Going to prepare for the next step soon... Unfortunately I already have a busy schedule for this weekend, but will do my best to request the Centurion during the next days. Your "Blaster Master" had to downgrade the E-11 to get EIB approval. Crazy world, heh?! Thank you Jesse. Can not wait to go ahead...2 points
-
Hi Tony, thank you very much for your fast reply, the EIB approval and the EIB badge. A great feeling - and another step for the March to 1000 program. Glad to be a part of it now. Also thanks for highlighting the position of the Thermal Detonator clips. The CRL says "little to no gap" and I thought this would be accepted as "little". Anyway, I will use the next days to correct this, take new photos and then submit for Centurion. Maybe Santa Claus brings a special birthday present this year...2 points
-
Frank the combat dentist2 points
-
Lucky you had a spare blaster (or five) to hand... ;-)2 points
-
If you keep it up with these great infographics/images I think this thread could end up being a great resource for aspiring RS builds. Screen used suits had off-white mic tips that were painted black on the outside... the interior was white and on many (most?) suits the ring around the mesh was white due to weathering.2 points
-
Hi all with the upcoming premiere of The Last Jedi and many of us attending troops it would be greatly appreciated if you could share your photos to this thread, we will be adding some of these to January's newsletter. as well as a link to that thread. As always you can post a troop report of your event here, previews to these are also included in the following month's newsletter. Enjoy your troops and looking forward to seeing those photos2 points
-
Greetings and salutations fellow troopers. At long last I have received my FOTK kit. It has been a long road that started in June 2016. Anovos unveiled a Premier FOTK kit that was promised to ship in Sept 2016. Welllllllllll, that kit still hasn't shipped to the poor folks who purchased that. I jumped out back in March and ordered a kit from KB Props. Unfortunately, life got in the way for KB but at long last I received most of my TFA kit last week. I was hopeful to suit up for the Ep 8 premier as a member of the First Order, but that just isn't realistically going to happen. I say "most" as there are few little pieces missing, namely the hand guards and the TD "holder" (the 3 ridged piece), which KB will send soon. Also coming from KB is an executioner "upgrade" kit with a black yoke, second back piece and black shoulder bells. I already have a TFA FOTK helmet from Anovos and have the Executioner helmet on order from them too, for now. Surprising to nobody, it has been delayed to next quarter. Goal: Basic approval for TFA FOTK and TLJ Executioner. The builds are similar enough that I hope to get two costumes out of only a little extra effort. By documenting my build and efforts to achieve that goal, I hope and seek your input as I progress on how to best accomplish this goal. Quick Links for my own convenience: Inspiration Build Threads: The great and always thorough Ukswrath's thread. Ruthar's Fabulous KB Build TFA FOTK CRL TLJ Executioner CRL Previous Build Experience: Anovos ANH-S, Centurion certification. Body Stats: Since this matters to some people considering a build, I am providing my body composition at time of build. Ht - 6 ft 0 in (1.83 meters) Wt - 205 lbs (93 kg) Somewhere between Mesomorph and Endomorph body type (I'm muscular but I also like ice cream ) Parts Origin: Buckets: Anovos Standard Line TFA and Anovos TLJ FOTK Helmet from Star Wars: Galaxy's Edge Kit: KB Props FOTK + Executioner add-on Helmet Fans - Henry's Helmet Fans Helmet Audio - Ukswrath's FO Audio kit Gaskets: Geeky Pink's Phantastic Gaskets - Cloth Boots/Gloves: Imperial Boots Belt: Belts of the First Order Blasters - Hestonkent's F-11D blaster with shoulder stock. Laser Axe from Stormtrooper on Weekends Supplies/Tools: Belt Sander - Others have sworn by this and I am now one of them. Great for quick sanding and creating a nice clean straight edge for seams. Contour Gauge - great for trimming the Ab boxes! Gaffer's Tape Heat Gun Industrial Strength Velcro - white, low profile, 3'x1" Lexan Scissors - curved and straight Neodymium 1.26" x 1/8" disc magnets x 6 Needle File Set - for pill holes and general filing needs Rotary Tool Tungsten Carbide Dremel Tip - for the pill holes. Weld-On ABS Cement - 1 Quart (1 Pint would probably be enough) Build Chapters: 1. Trimming (Admittedly, I do not go into great detail on how to trim most of KB's armor outside of the below links, you are better served looking elsewhere for this info) Miscellaneous Trimming Stuff Shin Accuracy Ab Boxes Chest Hole Filing Pill Hole Drilling (Chest, Biceps, Shins) 2. Assembly Ab/Kidney (bottom of linked post) Ab Box bolting to Ab piece Biceps Pt 1 Biceps Pt 2 Forearms Greeblie Sanding and Shaping Seam Filling (Forearms, Shin Boxes, Ab Kidney) Seam Filling (Yoke) Shoulder Bells (towards the middle of the linked post) Shin Boxes Shin Closure Overlap Spats Pt 1 (middle of the post) Spats Pt 2 Thermal Detonator Pt 1 Thermal Detonator Pt 2 Thighs Thigh Holster Yoke 3. Painting My FOTK was pro painted by a friend so this is mostly about preparation for that. I will be painting the black pieces of the Executioner Yoke and Bells and will update when I do that) Paint Prep Paint Progress 4. Strapping Ab/Kidney Magnetic Closures Belt Butt Plate to Back Chest to Back Cod to Ab Decal Application Gaffers Tape (Shins, Biceps, Chest) Gaskets Velcro Hand Plates Knee Plates Posterior Prep (towards the bottom of the linked post) Shins Shoulder Bell to Yoke Spats Thigh Supports 5. Progress Checks First Test Fitting Second Test Fitting (upper body mostly) Submission Photos Epilogue: 18 months later... Finishing up the Executioner costume.1 point
-
Personal Information Name: Tino Jacobs 501st TK ID: 61276 FISD Name: T-Jay Garrison: German Garrison (White Shadows Squad) Profile Page: 501st Profile TK-61276 Armor Maker: Troopermaster Helmet Maker: Troopermaster Blaster Type: E-11 DoopyDoo's Full Resin Height: 176 cm Weight: 70 kg Boots Maker: TK-Boots Canvas belt: Troopermaster Hand Plates: Sonnenschein Electronics: Aker Voice Amp Neck Seal: Veedox Holster Maker: Troopermaster Link to Armor: Fully finished ANH Stunt TK (1,5mm ABS) from Troopermaster with some modifications Link to Blaster: Full resin E-11 from DoopyDoo's with some modifications Armor Photos Full Body Front – Arms at side Back – Arms at side Left – Arm raised Right – Arm raised Right Side Detail – Arm raised Left Side Detail – Arm raised Armor Details Abdomen Details Action Shot Cod and Butt Plate Attachment Interior Strapping Helmet Details Front Left Side Right Side Back Hovi Tip Detail Lens Color Blaster Details Blaster – Left Blaster – Right Accessory Details Neck Seal Thermal Detonator – Back Thermal Detonator – Front Holster Attachment Inside Holster Attachment Outside Please state if additional information or photos are required. Thank you.1 point
-
Thanks mate and I thought I had improved from my disco days1 point
-
So the most recent news from ANOVOS-land is that the container is on the way from China, and they expect to be shipping out the Standard Line First Order Stormtrooper kits before December 22nd. Not in time for the TLJ premiere, by a long shot (I mean, build time and everything, what?). I'm hopeful, but cautiously so. We'll see...1 point
-
Are they good in low light? I tried some welding lenses but way too dark. Nice lid interior.1 point
-
1 point
-
Congratulations and welcome to the ranks trooper1 point
-
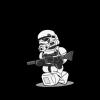
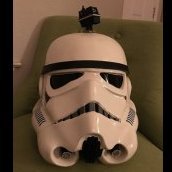
Not much cooler than a TK on a motorcycle. Sent from my SM-G935V using Tapatalk1 point
-
I can see the CRL.... biker scout must have own R1 .... only joking .... lol Sent from my iPhone using Tapatalk1 point
-
That is technically a biker scout, though.1 point
-
Glad to have you at EIB and then hopefully Centurion. Regarding the TD, it's not a deal breaker, we're always looking to make things a little better. That said how it looks is ultimately up to you and it certainly won't prevent you from earning a Centurion badge.1 point
-
Frank the dentist!1 point
-
My hats get dropped off today, my sewing skills aren't the best, but if I come up with something usable I'll post something up.1 point
-
Good luck on the build! RS Propmasters offers everything but the undersuit, FYI.1 point
-
Level 4 Approval?1 point
-
Let the fun begin!1 point
-
Too funny, I noticed that too....and I'm in N. California!1 point
-
rear sight knurl1 point
-
Looks great! Only thing I have to add (and this isn't an EIB or Centurion requirement), is you may want to take a lighter or heat sealing iron to melt the ends of your elastics on your brackets. When you heat them up, it'll prevent fraying (and premature replacement). Takes just a few seconds and leaves a clean edge. Good luck, trooper!1 point
-
Hey Tino thank you for your EIB application brother and thank you for updating your blaster photo. Now let's have a look. CRL and EIB Application Requirements: All submission photos have been posted. Excellent job on your TM build . We're loving the lite weathering also, obviously you've already been hard at work serving the Empire. That being said Andrew and I are very please to say your armor displays all the necessary elements to qualify for Expert Infantry. Congratulations! Other-Armor Fit/Assembly: In this section we review observations made by your fellow troopers and ourselves. Some observations may lead to suggestions to improve the overall look of your armor. We have nothing to add here. Centurion Suggestions: Because Centurion photos show much more detail than EIB, items pertaining to Centurion might be seen there and not here. We try to point out all we can from what is seen but the final accuracy is the responsibility of the trooper. The only area in question at this time is the position of the Thermal Detonator clips. According to the CRL they should be butted against the end caps or very close. Reference photo That's it, congrats again and hope to see you at Centurion.1 point
-
I did reindeer antlers I used magnets on the inside of the helmet and then felt and magnets on the antlers. Plus a candy cane axe because why not! Cant see it but it has Xmas lights for blades.1 point
-
Very good brother. I see your EIB badge coming closer There is one critical thing, your TK is soooo dirty You are lucky that this would not effect the approval1 point
-
WOW, huge congratulations are in order to you!!! What a journey, right? You look amazing! Now get out there and make some kids happy, Trooper! (and bonus points if you can get pics of you riding your motorcycle in kit...)1 point
-
Lmao!!! You guys are crazy!!1 point
-
I checked in on your build from time to time so I know you did tremendous amount of work making the armor fit you and for that I salut you I have a few suggestions: Ab button plates seem to be a tad big Drop boxes (Centurion in mind) are aligned to end of the ammo belt at some pics and not at others, some glue needed perhaps? Could also be my eyes diceiving and if so please take no notice of me I think your first pic is Epic...you scroll down and...a stormtrooper emerges - says it all1 point
-
Hi Stephen, thanks for your application, we are slowly catching up so will be with you as soon as possible.1 point
-
Congratulations Glen, well deserved mate and a fellow Australian, it just doesn't get any better.1 point
-
lol You're welcome1 point
-
Alright Glen, our first "The First Order" costume EIB application. Let's rock this! CRL and EIB Application Requirements: All required submission photos have been posted, very nice work as always sir . Andrew and I are very please to announce your armor displays all the necessary elements to qualify for Expert Infantry, Congratulations! Other-Armor Fit/Assembly: In this section we review observations made by your fellow troopers and ourselves. Some observations may lead to suggestions to improve the overall look of your armor. Its not too often we get the opportunity to review a Detachment staff members armor and so Andrew and myself hammered out this review together. As you know staff members may receive a bit more scrutiny as we believe in leading by example. Also, as staff we should look the best we possibly can so, again great work on your build . With the TFA's now applying for EIB and above we hope this gives the remainder of our membership the inspiration to do the same. With that, we have nothing more to add here. Centurion Suggestions: Because Centurion photos show much more detail than EIB, items pertaining to Centurion might be seen there and not here. We try to point out all we can from what is seen but the final accuracy is the responsibility of the trooper. Hope to see you L31 point
-
My wife asked what I was reading and I said bikini cods. She is now convinced FISD is a place where half naked girls hang out. I'm trying to tell her otherwise. Sigh...some days there is no win.1 point
-
Right!? can't stand it1 point
-
Pauldron is black on the Yavin, Cloud City, the Death Star, Endor. Pauldron is orange on the Tatooine map. ----------1 point
-
Of course i went looking for this set at Target so can have a MicroMe! but alas they did not have any. oh well. haha1 point
-
You can usually find those styles of candy canes at the dollar store, FWIW. If I had any skills with a sewing needle I'd help you out, but alas...1 point
-
Step 6: Sand and wash Using a high-grit sandpaper (300-ish), work the filler spots down until smooth. Wash and check for any spots you missed until you're satisfied! Step 7: Cut out the teeth (eye protection) Using a drill with smaller-than-the-gap drill bits, carefully drill a pilot hole between each tooth. Feel free to use a pencil to mark the area being cut out if that works for you. Then come in with your needle files. I use a flat one for most of the work, and a triangular one for the corners. Turn the bucket to see where the flashing remains and continue until you're satisfied. Take your time with this, going slowly so you don't put gouges in the tooth. I find it helpful to angle the file away from the outside rim so I'm filing everything at a downward angle. Look at that smile! Mom would be proud!!1 point
-
Hi there Tim! Thanks for the encouragement; it's been allot of fun! haha, no worries, there's no end in sight, more fun in the coming months Still outstanding are big items like scope and power cylinders, THAT will be ALLOT of fun - next up is magazine housing1 point
-
Pictures aren't showing up (for me at least). You could always try a local paint shop, they're usually able to get close matches of paint, and many can do so with rattle cans as well.1 point
-
The second battery is stored at the end of the doopydoos pipe. This is nicely sealed by the end cap. To be able to put a 9V battery at this location there needs to be additional space. Therefor I used the dremel again and created a rectangle shaped box. This way the battery fits perfectly. However: The colour of the pipe will be black, but the colour of most batteries isn't. So the battery needs to be painted or covert somehow. I have chosen to cover the battery. I used a thin metal sheet which I painted black. This sheet is bend around the battery. After creating the right shape I glued this metal sheet into the pipe. (I did this at the final stages of my project as this will block the entrance of the back of the pipe : The speaker needs to be put in first ). To give an impression of this solution the final back end looks like the picture below. This picture is taken using a flash, in real life it is almost unnoticeable.1 point
-
1 point
-
When is the grip frame going to hit ebay? I think I need to order the pieces I need to wrap up blaster 1 first and then wait for the full kit. instead of waiting for everything at once.1 point
-
To give an impression of the complete functionality of my script, I recorded the video below. [As I don't know how to show a video I just copied the link. Hopefully this works] http://vimeo.com/232666628 The numbers in the under left corner are debugging number which I used to verify the functionality of the swith, MP3-player and trigger. In the final version I deleted this debug-code.1 point
-
I bought one of Justianian’s resin kits. It’s resin so not sturdy as a hyper firm but think it holds up better than 3d printed ones that I have seen. Anovos has a rubber one on their website but they suddenly changed the status of the blaster from preorders to unavailable. That will be a fairly durable static blaster.1 point


.thumb.jpg.fe734c2874fe147a5789e833ad00772e.jpg)