Leaderboard


Popular Content
Showing content with the highest reputation on 09/27/2017 in Posts
-
Yes, That's the plan. This kit will be designed to install electronics inside for lights and sound. Oh yes, these will be so much lighter than a real steel Sterling with a vintage brass Honeywell telescope, and vintage Hengstler counter. Yet they will be metal and incredibly accurate to the real thing right down to the last dimension.3 points
-
Outstanding work mate. Really hoping that BlastFX will fit into it too.2 points
-
Cool. I guessed it would but wasn’t sure if some sacrifices had to be made when producing the parts. This will be epic.2 points
-
We are in the queue...2 points
-
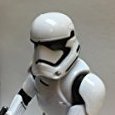
Everything will function as it does on a real Sterling aside from the ability to fire live rounds! The Mag Release will allow you to remove and re-insert the magazine which will be great for a battery compartment, The Trigger will function with an electronic momentary switch, The Selector Switch will function as a three position switch just like the real thing, The cocking handle will function as an additional switch complete with an accurate bolt and spring replica inside, The folding stock will be fully functional complete with a removable Rear End Cap just like the real thing. This blaster kit is sure to impress! It will definitely bring any Stormtrooper costume up a few notches and all your fellow troopers will be jealous of your E-11.2 points
-
Aluminm MAG well test run2 points
-
Hi All, Long Time SpecOps Specialist Member and now working on a TLJ/Executioner build. If you see anytime im doing incorrectly or have suggestions please feel free to share as by all means i want this kit to look its greatest. Feedback is welcome. Kit - Jim Tripon TLJ/Executioner (ver 5) Gaskets / Soft Pouches - Jim Tripon Belt - Darren Vaughan - Belts of the First Order Laser Axe - Wayne Laagewaard (Diversity3D) Boots/Gloves - Imperial Boots UnderSuit - Stormtrooper Undersuit Neck Seal - Anovos Premium Line Holster / Clips - Justin Lee Morrison F11D / SE44c - Heston3DSolutions BBB Day - 09.23.2017 Helmet - 09/26.2017 1) Block sanded the entire helmet with 80 grit then coated low spots with Bondo 2) Block sanded Bondo filler with 80 grit once more shaping down and removing High spots. Gave it a coat with Primer Filler and let it dry overnight.1 point
-
Going insane..... So it's about high time I started my own build thread, what with the CRL coming out and all. So here we go... Real early mock up, seeing it's not painted, but that'll come soon...1 point
-
It's finally here!!! "BBB" day! So excited to finally get this build started. I plan on shooting for Centurion right out of the box. Any helpful advice and criticism will be greatly appreciated!!1 point
-
Great news, CONGRATULATIONS1 point
-
Looking forward to the progress1 point
-
This E-11 just gets better and better. Amazing work1 point
-
Awesome review - with everything i am hearing - sounds like I made the right choice to go with Jim. Shipping was pretty high to the US, but i wanted the best quality armor that I will enjoy for years to come and i feel like thats what ill be getting based on this review - and the fact that i am supporting a guy who is well respected and does so much for the legion makes it all even sweeter. My armor just shipped and eagerly awaiting arrival.1 point
-
Hi everybody, Ah, the fun continues and quite happy about some results this latest go. In this latest round, I've cut out the latch on the inner rod of the folding stock and installed the latch itself. Hinge bolts also installed; folding stock now swivels and extends to the full back position. Although not pictured, it locks into place when pushed against the end cap, which was really exciting for me to see that functionality. I know I needed to be pretty picky about the screw used for making the latch piece. It was a screw with a width just over 4mm so there was minimal back and forth when placed through and against the vent hole notch. The screw was wood in type so that it will have maximum grab when screwed into the pencil. It's length was measured out carefully as well so that there's minimal gap between the folding stock and receiver tube. Here is a close-up of the latch cut-out. Haven't done much since the rough cut-out of it. I used my Dremel with Diamond Cutter to shorten the screw. Pliers were used to hold the screw during cutting; the screw gets really hot! 5mm black heat shrink tubing placed and heated with heat gun to shrink the tubing onto the bolt thread. Latch piece screwed into pencil. Seeing the latch piece installed was a moment of pride as I prepared a long way to get here. It is functional and able to slide up and down the inner rod =) I was initially pretty confused on how to use carriage bolts for this part of the installation. The folding stock hinges installed nice and flush, with a bit of tightness when swiveling the folding stock, which I like. Here are some pictures of the folding stock attached. Finally, I confirmed that my latch piece dimensions are correct as it is able to bring the folding stock fairly flush against the receiver tube with showing minimal gap. Thanks for reading!1 point
-
A very big bomb Nicholai. I needed something a bit smaller1 point
-
Amazing Build Darren!! thanks so much for Sharing all the details.1 point
-
Looks great! Keep it up and it`s not a race...easy so say but sometimes hard to live by, for me anyway when it comes to armor, lika a kid who just can`t keep my hands of...even when I probably should1 point
-
Hehe - is that a challenge? ;-) lol Sent from my iPhone using Tapatalk1 point
-
Looking good Jim1 point
-
Awesome. You spray canning or car wrap?1 point
-
Looking good Dan not long to go now!1 point
-
Looking Great Dan! If you decide to bail on the snaps on your boots, you could add Industrial Velcro to the front of your boots and the inside of your shins. The shins will stay down and will not rotate. Works well too.1 point
-
yep, I'm in the groups and all that jazz, just too shy to post there much. Muah haa haa.. anyway.. working on so many things right now my brain hurts! Miss ya buddy! Have Hamilton Comic Con this weekend!!!1 point
-
Well... The build continues. Veery slowly, and not so steady. But small steps... [emoji16] This time I've been fiddling with the arms and belt. I still need to make the bicep hooks and fix the drop boxes in their final location Skickat från min SM-G930F via Tapatalk1 point
-
Look at some original helmets in the gallery and pick one you like to emulate.1 point
-
Hi there! I am nearly finished with my TK Build and want to post what I have completed. I would appreciate any feedback and help with the last bits I have to finish. I do have a few questions regarding my kidney and posterior on how it should fit but will get to it below. Thanks in advance for everyone's help and hope I can join the 501st Legion ranks very soon! ----------------------------------------------------------------------------------------------------------- I started my build at the beginning of the year since my nights were freed up. My wife and I decided to put our daughter to sleep in her crib in her own room. I use to rock her to sleep and if she woke up, I would soothe her back down to sleep. I use to just hold her and catch up on TV shows on my iPad instead of putting her in her crib near our bed. So, when we started putting her in her own room, I found myself with a lot of free time (since I still had the night shift if she happened to wake up.) I wasn't planning on starting a build thread so I don't have a lot of progress pictures so I'll just post what I have... I followed ukswrath's ANOVOS TK build almost exclusively during my build in the final goal of reaching Centurion level for the Stunt TK. (I have since decided to go for the basic level and work my way up even though I did a lot of work following the higher level requirements following the CRL for Stunt TK) I used E6000 to glue everything. It is very forgiving and can take parts your previously glued and re-glue them (even letting the glue cure for 48 hours; normal set time is 24 hours). The combination of clamps and magnets (which I taped up using blue painters tape just in case the magnets rubbed on the armor and left a mark or stain) worked very well with the E6000. Here are my forarms and biceps and shins. Gluing my coverstrip to the shins: I got my boots from TK Boots! And, upgraded the ANOVOS kitchen gloves to endorfinders gloves! The endorfinders gloves are so awesome made with great quality with velcro already sewn to the tops of the gloves already. I'm going to double the gloves to use for my future Shoretrooper build. I had to redo my shoulder straps a few times because I didn't like how it sat when I tried it on and water bathed the left strap so it sat flush with the black plate. The first fitting of my chest and arms went well. I was happy with the fit and the ease of getting into the chest armor and arms easily. I did ad some foam for at tighter fit on the forearms and may still trim it down for comfort once I get my E-11 or DLT-19 (I'm leaning toward the heavy blaster) to help me move and hold the blaster easier. My first fitting for the chest and ab piece connected to the posterior and kidney: It felt good but had to trim some return edges on the cod piece since it was cutting into my htigh. The Ab and kidney though did not fit the first time I tried it on. I decided to shim the one side of the kidney in order it to fit flush together (even though for basic approval, it is not necessary.) I followed TK21029's shimming post and still need to polish the kidney and spray a light coat of white spray paint to try to match the rest of the armor. I know there is a facebook poster who does limited runs of paint that is the closest match to the original color. Here are a few prelim pictures of me suited up! Let me know what you think and any advice would be awesome!! Thanks for browsing my post!1 point
-
EIB Approved! Link to approval thread1 point
-
Looking good, just make sure you give both sides a scuff with some sandpaper before applying any adhesive, will give it something to grip too.1 point
-
Been rough-trimming the eyes and teeth...used an exacto and went super-slow so nothing else has been done today. Some clean-up tomorrow and hopefully got time to put it together...and...I taped it up real quick before nap-time and voila...an almost Hero-helmet1 point
-
Ab and Kidney Plate are joined together as one piece:1 point
-
Backplate:1 point
-
Hand plates and Shoulder Bells:1 point
-
Chest & Shoulders are integrated together:1 point
-
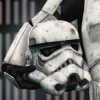
Here's my completed helmet:1 point
-
Got the side panel roughed out for trigger frame1 point
-
Lmao!!! The funny thing is that absolutely no one else outside of the 501st gives a crap! It just all looks "cool" to the kids, etc that we're doing this for! Leave it to us to stress about the little things! Lol.1 point
-
I think a sandy made this:1 point
-
Afternoon folks. A good shout by many on the Homebase 145ltr storage box. £12.99 is a bargain. For those that haven't seen it, it's big, has four wheels and a clip on lid. Apart from my lid and blaster, everything else is in there with lots of space to spare. Complete left arm and left shin are inside the left thigh. Same for the right. I could probably squeeze my lid in there but will find a decent bag or cover first. Think I'll build a little box to to sit under the armour to house my soft goods, TRamp etc. Also, we've had different sets of friends over on Sat and Sun and, thankfully, both asked me to kit up. I'm really pleased with how kitting up is becoming easier and I'm feeling better and better in the armour. Movement is coming on dramatically, including walking. Much fun :-) Sent from my iPhone using Tapatalk1 point
-
FYI all the pictures have been posted and the CRL as it is is being reviewed by the LMO. https://origin-wiki.501st.com/databank/Costuming:TK_rogue_one Henry - I saw you posting while I was doing this. I'll read through your changes and see what may make it in. The one picture we really need is a good one for the E-11, or two.1 point
-
Thanks Andrew! Wow, never thought of applying this for centurion... that's flattering and very kind of you. But I don't know if this worth it or if it meets the standard. And wasn't done with that goal in mind... just for a cheap way to complete a mannequin display. I also own a DD kit that sometime in the future will be the main gun in the house, but thinking that it will deserve to be displayed on its own, so this rubies is going to be the blaster for the mannequin for better or worse. but I give you one thing there... this mod got what I modestly think is a good piece for a very low budget. I'd have to run the numbers, but definitely under 50€ and probably under 40€. Most of the things used are spare plastics and sintra foam and resins and bondo and spray cans that I already have... so in this aspect this is something to consider, to provide a cheap way to reach higher ranks for everyone, without having to spend crazy cash. thanks again for your kind words and your support during the process. Nice to have you there all along. cheers.1 point
-
Well I've messed up the outer cover strip on the left greave It's about as straight as a dogs hind leg... doh ... so off it came and the greaves were split and re-trimmed.... the raised bit at the front was a few mm too wide Stuck it all back together again.... Now the right greave.... I'm still fettling the sniper knee plate.... I think I'm almost there? I think I need to trim it to the line shown below? And the other side seems fine I've also trimmed the ab buttons, do these look ok? But the small button plate seems too big.... but I'm not to sure what, if, or where to trim anything else off ? Any advice? I think I have the drop boxes sorted? If they are ok do I glue them now or fit the back piece to the belt first and then glue on the front? Oh and before I cut out the rivet covers out for the ammo belt.... what size should they be? Next job is to trim down the thigh ammo belt thing and start to strap the torso together... then I can see how it all fits together and assess what I need to do with the thighs and if the torso needs shortening..... I'm getting there Sent from my iPhone using Tapatalk1 point
-
Ok. I call this done. The only one thing left is the numbers on the counter. I've tried several times to do a transparent screen like seen on the fisd blaster reference with veeeery poor results. It's clearly a process that's gonna take me a while to master and I don't want that to delay this blaster much longer. so, until further notice I call this build done. Here I post you my final reveal pics... this long journey made this: Into.... THIS: Here is the "working" scope with reticle inside View from below to show the inner rod on the folding stock and the inner barrel In case you wonder about the painting process, I'll summarize it a little for you. After the black primer you saw on the previous post was fully dry, I went to rub all the main gun with a cloth covered in graphite, avoiding the t tracks, the counter and the scope, because I wanted all this parts to look like made of different materials. Then I lightly weathered all except the counter and the t tracks with silver and grease steel. Then I painted the silver parts on the grip. After that, weathered the scope in old gold using dry brush technic. Masking the bolt, the counter and the scope, sprayed matt varnish on the blaster. Then masking all but the handle, hit that with several layers of gloss black. Masking again all but the scope, the counter and the handle, sprayed those parts with a high gloss clear lacquer... and final touches here and there with silver, rusty black and old gold acrylic pens. I'm more than happy how this came out! And finally, here is the Pal... no longer grumpy and now the happiest trooper in the station, ready to terribly miss point black shooting those dammmmm rebels with his glorious non lethal e11 blaster. Big thanks to you all for your attention, your ideas and your support! Enviado desde mi iPhone utilizando Tapatalk1 point
-
Hi again. It's almost done! Probably this evening I could finish it. Oooooohhh I'm sooo excited and soooo proud of it... I'll try to take some good pictures later on to show it in all his beauty... in the meantime I'd like to share with you all a nice trick I came up with to mask the holes on the barrel and avoid new spray entering the inside that was already painted. It worked as a charm. I used demake up cotton dishes cut to pieces and forced inside. They are soft enough to be pulled inside with no harm done, they are strong enough to be pulled out with no debris or very little left, and they are dense enough to hold several layers of spray without getting dumped or start leaking. You can see here how it's done and in the background a couple of those cotton dishes uncut. Here a couple of shots of the piece black primed with the holes masked using this trick. It worked perfectly. Thanks all for being there and stay tuned for the revealing time about to come! Enviado desde mi iPhone utilizando Tapatalk1 point
-
I really want to recreate this thing,,, it damn sexxy ... ill get to it next year. need to find all the greeblies for it1 point
-
Yes it is. The ROTJ armour was made more simple compared to the complex ANH armour. Overlap joints, moulded ab buttons, straps glued, belt riveted, knees riveted, shoulder straps riveted - everything is much easier to assemble on the ROTJ.1 point
-
Has Roy, been to the archives? no Has Roy ever handled any real screen-used props with screen-used t-track on them? no Did Roy take dimensions off of real screen-used t-track to make his? no Did I do all of those things? yes Is my track more accurate than Roy's because of that? yes Is Roy's a cheaper alternative for those not needing their track to be 100% accurate or not made from original dimensions? yes In my opinion, is it worth it to spend a little more to have 100% accurate t-track on your valued props? absolutely .1 point