Leaderboard


Popular Content
Showing content with the highest reputation on 02/05/2023 in Posts
-
Missed that, had 5 pages open at once. "Correct Aerators/Hovi-MIX tips are present. Screens used shall be of a wide type mesh. The rim of the mic may be weathered, and the inside raised area painted white. Interior sides shall be painted black, mesh can also be painted black". The reason for these updates is for closer screen accuracy, as there is overwhelming evidence that the vast majority of the Hero helmets seen in the film were painted in this way. As noted, the mesh may be painted black but this is not a requirement at any level. Note the above was from Joseph announcement, both the weathering or the rim of the mic tip "MAY" be weathered and also the mesh "MAY" be painted black, personally I would have disputed the rim weathering and perhaps this needs to be discussed yet again to be clearer, we know the mic tips were white resin, we know the inside sides and outside was painted black, why the rim is weathered just wear and tear. And here is the Stunt which specifically calls for the rim to be white: with the rim of the mic and the inside white or painted white. Don't worry you haven't ruffled my feathers, I just remembered the issue of the mic tips and thought it had been made clearer and resolved. "May" and "Can" to me are options and as such it should be up to the applicant, I also think any changes should be posted in the applications and not via PM (DM for you younger folk) just so everything is clear.2 points
-
Enjoy your new banners @Armor92 points
-
Congratulations Trooper , welcome to EIB ranks.2 points
-
One habit I've started, which I'm sure each and every one of you does this as well. All of the new Starwars content coming out has got me looking at TK's with a lot more scrutiny! I'm now looking for shoulder bell elastic, cover strips, drop boxes, spacing, and God knows what else!2 points
-
Thank you all and thanks for all the time for the review. Very excited for the EIB having been a former Infantryman in my younger years. Sadly this is the end of the road for my journey, not willing to make those changes for Centurion, but excited nonetheless.2 points
-
Congratulations trooper and welcome to the Expert Infantry club and also the Expert Infantry Honor Gallery2 points
-
Hi Scott, and thank you for your EIB submission for ANH Hero! CRL and EIB Application Requirements: All required photos have been submitted, and on behalf of the entire D.O. staff we are pleased to welcome you to the rank of Expert Infantry. Congratulations! Other-Armor Fit/Assembly; In this area we review observations made by your fellow troopers and the DO team. Some observations may lead to suggestions to improve the overall look of your armor, and please keep in mind that we consider both text (CRL) and pictures (screen caps/reference images) when reviewing submissions. Well Scott, I want to thank you for your application. I also want to tell you not to be scared by the amount of photos you can see. Most of them are very easy things to fix, and I'm sure in no time, I'll be able to see your Centurion application. Let's start with suggestions... -L3: Ideally, the placement of ears (and screws) should closely follow the rear angle of the trap above them. The right side would need a small adjustment, but since it's not very noticeable, we mention it as a suggestion. The left side is perfect. Reference images -As seen in the reference images, the brow trim should be cut back a little to where it is even with the rear of the trap. Reference images -For a better "appearance", you can lower the right forearm a little to match the left. Also, it will be closer to the wrist, which is more screen accurate as well. Reference images -Also, I would round this area out a bit, as it can bite your arm when you move it. Reference images -The angle of the sniper knee plate should be a little sharper (don't make the corner a sharp one). Reference images -The rivets holding on your ammo knee pack are quite close to the corner. Not a big deal. Reference images -When suiting up, for a better look it's important to make sure the tops and bottom of the calves line up. Reference images -It looks like your E11 blaster has excess of wire. Although we do allow them of course, the coiled wires connected to the counter/power cylinders were not seen in the film and only used in promotional/publicity shots. Reference images "Standard" E-11 reference images Centurion Requirements: In this section we prepare you for our highest tier of approval. Because Centurion photos must show more detail than EIB, items pertaining to Level 3 might be seen there and not here and additional photos may be required. We try to point out all that we can from what we are able to clearly see, but the final accuracy is the responsibility of the trooper. -Ideally, the tube stripes are positioned approximately a standard pencil width away from the cheek. This is a requirement for Level 2, but since yours are somewhat close( the right side is perfect) we are allowing this for Level 2 and moving it to Centurion. Reference images -The plastic shoulder straps need to be held down in the back via a white elastic band to the white fabric that connects/bridges the chest and back piece. We will need a clearer picture on your Centurion application. It looks like the elastics are there but we will need a clearer picture on your Centurion application. Reference images -L3. There should be a minimal gap between the shoulder armor and the chest/back plates. It´s very little, but your armor will look much better if you reduce this gap. Reference images -Another item not mentioned in the CRL is the placement of the "Han" snap. We realize that there is a return edge, so you obviously can't place it on a curved surface, but it can be attached right at the edge. You must remove the snap, drill a new hole and reposition it. The old hole will need to be filled with ABS paste. Reference images -L3. Ideally there no gap between the abdomen and kidney armor. Abdominal and Kidney Plate align horizontally at top. It's too little... Maybe adjusting the belt a little bit will do the trick... Reference images The ABS belt should sit "at or just above..." the bottom of the ab-button panels. Raising it 3 or 4 mm would look better! Reference images -L3. Drop boxes are vertically aligned with the end of the ammo belt with minimal gap between belt and box. You can prevent the drop boxes from moving by applying some E-6000 behind the strap. Reference image -L3.The corners of the plastic ammo belt shall be trimmed at a 45 degree angle that that meets the outer edge of the cloth belt. You can trim the ends of the ABS belt, as long as the cut doesn't go into the square button covers. Reference images -L3.Canvas belt must be firm / sturdy in appearance. No creasing or sagging. Most belts have a plastic insert that stays rigid, which helps you when your E-11 is holstered too. Reference images -The butt plate is overlapping the kidney plate. The best solution may be to use the famous V-tabs. You can take a look at this LINK . -L3. Lower thigh ridge joins (front and rear) shall butt-up flush against each other. Any gaps must be backed with ABS or filled as not to be noticeable. This thread will be a great help LINK Reference images -It may be the photo, but it looks like the blaster grip has some weathering on it. Some gloss black paint and you are golden! Reference images That's all Scott, congratulations . It may seem like a lot of photos, but we think you'll be able to fix all these little "problems". If you need help, if you have any questions or comments, you can contact any member of the DO team, and we will be more than happy to help you.2 points
-
With my ANH Stunt build finally complete (though I still need to catch up on updating that thread) and approved to L3 I'm now turning my attention to the first of three conversions. First out of the gate will be the ESB variant since it will require the least amount of work, and my goal is to complete it to L3 standards. At this point I've acquired all the components needed and below is my conversion checklist. Helmet (using my raffle-won WTF bucket) Remedy brow trim height (lower) Strip all existing paint except on hovi tips Apply ESB decals from Trooperbay Re-sand and paint frown teeth black Touch up white hardware paint on ears, improve countersink holes Finesse ear fitment to face and cap (sanding) Sand hovi tips for clean white rim look (currently has black over-paint) Reinstall fallen-out hovi tip mesh (already proper wider variety) Armor/Other Convert ANH holster with tan straps to black looped ESB style New belt from Imperial Issue (Rob Kittell) to eliminate ANH holster screw holes New rubber gloves from Joseph (downsized to small from previous medium) Clamshell hand guards from Joseph (unsure of armor maker) ESB Hellhounds E-11 blaster (lacking hengstler counter and power cylinders) RESOURCES TK: ESB CRL Justin's Anovos ESB Conversion Luca's RS ESB Conversion ESB Expert Infantry Visual Checklist ESB Centurion Visual Checklist TheRascalKing's (Justin) Anovos Centurion submission CallMeMrTibbles (Richard) RWA Centurion submission Cleantrooper (Brett) TM Centurion submission giskard8 (Arthur) TM Centurion submission Table of Contents (links updated as posts completed) Introduction Post with Checklist and Resources Helmet Modifications Belt and Holster Conversion Clamshell Handguards Hellhounds E-11 Submission Photos2 points
-
Congratulations to Andrew (Sly11) for once again, being named our Detachment Leader!!1 point
-
I also remind you what it says in the applications: "...and please keep in mind that we consider both text (CRL) and pictures (screen caps/reference images) when reviewing submissions."1 point
-
And why say it now and not when it was requested? ("delay to my application", really?) I believe that DOs are not ogres, nor do we act arbitrarily. We always try to be fair and request the same from all applicants. And yes, after spending so many hours on your review, I feel the same or worse than you, as I don't at all like it when someone is discouraged when requesting an EI or Centurion badge. Personally, it's something that puts me off as well. Too many people questioning the work of the DO's lately. I'm not the one to talk about this, as I'm not anyone important here, but it's certainly something I'll talk to my superiors about. I hope I am not disrespecting anyone with this reply, if so, I apologize in advance.1 point
-
That's why I hand't seen it, I thought I was going blind. If it had seen it I would have made mention to the DO's1 point
-
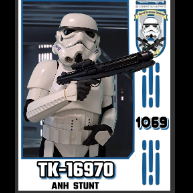
Hello, TK-16970 requesting access https://www.501st.com/members/displaymember.php?userID=35695&costumeID=1241 point
-
As we told you, that's a lot of pictures, but believe me, your armor looks great!!!....Most of these issues are easy to fix. Don't be discouraged...1 point
-
Thank you very much, you have some awesome skills!1 point
-
LOL working on in the sense of being a more presentable Trooper, but not for the next level.1 point
-
For the "Armor Sides" is the bottom one the butt plate and is the top one the kidney plate? -Yes Is the V Tab only glued to the butt plate but ledt unglued to the kidney plate? -Yes Do you think some white industrial velco help keep the two plates together? -It may not be rigid enough. But you can try it and let us know if it works or not... Scott, glad to see you're still working on your armor.1 point
-
For the V tabs, I have a few questions: For the "Armor Sides" is the bottom one the butt plate and is the top one the kidney plate? Is the V Tab only glued to the butt plate but left unglued to the kidney plate? Do you think some white industrial velco help keep the two plates together? Thanks.1 point
-
My first strapping steps. It looks ok for now. When I put on the ab and kidney armor, I have the feeling, that the gap between both armor pieces is too big an I have a bigger gab at the bottom. I hope, that with all the other stuff (strapping, belt etc.), it will fit better. Also the straps doesn't feel strong, so that it will last multiple troops. In particular on the mounting with the split rivets. Maybe I have to reinforce the holes of the straps on the split rivets. (Or upgrade then directly to snaps) Here are the progress photos:1 point
-
Whoop whoop! Congrats Andrew!1 point
-
Exactly the same was me . Another useful resource for your build is the Gallery Section , the EIB and Centurion Approved apps. Remember to open your own Build Thread and receive all the feedback.1 point
-
Congratulations Andrew , all the best from London. Sent from my iPad using Tapatalk1 point
-
Amazing job Scott! Congratulations and welcome to the rank of Expert Infantry!!! Awesome to see another great looking Hero out there!1 point
-
Congratulations Andrew!1 point
-
Congrats Andrew!1 point
-
So here is another reference of blasters in TLJ. Just to make sure this point is clear.1 point
-
Congratulations Scott. Welcome to expert infantry. looking forward to seeing your centurion application.1 point
-
Well deserved, I say!1 point
-
Congratulations. Your submission photos are inspiring for my upcoming EIB submission. Really good stuff.1 point
-
Congratulations Ardeshir!!!1 point
-
Next was the slots in the shoulder for the shoulder bell support brackets and strapping. I put the chest/back on and marked the top of the shoulder with tape. Then I marked with pencil where the slots would be located. Then I drilled holes to mark the ends of each slot: Next I used the cutting wheel on my dremel to cut the slots. It was pretty nerve wracking since these areas are really narrow, but it turned out ok: Then I sanded them a bit, then did a rough fit with the shoulder bracket and strapping. Looking pretty good: And with me just holding the bell in place: Then I glued the shoulder brackets in place with E6000: Next I decided to cut some slots in the ab for the 2” strapping that I’m going to use as a suspension. I got the idea from Captain’s Drydock on YouTube. I used the same technique as I did on the shoulders, drilled holes to mark the ends of the slots: Then used my dremel to cut the slots on the front and back: Rough fit with the strapping: I’ll also be using some parachute clips to make it adjustable and easy to get in and out of.1 point
-
Congratulations Andrew on another year stuck with the job1 point
-
Congratulations Sly [emoji122][emoji122][emoji122][emoji122][emoji122] Sent from my SM-A127F using Tapatalk1 point
-
Yea buddy!1 point
-
Congratulations Andrew!.1 point
-
Congratulations!1 point
-
Congratulations Andrew!!!! FISD is in great hands. Thank you for all you have done and continue to do for this detachment.1 point
-
Congratulations @Sly111 point
-
I normally only polish if I have a high profile event, then I use Tcut (auto polish), great for getting larger marks, scuffs and scratches off. I've only had a couple of cracks in my ATA which is 10 years old (now a sandy) for that I glue strips of abs behind the cracks, scuffing with course sandpaper, and apply JB weld, I find that holds really well and can be sanded if you get any runs. Inside the armor get's wiped down with anti bacterial wipes, again when ever it's been a sweaty troop. I noticed my Stunt helmet had some yellowing, no surprise there been outside with a lot of troops over 39.5deg C. I mixed up some Retr0bright, I've read about it but never used before and it's pretty amazing stuff, mixed, applied and out in the afternoon sun for 2 hours (low 20's deg C) and I couldn't believe my eyes, back to pure white once again. I used to carry quite a big bag of tools and replacements but found over the years it is rare I have any issues, lost 2 snaps over 10 years, now I use industrial elastic and soldering iron to create the holes, gives a little more strength, also a dab of E6000 can give a little more strength around the hole. I also carry some white gaffa tape, just in case, plus it's screen accurate One other update was adding an external AA battery to the Icomm unit, the internal battery can expire after a few years, replacement was going to cost $25 just for shipping, Andrew has a nice upgrade for an external battery I always charge everything before a troop, also check for any missing snaps and to make sure everything is still there.1 point
-
Wipe the insides with a clean rag. Get rid of that moisture, immediately! Clean with a soft washcloth and warm, soapy water if needed. Any liquid soap will work fine, I use dishwashing soap. Make sure everything is dry before storage. Cracks needs to be fixed as soon as possible. I use CA glue and spare pieces of plastics for a quick fix, and ABC paste made from spare pieces melted in aceton for a more permanent fix. If possible, repair from the inside. If the repair is visible on the outside, I sand it smooth with incrementaly higher grit sandpapers, and finish off with Novus polish. Scuffs is just battle damage and bonus weathering. It looks awesome (and movie accurate!) after a few troops. But if I want to shine, I rub away the scuff marks with an eraser, and then I wipe the armor with a soft cloth and isopropyl alcohol to get rid of any grime. I finish with Novus polish. Novus should work on all plastics, also PVC, but take a look at their website to be sure. It's novuspolish.com. Thighten all screws, nuts and bolts before storage AND before the next troop. Nothing is more annoying than losing a chicago screw on the holster in the middle of a troop. If you have an emergency repair kit (and you should!), check to see if you need to refill it. @Nairy: Yellowing has nothing to do with polish, but UV and heat. All white armor will turn yellow over time. Exposure to the sun will accelerate it, so do not store your armor near a window. I also advice against storing the armor near a heat source. But you can turn yellow plastic (temporarily) white again with a hydrogen peroxide and UV treatment. The tricky part is that it is difficult (and expensive) to submerge the armor in peroxide. The common way to solve this is to make a creamy peroxide gel to smear on the armor, that sticks to the plastic while the sun does its thing. Search "Retr0bright" for a recipe. Or get a ready-to-use mixture, like Trooperbay's ArmorWhite.1 point
-
Novus polish is excellent and specifically designed for polishing plastics. You can buy it in a 3 pack which is Novus 1,2 and 3. ! being a spray for quick polish or final polish, 2 for light scratches and 3 for heavy scratches. I use Novus for all black marks and scratch repairs. As far as repairs on the job, i always carry tubes of CA glue and spare small pieces of ABS and HIPS. These can be used behind your armour where you find a crack. Good to stop it from spreading specially on return edges.1 point
-
I use the sponges used for doing the dishes (the ones with a yellow and a black side, if that makes sense) and some water to remove the black scuff. For bigger repairs, it's always good to keep some leftover white plastic from building the armor. If you mix some little pieces of that with aceton, you get a paste that you can use to repair cracks in your armor. Put on the paste, let it dry, then sand it down. For the white screws, I just use a white paint pen (Google says the right translation ist touch-up pen?). Hope that helps1 point
-
1050 - 1099 Return to index
 1 point