Leaderboard


Popular Content
Showing content with the highest reputation on 01/12/2021 in Posts
-
Alright! Lets get this armor party started. Learn and remember the FISD motto: "Pics or it didn't happen".3 points
-
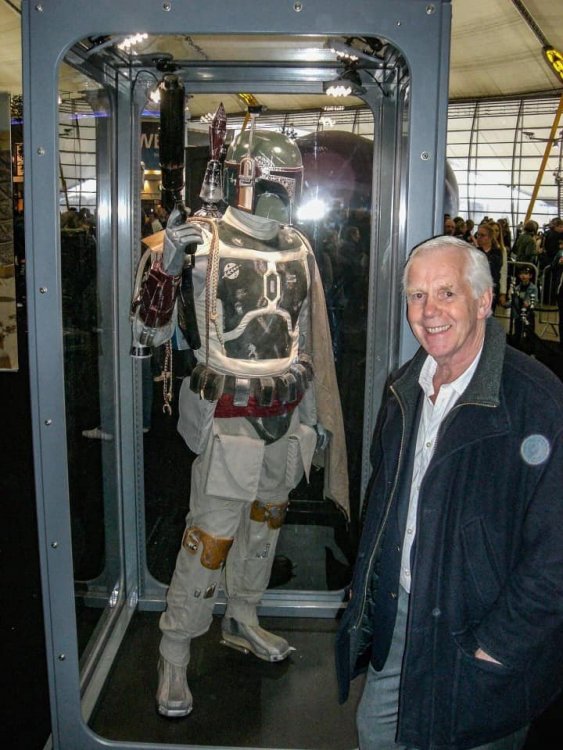
Thanks @illusionz_09. @Harder, the FX armor found a home where it will be displayed. I decided to go line officer (olive) for myself (thanks to all the IOC team who helped). I made our young one a foamtrooper costume so she can be like daddy. TBD when she'll wear the whole thing long enough for me to get some photos.2 points
-
Looking forward to seeing the progress, if you have any issues adding photos this is a helpful thread, good luck with the build2 points
-
@LTM suggested i start a build thread, to document my progress (little to none) and allow others to help with advice when I get stuck. That seems like a great idea, so I'm starting it here. I bought an RS Props trimmed kit, and it arrived in December. So far I've completed the thermal detonator (reasonably well but not perfect), trimmed the wrist end of the top forearm piece (but couldn't figure out how much to trim on the elbow end) and I trimmed the helmet a little, as well as cutting out the eyes and the frown. RICHIE STORMTROOPER videos helped a lot with that. RS Props videos helped a little less, he runs through things like you already know what he's doing. I'm reasonably close to the average guy build... 5'11" and 200-210 pounds, more stomach than I'd like, but i just bought an electric bike so I'll get out and ride more often.
 1 point
 -
Alright, so before I get started I am going to mention that this HOWTO is being done on the BS captain cardinal helmet. If you are reading this from the future and BS has a standard FO helmet on shelves, I would assume that this HOWTO would still apply, assuming it uses the same molds/form as the captain cardinal helmet. EDIT: There is now a white version of the hasbro helmet. It does use the same molds, and this howto will still be an accurate guide on how to modify it. I initially started this thread when I first saw the helmets promotional material to discuss it's accuracy, but I will be summing it up here. While this helmet is extremely good out of the box, it has a few inaccuracies to be corrected for higher level approval (presumably, no one has used this helmet as of yet for an approved build). They are as follows: The tube stripes are not hollow, there is 2 speaker slots on the rear of the helmet, the channel/groove on the chin of the helmet goes around the aerator instead of through it, and there is a missing groove/channel that goes from corner to corner of the lower traps. My plans for this thread are to correct all of these issues, as well as making a few adjustments to some of the parts of the helmet (like the teeth) that have some very small gaps that bother me personally. I will also be doing a total repaint on this helmet to convert it to a first order executioner! If one only wishes to correct the speakers, a repaint of the helmet would not be necessary. However for this conversion we are going to cut several of the pieces, fill in some groves with bondo (or a similar fill), and more. This would require a repaint anyways, regardless of what the base color for the plastic is. If you are planning on using this helmet for a full suit of armor, I would also recommend a repaint so that the colors are able to match exactly. So on with the tutorial! Here is what I am using for this build (will be updated as the build progresses) 1 Black Series FO helmet Small Philips screwdriver A flathead screwdriver, butter knife, or equivalent as a wedge Wire-cutters or a strong pair of scissors 200-250 grit sandpaper Exacto Knife Dremel kit E-6000 or equivalent Super Glue or equivalent Light Grey Primer (spray) White paint (spray) Black paint (spray) matte finish clear coat (spray) 1k or 2k Gloss clear coat (up to personal preference) Step 1: Disassembling the Helmet I initially was not going to do a detailed breakdown on this process, but it proves to actually be quite difficult compared to what I imagined. Remove the strapping from the helmet. I will be replacing this with padding later, as I find it uncomfortable, but it will still be needed to be removed in order to take this apart. Next, remover the battery cover (which is also the entire lower edge of the helmet) and unscrew all of the screws along this edge, as well as all of the screws on the inside. I recommend keeping track of which screws go where for the final reassembly later. Once this is done the small faceplate, rubber eye ring, and the black base should come off rather easily. The black base has two electrical wires that are still attaching it to the rest of the helmet, make sure there is no battery inserted in the battery case, and then cut the wires with a wire cutter or scissors. With a small push the aerator should also slide out of place from the faceplate. Congrats, that was the easiest part of this whole build. Everything will get significantly harder from here. The next step is to remove the inner grey sections from the helmet. You may have noticed that despite taking out the screws earlier, these sections have still held in place, they are secured through a few different methods still. Namely: glue and plastic tabs. For ease of explaining the next few steps, I made a quick diagram above, and numbered the parts 1-5. Section 1 is at the back of the helmet, and will be the first to be removed. 1 has two tabs, one on each side, that join with 2 and 3 (the sections by the ears). It also has five tabs deep in the helmet that connect 1 to 4 (the cap at the top). You will be able to easily unhook the first two tabs at the sides, the others you are unable to reach. Once the first two are unhooked, place one hand at the top of section 1 where it meets 4, and apply lots of pressure, this will push the tabs to an ideal position for removal; while doing this, take your other hand and pull section 1 out from the bottom. This will take a lot of force, don't worry, nothing should break here. The inside should now look like this: Sections 2 and 3 have two tabs at their top, securing them to the cap, section 4. There is also a couple spots of glue on their sides that attach them to section 5, the face plate. Take a small butter knife, screwdriver, or other item to use as a wedge, and slip it into the cracks where the glue is. Mess around until you think the glue is separated. Then repeat what you did for the first plate, and remove these two sections.It should now look like this: The faceplate (section 5) should be easy to remove, and the lens will fall out with it. The cap (section 4) will take some maneuvering as there are a few tabs holding it in place. Once it is removed, the two clip greeblies at the top of the helmet are no longer held in place and they may be removed also. Now we will separate the two large outer sections of the helmet, the faceplate and the cap/back. There's 6 screws total, four at the top and 2 at the rear. At the front where the two meet, there are three tabs glued in place. They are not very hard to bend back and remove the glue with your fingers. her's a better look at them: You can set the cap/rear aside as the only parts left to take apart are on the faceplate. On the right side you will see there is some electrical components, take out the screws and throw them away, however save the small red button/greblie. This also is the same for the electrical components on the black base. Make sure that you follow any local recycling and garbage guidelines/proper safety precautions when throwing away electronic components!!! You will also see there are two black strips of plastic underneath the tube stripes. They are glued in place, and easy to remove. These are also to be thrown out, as the tube stripes should be fully hollow. Behind the tube stripes on each side is a single screw and spacer. This holds on the small trap, unscrew them and remember to keep these small parts! Finally there's only one thing left to remove, the black sections of the face! this was the trickiest part to figure out, but it should be fairly easy for you if you follow these steps exactly: Use whatever you used for a wedge, and wedge it underneath the tear area (beneath the eye) Push the tear forwards and out, this should pop out the small tab behind it. Repeat for the other side. There is a similar but much longer tab at the top of the faceplate, where the large traps are. Theoretically this should also be able to be pushed out like the ones at the tears, but I couldn't get it to move far enough. So I took a small knife and cut the tab in half (only on one side). I was able to pop the tab out after that. The other side at this point slid out really easily, and the whole large piece can be set aside. Finally there is one last small part on the frown, with some jiggling this comes off easy also. I'm open to suggestions on this part: This is the back of the aerator, it seems the metal part was cast into a hole of the plastic, or jammed in there by a machine. I have tries hammering this out, but because of the shape it can't be done on a vice. I tried without it, but it was putting some strain on the plastic, and only making dents on the metal. I think i might have to drill next to it, but I'm unsure if thats the best bet. Any suggestions would be extremely helpful, as masking it off would be a pain in the butt. And thats it for the dissasembly!!!!! Prepping the helmet for modification and paint Take the four large red pieces, and sand them down using 200-250 grit sandpaper. (I used 150 because thats what I had laying around, but 200-250 would be preferred). You could argue that this is overkill, but I prefer to have a non-slick surface when applying primer, paint, and gloss. Next, in a well ventilated area and with a mask on, spray these parts with the light grey primer, as well as the red greblies and the aerator (once I figure out how to disassemble it). I did 3-4 light coats to ensure that all of the ups and downs and details of the helmet were covered. Feel free to do more, but remember there will be more coats applied later as the modifications are made. I also did one coat on the inside, so it won't be bright red when this is all finished. I would love to continue this post, however the next steps will be some of the major modifications on the helmet. I am still not finished with them yet, and will continue with it later this evening. Expect this thread to be updated daily-ish from now on until it's completion! Until then, -Eric1 point
-
NEW In Memoriam Detachment Leader Provost Marshall Centurion500 What You Wearing Merchandise Just For Laughs Hall of Fame INFORMATION & AWARD PROGRAMS Common FISD Acronyms and TK Glossary Pre Approval Forum 3D Section Field Exercise Award Master Armorer Program Imperial Attaché Program Fire Teams EIB & Centurion: What do these terms mean? Advanced Tactics Awards Public Relations Staff List 2020 Follow FISD On the 17th December 2020 we learned of the passing of Jeremy Bullock aged 75. Jeremy was a fan of the fans, and was one of the first actors to be inducted as an Honorary 501st Legion Member, a title he proudly wore. In 2009 Jeremy became a full member of the club as BH-5211 as Boba Fett, the character he portrayed on screen. Jeremy was a friend to all who met him and will be deeply missed. Our condolences go out to his family, friends and the whole Star Wars community. "Buckets Off" On the 16th of December, 2020 Master Sailor Duane Earle was declared lost at sea. Duane TK-26222 was a member of the Outer Rim Garrison and the First Imperial Stormtrooper Detachment. Duane’s love of all things to do with water, from sailing to scuba diving, earned him the nickname of “Squid” among his peers. After seeing his son’s reaction to members of the 501st in an event in Vancouver, Duane set out to become a Stormtrooper. Duane is survived by his two sons, a step daughter and his wife Tracy. Our condolences go out to his family and family. "Buckets Off" On the 29th of December, 2020 Rudy Cabrera (DZ-41474) passed away. Rudy was a dedicated member of Star Garrison and Texas Gulf Coast Squad, as well as a proud Tusken Raider in the Krayt Clan Detachment. Rudy, was a loving family man and this showed in his volunteer work with the 501st Legion. Rudy is survived by his beloved wife Diana and their two children. Our condolences go out to his family and family. "Buckets Off" Greetings fellow troopers Welcome to 2021 Man that holiday period went awfully fast and I'm back at work already!! Hope everyone had a break of some kind and a chance to try and recharge for the new year ahead. In saying this, we are quickly heading into the legion election cycle come February, so if you haven't checked in to the forums, perhaps it's a good time to log in and take a look around. We've made a few changes across last year and are making sure there is always something new to see or talk about on the FISD forums. All considering the global situation of 2020, I feel our detachment has had a very strong year with several solid changes to the forums and some great reasons to celebrate with milestones and initiatives. We managed to achieve many of the goals we set out in the last election, some are still underway due to the size and or nature of what they are (Forum clean up, Photobucket image replacement, and Centurion 500 almost there). We only had a couple of plans the team decided to postpone so the focus remained on the membership and how we could best keep you engaged. With the inability for most to do the things we love like troop and help others and our communities, we worked to offer a break out from the ISO so many had been placed in. FISD was the most active forum with and for members, something everyone can very be proud of. On behalf of the staff and myself, I hope we made a difference to your year in some small way and that FISD can continue to deliver on this with innovation, celebration and an inviting environment into the future. Thank you to everyone who contributed in some way shape or form to this wonderful family. 2021 are you ready for more!! With Unquestioned Loyalty Andrew Franke TK11469 "Sly11" Detachment Leader Happy New Year my FISD family! There is not too much information to pass on from the Provost Marshall office at this point. The forums are running smoothly and the detachment is as fun as ever. The only thing that I would like to bring up to our membership is that Legion Elections will be coming to a galaxy near you very shortly. We will be getting the FISD set up for them soon. I would just like to remind everyone that we have been fortunate to have very smooth running elections in recent memory. The DCOG team expects that to continue this year. Please be an active participate. This forum belongs to every active 501st member with an approved FISD costume! Engage any possible candidates. Ask them informed well thought out questions. Their answers will make it apparent as to who the most qualified candidate will be for the future of our detachment. But most importantly be respectful! This is the best way to make the Provost Marshalls job easy and we will be very appreciative. With Unquestioned Loyalty Steve Sheades TK10466 "starsaber25" Leading Provost Marshall With Unquestioned Loyalty Chris Pearson TK10991"themaninthesuitcase" Provost Marshal With Unquestioned Loyalty Aaron Gibson TK99725 “Pyrates” Provost Marshall Hot off the heals of our Victory1000 celebrations, FISD are proud to bring you our next target event. We are fast approaching another milestone and another chance to celebrate victory as we hit 500 Centurions approved. This miles stone will also come with another special Centurion only piece of merch for the first 500, in the form of a pin to match the Expert Infantry exclusive. Our very own gmrhodes13 (Glen) has outdone himself yet again and put together the perfect introduction for this milestone event so without further adieu, FISD brings you. THERE ARE ONLY 10 POSITIONS ON THE GRID, SO IT'S TIME TO HIT THE ACCELERATOR, SHIFT INTO HYPER-DRIVE AND HELP US BLAST ACROSS THE LINE! Now that we have reached 1000 Expert Infantry, It's time to once again become part of FISD history and enter the "Centurion500" We are aiming to have 500 approved Centurions by the end of the year. We only have 10 to go, so in order to reach that goal we are asking that you read over the CRLs for your particular armor, (this thread will help) make any necessary adjustments and post up your submission! Photo Checklists - Link here Apply here Questions: 1. Not sure if I have what it takes to reach Centurion- You don't know until you try, and you have not only the D.O. staff but an entire Detachment to help! 2. I need some repairs/fixes first- This is why we are here! We honestly want you to succeed and are here to help in any way we can. 3. I am happy with the way my armor looks, so why bother?- It not only makes you look more screen accurate, it instills a sense of pride and "esprit de corps"! 4. What if I don't make it? No worries, we will provide detailed suggestions on how to reach your goal! Benefits: 1 Bragging rights for being one of the "Original 500" 2. You get a cool badge under your name here on the FISD (full forum version) 3. Access to Exclusive Centurion500 pin for those in the original 500. 4. Certificate for your accomplishment. 5. You will have a more screen accurate looking set of armor. Now that the entire Staff and those who have reached Levels 2 and 3 are here to help in any way we can, you are more than welcome (and encouraged) to ask any and all questions you may have on this thread, or contact one of our Deployment Officers Joseph, Sha Sha or Mario. Let's get up to speed, push that throttle and prepare for lightspeed, you can do it troopers Your Deployment Officers, Staff and the whole detachment crew are standing by ready to assist If you'd like to show your support on FB here is the link to the Centurion500 profile frame www.facebook.com/profilepicframes/?selected_overlay_id=331320651285964 What You Wearing? - Armor Poll 2020/21 Re-opened The what are you wearing poll has been reopened and closes 21st of January, you can find it here: VICTORY 1000 11" Patch *NOW CLOSED* UPDATE 7/01/21 Patches are in the mail, many already receiving them. Updates here TRADING CARDS - SERIES 8 Looking for trading cards? series 8 has just begun, information and ordering here Happy New Year Troopers!!!!Congratulations to TK - 98911 Rick as he kicks off 2021 with his addition to the Stormtrooper Hall of Fame - welcome Trooper!https://www.whitearmor.net/forum/topic/50485-tk-98911-troop-log/?do=findComment&comment=709796 With Unquestioned Loyalty Aaron Gibson TK-99725 "Pyrates" Curator Hall of Fame INFORMATION & AWARD PROGRAMS Are you new to the FISD and wondering what the heck all those abbreviations and strange sounding terms mean? To help you @justjoseph63 has started a list of the most commonly used ones that will give you some insight. If you have ANY questions about a particular term that is not listed or suggestions for new ones please contact Joseph. You can find the list here Pre Approval Forum allows future Troopers the opportunity to submit photos of their completed build to be reviewed by the Staff, Imperial Attaches and others in preparation for forwarding it to their GML for approval. Any and all advice/suggestions given will be specific, constructive, helpful and respectful. Please note that this program will NOT take the place of your local GML, as Detachments are not chartered for costume approval and can not override a GMLs decision, but is instead a peer review program designed to help you look your best and offer guidance and positive feedback. You will have the opportunity to ask questions about your completed armor, weapons (if applicable), accessories, etc. and get accurate information from the experts here at the FISD.. the definitive home of TKs worldwide. For more information on this program, please visit the link here Contributor Awards Don't forget to visit our 3D section when next surfing the FISD forums, there is plenty of useful information to potentially help you on your next TK adventure. You may be a designer wishing to showcase your latest designs or prints, or maybe looking for a file to print your very own Blaster or Laser Axe. You might be feeling may generous and share with our community a new TK related 3D file and maybe win yourself a 3D contributors award so check out the details below and be part of the in house 3D community. Here is a link to the FISD 3D Contributor program. Don't forget to create a troop log here on FISD and get awarded for your adventures The list of accomplished troopers keeps growing, so get on board and register your troops today. Simply start (or update!) your troop log, keep the running total in the title, and post (at least!) a date and name for the official 501st event where you wore your TK! Once you've hit a milestone count, go over to the "Field Exercise Awards -- Post your milestones here" thread to request your profile be updated! Simple, right? Milestone post example: Milestone and Troop Log Title: [100] TK12345 My troop log Date and Event: 8/23/2019 -- Death Star Cooking Class Photo: Pictures are not required, but are highly encouraged! Your picture may end up in the Stormtrooper Hall of Fame Award Recipients December - January TK99901 "IRoS" Mario - The FISD Master Armorer program is an optional, detachment only incentive award to recognize individuals who have directly helped another 501st stormtrooper to achieve Expert Infantry status. Some people spend countless hours helping others, and want to reward their results as well as incentivizing new people to help as well. To register a “win” in the program, the assistance must have provided hands-on help trimming, building, and/or fitting of said armor for the person who was awarded Expert Infantry status. Other program notes: • Helping remotely, giving advice, or taking payment in exchange for help does not account, all work must be voluntary and without expectation of compensation. • The assistance must be for a period of 30 minutes or more. Spending 15 minutes tweaking someone’s fitting or taking photos does not count. • "wins" can be retroactive, e.g. if you helped 5 people in 2017 already, those can count as long as they are fully documented. Award Levels • 5+ “wins”: FISD Armorer Badge • 15+ “wins” FISD Senior Armorer Badge • 25+ “wins” FISD Master Armorer Badge The process • Person applying for the award will create an application thread to track the help they give. • For each “win”, they will list the person they helped achieve Expert Infantry status by copying their EI approval thread. • For each “win”, the person who was helped will validate that this person helped them. You can find the master award area here https://www.whitearmor.net/forum/forum/182-fisd-master-armorer-program Are you an approved TK that spends more time on the boards than the average Trooper? Do you enjoy using your knowledge to help out future and existing Troopers? If so, we would like to invite you to join the Imperial Attaché program! Members of the I.A. team are chosen to help out not only those here on the boards, but on a local level as well. Our aim is to have at least one in each and every Garrison, Squad and Outpost in the entire legion to be the eyes and ears of the FISD on a local level. A suggested level of EIB or above is preferred, as part of the duties include assisting those aiming for levels 2 and 3, but is not a requirement. Being active on the boards on a regular basis , welcoming new members and helping out where you can is, though. Some of the benefits: 1. Access to exclusive Attaché merch., including patches, etc. 2. Having the Imperial Attaché title under your name. 3. Being a part of the team that welcomes new and prospective members of the FISD. 4. Being the "go-to" person in your Garrison, Squad or Outpost. 5. Exclusive access to the Attaché HQ area, Imperial Propaganda Machine (newsletter) and merchandise discussions. For a complete list of Imperial Attaches, go here IMPERIAL ATTACHE AWARD Imperial Attaché Award for those attaché's who have gone above and beyond [minimum 1 year of service] You can find a list of prior recipients here Attaché Merchandise For those of you on the Imperial Attaché staff, the official I.A. patches are available You can find the thread here (Imperial Attaché's ONLY) ATTACHE ROCKER For those of you on the Imperial Attaché staff, the official I.A. rockers are now available. You can find the thread here (Imperial Attaché's ONLY) Attaché Ambassador Not much to say from the Attaché department. Other then Happy New Year. I hope this year is filled with plenty of troops!On a forum side note we are still always looking for Attaches. And for all the returning attaches please be on the look out the 2021 Attaché check in. I will be posted in the coming days (if I haven’t already).Here’s to hoping things get better! With Unquestioned Loyalty Frank Peranteau TK75139 "Frank75139" Attaché Ambassador Update Your Fire Team Info: Hi all, I've been doing some housekeeping in the approved Fire Team area, mainly to make all the posts in a uniform, easy to see format. The original post were in a different forum theme and those font colors were hard to see in the current theme. Anyway, please check any teams you may be a part of and see if they are still active, members up to date and the logo still works. Please contact me directly if any of your information is incorrect or you need your logo updated. For the full list of Fire Teams here Thanks! With Unquestioned Loyalty Mark Ryner TK4584 "captsafe66 " FISD/Fire Team Director So what exactly are EIB (Expert Infantry Badge) and Centurion levels? These programs were designed for those who choose to take their armor above and beyond the minimum requirements for basic 501st Legion approval. It gives you the chance to show a level of dedication and pride that takes your armor closer to being as "screen accurate" as possible, without as much extra work as you may realize! It also works on giving a better look to the Legion as an entity, and you can bet others will take notice of your hard work. The 501st has a list of detailed requirements for Basic approval, (level 1), EIB, (level 2) and Centurion, (level 3) which can be found here in the Costume Reference Library, (CRL) http://databank.501st.com/databank/Costuming:FISD_CRL Here are a few of the questions people may be wondering about: 1. "I am a (tall/short/heavy/thin) Trooper. Can I still apply? Of course! These programs are open and encouraged for all sizes of TKs, as long as the costume is correct and meets the guidelines. There are many specific build tutorials to every option, as well as a vast network of fellow TKs on the FISD to help you out and offer suggestions. 2. "How much extra will I have to pay for extra items"? The cost is actually quite reasonable, considering the few extra supplies you will need, which are listed in the requirements area. While it may run you a little more to implement these additions to your costume, they will go a long way to improving accuracy. All needed items can be found for sale on this thread: https://www.whitearmor.net/forum/forum/16-ongoing-sales-project-orders/ While blasters are not required for basic approval, for EIB and Centurion levels they are, and may need upgrades (also listed in the CRL). 3. "I haven't even got my kit yet, is it too early to start planning"? Actually, aiming for Centurion is easiest to do right out of the box. 4. "I have my basic TK approval, can I still get in these programs"? In a word... absolutely! 5. "Are there any "perks" to this extra work and cost"? Besides knowing that you have a great looking set of armor, the 501st and FISD believes you should be deservedly recognized for your achievement(s), and allows you to wear the appropriate embroidered "rocker" badge of rank (available for a very minimum cost) on your shirt, helmet bag, etc., as well as rank decals to put on your armor bin. You will also have access to select "challenge coin" runs, receive (free) a cool certificate for your new rank, and have your title posted below your name in your FISD signature. Plus, once you reach these levels, you will have the extra knowledge to help out those who are looking to apply as well. 6. "Is it hard to apply, and what happens then"? After basic approval, all you do is make sure your armor is up to the standards set forth in the CRL, post a thread with the required photos in the appropriate area (see below), and wait a bit for the D.O.s (Deployment Officers) to address it. (Hint: Studying other people's threads before you submit can be a GREAT help). These are also listed on the main page of the FISD site. While waiting for approval, you will get some comments from others who will offer suggestions and constructive advice to help you out. If you should need any changes, the DOs will let you know, so you can adjust accordingly. Don't be dismayed if you do need changes... it's all for your benefit! After you are approved for EIB, then you can submit for Centurion. EIB https://www.whitearmor.net/forum/forum/19-request-expert-infantryman-status/ Centurion https://www.whitearmor.net/forum/forum/72-request-centurion-status/ Photo Checklists To make it easier (and faster) to get you approved, we have updated the Photo Requirement checklists for both OT and FO and included visual examples of what we as D.O.s are looking for in order to move you along at an expedited rate. These can be found here: Expert Infantry: (For all non-FOTK costumes) Centurion: (For all non-FOTK costumes) FOTK: (EI and Centurion) Just remember that the FISD is here to help you every step of the way with whatever other questions you may have, but if you can't seem to find what you are looking for in your research, just ask away here on the forum. This area lists all those who have gone above and beyond basic approval toward screen accuracy. FOR December - January the 1st Imperial Stormtrooper Detachment would like to congratulate: Expert Infantry Badge Award: Thomas "choinierx" TK11730 EIB 1015 GREAT job on your approval, now on to Level 3! Request your free EIB certificate here --------------------------------------------------------------- Centurion Badge Award: Daniel "Lord Q" TK26306 Centurion 489 Alex "azoroes" TK22504 Centurion 490 Outstanding job on reaching Centurion, Troopers! Request your free Centurion certificate here If you see any of these Troopers around your Garrison or Squad, be sure to congratulate them! Newsletter Welcome back everyone, hope you all enjoyed the festive season break and hope we all are in for a much better New Year. With all that is going on in the US at the moment we wish you all are safe. If you have any interesting stories or photos or something you think newsworthy please send them to me via pm. With Unquestioned Loyalty Glen "Q" Rhodes TK-85421 "gmrhodes13" PRO Newsletter Editor At Large Huge thanks to our workhorse @gmrhodes13 and to our glorious DL @Sly11 for initiating the forum cleanup with full energy this year. Thanks to these two gentlemen we got all dead links eliminated and all photobucket watermarks removed in 67 of our 128 subforums. We are ready to go full throttle for the next two months and work through the other 50% of the forums. But we need your help!! Whenever you stumble across any issues in a forum thread, let us know and we will fix it! Old links, leading to a dead end? Nasty watermarks blocking details on the most important pictures? No problem! Your friendly staff team is here to save the day! Just do us a favor an post the URL to the existing issue in the thread above. Many have done so before and we will not stop until all issues are solved. The more we find, the more we solve. We are at your service! With Unquestioned Loyalty Danny Lauber TK-55550 "Ripper_L" PRO Editor at Large Staff List 2020 Detachment Leader (DL): Andrew Franke (Sly11) TK11469 Executive Officer (DXO): Tim Waychoff (Dark CMF) Deployment Officer (DCA): Joseph Pedigo (justjoseph63) TK-10963 Deployment Officer: (DCA): ShaSHa (ShaSHaChu) TK-19233 Deployment Officer: (DCA): Mario (TKSpartan) TK-48117 Lead Provost Marshal (DCOG): Steven Sheades (starsaber25) TK-10466 Provost Marshal (DCOG): Chris Pearson (themaninthesuitcase) TK-10911 Provost Marshal (DCOG): Aaron (Bronx) Gibson (Pyrates) TK-99725 Fire Team Relations (PRO): Mark Ryner (Captsafe66) TK-4584 Personnel Officer (PER): AC (Novatie) TK-5597 Content Editor At Large (PRO): Christoph (Danny) Lauber (Ripper_L) TK-55550 Content Editor Awards (PRO): This will be handled by the XO Newsletter Publisher (PRO): Glen Rhodes (gmrhodes13) TK-85421 Attaché Ambassador (PRO) Frank Peranteau (Frank75139) TK-75139 Social Media Relations (PRO): Teresa Nuthall (Soulart) TK-41307 Social Media Relations (PRO): Jim Ferrell (Rat) TK-95970 Imperial Propaganda Machine: Brien Edick (Harbinger) TK 92802 Imperial Propaganda Machine: Eric Ho (Hoda) TK 77520 Systems Administrator (DWM): Eric Brager (Darth Aloha) TK-9674 Systems Administrator (DWM): Mathias (Locitus) TK-2959 Detachment Founder (DF): Paul (Daetrin) TK-8020 Replica Section Curators (PRO): Dan Branton (CableGuy) TK-42911 Don't Forget We're on Facebook, Twitter & Instagram Facebook: www.facebook.com/whitearmor Facebook Group: 1st Imperial Stormtrooper Detachment (FISD) Official Twitter: www.twitter.com/FISD501st or @FISD501st Instagram: www.instagram.com/fisd501st On behalf of the 1st Imperial Stormtrooper Detachment Command Staff and the Imperial Propaganda Department

 1 point
 -
Thanks Mario... that's really helpful, as well as the thread on return edges... bookmarked both of them!!1 point
-
Hi Michael, great to see your Kit has arrived. If you're like me and like the video tutorials, I would like to recommend you to take a look to this video from RWA creations, they are so practical and I think they could be so helpful for you. Also you can take a look to this forum post about return edges . Remember, post photos , ask questions . If you're not sure of a cut, post a photo here prior to cut anything. We are here to help.1 point
-
Yes, the TRamp is built on an Aker unit but with the other electronics built in. No need for separate units. So, it has the static bursts (they can be switched off if needed). There are lots of various clicks and bursts so it doesn’t sound too fake. It also has preset voice samples of the character you are using. Within the unit, you can select Stormtrooper, Vader, 3PO, Wookiee, Jawa, the list is over 20 or 30 characters. The samples then relate to the selected character. It has audio loops for many characters, too, including TK chatter. To trigger the samples and loops can use this with an optional remote or with optional finger triggers. The Aker is excellent for the money. No bursts or gimmicks, just a decent sound and no frills. :-)1 point
-
Thanks for the info everyone. I was hoping to reduce the amount of wires and batteries as much as possible. @ukswrath I will likely order some fans in the future.1 point
-
welcome aboard and good luck!1 point
-
"And for the back plate it looks as I need to remove a goo portion of the bottom return edge to make it sit flush with the top of the kidney. " Wait to suit up first before making any cuts. What worked for others might not work for you (different body types). From page 10 on AJ's build, you can see only after he has worn it did he know what areas to address.1 point
-
Shouldn't be an issue. We try to keep standard sizing on the front as that is what is seen from the public, then add more on the rear if you need more space1 point
-
Started the HOWTO. Any further discussion related to modding this should be put there!1 point
-
Nice work, looking forward to seeing the progress1 point
-
Made some progress on the abs, cod, posterior and kidney strapping and snap plates. Took a page out of A.J's book on the strap hinge method on the Kidney and abs. Also question for the 20mm x 20mm square notch. It should follow onto the posterior right? See my pencil lines. And for the back plate it looks as I need to remove a goo portion of the bottom return edge to make it sit flush with the top of the kidney.1 point
-
Yes! I am using that tutorial. I contacted my local garrison already and they’ve been giving me help, including turning me on to that tutorial.1 point
-
I guess I better get this thing finished and approved. Sent from my iPhone using Tapatalk1 point
-
Ok, was wondering why I didn't hear any static burst on the Aker. Because the Tramp has everything buit in and the Icomm requires the Aker or vice versa?1 point
-
I used the PTT once I think, just found without it was easier BUT you do have to watch some comments you may make from time to time, I slipped up once, was a naughty word1 point
-
Haven't posted in a while. Had shoulder reconstruction surgery due to an old sports injury. Healing now. Can't fit into the armor at the moment due to mobility limitations, BUT!!! I took a few extra pictures before I went under... I had to have one last Old Fashioned before I went under the knife.1 point
-
Ask for help and search for what you need here. Sure you'll find all the help you need. Good luck.1 point
-
Thanks for the Welcome everyone! I should have mentioned at first. I already have an Anovos Kit that I picked up on FB marketplace. Of course I bought it without really knowing where to start, but this site, and some local guys, have already been extremely helpful.1 point
-
Teeth filled in! Tubes stripes and 501st markings next!1 point
-
You don't have to have any return edges on the biceps but many of us with smaller arms keep some to stop them moving around as much. A few of us have to also use foam inside to stop them moving. You can trim to match the bottoms of your shins, also remove any return edge so they don't rub on your boots.1 point