Leaderboard


Popular Content
Showing content with the highest reputation on 10/23/2020 in all areas
-
Very true!2 points
-
Ah, this is great info, thank you. I hadn't seen your update thread there - excellent! I do like the idea of snaps to remove in windy conditions, as you say. I'll give it some thought and plan my attack. Cheers!2 points
-
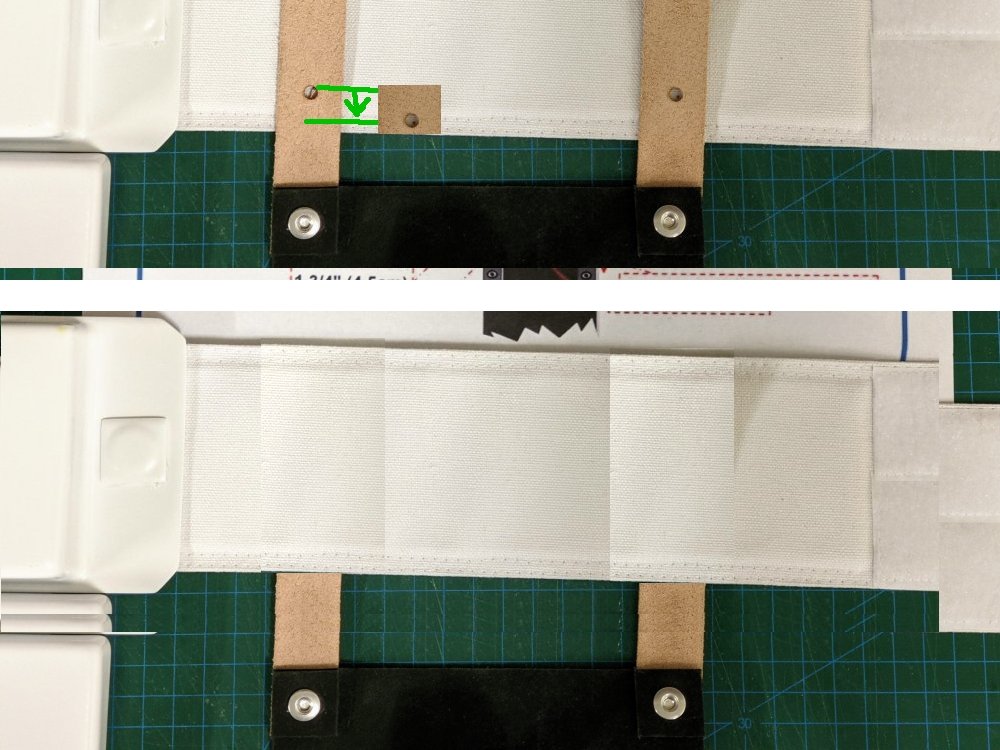
There are no issues with using chigao screws or rivets, I use snaps behind so I can remove the holster at windy troops where we don't use weapons. The straps do sit behind the belt so you could drop the straps down until the hole already punch stops before the edge of the belt, but how you have it now really shouldn't be an issue. the billgram image I updated recently to give the options in positioning, for a long time the image only gave a standard positioning which wasn't a majority of what is seen in ANH, there is a thread here if you are interested:
 2 points
 -
My thoughts, not official in any way, is no one is going to get a ruler out on your armor. If it looks good then should be ok. I used Chicago screws and they have worked fine. Sent from my iPhone using Tapatalk2 points
-
48hrs later, going to give more time given the glue for gloves hasn't arrived Sent from my SM-A520F using Tapatalk2 points
-
Hello all, Biker Scout who recently got his TK armor approved and am ready to mix it up with the F.I.S.D...... Looking forward to not sitting at troops. TK-578991 point
-
I got up once again at 5:30am, and suited up, set up some lights in the driveway, and took some turnaround pics. Submitted to my GML for basic approval today, wish me luck!1 point
-
Some gloss white touch up to the thighs and butt plate. Then a lot of trimming some elastic and webbing and installing snaps. The elastic holding my biceps to the bells will now be double-snapped. I tried again to CA glue the edges of the large ammo boxes to the belt. And I started redoing my thigh hanging straps.1 point
-
Looking great Garrett1 point
-
Great to hear guys! For the helmet interior im planning to coat it with black velcro entirely. This will give me the common advantage of people not really seeing my face through the lenses and from down below, along with maximum flexibility where to place my tech. So there is two ways to got about this a) Line the helmet with hook velcro, directely attach the padding to the hook velcro, and put loop velcro on the fans and voice amp. Here i'm worryied about the scratchy nature of the hook velcro, especially when putting the helmet on and of. b) Line the helmet with loop velcro, and put hook velrco on padding&tech. Here i'm unsure if self adhesiv velcro will actually attach to the padding. I'm looking a the kind of padding that Cableguy and many others use. Which of these do you think would be the smarter option?1 point
-
Dude, that is a great idea! I've already glued at the indicated spots but I will certainly look into this idea as a means of added stability. Thanks Andrew!1 point
-
Weathering success! I used some metallic silver (the same as I used before) to drybrush some erosion on it and I'm pretty happy. This time, I was very conservative with the sanding on the scope. A fine grit, one wipe at a time deal. I got a decent result this time. I'm pretty happy with this now. Aside from a few small paint touch ups, I'm going to table this for now to start on the actual suit. I'll probably come back to it at some point for better details. I'll square away the Hengstler counter, get some coils, and then maybe spiffy up the scope with plastic lenses? It all depends on where I get with my actual suit. Thanks a lot gmrhodes13, you've been a voice of wisdom along the way!1 point
-
Looking good so far.1 point
-
A good tip is to use nuts and bolts first as it gives you the ability to remove and re-drill holes if you need to move the pieces around, rivets are very hard to get out once set in. Tilting the faceplate or backplate forward or backwards can adjust brow height but also can affect the size of the neck opening. Each helmet make have their own quirks so don't be too hard on yourself, we can all make mistakes but hopefully you can still make this work.1 point
-
Full disclosure: when I said I'd started trimming the bucket back in 2018 before I started the build, I think I may have trimmed too much! I made the mistake of trimming along what I thought were the trim lines... and drilling holes in the dents molded into the plastic. If it was any other armor maker aside from RS I probably would have been fine doing this, but I was not wise to the process of RS's builds (and the fact that the trim lines and holes from the HDPE original don't work with the ABS replica), and hence I may be left with too little material to work with Regardless, before I started on the eyes and frown, I painted the inside with two coats of black Plasti-Dip: I masked off the area around the frown and eyes for easier trimming. Now, I've added the brow trim and am working on riveting the helmet together. I'm worried that I don't have enough material on the back to put all four rivets in... but I'm hoping at the worst case I can superglue some spare ABS to the inside of the back to rivet into, and no one will ever be any the wiser. Stay tuned, and please keep offering advice! @Rat has kindly offered to sanity check me as I go along, so fingers crossed we'll get there!1 point
-
Yes Mark I know but he posted a search link not his actual profile link1 point
-
NoVAtie should be along soon to update everyone.1 point
-
Looking good so far, a few references for you1 point
-
I am just about to start this build (a V3 Imperial Arms 3D E-11), the last part of my kit, so I will update you all with how it turns out. It has a lot of actual bolts and metal parts, and is so disassembled that it should make sanding the individual ones easier. I will be using XTC 3D for the first time to try and speed it up.1 point
-
Ordered a Commission and yes for me it was straight to approval and EIB without changes1 point
-
So I had a few armor items drying last night, so rather than wait until the weekend, I decided to tackle the abdominal armor fastening system. I'll submit this post as a tutorial for this awesome abdominal closure. Thanks again to @11b30b4 for "nudging" me towards this system rather than the strap and buckle setup I had already gone with. Since I've tried both methods, I'll go over the positives and negatives of both towards the end of this post. First, let me show what I'm trying to achieve: Both of these pics are from Jeff's Rogue One TK vs. OT TK Comparison thread found here: https://www.whitearmor.net/forum/topic/48617-rogue-one-tk-vs-ot-tk-comparison/. The first pic is of what appears to be a screen used ROTK set. The second is Mr. Paul's Shoretrooper system. Regardless of the authenticity of the first, it seems legit. I tried searching everywhere for ROTK wardrobe malfunctions that might show one, but this is the best I can muster: Can't tell, but by just looking at the unclear image I'll just assume this is the way it is. Regardless, here we go. First, here's the necessary tools: Not too much there. Of course, you only need one zipper, and scissors work just as good as the rotary blade. Also, you don't need a HD machine for this task, a regular sewing machine works just fine for elastic and zippers. Technically you can hand sew the entire thing, but this is much faster and providuces a much better product. You can see the zipper foot to the left of the machine, but I didn't use it; a regular foot works just fine. While I'm discussing sewing, I'm no pro, I don't even claim to be good. But, my advise is don't be afraid to try it out, especially if you're building a lot of costume accessories. I bought this because our old machine couldn't handle duck cloth without failing let alone vinyl or leather. Plus, it's like 25 years old. Additionally, I can't justify $770 for Mando soft parts and another $650 for leather. We're getting up towards Darth Vader costume prices there. Back to the build. First, the edges of elastic can get pretty "thready," mostly when cutting against the grain. I squared off the swatch, and then burned the edges to melt off and close the ends of the fibers. This elastic is 10" wide, so it's plenty big enough for most abdominal armor. Unfortunately, I cut off the right side of this picture, so you can't see how far it extends past the bottom edge. My armor is 9" tall. Also, distance from the top of the belt recess to the top of the back is 8". This is why I ordered a 8" zipper, but I probably could have just grabbed the 7" (8" overall length) one that they had at the fabric store. I'm also looking at the mess left over from the 1/4-20 screws, washers and buckles and think this new system will be much more kind to the armor. Old picture. Next, I double checked the armor to see what I was working with. I had my wife measure the gap at its widest point which came out at 3 1/4". With that info, I set out to transfer measurements to the elastic. The dotted line represents the zipper. The inside solid lines are the edges of the back gap and the outside is Velcro. I decided on 2 inches of Velcro on either side of the gap. Since this is a lateral pull I don't fear that the Velcro will separate from the armor, but I went with 2" regardless to provide plenty of surface area. This gives you a good idea about what I'm talking about. I held the elastic up against the armor again to get one last measurement of where to cut the bottom, which I shouldn't have done. . As discussed previously, I purchased an 8" zipper which has an overall length of 9". Now, I could have used this regardless as the extra inch of zipper fabric at the top can be cut off or folded and sewn over, but at the last minute I decided to run the zipper the full length of the armor. So, I decided to cut a new piece of elastic which took about 5 minutes. Untrimmed and trimmed. Next, I cut down the dotted line, laid double sided tape along the seam, and set the zipper in place. I like using double sided tape because it holds very well, it's fast, and doesn't require me to put pins in the fabric. They make seam tape for these applications, but it costs $7 for a small roll and doesn't hold as good. On the plus side, the seam tape dissolves after washing a few times, but after scoring and cutting the tape, it will never be seen again. This is the result. Now, this is where the sewing pros should bust on me. I didn't fold the seam over before sewing. Honestly, it doesn't bug me at all, because with the ends cut straight and melted shut, it turned out pretty clean. Also, as you can see from the second pic, after running a straight stitch down the length of both sides of the zipper, everything holds strong. Next, I laid the Velcro down along the edge of the fabric and sewed it on. Finally, I stuck the piece in the inside of the armor and covered the edges with Velcro for the kidney/ trauma plate. I know, it's not centered, but you get the point. This is so much more comfortable than what I had before. Also, I discovered that I need to put a little cord on it so that I can zip it myself. Finally, regarding the kidney plate, I just realized that the new CRL says "the abdominal armor back cover plate has two protruding tabs along the bottom that rest inside the back hard belt." I'll add that this weekend, but @11b30b4, @Sly11, can we move that down to the Kidney Armor section? I overlooked it previously because it's listed under abdominal armor. Pros and Cons of both systems. Old buckle system: Pro- Can pull ab real tight. This has a good thinning effect. Con- If tight, it's hard to breath. If loose, you really rely on the suspenders a lot. Skinny guys don't need thinning. Pro- Very stable. Con- The straps have to be fastened somehow; either screws or epoxy, glue, etc... The holes in my armor show the obvious draw of this system and sometimes glue fails. Con- Even when filed flush to the nut, I can still feel the screws in my back. This doesn't bug me too much, but my undersuit cost $200. I don't want it to get snagged/ damaged. Pro- Can easily take on and off by myself. Pro- Doesn't require sewing. Con- Though not listed in the CRL, it's probably not screen accurate. New Elastic system: Pro- Very, very, very comfortable. Con- Cannot tighten as much as old system. Pro- You can breath in it without effort. Seems much more natural. Pro- I fastened it with "industrial strength" Velcro rather than adding a 'mechanical system' to the armor and it's not going anywhere. Pro- No screws or glue; much easier on my undersuit. Con- Sewing Pro- SEWING IS EASY Con- Unless you're a contortionist, you're not getting this on and off by yourself without a cord. Pro- The last one isn't really a con, because adding a cord takes about a minute and it's hidden by the kidney armor. Pro- Building this and installing it took less than an hour. Pro- See number one. Pro- It's probably screen accurate, but unless I'm corrected, this has yet to be verified. Overall, this entire process took less than an hour, and it's well worth it. It actually took longer to write this post during my breaks and lunch today than it took to do the actual work. Also, the comfort of the system cannot be overstated; this has become a necessity for me in future builds. I really hope this helps someone out in the future. In my opinion, the return on investment is huge. Thanks for viewing.1 point
-
Appears you haven't given your correct profile link, should be https://www.501st.com/members/displaymemberdetails.php?userID=326501 point
-
Question for the other way: How can i subscribe to those? I'm sure I was once subscribed to the newsletter and got that on my normal mail. Since a few months that's not the case anymore. Or do I misremember something? Nevermind. I found it Popped up on the side of the forum somehow.1 point
-
Good work trooper always good to have additional heavy weapons support.1 point
-
Quick update. I got an email this weekend from DHL that said my boots are coming tomorrow. Awesome. The only problem is that I've been "slow rolling" my build over the last couple days since I didn't expect my boots for another couple weeks. Oops. I've been planning on taking a picture of myself barefoot in full TK armor waiting by the mailbox, but apparently I underestimated the turnaround time for Imperial Boots. I'll remember that next time. So, when I received that email, it was enough to motivate me for another push. I put up pics of the belt and thighs last time, so now that they're put together and awaiting paint, I decided to smooth down all the edges of the abdominal armor I had banged up while sizing everything else. As I stated in a previous post, other threads mentioned starting at the middle and work out. This meant beginning with the abdominal armor and then putting it on/ taking it off about a hundred times to see how everything else fit. This meant that all the smooth corners I had worked on back in August had become rough and the multiple layers of primer had their fair share of dings, scrapes, and gouges. However, everything was easy to fix and I was able to hit it with the gold paint. This was taken after my first round of wet-sanding at 400. As you can see, I went pretty heavy on the gold, which resulted in some big runs, but as I've discussed previously, the corners and cracks got filled up nice with the gold flake and the runs were taken care of after wet-sanding at 800 grit. Following the gold and sanding, I got my golden thighs and the ab together and started spraying. This was the result: My pictures never seem to do this stuff justice, but believe me, it all turned out awesome. Also, I've been stressing about spraying the abdominal armor, but it all worked out fine. I just had to keep reminding myself to take it slow and not go too heavy. Also, I was finally able to pick this stuff up: Why is French Blue so hard to find? I couldn't find it online for a reasonable price. However, in my search for 10" elastic and 9" separating zippers (had to order off of Amazon) I found a bottle at Hobby Lobby. It was actually hidden behind another blue and the only one in the store. Also, I'll be doing a final build update this weekend and try to include as much about my strapping as possible. The elastic/ zipper abdominal closure has been covered in other build threads, but I'll do something here as well. I've got a plan in my head, but we'll see how that goes. Also, I think I've got enough elastic to do like 5 stormtroopers. With everything else done, I've now turned to the pieces that have had me spinning my gears ever since this build began. I've posted pics of the shin armor taped together a few times, but I've also documented how I haven't been happy with how it fit. So, after looking at other build threads, I just decided to get to work. Now, I just posted a few days ago that I asked the designer to change the shin armor, which they did, but I really didn't want to print out the new set. These fit together "clam shell" style, so it's pretty straight forward. However, I cut away the strip I circled in red because it was causing a whole bunch of weird gap/ fit issues. Additionally, I didn't feel that it was necessary since the front will be butt-jointed and sealed. Also, the strip would prohibit any kind of flex and make it impossible to put on the shin armor. Ok, this looks bad; real bad. But all I can say is "PC-7, where have you been all my life?" Ok, the product is over 60 years old, so obviously it's been there the whole time, but I've never used it until now. Also, the only reason I decided to try it out was because of @11b30b4's posts. So Jeff, thanks again. As I said, this looks bad, but if anything, this build has made me very good at sanding. After doing that all night, I was left with this: LOL, socks and Birkenstocks. I guess that's the Pacific Northwest side of me showing through. Actually, since this is a 3d print it doesn't flex as much as I would like. I have to kind of slide my heel down the crack in the rear which wouldn't feel good barefoot. The socks help a lot, but this means that when suiting up, I'll have to start with the legs first, then boots. Ultimately, they passed the stress test. I was able to put these on and take them off several times without issue. I'm probably going to print off another set though, using the new file. When I do, I'm going to set the infill very low. As a side-note, I printed off Sean Fields' Shoretrooper shin armor for my Mando build and it was designed very thin with a lot of flex. I think that if I emulate his settings for the next print, I'll be golden. So there we go. Other than painting the belt, which I'll do tomorrow night, I'm on my last two pieces of armor. I'll get back to the shins on Wednesday night, but I'm at the point where all I'll be doing is touch-up paint and sewing/ strapping this weekend. Also, with packages arriving from The Darkside Closet and Imperial Boots tomorrow, as well as new Hovi Mic stainless steel mesh form Etsy, I'll likely be sending pics into my GML next week and see if we can get a 3d printed TK into the 501st. Thanks again for viewing. I'll update this weekend.1 point
-
Hi Francois, you have nothing to worry about. Your affiliation is only used for voting in elections for the detachment. It doesn't affect you being a member other than that. Yes if you have not logged in on the boards since the prior census you will roll off the list. From what I can see, the last time you logged in was indeed October last year and that was to unsubscribe from our news letter and FISD updates. You will get picked up in the Web teams annual bulk update which will occur before elections next year. There is no set time that they do the update so it could happen sooner or later but definitely before February so as i mentioned, you have nothing to worry about. All your interaction with the detachment are as normal and not hindered by affiliation in the mean time.1 point
-
Hi Jason and Jeff, Thanks for the comments. I have a STL file that was scanned and reconstructed based on a HT 12" R1TK. There is no details on the model, but the overall shape should be good reference for 3D modelers. I am not sure if it is allowed to post here, so if anyone is interested in getting the file, PM me for the link. Thank you so much. Cheers, Azuma1 point
-
I really like this congrats Trooper1 point
-
Jeff, Thanks, I was just taking my morning break/ forum check and saw you post this. So, my shoulder traps sit similar to the reference pics you posted with a very small gap under the bottom. I'll play around with them a little. I still need to finesse those tabs on the belt a little bit. I intentionally left them a little "fat" so I would have room to trim. Also, since I added an extra strip underneath the belt (I forgot to post a pic, but it's basically the same size as the test strip I bent) the belt sits in a position that should allow me to bend the tabs inward slightly. Also, I actually just went to my garage and looked at the rear belt. I may play around with it a little bit because I feel like there's too many layers of plastic there. Finally, I saw this pic of the boots before and I love it. For reference below is my 1980 Dengar figure and one of my son's Stormtroopers from 2010. In Rogue One, are those "holes" cut out or painted? They look painted to me, but I wasn't sure if anyone ever got a close look. I have no problem with painting a "hole" on the bottom of my boots when they come in. That might be fun.1 point
-
Congratulations on your HWT! Looks great!1 point
-
Congratulations trooper and welcome to the ranks1 point
-
DarthBiscuit, When I did my T-nuts, I only needed a 1” square hole on the back side of each box and I used PC-7 to hold the T-nuts in place on the inside. If I was doing it all again today, I would go the route I did for Kal Akaan’s vacuum formed kit. Just cut the entire back off each box, then make a Sentra inset for each box. Drill out the mounting points for each T-nut (2 per box) then glue the inset inside the box. This gives you a nice secure look and fit and you can always remove the boxes later if you need to repaint or whatever. Its not a lot of work and in my opinion well worth the extra effort. If you are interested in this method, check out Kal’s WIP to see how I did it and hit me up if you have any questions. The only other option I would suggest it to use 3M industrial outdoor double sided tape like this: https://www.homedepot.com/p/3M-Scotch-1-in-x-1-66-yds-Permanent-Double-Sided-Outdoor-Mounting-Tape-411DC-SF/1005753851 point