Leaderboard


Popular Content
Showing content with the highest reputation on 10/07/2020 in Posts
-
I got a lot done over the past few days! I figured I'd combine it into one post, since a lot was redoing stuff... I finished the trauma plate! Snapped it on the barrel elastic straps and stored it in my footlocker. I probably should've started the TD earlier in my process, since there's SO MUCH to it. I spread putty and then wet sanded it to 220. My buddy printed the painting pyramids for me! I wet sanded the ammo boxes since they had a lot of runs, some stuck cardboard (from resting them directly on boxes for painting), and a spot that wouldn't take paint. I sprayed them gloss white again and they're good! 2 more days and I'll E6000 (I think) them to the belt. Something I noticed (that I don't think anyone mentioned) is that the drop box elastic comes out from between the outermost ammo box and the belt. These pics show that the elastic is on top of the belt. So I'll probably E6000 the elastic to the box, and then E6000 it to the belt. The thighs have been a huge pain! I sanded the gray chunks of spray paint off and sprayed again. At one point the can started doing it again, but I stopped immediately so only 1 thighs got messed up. I wet sanded to 220 later and sprayed it again. I think they're finally done now! Tomorrow I'll stick velcro on the back and trim out some 1" webbing to hang (with a clip, wrapped in elastic, per the new CRL). Hopefully they fit alright, or I can add foam strips in some places, because I DON'T WANT TO cut off the cover strips! Today I somewhat taped off the white parts of the TD. I wasn't too worried with perfect taping, just with simplifying my future sanding. I then sprayed gloss gray and it went very well! In 2 days I'll tape the gray parts and then spray gloss white...2 points
-
You may find your strapping between the cod and butt plate is a little tight, as it appears to be pulling the butt plate in which is causing the overlap to the kidney.2 points
-
Your bicep look too big they should fit snug around biceps this will also help shoulder bells sit properly, AP biceps are bigger then original to accomodate most but to be movie size accurate you need to completely trim the raised areas on both sides and reapply strips of course if they will fit you that way but thats teh accurate look. Mark (AP)2 points
-
Based on some of the comments I changed some of my strapping: - bought shoulders in - extended straps between breastplate and ab to extend torso - took some of foam out of bucket, could remove some more. Seems to look a lot better than previous photos.gotta change straps on butt plate and lock it in place a bit better 3 more questions - Shall I extend shoulder straps to drop back plate lower? - sides look ok? - wth do I do about rear shoulder gap?? Feel free to be critical Sent from my SM-A520F using Tapatalk2 points
-
Cool might not fully trim especially if I lose some kegs Sent from my SM-A520F using Tapatalk2 points
-
Understand that, he just came up without a warning! Still really excited though, always fun to see new troopers!2 points
-
Thanks, I was thinking of replacing the strap there, so I'll add it to the list. Sent from my SM-A520F using Tapatalk1 point
-
They aren't Newey snaps , those haven't been made for decades . Why not just get in touch with RS and ask for a couple of new snaps ? Although to be honest, modifying the crotch strap won't help your problem at all , it really doesn't do anything .1 point
-
Didnt thought of that! Will do that this evening... [emoji1303] Verzonden vanaf mijn iPhone met Tapatalk1 point
-
Another tall trooper! Can you post photos of the rigging/strapping for your thighs and shoulder/biceps? For the thighs I used a velcro strapping system that allows for adjustments on the fly. Don't know what you're using to strap them in. For the arms I can't tell if you have a cross strap underneath the shoulder bell. That helps me keep my bells and biceps in line. Like you I've got long arms and legs and keeping proper spacing is very difficult. You may be able to bring up the biceps a tab. Use some painters tape first to check how it fits and looks before you start pulling the strapping apart and re-gluing. He's a link to my build that dealt with the arm strapping. Hope it helps. If you have questions feel free to post here or DM me. Looks like we've dealt with the same issues fitting trooper armor (the kidney shims, thighs, and strapping). Good luck!1 point
-
Por supuesto. Gracias TKSpartan Of course. Thank you TKSpartan1 point
-
Hi Dennis, What I would do is to add a new Snap to the elastic where I need to shorten it. I usually install a couple. Hope this can help. Cheers.1 point
-
Great Tip !!1 point
-
Adjunto fotos después de intentar solucionar algunos de los errores detectados. Perdón por el retraso. I attach photos after trying to fix some of the errors detected. Sorry for the delay.1 point
-
- Backplate looks ok - butt plate flare is cannon [emoji6] - shoulders are fine (imo) - drop the forearms a bit - sides seem ok on first impression Next photos can you put the belt on? Even if just the cloth bit. Also gloves and hand plates.1 point
-
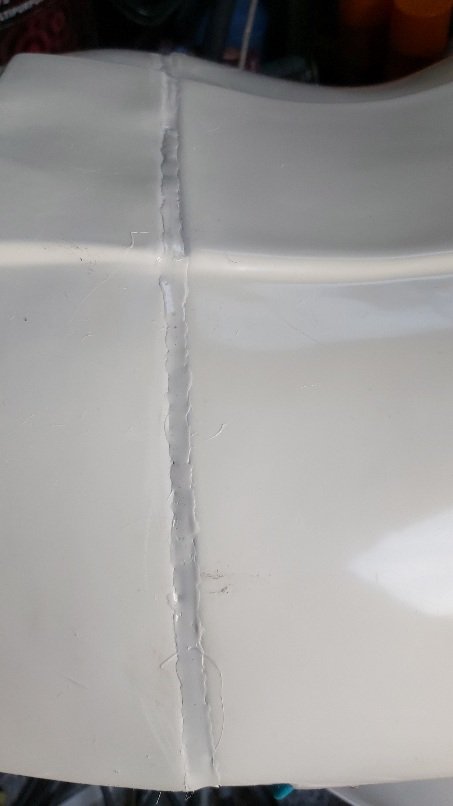
Sanded the ABS paste on the AB join but needs another coat, will let that set for another day or two. Working on adding the U channel This took a while but finally done
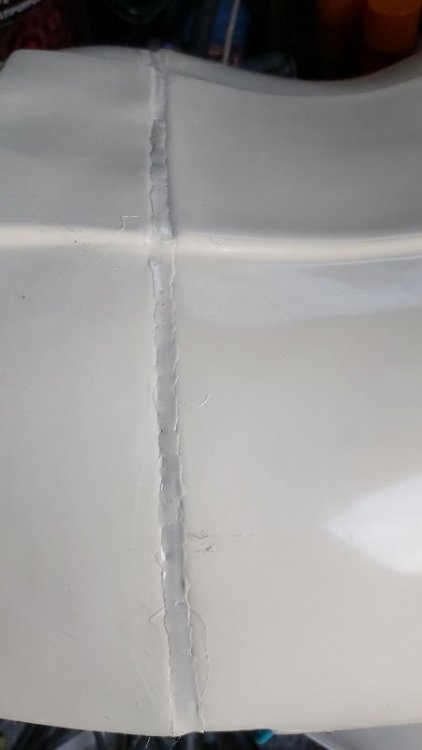
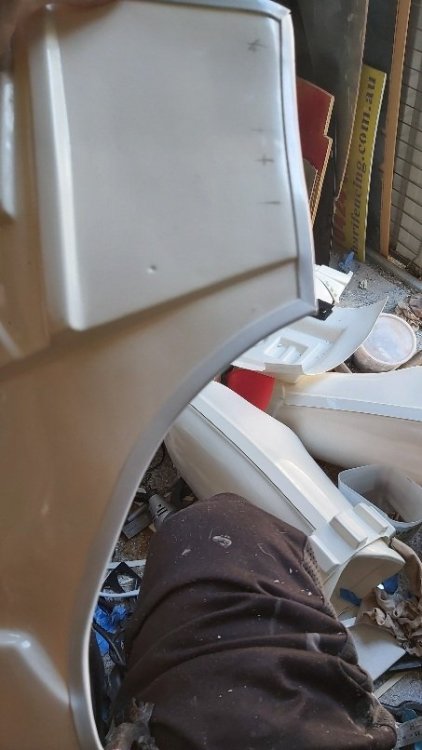
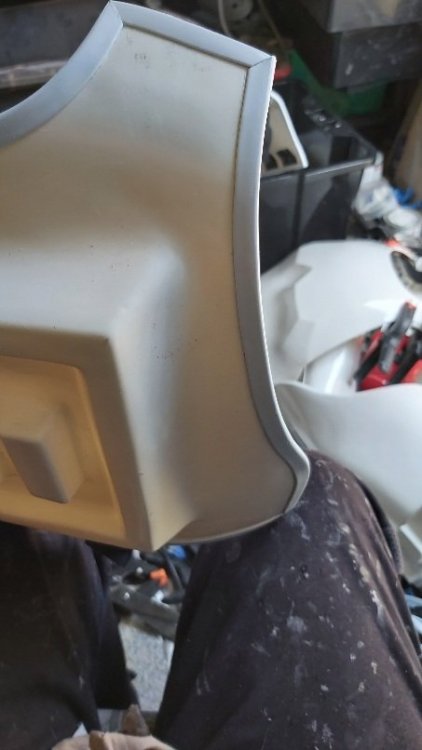 1 point
 -
Defo. I created straps from painters tape and adjusted countless times before settling on a good length and gaps.1 point
-
That’s not something that’s enforced. The gap between the bicep and forearm should be the same as the forearm and hand armour.1 point
-
Jeff, I saw you posted that method and it looks amazing and clean! I just don't have the resources to pull something like that now haha! Thanks so much for the suggestion! Your builds and walkthroughs have been crazy helpful!1 point
-
Oh, yes, that gap is quite minimal. I'll put the elastics on the shoulder bells and do another fitting that should be more accurate. Thanks!1 point
-
I was able to buy an unused R2Dan holster (without hardware) from Ryan who ended up needing a different solution for his fiberglass kit. Thanks Ryan! Here is the hardware I'm looking at ordering from McMaster 3mm x 7mm x 3mm Bearing Tamper-Resistant Torx Flat Head Screws - M3 x 0.5 mm Thread, 12 mm Long Tamper-Resistant Torx Flat Head Screws - M5 x 0.8 mm Thread, 16 mm Long1 point
-
Wow Sha Sha, you were right and I have no idea how I missed that. Just went through it and cleaned it all up. Thank you for catching that. Ardeshir1 point
-
Mando has a couple of differences so may end up as the Remanent Stormtrooper and it's own CRL. Solo, if it is the same may just be an add on the the R1. If they carried slightly different weapons they could be covered in an addition to the weapons accessories in the same way we are considering the TroS FO trooper as it is the same armour as TLJ with a different weapons load out.1 point
-
Hi Mark, Shoulder bell looks ace. Great fit. The biceps: personally, I’d drop them down by at least one inch. At the moment, the bicep to forearm gap is pretty large, and, your forearm to the hand guard on the glove will be quite large too. The below pictures are excellent for showing the bicep to forearm gap (at the elbow). :-) Sent from my iPhone using Tapatalk1 point
-
Hi, both are ok for L2. Crl: OPTIONAL Level two certification (if applicable): Gloves must be either black silk, satin, or silk-like material, or gloves must be rubber or rubber-like chemical gloves, in black1 point
-
I notice you are using rubber gloves . I thought that fabric ( silk like ) gloves were worn in e.s.b. And that the hand plates had fake stitching on them . But i may be wrong .1 point
-
Hey Ardeshir! Thanks for your patience. It's always a pleasure to see applications from you. One possible area for correction. It could just be the photo, but it appears that you may have a bit of the black frown paint on the gums of the teeth: Like ANH armor, ESB helmets should also be sure not to have any frown paint on the gums. If the paint is indeed on the gums, we'll need to you correct that before moving on with your applications; otherwise if you can post different photos that show otherwise, that would be fine as well. Reference: Thanks!1 point
-
Maybe an idea to shorten the crotch strap? Verzonden vanaf mijn iPhone met Tapatalk1 point
-
WOW! Excellent work sir,,, looking SHARP (as always)!!!! I'm kinda' tough on you because I know you are perfectionist .1 point
-
Throwing in some pics of my sight for E-11. Sent from my SM-G930T1 using Tapatalk1 point
-
I would say yes, as long as it is comfortable, even try a combination of adjustments. lower the Ab/cod, take a photo and see how it looks. Lower the chest plate slightly, again take a photo and see how it looks. Work out which feels the best, vs looks the best. Don't be too concerned about your helmet not resting on your chest plate, everyone is different shape and size so it's not going to be a decider in any approval.1 point
-
Jason, Tarok is correct. IB only does runs once a month for a week at a time. So, if you go to their web site and get the message you posted, it’s because the run has not started. Also be sure to check out their FB page before you go grab those boots. Sometimes they run deals and discounts. Most of the time its for combos like the Shoretrooper pants, top, boots, gloves, and belt for a set price. As for the fit of the boots, the size chart for IB shows hot to measure the height of the boot from the bottom of your heal. However, I will tell you that I wear a size 10 reg in combat boots, Vans and Converse All Stars, and my ROTK boot is a EU size 43 or US 10. While IB does not do returns, if you get the wrong size, most likely there is a market to sell them to someone on FISD. The scaled sniper knee (left) looks correct in my opinion. I have no doubt that the strapping and buckles you put on the back side of the abdomen will work fine; however, if you are unable to tighten them up any further, Consider using smaller webbing and buckles since that will give you some additional clearance. Also, FYI the designers of RO actually used an elastic fabric similar to neoprene and a zipper, this was then attached to the inside of the armor with Velcro. You do not need to yours this way, but I wanted to make sure you were aware. Here are few pics of Justin’s (TheRascalKing) build and how he did the zipper closure. Very clean and nice. As for painting the TPU, you may have better luck with 100% silicone white caulk rather than the Kwik seal. The Kwik seal is petroleum based. Even if you print the TPU in white, most likely you will have the issue of it not being a gloss white, so really getting a clear gloss coating that wont crack should the main concern. As for E-11 suggestions. I have a Hyperfirm or HFX RO E-11 and I love it. Its rubber and looks very real. It also does not weight a ton. I will say that when I started my build, I was 100% of the mind that I wanted the S&T airsoft that I planned to modify to RO standards. I am so glad everyone talked me out of this idea. One 3-mile parade and you will be soooooooo glad to not have a boat anchor for a prop. Hell, it’s the whole reason I have rebuilt my T-21 three times. The weight of the weapon is a big deal that most people discount until your arms are screaming. So, I suggest a lightweight E-11 and that generally points towards 3D printed. However, if you drop a 3D printed E-11, most likely you will have a lot of parts for an E-11 rather than a complete E-11. In my opnion, the only way to go is a rubber gun. Hyperfirm is no longer in business and as far as I am aware of, the only real option you have for a rubber RO E-11 is Praetorian Blasters. Praetorian Blasters actually makes a nicer looking RO E-11 than my Hyperfirm in my opinion but they were not an option for me when I got my E-11. Two things you need to be aware of before you purchase an E-11 is that the RO E-11 have several differences from the OT E-11s All RO E-11s have a similar but different scope the M.H.R. (Minneapolis Honeywell Regulator Co.) M38 Telescope. 1943 model not the 1942 model seen on other E-11s. Also, the Henstler 400 counter with the small eagle is different from OT E-11s as is the power cylinders. So, make sure you are getting an accurate RO E-11. The other thing you need to know is that the rubber E-11s are not cheap, they run between $200-$300 dollars. Lastly, do not be mislead when I say the blaster is rubber, its not soft and flexible like a swimming pool noodle, it’s a rigid hard rubber like a tire. Well I hope some of this helps and keep up the great build.1 point
-
I figured that I would need to, but was concentrating on the join between the chest and back plates in these photos. Once I get this done the next job was to tighten the shoulder straps to bring the top of the chest plate in and down a little. Strapping a R1 kit is more complicated than my previous ANH kits. Sent from my iPhone using Tapatalk1 point
-
Flamethrower just needs a little weathering and hoses attaching. Sent from my iPhone using Tapatalk1 point
-
Recommended material? What sort of rivets? Snaps? Other advice? --Jonah1 point
-
Well, thats always good... here is "troopmaster's" Kick Butt ANH pattern... enjoy1 point


.thumb.jpg.a22c59871126b71e159a4adfd3e00414.jpg)