Leaderboard


Popular Content
Showing content with the highest reputation on 09/13/2020 in all areas
-
Troopers !!! The time has come....1 Spot Left. Last Approved TK90277 Will . Surfintrooper. #99910 points
-
I'm sure they also want to be extra careful on the last of the first 1000.4 points
-
4 points
-
HA HA HA oh boy do I remember that email stalking
 4 points
 -
Just one more!!3 points
-
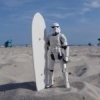
The best way to store armor is not in a bin, but on a mannequin. So today I built Cameron a PVC mannequin so he can admire his armor even though he can't troop in it (for now). Took less than 30 minutes to build it, and cost less than $20 for materials. The mannequin torso is a little longer than Cameron's torso (the chest sits higher on the mannequin than on Cameron), but it still works to hold the armor pretty well. Looking forward to getting pics of Cameron in his kit soon! And it's very clear to me now that this build is DONE. Thanks for the help, support, encouragement, and for coming along for the ride!3 points
-
They never sleep. That's why their salaries are so high...3 points
-
One more to go,3 points
-
Thank you. Thank you. I am sooo happy to have made it. I’ll be dancing on clouds all weekend. I will take all the recommendations and fixes to task for a centurion submission. Some of them I haven’t noticed so I’m glad they were pointed out. And I’ve had the rubber gaskets but haven’t assembled them. Lol Thank you for recognizing some of the issues as minor dressing concerns, I had my teenager help me with the photos And she doesn’t always recognize an issue even though she has helped me as a Galactic Accademy member suit up during the three years I’ve trooped in the armor. Again, thank you for the EI Distinction. I will represent the FISD with it proudly. Will G . TK-90277 Surfintrooper3 points
-
Ah, cool. Glad the video(s) helped. I’ve not done a huge amount, but, some go into those finer details, like coverstrip lengths, strapping, alignment etc. I’m a true TK nerd when it comes to the finer details. ;-) You’ve done the right thing signing up here. I’ve been on here for about 3 years now and I can honestly say, some of the nicest, most helpful, and most knowledgeable people are on theses boards daily. You are in safe hands with the FISD family. :-)2 points
-
Get the champagne ready.2 points
-
Anybody know what time the DOs go to bed and wake up? Cuz I wanna match their schedules ;-) Sent from my iPhone using Tapatalk2 points
-
Left and right cover strips (25mm) on backs of calves. Going to trim sniper knee now as suggested. Sent from my SM-A520F using Tapatalk2 points
-
Eeeeeeekkk! Sent from my iPhone using Tapatalk2 points
-
Hi Will, and thank you for your EIB application! CRL and EIB Application Requirements: All required photos have been submitted, and on behalf of the entire D.O. staff we are pleased to welcome you to the rank of Expert Infantry. Congratulations! Other-Armor Fit/Assembly; In this area we review observations made by your fellow troopers and the DO team. Some observations may lead to suggestions to improve the overall look of your armour. *************************************************** Let's start : Looking at the reference images , your shoulder bells can rotate inward a bit to get a better look. Reference Images Your left biceps alignment is perfect, the right one should be turn a bit to center the seam line. Reference Images We are suggesting to trim your Inner yokes a bit to avoid the excess showing in both sides Reference Images There's a noticeable gap between your TD and the backplate that you may want to make some adjustment to reduce it. Reference Images Also with your TD, for more screen accuracy it should have a separation between mount and plate Reference Images May be this should not be noticeable, but you could give a hand to smooth out the rim on the TD end-cap, as you can see it has a couple of rough areas Reference Images Most of the time this is a dressing issue, but your belt could be raised a bit closer to the ab section. Reference Images vv We noticed that your black pouch is a bit angled downwards, could use some stiffening and straightening... easy fix! Reference Images Your right thigh is touching the cod section and both are a bit close to the cod area. We suggest moving them down a bit. This will give you some more movement and more accuracy too. Reference Images Another dressing issue we noticed and easy to take care of is to center the knee plates as per the reference images below. Reference Images You will need to move your spats just below the black ankle rectangles. Something to consider each time you put on your armor. Reference Images Looking more in detail, there is some excess material (mold lines) on a few of your armor pieces which could be trimmed off. Moving on with your blaster and pistol, there are some small details that can be improved to give your weapons a better look : F-11D screw could be painted black and recessed also white circle paint black Reference Images The front emblem is not complete and too large Reference Images One last detail to give your Blaster a very great look is to add some Texture to your grip and de front handle. One possible solution would be using some Rubber Textured Gun Grips Material Sheet . Reference Images *************************************************** Centurion Requirements; In this section we prepare you for Centurion. Because Centurion photos show more detail than EIB, items pertaining to Centurion might be seen there and not here and additional photos may be required. We try to point out all that we can from what we see, but the final accuracy is the responsibility of the trooper. If you decide to go up (as we hope you will),for Centurion level there are just a few adjustment you will need to do : CRL L3 :Ideally, the neckseal shall have 11 ribs. The neckseal has a glossy finish. This will need to replace the neck seal for a more accurate one. Reference Images CRL L3: A support tab extending from the outside top arch of the yoke shall be present. The support tab should be of a sturdy material, white in color This is possibly a challenging improvement, but we are sure you can deal with and go on . CRL L3: Gaskets shall be made of rubber. Fabric gaskets are not acceptable. Yours appear to be fabric gaskets, so they will need to be replaced for the next level ones. Reference Images CRL L3: Working lights and working front torch are required. For level 3, your E11 blaster will need to be upgraded or replaced for one with working lights. Reference Images And finally, for Centurion Level, it will be needed to smooth the print lines that are not permitted. That's all Trooper, Welcome to the EIB 1000, and keep on Being a Bad Guy Doing Good!! Congratulations !2 points
-
Man, what's with you and ALWAYS recommending that I try on my armor before trimming?! It's like you care that I'm successful and get approved following the months of work I've put into this thing... I suppose I'll humor you and try it on [emoji6]2 points
-
2 points
-
I can't wait for COVID to end so we can have another mass gathering of TKs. Thanks for the reminder of happier days.2 points
-
After owing an Anovos Original Trilogy Stormtrooper for two years, and reading how happy everyone is with AM, I decided to sell the Anovos TK to fund a new set of armor. I recently placed an order with Dave's Dark Side Depot. Hopefully the kit will arrive soon, but in the meantime, I have been catching up on other AM builds. My intention is to build it to Centurion. I am looking forward to another armor building journey, and will post pics as I progress. This will be an interesting time, as I will also be working on a Tusken Raider simultaneously. Long live the Empire..... Armor: AM 4.5 (On Hand) Boots: Imperial Boots (On Hand) Neck Seal: Darman Props (On Hand) Holster: Darman Props (On Hand) Belt: Imperial Issue (On Hand) Thermal Detonator Clips: Ukswrath (On Hand) E-11 Blaster: Praetorian Blasters (On Hand)1 point
-
Hello everyone, I received my ANH AP untrimmed kit about a month ago and have been working diligently in my free time. I have everything trimmed and just about put together and I have ran into a few pieces which I am questioning any and all advice will be accepted graciously. So here is everything I have removed some of the return edges for better fitting and might need to remove some more in the forearm and biceps. Also deeper mobility cuts, question is, is there a limit on how much I can trim for fitment and mobility? For my helmet I'm thinking of removing the stickers on the cheeks and skull so the painted features will match as well I am having a difficult time getting this sniper plate on. This is my third attempt so far, trying to get it straight and gettiing the return edges/ridges to line up seem to be my issues. It appears Im sacifricing one for the other. I'm thinking of ripping in apart and shifting the lift right shin piece just a bit so it will sit better and look straight from the front. Any advice would be greatly appreciated, Branden1 point
-
First Order ( The Force Awakens) Armor- Anovos beta kit. Helmet- Anovos Blasters- printed by Gerry Budde and assembled and painted by myself using accurate torx screws and rubber for the grips. profile - https://www.501st.com/members/displaymemberdetails.php?userID=20568 William Glasgow TK-90277 5'11"/ 163lbs. boots- Imperial Boots gloves- Endorfinders gaskets - Sister Margarets undersuit - extreme racing neck seal- extreme racing belt - belts of the FO holster- r2 Dan Thank you for your consideration. I will keep an eye out for your response. Will G. TK-90277 Surfintrooper1 point
-
Thank you very much. I’m very excited to have made the 10001 point
-
I won’t be 1000 but my helmet has been shipped with my shim replacements. Time to do my final checks and start shinning my armour before some blaster marks come through on a HWT Sent from my iPhone using Tapatalk1 point
-
Thank Dan - all great info that I will use. I did look at the FISD images but there's so much, and I am yet to be tuned in to the sometimes very subtle differences in pieces. We actually sat and watched your YouTube video before we did our first trim on the outer bicep yesterday - great stuff. I will check out Ross' videos today!1 point
-
Will follow your build thread when posted, AM is a great kit!1 point
-
Hey trooper, Welcome aboard. :-) Regarding videos, I would agree that the RS Prop Masters tutorial series is excellent. It’s a wonderful source of knowledge. However; just bear in mind that the RS videos are about replicating the exact screen used size of their specific RS suit. From what I have read, WTF is smaller than other kits, so I’d take that into consideration. Also, as the RS suit is cast from an original suit, it’s about as accurate as you can get. As WTF is a “copy”, you are likely to find that some of the finer details are not the same as the RS suit/original suits. Again, just take that into consideration if you follow the RS videos. A useful source of videos when I built my first suit around 3 years ago was Ross of RWA creations. Last, but certainly not least, check out the FISD gallery. You can’t get better reference material than the actual source material: https://www.whitearmor.net/forum/gallery/ Working on your biceps? Check out some original biceps to see how they were trimmed, glued, finished. Working on the forearms? Again, check out some original forearms to see how they were built. If you want to “idealise” your build, then probably best to look at some previously cleared WTF suits, just to see if there were any hurdles that need to be overcome on this specific make of armor. Best wishes Dan1 point
-
Good luck Trooper, looking forward for your BBB day Photos1 point
-
Looking forward to the BBB day and your build progress, the second time is much easier1 point
-
Maybe we are always on guard1 point
-
Thanks, this would have been a better solution, but already trimmed. Better fit before trimming but nothing a bath won't fix. Sent from my SM-A520F using Tapatalk1 point
-
Looking good. With the the sniper plate I had to pull mine across so I didn't trim all the return edge of the bottom front, I cut a notch into it so the coverstrip held the plate central.1 point
-
It's all about "Troopers helping troopers"1 point
-
Congratulations Will, great looking application and armour. EI 999, that's pretty darn cool1 point
-
Fantastic job Will, welcome to EI brother1 point
-
Congratulations trooper and welcome to the EI ranks, great effort on the build and well presented1 point
-
Dude, you're killing it with these memes!!1 point
-
You can also use this "follow" tab to get notifications of new posts in threads
 1 point
 -
Measure twice cut once (or in this case, trial fit then trim)
 1 point
 -
I've just started working on an AP kit as well, so I'm posting here to follow. Looking great so far! Sent from my Pixel 4 XL using Tapatalk1 point
-
Nice progress. I find velcro fails more times than elastic and snaps. You also want a little stretch/give for bending so I'd say stay with elastic. In stead of taking off a full front section can you just enlarge the oval area at the rear, again I would try on all your arm armor before trimming, just to check gaps
 1 point
 -
There's a great how to here1 point
-
thanks for the tip, will do1 point
-
Off to a good start, you may want to move over to another image host like Imgur as your images are watermarked1 point
-
Fingers crossed on my submission and checking my email on the hour.1 point
-
1 point
-
I can almost hear it... The marching sound of 1000 EIB troopers1 point
-
Making more m19 screw you find all these scope and accessories here http://www.warmachinepaintball.com/replica-scopes-and-mounts/1 point
-
You might want to think about trimming off some more of the bottom of the sniper plate. This may give you some "wiggle room" to straighten it out a bit as well as reduce the gap between it and the top of the the calf.1 point
-
Right, I have some ideas but people who do this regularly to pick their brains might be a good thing. Just as an update, my TK kit ships from Florida tomorrow gang. Next weekend hopefully it'll be in hand. If it arrives sooner I'm seriously going to have to fight the urge to tape the helmet pieces together and wear it prior to putting it together. Kid with a new toy. Sick almost all weekend, slept for most of it after Saturday, got me a stomach bug somehow or another. Any suggestions on any items that I might need to pick up to get started? Was talking to Justin he was saying do just a few things a night and sooner or later it'll be completed. Think with masters and long work hours I might have to kind of go that route... Haven't had a chance to look through the build thread everyone's been sending me to.... will though. -Wayne.1 point