Leaderboard


Popular Content
Showing content with the highest reputation on 05/06/2020 in all areas
-
While we always appreciate your input, it appears that you think the entire staff is against this issue, which is simply not true. We are well aware that different armors have their own unique nuances, and that these differences are a fact of life. Most of us accept them and make allowances, and for what it's worth I feel as you do that it's much more important to have the knee plate angle as you suggest rather than having the gap at the bottom and have it angle inward. For instance, even though the inside angle is off (photo) the outside angle is perfect. Would I pass this at EI and Centurion? Absolutely without hesitation (although I would ask that the top be trimmed a bit).4 points
-
You're doing Great Caleb, I was looking at your Vader's Build on Sith Lord's dtach. . You did an amazing work mate!! and with this one is not the less.2 points
-
Here's also a new shot of my legs with my new boots:2 points
-
If you've followed any of my prior build threads, you know how I can get hung up on things looking just right. Even if it's something that no one else will notice. Itty bitty details. This build is no different. <sigh> After priming the chest plate, I noticed that while it looked smooth overall, it still looked veeery slightly lumpy at the seams- especially when the light would hit it just right. The chest plate is such an important piece of this armor that any lumps will really make it look bad (at least to me). So I sanded things down as much as I could without destroying the integrity of the part, but there were still lumps at the seams. Time to bust out the Bondo (and make sure you're wearing a decent respirator when working with it- even outside. The stuff is noxious.)! I'm using Bondo High Bond filler to fill in the low spots and make things smooth all over. The stuff cures and is ready for sanding in a crazy fast 15 minutes! Here is the chest plate after one layer of Bondo and some sanding: There are two colors of blue on there because I had to mix up two batches, and I ended up adding a little more hardener to the second batch. Let's just say that I don't recommend working with this on a warm day. It was 85 degrees outside in the shade where I was working on it, and I ended up having less than 5 minutes work time with the Bondo. I was leisurely smoothing it all on when BAM!- it all hardened up on me in an instant. I thought I would have more work time, but nooooo... gah! As a result, I my application didn't go on as smooth as I'd hoped. Thankfully, it was ready to sand just as quickly, and sanded incredibly easily as well. Once done, I realized that I needed to even things out just a bit more with some more filler. This morning was a much cooler 65 degrees, so I knew I'd have a little more time to smooth the Bondo on just as I wanted it. I was right! With just one small batch, I was able to apply another thin layer of Bondo with plenty of time to spare. I had to wait a little longer for it to be ready for sanding, but that wasn't a big deal. I used 150 grit to knock down the high spots, and 400 to feather the edges in and smooth things all over. It is soooooo smooth now! And yeah, I know I have to do some extra cleanup in the holes and ridges. This is an easy task with a small Dremel bit, and it'll get taken care of next. There are also small pin holes that will get filled with spot putty before the next application of filler primer. And I think it's kind of cool to see the "behind the scenes" of 3D printed parts. You can't tell from the front that this chest plate is comprised of 5 separate prints!2 points
-
I have used Plasti-Dip spray on all my buckets (including my Tusken Raider) and LOVE it! In addition to Chemi's notes, here are a few of my suggestions: 1. Before applying it, sand down as much of the surface as you can with 120 grit sandpaper. This will give the product a better surface to adhere to**. 2. Clean it thoroughly afterward with alcohol and let it dry. 3. Do this outdoors, and I strongly suggest wearing a respirator or at least a decent mask. This stuff is pretty foul smelling, but has no odor when completely cured (think several days). ** This is really important. Since the inside of the bucket normally has a gloss finish, roughing it up will help prevent it from peeling off in the future. This is especially important when you go to install components like fans, battery packs, etc. using Velcro. If the Plasti-Dip does not have a surface it can grip to, whatever you attache to it can cause it to pull away from the original surface. (Trust me).2 points
-
It's finally here got it on may the 4th! Went for a walk in yesterday but wasn't able to get any pictures of me in kit but here's a picture of the backpack. So happy it finally arrived! Has a compartment and a camel pack in the backpack. Got it from Dave's Darkside Depot.2 points
-
Been working on the shims this is how my kit is sitting ATM from the front and how the shims sit on the manakin using Velcro at the front of the shims and them glued at the back. Still have to fix my sniper knee issue.2 points
-
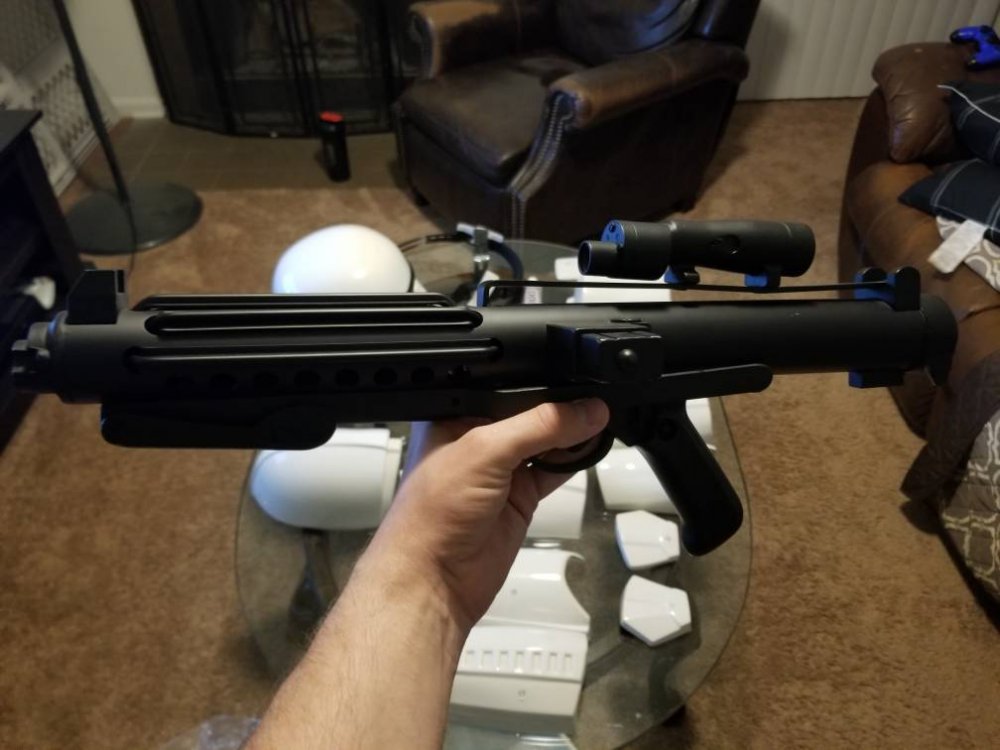
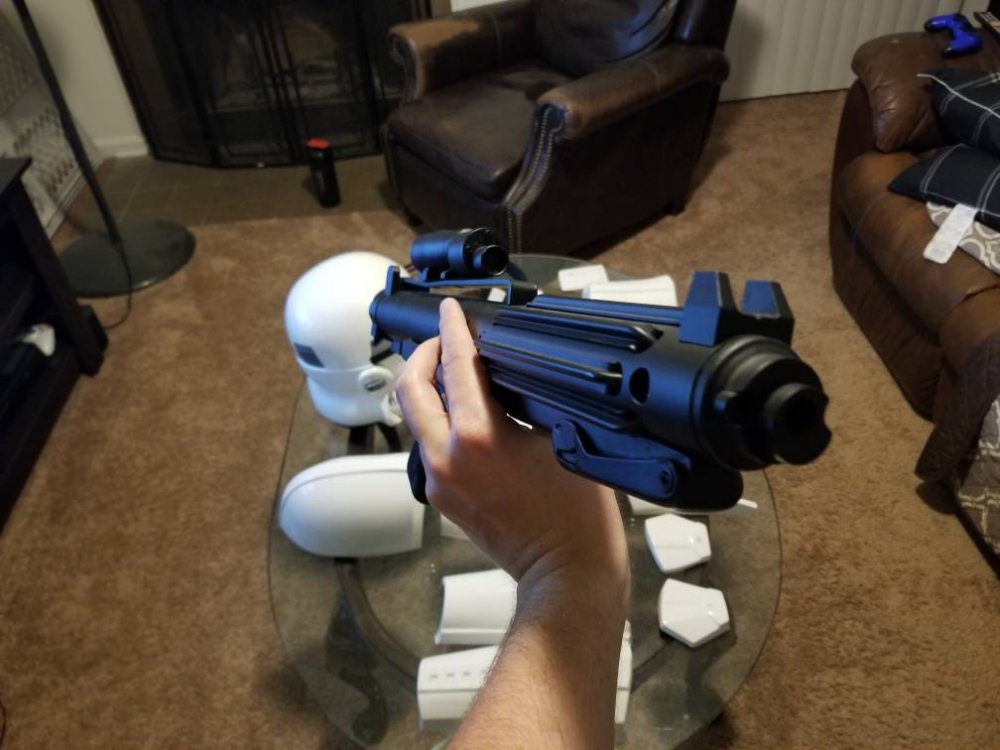
Hello everyone! I've lurked for a long time on these forum's and I decided it was time for me to stop procrastinating. Back in 2015 I pre-ordered the Anovos TK armor with completed helmet. Ever since I received it, the helmet has sat on display and the armor pieces have sat in its brown box for the most part. At one point I had gotten some pieces out and started scoring some edges while follwing the instructions provided by Anovos. That being said, once I got to a certain point I felt very uncomfortable with continuing on due to fear of messing it up, ruining pieces and undersizing them. Since then I have moved states and am living on my own in an apartment which doesn't give me the best work area either for it. I am tired of beating around the bush though. Some initial questions: The original helmet liner (or harness rather) has all but fallen out. The adhesive they used was terrible. Are there any recommendations as to a better replacement for this? Even with the harness it felt like I was a bobble head. I need something more secure. I have an E-11 replica I purchased online a few years ago, but I'm really unsure if it is up to 501st standard. It isn't a Hasbro repaint, but it seems to be mostly wooden in build. I will post pictures later of the prop. Are there any guidelines that would be better followed from other's experience in builds other than the Anovos instructions? It is helpful but it seems like it has a formula to it for the most build, and I want mine to last for a while and troop in. I've seen where many have point out that the belt that comes with the Anovos TK's don't seem to hold up well, what other alternatives are there? I appreciate any help and feedback, and I can't wait to finally get this thing finished! Pics will be posted soon. Thanks1 point
-
I definitely learned that with my Vader costume, ask questions, measure twice, and hopefully don't buy everything 2-3 times like I did. Bought a halloween costume off ebay and after spending $800 the only piece that I reused were the shins. Hopefully I can get the rest done before I go back to work in 2 weeks, shouldn't be too hard at this pace. I've been studying helmet references for that build, Ill probably start that here in the next day or two.1 point
-
You'll find RWA Creations on facebook1 point
-
Here is a build converting an Anovos to ESB full of helpful info Looking at the thread apparently trooperbay sell Anovos specific ESB decals so you could contact him to confirm A lot of AM kits come with ESB clamshell handguards which many don't use, may be worth putting up a wanted add in the sales sections. You can use rubber gloves or silk/material. Gloves must be either black silk, satin, or silk-like material, or gloves must be rubber or rubber-like chemical gloves, in black I found fabric gloves at a local store. Diagram of the sewing pattern
 1 point
 -
Three days all clamped, i guess that what i need to do with this glue Sent from my GM1900 using Tapatalk1 point
-
Thanks! It's always a worry that I do something, or cut something, and someone comes along and says that I did it wrong and need to redo everything, so I'm very happy that it looks great1 point
-
Welcome to my world, Cricket! Amazing job so far, but I have one question: Are you taking commissions for the full size version? (Just kidding). I think we need to change your FISD Kudos title to "Best SW Mom Ever"!1 point
-
The lines you have look pretty close to the original ones, but they are a bit wider than many seen onscreen. Is this a big deal? Nope. The main thing to focus on is if you have enough to go over the tabs on the back plate and space enough to attach the white 1/4 inch elastic. Being a taller trooper, 4 bumps on the front (not including the large one) of the chest plate will be good. If you need less, it's not a deal breaker for Centurion. We completely understand that troopers come in all shapes and sizes! By the way, your back/kidney/posterior plate connections look spectacular! NICE JOB!1 point
-
Ok, I've read the document, it says that it is touch cured on about 25 mins, but in my experience is a bit less, even when the glue takes 3 full days to reach it full adhesion power you need to be fast to apply the glue and stick the pieces, and then 3 days of wait. I'm gonna need way more additional magnets Sent from my GM1900 using Tapatalk1 point
-
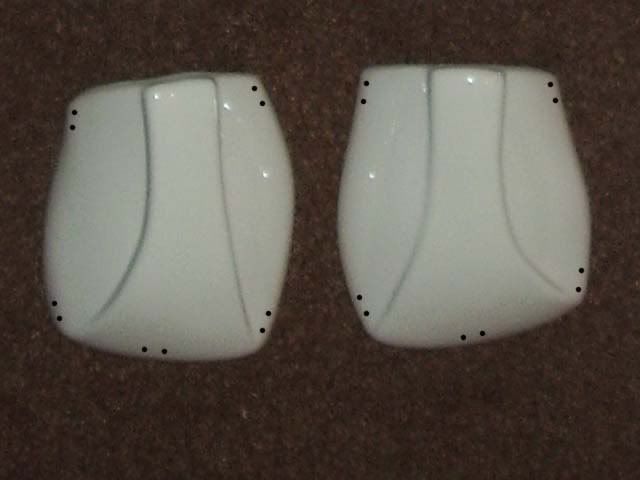
Thanks Joseph, that makes me feel better about the knee. I trimmed it like you mentioned. I got the torso and back piece straps done. I expect to take them apart a few times, but I need them together to accurately size the shims. Next I need to get the top straps done. I believe I read that 4 bumps on the top straps need to be attached to the chest armor and the rest behind. I wasn't sure if that was accurate so I did some research. Here is a good photo reference, from what I've researched 4 is the minimum on the armor, but it most are 4-6 bumps but there are numerous examples with more than that. Because of my height, 6' tall, I imagine I'll want 4 and if there is excess over the back I can deal with that. I might do 5 depending on how they sit when I try them on. I have to trim them first, so I'm researching that too That's it for now, maybe Ill post later tonight with more updates.1 point
-
OK, it's time for me to get off my butt and do this... Gathering intel. Need to see what I should fix and what I can ignore (for now).1 point
-
Good to know!! I think I’ll just stick with e6000 and single snaps as per the screen used for now, and then revisit once I’m approved and happy with the armor’s fit and look. As far as the magnets, one of our Cloud City Members here, Dave Mahoney, has a brilliant setup with neodymium magnets for his shoulder bells -> bridges that I’ll be looking to emulate down the road. He can kit up himself without assistance and it’s pretty durable!1 point
-
Thanks bro! I will look for white E6000... Sent from my LYA-L29 using Tapatalk1 point
-
He's updated CGTrader so if you want the file it's on there now.1 point
-
Hi Tom, As mentioned on the KFG forum, it looks like your shin outers and inners may be swapped around. I wonder it those in the know could give it a 2nd look over? @justjoseph63? For your basic approval, I suggest using the ABS hand armour. I can tell you now our GML is going to push back on the EVA foam armour. And then a trooping tip: shape the tail of your butt armour (the bit that goes down under your cheeks) a bit. Those square tips are going to tear you up fierce between your legs.1 point
-
Awesome tutorial. Thanks Joseph!!!!1 point
-
Welcome to FISD Clint. This place is a world of information to get started and to build your armor. If you need anything shoot me a message and let me know.1 point
-
Hello Troopers! I am currently going through a mid-life crisis and decided I want to be a Stormtrooper so here I am... Okay that is only about half true, mid-life yes, crisis no. I've been interested in the 501st since I found out about it years ago. Like many of you I'm sure, I have put off getting involved because of other adult things like food, shelter, kids, etc. Well I think I am getting close to ordering my kit so I thought I would become more active on the site. I can already see years worth of tips and advice I want to go through so if you are a contributor, Thanks!! My plan is to order the untrimmed AP kit and go slow. Thanks for so many resourses! Until later, from the Great White North, take care and be safe! Scott1 point
-
Welcome aboard Clint, nothing wrong with being a man child by the way Every time I see that a member comes from Phoenix a song pops into my head that my folks used to play when I was young. It's a fond memory, and I love this version to the very day.1 point
-
Yikes. I would suggest posting something up on your Garrison boards explaining what you need, as there may be someone who has some they can supply you with. (Acetone, not meth, lol). Are you looking to make it to fill the gap in the lower ridge of your thigh? If so, the gap is not that wide and you can use white E-6000. Just tape up all the edges carefully (remember, it's runny) and don't over-fill the space.1 point
-
Hi John. No confirmed info from my side, but I experienced the same a while ago already (before the lockdown). Since I know DoopyDoo's, they have always been very low on communications, but always shipped what one ordered. Let's keep fingers crossed, it is just a temporary production pause... I am on their waiting list, too.1 point
-
Looks GREAT, Nadas! This is the first pack I've seen from Dave since he took over from Shawn (CrookKnight), and I gotta say I am well impressed! One step closer to HWT, sir.1 point
-
I would like to get some expert opinions on a few items for the suit! Do you think I need to repaint these buttons? They got a bit wrinkley for some reason, I think too much paint. They seem to be the right size though. This is my thermal detornator, which we've been leaving until last, as it is a removeable addition. It's a slight shade darker than the helmet greys, and in darker environments it's almost a light black. Do you think it needs a repaint? I got some nomex gloves for the hotter troopers, WAY more breathable and flame proof if I ever get attacked by a flamethrower: Here is my belt, any suggestions on how to layout the snaps/rivets? And finally the new ribs for my neckpiece: Thank you all for your help so far, nearly there, I've been tired and groggy for like the last week and honestly haven't been feeling it right now, but getting back into it tomorrow hopefully!1 point
-
Almost there. I did a similar mod with magnets on my Sithtrooper shins, used a slightly larger magnet behind the inside sections so I didn't have to use spacers, always amazing to see different ways to achieve the same results. Great work1 point
-
The first layer should be very, very light ... Wait 10 or 15 minutes between layers... I gave it about 5 layers I think ... Shake the plastidip well before using it and spray about 20 cm from the helmet. When finished, spray face down until no more plastidip comes out.1 point
-
I sent the two images above to the files designer and about 90 minutes later had an updated file with some really nice triangles! Image for those who don't want videos, just I was struggling to show them well in an image. Just need to reapply my resizing now and add the side holes.1 point
-
I have the answer from a TFA screen grab and @ukswrath sent me this nice clear one of just the armour.1 point
-
I too have an ANOVOS kit and I had a lot of fun building it. Always remember the folder rule, measure twice, cut once. Find someone in the 501st in a garrison you will be joining and seek out an armour specialist that could help you through the process. I’ve had a tremendous amount of help from a couple of legion members from my garrison that helped me out a lot. good luck brother!1 point
-
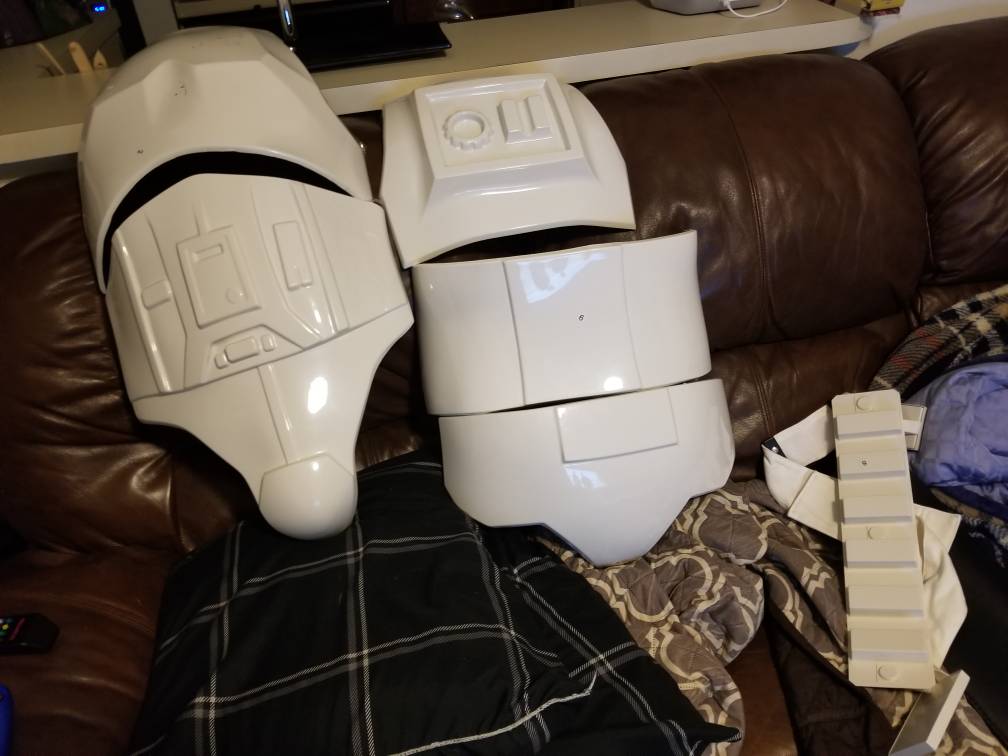
Alright, so I've taken my big brown box out of storage and started to lay out everything. I had forgotten I had actually bought some E6000 for this build so that's a good start. I will probably follow Ukswrath's build closely. The more I've studied it the more I have liked how he has things put together. Here are some pics of part of the kit. I also included a picture of the harness that fell out, a look into the bucket etc. It looks like the lense also fell off with the harness. Also attached are pictures of the E-11 I was talking about. Here goes nothing. [emoji2369] Sent from my SM-N950U using Tapatalk


 1 point
 -
Down to 36. Congratulations to our newest EI, darthcue. Way to go Ted!!1 point
-
Thanks @gmrhodes13. I found 1 maybe 2 that showed a shadow but nothing definitive. A few reasons really. Part I have used meshmixer far more and so know what to do to achieve things. Part is Armorsmith pegs my GPU and isn't as nice to use because of it. Maybe I need a new GPU but funds are going into build materials right now. Also I am not sure I want to go down that rabbit hole. Though my GT-720 is well past due! It's a bit frustrating as it's paid software but there you go. I'm going to approach the designer and see if I can get them added, just need to grab a few source images. The side holes I will still do my self so I can control the size as I want them right after scaling not before.1 point
-
Hello, My name is Gavin and I have no clue if I'm doing this forums thing correctly. Anyways, I am building my stormtrooper armor kit right now and I just figured I'd reach out and ask for help. I have a few questions for right now, and maybe more to come. So if any of you could answer any of these questions that would be great! 1. Does anybody know where i could find a FOTK instruction guide on the internet? I've searched the internet looking for a tutorial and i have barely found anything. 2. Are there any First order troopers here that have big feet? I wear a size 14 and I can not find any First Order boots that fit me, so if any of you know where I can find First order shoes for a larger foot I would appreciate it. 3. I wanted to make my armor more sturdy, (the armor is expensive and I want to ensure that it isn't going to break) What would you recommend i sue to make my armor more sturdy? I was thinking i add fiberglass to the armor but I am not sure. 4. Does anyone know where I can find the under armor gaskets for the First Order stormtrooper? That about sums it up for right now, like I said, If anyone can answer any of these questions for me I would appreciate it. Thanks so much, ~Gavin1 point
-
Assuming you mean the rare earth (neodymium) type, I have personally never seen them used that way. Keep in mind that those are crazy strong, and depending on the particular strength/size can (will) jump up to 8 inches or more to re-connect with each other. They can also shatter/break if this happens (trust me). Plus, when you store your armor in your bin it could turn into a pain in the posterior plate as they would tend to stick together. I would be really interested to see any examples of this method, though! If you mean regular magnets, I don't thing they would have the strength. Using snaps is a tried and trusted method. Many troopers go with a single snap on either side of their connections and most have no issues, but I went with the "double snap" method. This way, you know that none of your connections will never ever come loose. Yeah, it costs a bit more in the beginning, but I like the peace of mind.1 point
-
For SLA printer printing services, I recommend 'The Imperial Factory'. www.facebook.com/TheImperialFactory/ With permission from Garmin, they have printed a couple of SE44C and F11-D for some troopers1 point
-
So I got ABS pasting my thigh seams, but I think I should've gone the thinner seam route - I didn't know how bubbly ABS paste could be - I think I have a density problem - the shade of ABS on some of the areas seem a bit darker - would it be better to paint at this point? I thought polishing might help it, but not really1 point