Leaderboard


Popular Content
Showing content with the highest reputation on 07/25/2019 in Posts
-
Well, today is BBB Day. And I’m officially intimidated and overwhelmed. Haha! Sent from my iPhone using Tapatalk2 points
-
Nice work trooper, a couple of photos I know the DO's like are: Sniper plate front and both sides. Thigh ammo strip rivets inside and out. Just watch your belt placement, it's a little slanted in first image. Good luck with approval.2 points
-
OK, future Troopers, many of you have asked about how to set snaps for your armor connections, so I thought I'd whip up a little tutorial. Please note that the example that I am making is based on using the "double snap" connection system (see last photo). I highly recommend this method, especially on the back/kidney, kidney/butt, and ab/kidney connections, as it provides an extra layer of confidence. Yes, it costs a bit more to do due to the extra snaps involved, but you can be sure that no matter what happens, you will NEVER have a piece come loose or fall off on a troop. Some builders may have used others, but after countless troops I have experienced no problems. So here we go.... Materials needed: 1. Hammer 2. Soldering (woodburning) iron. (Available at home improvement and craft stores. WELL worth the $10-$12.00 investment). NOTE: The tip of this thing gets CRAZY hot, so be very careful where you set it. Many come with multiple tips, but I suggest the pointed one. 3. Snap setting kit. (Available at all craft stores). Please note that I am showing both sides of the base... more on that later. Convex side Concave side 4. For this purpose, I am using 2 inch (5cm) wide black nylon and 1 inch (2cm) black nylon. The 1 inch strips will be attached directly to your armor. I suggest using E-6000 glue and clamps for this. 5. Snaps, of course! Don't "cheap-out" when buying these. The cheap ones come undone very easily and are garbage. For this tutorial, I am labeling the 4 parts as such: STEP ONE Cut the 2 inch strapping to about 4 inches long** (or as needed) for the particular connection. Cut the 1 inch nylon into 2 inch lengths as seen below. **NOTE: The actual length will depend on there you are using them, i.e. the kidney to posterior plate connections will be shorter. Just be sure there are no gaps, and that the 1 inch wide base pieces are in the correct position before attaching them. Example: The ends will be a bit ragged and will fray. Use the soldering tool to seal them. Again, using the soldering gun, make 4 holes in the 2 inch wide nylon as seen below. Be careful not to make them too large (just larger than the shaft of the snap base) or the snap may eventually pull out. Take one of the 1 inch wide nylon pieces and slide it up under one end of the 2 inch wide piece, even with the end. Once it is lined up, use the soldering iron to make holes in the 1 inch wide piece. This will assure that the holes for the snaps line up correctly. (VERY important)! You should end up with this: Repeat for other side, but be sure not to get the sides mixed up, as one set of holes may be farther apart. Insert one of the male bases into one of the holes in the 2 inch wide piece. Flip it over and place one of the male snaps on the post. Place the base in the concave side of the snap setting kit base. Place the striking rod in the center (straight up and down) and strike it several times firmly with the hammer. The inside shaft should be sufficiently widened to keep the top from coming off. There... your snap is set! NOTE: Do not attempt to do this step on a regular table. You need a hard surface, and a heavy duty workbench or concrete surface works best. Repeat this step for the remaining 3 holes. Now onto the 1 inch wide strips.. Insert one of the female bases into one of the holes, then (as above) place one of the female snaps on top. Place the female snap base into the convex side of the snap setting base. Again, using the striking rod, give it a few good whacks. (Getting the hang of this now)? This is what you should have at this point (only one end shown) CONGRATULATIONS, you have one strap completed! Now that you realize how easy this is and have it down to a science, repeat as necessary. NOTES 1. For added security, the double snap system can be applied to other areas as well, including shoulder bridge attachments and bicep to shoulder bridge, (example below) This is especially good for those who wear packs (HWT, Sandie, Spacetrooper). 2. Snaps set in elastic (as seen above) can pull out over time with repeated use. For added strength I recommend doubling the elastic over before attaching the snaps. 3. Be sure to use the female base on all the straps that will be glued to your armor. The reason being is that the bottoms are flat, insuring a tight seal. 4. Some folks set the female snaps in ABS instead of nylon when gluing them to the armor. There is absolutely nothing wrong with this, it's just a different way of accomplishing the same goal. The reason I use nylon is that I find it conforms to the curved parts of the armor better, and gives a larger surface area for the glue to adhere to. 5. Some use CA (super) glue to attach the 1 inch nylon to their armor. I have found that it can get brittle and break off or even cause warping on ABS due to the heat it puts off while drying. E-6000 needs to be clamped and takes more time, but trust me, it's worth the wait. 6. When gluing the 1 inch nylon to your armor, do NOT keep the 2 inch wide nylon attached with the snaps. Some of the glue may seep through the hole in the snap and glue the whole connection together. Not a good thing. If you should have any questions, just ask here or PM me, and best of luck on your build! Photo 1 (Double snap system.. note clamps). SHOUT OUTS: Gary jr. ( @flashpoint0214 ) The guy who introduced me to the double snap system! Jeremy (Copper) who supplied the nice clean photo of the double snap system.1 point
-
This is a mini tutorial about the use of Neodymium ("rare earth") magnets. As you may have read here in different build threads, these little devils are invaluable when constructing a set of TK armor. BUT.. there are a few things to consider before purchasing and then using them... For purposes of this tutorial, I will be referring to magnets that are 7/8 inches (23mm) in diameter and 1/8 inch (4mm) thick, (as seen below) with a strength of N40. First, know that these things are STRONG! (Imagine a regular magnet the same size, but 10 times more powerful). This is a good thing for our purposes, but you should know a few quick facts first: 1. I mentioned that these are strong already, but know that the strength is such that they can (and will) jump up to 8 inches to reconnect with each other or another metal object. If your finger is between the magnets and this happens, it can cause injury, from bruising to serious cuts. They also can (and will) shatter if allowed to connect from a distance, and flying chips can cause eye injuries. In a word, be careful. I highly suggest wearing eye protection. That is up to you, but please read this post from Glen located below. 2. Due to the strong magnetic field, those with pacemakers or the like should take extra caution when handling these. 3. Whatever you do, keep these away from children. Now that I've scared you a bit, on with the show! When considering what size to buy for your build, I cannot recommend the 7/8 x 1/8 size enough. The reason being is that you will only need one on each side of the connection you are gluing, and they have a large surface area. Anything smaller (or thinner) and you run the risk of having to "double up" (stack) them to get the proper adhesion, and the thinner ones shatter more easily. When you receive them, they will have little plastic separators between each one. To get them apart, the easiest (and safest) way is to slide them. As you separate them, again, be sure to keep them as far apart as possible to prevent shattering or injury. (Save the plastic inserts). After separating them, I strongly recommend doing one of 2 things... 1. Wrapping each one in masking or painter's tape, (this will prevent them from scratching your armor) or 2. Making mini "sachets" for each one. The tape method is quick and easy, but the sachets are really handy if you have the time. To make them: Cut 4" (10cm) squares from a piece of fairly thick cloth, (not t-shirt type material) for as many magnets as you have. Place one magnet in each one**, and secure it with a zip-tie. (I used a rubber band for the photo, which will not work in real life). This gives you a "handle". NOTES: **Be SURE that you do half facing one direction out and half facing the other (north/south poles). Otherwise they won't adhere. Using a sachet will not prevent them from shattering. Cricket added a great example photo and tips in a post below. After you have applied the E-6000** to the seam you are gluing, place one magnet on the top of the cover strip, and carefully add one to the opposite side (inside). To keep the cover strip tight to the join along the entire length, I suggest placing magnets every 3-4 inches apart. If you see any areas where the cover strips are not flush with the armor, add more magnets. For the ends, you can use clamps as seen above. Be sure they have rubber or plastic on the ends, though. After the E-6000 has cured (usually 12-24 hours) it's time to remove the magnets! IMPORTANT! I have found the best way to remove them is this: First, remove the clamps. Then, using one hand, grasp the magnet on the top closest to the end. Using the other hand, SLIDE the one on the inside out, keeping them well apart. Stack them using the plastic separators they came with. Now, it's time to look at that perfect seam and think "Hey, I'm one step closer to approval"! NOTES: ** As the vast majority of TKs will tell you, E-6000 is really the best adhesive out there for armor. Unless you are an experienced builder, if you choose to use CA (super) glue, know that if it drips, you run the risk of it running onto your armor or causing the magnets/sachets to adhere to your seam. You have been warned. 1. There is no such thing as having "too many magnets". I know they are not cheap, but the more you have the more pieces you can glue at one time. I recommend having no less than 12. 2. There are many sources to purchase this size magnet, and the prices can run up to $3.00 each. But, you can find them on eBay most of the time for a lot less. This seller for instance offers them for $9.99 for six, which includes postage. https://www.ebay.com/itm/6pcs-Super-Strong-Neodymium-Rare-earth-Magnet-Disc-for-sale-7-8-dia-x-1-8-thick/281060567507?ssPageName=STRK%3AMEBIDX%3AIT&_trksid=p2057872.m2749.l2649 Another good source is here: https://totalelement.com/products/3-4-x-1-8-inch-neodymium-rare-earth-disc-magnets-n52-8-pack Tim (PICTreed) found a great site that is a fantastic magnet source here: https://appliedmagnets.com/neodymium-disc-magnets-1-in-x-1-8-in-w-countersunk-hole-p-601.html 3. When you have completed your build, please consider "paying it forward" to someone in your Garrison/Squad who is starting their build by selling them your magnets at a reduced price. "Troopers helping Troopers"!1 point
-
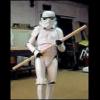
Costume Information Mandatory Information Armor = AP Helmet= AP Blaster= E-11 Quest Design Canada Optional Height = 5' 10" Weight = 185 lbs Boots = Imperial Boots Canvas belt = AP Hand Plates = Silicone AP Neck Seal = Geeky Pink Holster = AP Armour Photos Full Body Front Full Body Back Full Right Full Left Right Side Detail Left SIde Detail Action Shot Abdomen Detail Cod and Butt Plate Attachment Interior Strapping Helmet Detail Photos Front Side Back Hovi tip detail Lens Colour Ammo belt Holster Attachment Neckseal Blaster left side Blaster right side Thermal detonator Boots Ammo Rivet Sniper Knee Gloves Shoulder Straps Chest Attachment Shoulder Straps Floating in Back and Elastic Attachment1 point
-
Jim is great Atleast you can start on the armor while you wait on the helmet1 point
-
Update: Jim is replacing the bucket! Sent from my iPhone using Tapatalk1 point
-
Wow! Thank you Daniel!! Here is my action shot. It's same what I used to my building thread but I hope it doesn't matter.1 point
-
I need an action photo for the EIB processing thread - thanks1 point
-
Hi again Tuomas and thank you for your EIB application. (For those looking at this review for their own future application please be aware that this review is made in appliance to the previous CRL, meaning that there are elements in this review that are suggestions that will be manadatory for those beeing reviewed according to the current CRL as per regulations stipulated for when the changes would take affect, you can read about it in this NL https://www.whitearmor.net/forum/topic/47339-june-fisd-newsletter-2019/) In this review I will ensure that your armor follows the requirements set out in the CRL L2 Expert Infantry Badge and also point out what I can to prepare you for Centurion, should you choose to apply. I hope you do! Let´s get started shall we! CRL and EIB Application Requirements: All required submission photos have been posted and I am very pleased to announce your armor displays all the necessary elements to qualify for ANH Stunt Expert Infantry. On behalf of myself and the entire D.O.Team, Congratulations! Other-Armor Fit/Assembly: In this section we review observations made by your fellow troopers and ourselves. Some observations may lead to suggestions to improve the overall look of your armor. As we navigate through this review we are going to start from the top and work our way down. We start with the helmet and although there are examples of brows in different positions we feel that the intended look is what´s seen below - a clear gap between the eyes and the brow trim. Just something to consider. Here we suggest some additional trimming to reduce that "sleepy-look". Again, just something to consider. As seen in the reference image and on the majority of the Stunt helmets the most forward stripe has a lean forward to it, a simple "fix" for added ANH magic would be to add a stripe leaning forward. The vocoder is pretty good as it is but it seems that on the 3 middle ones the paint extend past the molded part and the side one could be a little rounder. If you want to look into that, a toothpick and or miniral spirits will have this sorted in no time. Again, nice paint job but that blue one could be a little smaller. We continue on with our nit-picking in our quest to help you be all you can be. As seen the control panel should but-up to the clips or vice versa. Another one of those small things that will add to that sleek look would be to fill in those gaps with some abs paste. Looking at your cover strips we see that your cuts are a bit steep compared to the movie suits. Not a big deal but worth mention none the less. Here we suggest some trimming to get closer to the on-screen sniper knees. And that´s it! Congratulations Let´s move on to the next step! Centurion Requirements: In this section we prepare you for Centurion. More photos may be requested in the future that allow us to make better decisions on possible adjustment etc. If there are any areas of concern they will be discussed here. Because Centurion photos show much more detail than EIB, items pertaining to Centurion might be seen there and not here. We try to point out all we can from what is seen but the final accuracy is the responsibility of the trooper. Below you will find areas that will need to be adressed for a future succesfull Centurion Application We start with the shoulders and although they are pretty good we need you to close that top gap as well. The elastic is beeing pulled out by the shoulder bells so finding stronger elastic, double up on the elastic or using canvas should have this sorted. Next up we have the belt and we need you to shift it to the left, when looking at the drop boxes the issue gets more visible and needs to be amended. The left drop box is slightly too far in on the belt itself but the belt still needs moving for it to look right. Staying focused on the belt next task is to raise it as seen below for a crisp Centurion-look. Moving on we have a heads up to make sure the drop boxes are in the correct position, a strategic dab of glue and you`re golden every time you suit up. Lastly we need you to tone down the weathering on the scope, the E-11s in the movie were mostly all black but minor weathering and/or base metal exposure are allowed. Again congratulations on a job well done - now head on out making the Empire proud as it´s newest Expert Infantry Man1 point
-
Thought you guys might be interested in my latest interview. Chatting about Star Wars and the Stormtrooper armour. Hope you enjoy it https://youtu.be/NjRzpeb2qn01 point
-
Thanks for the feedback. I added the extra photos.1 point
-
Go for the hot water bath. It will help match the parts up. See how they look on the RS that has two outer parts that don't match up properly.1 point
-
Hi Andrew, Looking good trooper, an additional photo that the D.O. surely will ask for is : Close picture front and back of shoulder bridge as the CRL states SHOULDER STRAPS These shall be securely mounted in front and may free float in back. They may be affixed with rivets, Velcro, or adhesive. The rear tab of the shoulder strap is optional and may or may not be present. Level two certification (if applicable): No visible rivets are allowed. Good luck trooper, see you in EIB.1 point
-
Thanks Ryan. I really appreciate it. :-) Thanks Troy. I’d highly recommend it. It really gives it a lot of character and that ‘ANH’ feel. If nothing else, it’s a really good project. :-)1 point
-
1 point
-
Looks amazing Dan, I'm inspired to give this a go myself (to some extent) as I have a bucket at home to be built verse my pre-delivered and constructed Anovos bucket that I just tweaked for approval.1 point
-
Very excited to see the finished product. This helmet is coming along beautifully!1 point
-
Take 2 on the forearms. I got rid of all return edges and used the dremmel to smooth out. I think this time it will set much better. Sent from my SM-N960U using Tapatalk1 point
-
Just got this photo from the guy printing the blaster for me. I’ve got a very good feeling about this! Sent from my iPhone using Tapatalk1 point
-
Also finished my KB Props Riot Shield.1 point
-
Adjusted my bells. They kept binding when raised until I swapped the ridged straps to elastic (thank you Q). They move much easier now.1 point
-
That's great news! So now there are exactly 3 confirmed and shipped suits out of the 50 "shipped" months ago?1 point
-
Forgot to say that my red pauldron and FOTK kit came last week, minus the gaskets and the lid.1 point
-
Progress so far: I think I’ll tweak the left tear and the vocoder. :-) **these are all different helmets I’m using for reference as I’m not following one specific lid. Just getting the feel of the originals. :-)1 point
-
strong magnets and clamps is your possible solutions brother1 point
-
Looking good Dan You might consider "raising" those middle ones a tad though1 point
-
Hi troopers, The fun continues with the hand painted details. To create the pinstripes I’m using the ‘black before grey’ method. All the usual paint colours at this stage. More to come. :-)1 point
-
Some of my favorite "out of character" jokes and one-liners when taking photos include: "Smile and say Star Trek!" "Make sure you get my dark side..." "Oops, I think I might have blinked in that one!" People don't expect us to be funny, but read the room - sometimes it's just what people need!1 point
-
Great progress!1 point
-
Yep I definitely love trooping in character, my repertoire varies dependant on situation and as you mention, changes for the kids along with plenty of high fives. Great work. Sent from my iPhone using Tapatalk1 point
-
Nice work, now the wait for glue to dry continues1 point
-
So, I wasn’t really happy with the finish as it had quite a few imperfections (yes, I know the originals were pretty bad too, lol). Not sure if this was caused by the paint, weather, my technique or what... I was planning another coat to try and cover this finish. Although, I really wasn’t happy with the Appliance White as it was just TOO white, especially when compared with my armour. Thankfully, I was speaking with Paul ( @troopermaster) about some of his latest pieces and he kindly gave some tips and recommended a different shade. This is a MUCH better colour now, offering a shade that’s nearly a perfect match for my armour. Firstly, Appliance White against my 1.5mm ABS belt; Next, Paul’s recommendation against the same belt; Side by side (photos taken on two different days so lighting is different, making the belt look a different shade - look at belt to helmet to see the difference); Not sure if it’s the paint, that’s it’s applied over the other gloss white, environment or what but the finish is much smoother this time around; Really pleased with it now and extremely excited to get to the hand painted details. :-)1 point
-
Paint curing 101, funny how a lot of people don't understand the importance.1 point
-
Well, the helmet is now white. First off, Hycote White primer. Ears attached ready for gloss. Even attaching the ears caused a small amount of damage. Or, “weathering”.... ;-) Now on to the gloss white. Halfords Appliance Gloss White has been referenced in the UK many times and is also the spray I used for my previous re-spray. It’s proper white so I will not be going straight for an aged look. This ended up being about 2&1/2 coats (if that’s possible).1 point
-
Detachment Leader Executive Officer Provost Marshall Deployment Office Pre Approval Forum 3D Section Hall of Fame Just For Laughs In The Media Costume Totals Trooping Imperial Attaché Program EIB & Centurion: What do these terms mean? Advanced Tactics Awards EIB - The March To 1000 Merchandise & Branding Officer Merchandise Public Relations Follow FISD Greetings Troopers, June is my favourite month. Besides my birthday, it also seems to be that awesome time in the North East of the U.S. where everything gets warm enough to finally start having fun without getting overly hot. Cookouts, long hikes, and best of all lots more trooping! There seems to be something going on every weekend, or more. I hope everyone out there is having lots of fun being bad guys doing good We have some really exciting things being shown off in this newsletter edition. Be sure to check out all the new merchandise previews being shown off by our DMBO below. We also have our first round of CRL Updates completed and live. Now back to trooping! With Unquestioned Loyalty Sarah Bailey TK-20466 "Alay" Detachment Leader NEW CRL UPDATES AND MODEL ANNOUNCEMENTS! Okay Troopers (and future Troopers), If you have kept up on recent events here, you are aware that the updated changes in the CRLs for ANH Stunt, ANH Hero, ESB and ROTJ will take effect on June 1st. We will also be including new models! (See below) We understand that many of you may have started your build before that date, and in order to avoid confusion and possibly causing you to have to make changes, we are allowing those in that scenario to adhere to the existing CRL guidelines. There are some conditions, though: 1. You must have started (and documented) your build here on the FISD prior to June 1st. 2. You will have until September 1st (approximately 90 days) of this year to submit for Expert Infantry and then Centurion if you opt to go for higher levels with that particular set of armor. 3. We took into consideration that an average set of armor takes approximately 3 months (or less) to build and that "life happens", but if you find that it will be taking longer than the 90 days, you will be required to contact the D.O. staff if you are aiming for EI or Centurion and explain your situation. After that date, you will be required to follow the requirements as per the updated CRL. If you have already started your build and would like to include the new updates, you are more than welcome (and encouraged) to do so. If you have met the above guidelines and would like to use the existing CRL, we suggest that you print a copy before June 1st, as these will not be available to view on the 501st site after that. If you have any questions, please feel free to contact any member of the D.O. Staff. Since we are updating the requirements, as mentioned we will also be adding new CRL models for each costume as they take effect, which will include side views as well as front and back.*** On behalf of the entire Staff, I would like to congratulate those who were chosen to have this honor: 1. ANH Stunt- Wayne Winfield, TK 32945 "Waynocerous" (Centurion) from the UK Garrison 2. ANH Hero- Eric Ho, TK 77520 "Hoda" (Centurion) from the Star Garrison 3. ESB- Arthur Wong, TK 39093 "giskard8" (Centurion) from the Hong Kong Garrison 4. ROTJ- Markus Vock TK 15315 "Maxl" (Expert Infantry) from the Austrian Garrison ***Note that it may take some time to get the new photos posted. Please bear with us*** With Unquestioned Loyalty Joseph Pedigo TK-10863 "justjoseph63" Executive Officer With Unquestioned Loyalty Steve Sheades TK-10466 "starsaber25" Provost Marshall Deployment Officers With Unquestioned Loyalty Sha Sha Chu TK-19233 "shashachu" Senior Deployment Officer With Unquestioned Loyalty Daniel Melin TK-99665 "TheSwede" Senior Deployment Officer With Unquestioned Loyalty Christine Lee TK-10401 "Cricket" Deployment Officer With Unquestioned Loyalty Mike Souza TK-11463 "msouza" Deployment Officer The FISD is pleased to announce the addition of a new area in the Advanced Tactics forum dedicated to those ready to submit for basic 501st TK approval. This section will allow future Troopers the opportunity to submit photos of their completed build to be reviewed by the Staff, Imperial Attaches and others in preparation for forwarding it to their GML for approval. Any and all advice/suggestions given will be specific, constructive, helpful and respectful. Please note that this program will NOT take the place of your local GML, as Detachments are not chartered for costume approval and can not override a GMLs decision, but is instead a peer review program designed to help you look your best and offer guidance and positive feedback. You will have the opportunity to ask questions about your completed armor, weapons (if applicable), accessories, etc. and get accurate information from the experts here at the FISD.. the definitive home of TKs worldwide. For more information on this program, please visit the link here Don't forget to check out the new 3D section, and please contribute where you can, also see the link at the bottom for the new Contributor award details Contributor Awards Main forum title: 3D Parts and Technical Sub topics: 3D Printer owners Your place to discuss what printer/s you own, recommendations, tech talk and the like, It’s a place to learn something new 3D CAD Designers Home of talented 3D cad designers, show off your 3D renders, of FISD related costume parts and accessories. Offer help and advice on programs, or offer to commission a piece for a fellow member 3D File Depository A home for 3D file sharing, Troopers helping Troopers is what this section is all about; yes a single location to keep any 3D files offered up by our extremely generous membership. This will be a 501st member’s only section and rules will apply to any usage of the content. I will be looking for content to get these new sections started so If you are interested in helping drive these new forums, then please send me a PM and let’s get the threads and the filament flowing. 3D printer heads will understand that last comment Here is a link to the New FISD 3D Contributor program. Wow - a great month for Field Exercises!!! Many continued thanks to all for all the contributions you Troopers provide. Let’s cut to the chase and get to this month’s inductee!!! This Trooper I met when first coming on board the FISD. He is always friendly, selfless, and has extreme patience for volumes of questions that come his way (including my own when it came time to move up the ranks to Centurion). From Attaché to Deployment Officer to XO, and now please join me in welcoming TK - 11469 Andrew "Sly11" to the Stormtrooper Hall of Fame!!! Well done mate!!! https://www.whitearmor.net/forum/topic/47256-galaxys-edge-disney-promo-troop/ With Unquestioned Loyalty Aaron Gibson TK-99725 "Pyrates" Curator Hall of Fame Galaxy's Edge Good Morning America received some special guests for their news report on the opening of the new Disney Parks Galaxy's Quest, TK12110 Taylor Goodson of the Northeast Remnant and TK6744 Chris Feehan of Empire City Garrison, well done troopers, great to see members of the 501st Legion involved in the festivities. Some special guest where also in attendance at the official opening 709th Legion "Red Fury" troops also on hand patrolling for rebel scum Currently (as of 21st May) there are 28155 costumes in the legion, out of these under FISD there are 5,647 which is 20.06% of all approved 501st costumes. Want Your Troop to be Included? Just a reminder if you would like your troop added please post your troop report in the Field Training Exercises section here ****Those with troop logs please post a separate troop report as it is easier to link too**** May - June HBF Run For a Reason More here By: Glen, TK85421, "gmrhodes13" Galaxy Edge Promo Troop More here By: Andrew, TK11469, "Sly11" May 4th More here By: Paul, TK27679, "sithpiper67" Tidewater Va Beach Comicon More here By: Pam, TK10867, "kekike2002" Star Wars Night With The Omaha Storm Chasers More here By: Ray, "Dielotski" Serve proudly, ladies and gentlemen, and as Tim (Dark CMF) says: "Keep doing what it is that got you here"! Are you an approved TK that spends more time on the boards than the average Trooper? Do you enjoy using your knowledge to help out future and existing Troopers? If so, we would like to invite you to join the Imperial Attaché program! Members of the I.A. team are chosen to help out not only those here on the boards, but on a local level as well. Our aim is to have at least one in each and every Garrison, Squad and Outpost in the entire legion to be the eyes and ears of the FISD on a local level. A suggested level of EIB or above is preferred, as part of the duties include assisting those aiming for levels 2 and 3, but is not a requirement. Being active on the boards on a regular basis , welcoming new members and helping out where you can is, though. Some of the benefits: 1. Access to exclusive Attaché merch., including patches, etc. 2. Having the Imperial Attaché title under your name. 3. Being a part of the team that welcomes new and prospective members of the FISD. 4. Being the "go-to" person in your Garrison, Squad or Outpost. 5. Exclusive access to the Attaché HQ area, Imperial Propaganda Machine (newsletter) and merchandise discussions. We are currently in need of Attaches in many units, especially International Garrisons/Squads and Outposts. For more information on this program, please head here and if you should have any questions or concerns, feel free to contact me at any time. (Pretzel) For a complete list of Imperial Attaches, go here NEW ATTACHES! Please join me in welcoming our newest Imperial Attaches! @Oztrooper (Jeff) - Hailing from Southern California Garrison, Jeff has quickly made a name for himself with his helpful advice to his fellow troopers here on FISD. We will be watching his career with great interest. Thanks, Jeff for stepping up to become the newest Attache of the FISD. Serve proudly, Gentlemen, and as Tim (Dark CMF) says: "Keep doing what it is that got you here"! IMPERIAL ATTACHE AWARD Imperial Attaché Award for those attaché's who have gone above and beyond [minimum 1 year of service] You can find a list of prior recipients here ATTACHE MERCHANDISE Attaché Patch NOW AVAILABLE For those of you on the Imperial Attaché staff, I am pleased to announce that the official I.A. patches will soon be available... again! Here are the details.. PLEASE READ CAREFULLY! Patches will be limited to TWO per person, and will only be sold to those who are current FISD Imperial Attaches. These patches have been graciously DONATED to the FISD, so all you will need to do is cover the cost of shipping and PP fees, which will be $1.00 each for those in the U.S. and P.R. and $1.50 each for those outside the U.S. What a deal! You can find the thread here Attaché Ambassador Fellow Attaches! As we progress through the year it is vital to remember to always give accurate information to the new troopers of the FISD! A great topic to keep saved in your arsenal is the reference links. Check this out, and if you have any suggestions on which topics should be added, post up in that link. Keep on Helping your fellow troopers, and thank you for all you do to make FISD what it is today! With Unquestioned Loyalty Preston Christman TK-91488 "Pretzel" PRO Lead - Attaché Ambassador So what exactly are EIB (Expert Infantry Badge) and Centurion levels? These programs were designed for those who choose to take their armor above and beyond the minimum requirements for basic 501st Legion approval. It gives you the chance to show a level of dedication and pride that takes your armor closer to being as "screen accurate" as possible, without as much extra work as you may realize! It also works on giving a better look to the Legion as an entity, and you can bet others will take notice of your hard work. The 501st has a list of detailed requirements for Basic approval, (level 1), EIB, (level 2) and Centurion, (level 3) which can be found here in the Costume Reference Library, (CRL) http://databank.501st.com/databank/Costuming:FISD_CRL Here are a few of the questions people may be wondering about: 1. "I am a (tall/short/heavy/thin) Trooper. Can I still apply? Of course! These programs are open and encouraged for all sizes of TKs, as long as the costume is correct and meets the guidelines. There are many specific build tutorials to every option, as well as a vast network of fellow TKs on the FISD to help you out and offer suggestions. 2. "How much extra will I have to pay for extra items"? The cost is actually quite reasonable, considering the few extra supplies you will need, which are listed in the requirements area. While it may run you a little more to implement these additions to your costume, they will go a long way to improving accuracy. All needed items can be found for sale on this thread: https://www.whitearmor.net/forum/forum/16-ongoing-sales-project-orders/ While blasters are not required for basic approval, for EIB and Centurion levels they are, and may need upgrades (also listed in the CRL). 3. "I haven't even got my kit yet, is it too early to start planning"? Actually, aiming for Centurion is easiest to do right out of the box. 4. "I have my basic TK approval, can I still get in these programs"? In a word... absolutely! 5. "Are there any "perks" to this extra work and cost"? Besides knowing that you have a great looking set of armor, the 501st and FISD believes you should be deservedly recognized for your achievement(s), and allows you to wear the appropriate embroidered "rocker" badge of rank (available for a very minimum cost) on your shirt, helmet bag, etc., as well as rank decals to put on your armor bin. You will also have access to select "challenge coin" runs, receive (free) a cool certificate for your new rank, and have your title posted below your name in your FISD signature. Plus, once you reach these levels, you will have the extra knowledge to help out those who are looking to apply as well. 6. "Is it hard to apply, and what happens then"? After basic approval, all you do is make sure your armor is up to the standards set forth in the CRL, post a thread with the required photos in the appropriate area (see below), and wait a bit for the D.O.s (Deployment Officers) to address it. (Hint: Studying other people's threads before you submit can be a GREAT help). These are also listed on the main page of the FISD site. While waiting for approval, you will get some comments from others who will offer suggestions and constructive advice to help you out. If you should need any changes, the DOs will let you know, so you can adjust accordingly. Don't be dismayed if you do need changes... it's all for your benefit! After you are approved for EIB, then you can submit for Centurion. EIB https://www.whitearmor.net/forum/forum/19-request-expert-infantryman-status/ Centurion https://www.whitearmor.net/forum/forum/72-request-centurion-status/ Just remember that the FISD is here to help you every step of the way with whatever other questions you may have, but if you can't seem to find what you are looking for in your research, just ask away here on the forum. This area lists all those who have gone above and beyond basic approval toward screen accuracy. FOR April - May the 1st Imperial Stormtrooper Detachment would like to congratulate: Expert Infantry Badge Award: Mario R. "TKSpartan" TK 48117 EIB 913 John "repentance3232" TK 35623 EIB 914 Eddie Wang "Eddie-Wang" TK 83126 EIB 915 Linz Harding "Linz" TK 24037 EIB 916 Ardeshir Radpour "equuspolo" TK 42128 EIB 917 GREAT job on your approval, now on to Level 3! Request your free EIB certificate here Centurion Badge Award: A.J. Hamler "A.J. Hamler" TK 51351 Centurion 434 Mario R. "TKSpartan" TK 48117 Centurion 435 Outstanding job on reaching Centurion, Troopers! Request your free Centurion certificate here If you see any of these Troopers around your Garrison or Squad, be sure to congratulate them! As many of you are aware, the FISD is currently in our March to 1000 program. Our goal is to reach the one thousand mark of Troopers who have earned their Expert Infantry Badge, and although we are well on our way to this goal and have just reached the 913 mark! The amount of approved submissions is increasing (over 80 this year alone) thanks to the dedication of those willing to go the "extra mile" toward screen accuracy. Here is a brief description of EIB as written by Paul (Daetrin), our founder: "Expert Infantryman status is not required for members of this detachment. It should be viewed as an optional set of requirements for those who wish to take the accuracy of their costumes to the next level, and be recognized accordingly. We're a costuming club - think of it as an award for costuming excellence and you get the picture. The requirements will not replace or supersede 501st standards, but only serve as an inspiration for the level of accuracy that can be achieved. The standards are meant to be high but achievable..." Besides the added pride you will have in your armor, those reaching this level can purchase exclusive EIB gear (patches, decals, coins etc.) and get a free certificate for your accomplishment. If you are interested or would like more information about the program head here that will help. You can also contact myself "Pretzel" or any Imperial Attaché, and we will be more than happy to assist you! Greetings, troopers! I am very excited to announce several upcoming merchandise runs for our detachment. First off, we are working on an all new challenge coin run! We will have updated versions of our regular and EI coins, and for the first time ever we will be offering First Order versions of both: The silver coins are open to all active 501st members, to order yours visit this thread: Gold coins are restricted to one per EIB member, if you have not already ordered one and have achieved EI or higher status, stay tuned to these forums as we will be announcing a sales thread in the coming weeks. We will also be releasing a Pride coin this summer: For our last piece of merch news, we are rolling out a long-awaited update to our FISD trading cards! There will be two versions, one for classic/original trilogy costumes and another for First Order based costumes: PS: If you have not already heard, Lucasfilm/Disney have recently announced some new guidelines on shirts and apparel. While we do still plan on offering a racing shirt run this year, until these discussions are finalized and we have a better idea of what these new rules will be, all apparel is on hold. With Unquestioned Loyalty Brien Edick TK-92892 "Harbinger" Merchandise & Branding Officer - PRO Twitter ****PLEASE NOTE**** Although I try to add any new merchandise to the monthly newsletter not all merchandise runs coincide with each issue, it is always best to keep a watchful eye on the forums and especially on the merchandise area for any new runs as I am not privy to when they may be posted, as such some runs may not be included. FISD Coins The silver coins are open to all active 501st members, to order yours visit this thread Run open June 9th - June 30th These coins are unlimited to 501st Members. You will need to provide your TKID when adding the coins to your shopping cart or your order will be cancelled. Purchase Link: https://www.endorfinders.com/fisd/ Password: tkgrunts Lead Public Relations With Unquestioned Loyalty Preston Christman TK-91488 "Pretzel" PRO Lead - Attaché Ambassador Newsletter Always on the look out for member's stories or photos, you can contact me via PM @gmrhodes13 With Unquestioned Loyalty Glen "Q" Rhodes TK-85421 "gmrhodes13" PRO Newsletter Facebook With Unquestioned Loyalty Daniel Lauber TK-55550 "Ripper_L" PRO Facebook - Editor at Large Instagram With Unquestioned Loyalty Preston Christman TK-91488 "Pretzel" PRO Lead - Attaché Ambassador With Unquestioned Loyalty Teresa Nuthall TK-41307 "Soulart" PRO Instagram Twitter With Unquestioned Loyalty Brien Edick TK-92892 "Harbinger" Merchandise & Branding Officer - PRO Twitter Facebook Group With Unquestioned Loyalty Tim Waychoff TK-51878 “Dark CMF” PRO Director Facebook Don't Forget We're on Facebook, Twitter & Instagram Facebook: www.facebook.com/whitearmor Facebook Group: 1st Imperial Stormtrooper Detachment (FISD) Official Twitter: www.twitter.com/FISD501st or @FISD501st Instagram: www.instagram.com/fisd501st On behalf of the 1st Imperial Stormtrooper Detachment Command Staff and the Imperial Propaganda Department1 point
-
I only posted this a few months ago, which is why you may not have seen it. The best diagram I have is from Jeff (wingnut65) of the Tampa Bay Squad (below). The only difference in mine is that I use 2 snaps on the shoulder bell to shoulder bridge connection.1 point
-
Tom Rogers 19764 Centurion letter size Andrew http://www.whitearmor.net/eib/certificates/19764-centurion.png1 point