Leaderboard


Popular Content
Showing content with the highest reputation on 03/04/2019 in Posts
-
Thanks, yes, the uneven edges will be covered by the paint. I will use tape to cover the exact size of the display. Before, i will paint the inside black. After the paint is done i will remove the tape and the only thing you will see ist the display, even if you look from the side, as everything is painted black inside. Gesendet von iPhone mit Tapatalk3 points
-
Damn near perfect I'd say!2 points
-
It's for Centurion ;-) but thank you very much anyway Oops my bad !! Sorry !1 point
-
I’m on my iPad so it may be a shade different on a real computer, but: top menu > account > my attachments from there you can delete any you want to.1 point
-
good luck on your EIB application ! keep up the good work trooper !1 point
-
It's official! TK40834 reporting for duty! Just need my official forums access on here so I can EIB/Centurion1 point
-
Congrats Chris! I'd recommend you cut down the screws inside your helmet and put some acorn nuts on the end to make them less likely to impale your head should your bucket get knocked while wearing it. Nice job.1 point
-
Congrats on EIB! On to Centurion! If I recall correctly from his build thread they're ukswrath hovi speakers (they also look just like mine, so I think that they are). I found it odd because as far as I know they've never been called out as an issue for L3 approval in the past. Prior to taking them apart I would suggest asking for clarification on that aspect as they might be damaged by opening them up.1 point
-
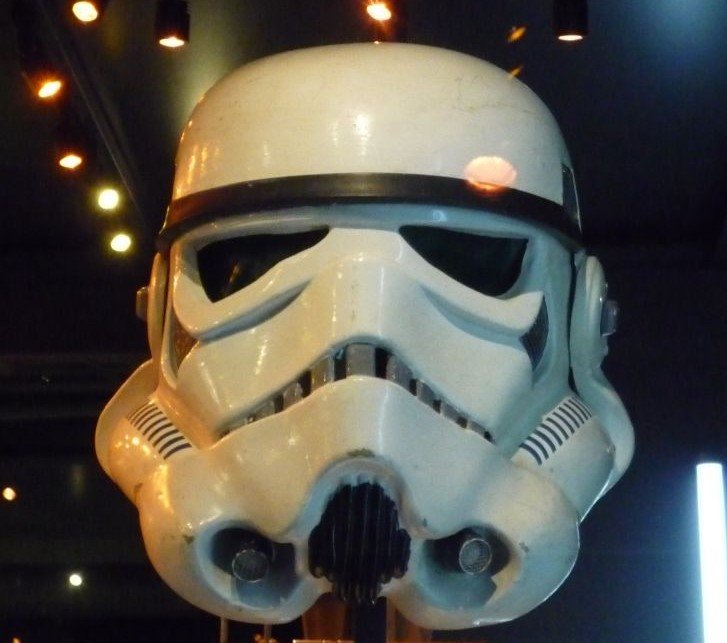
Nice work Brendan and congrats on approval. Before you pull your helmet apart - keep in mind that the alignment of those ear screws can look off in pictures depending on the angle of the shot. I have an AP kit and always thought my screws were a bit out based on pictures, but when looking at the helmet in person, it is very close to lining up to the edge of the trap. I took a bunch of pictures to test, and sure enough... depending on the angle of the camera to the helmet, the screws can look really out to lunch. Especially if you are close up to the helmet and using a wide angle lens (like what most smart phones have). Did the hovi mics come from AP like that? See you at Centurion!1 point
-
Thank you Brothers!1 point
-
Damn fine build Miguel, good luck sir.1 point
-
Fuerza Miguel, ya casi lo tienes. UN saludo1 point
-
Nice work Marko. This will be interesting to see when its all finished. For the openings you cut out for the displays, will you be able to frame the open window area so you can't see the cut edges? Just worried the uneven edges might be visible.1 point
-
Sure you may do that. As long as it conforms to the rules. Good luck!1 point
-
Thanks so much, Andy!! I appreciate the time you put into evaluating my armour so thoroughly. I look forward to approaching each of your suggestions! You rock!! Thanks guys!! :-D Time to get to work! L3 awaits :-)1 point
-
Nice work trooper, a couple of other close up photo's I know the DO's like are: Blaster D ring Sides and front of sniper plate. Sides inside/out of knee ammo strip rivets Bottom ear screws Also you may want to change those TD screws as they should be "pan head" and yours appear to be "domed" I would also advise perhaps adding some foam behind your sniper plate (in case you haven't already) to keep it away from your knee as it may catch how it is now. Good luck with approval1 point
-
Hi, Candido. thanks for your patience while we review your Centurion submission. Not much longer now. Andy1 point
-
Congratulations trooper and welcome to the EI ranks1 point
-
I love this!! I do have snaps fair close to the edge of the butt/kidney and I think they're tight ish? But the straps for those snaps aren't elastic - that can be improved too.1 point
-
Hey Kevin welcome, there's a few tutorials or How Tos" floating around here just go to the Helmet Electronics sections.1 point
-
Congratulations Brendan! That was fast! Welcome to the EIB, now off to prep for the next level!1 point
-
Yes you could as well as other methods, it's just not as accurate as it could be for a kit that is Darn near perfection1 point
-
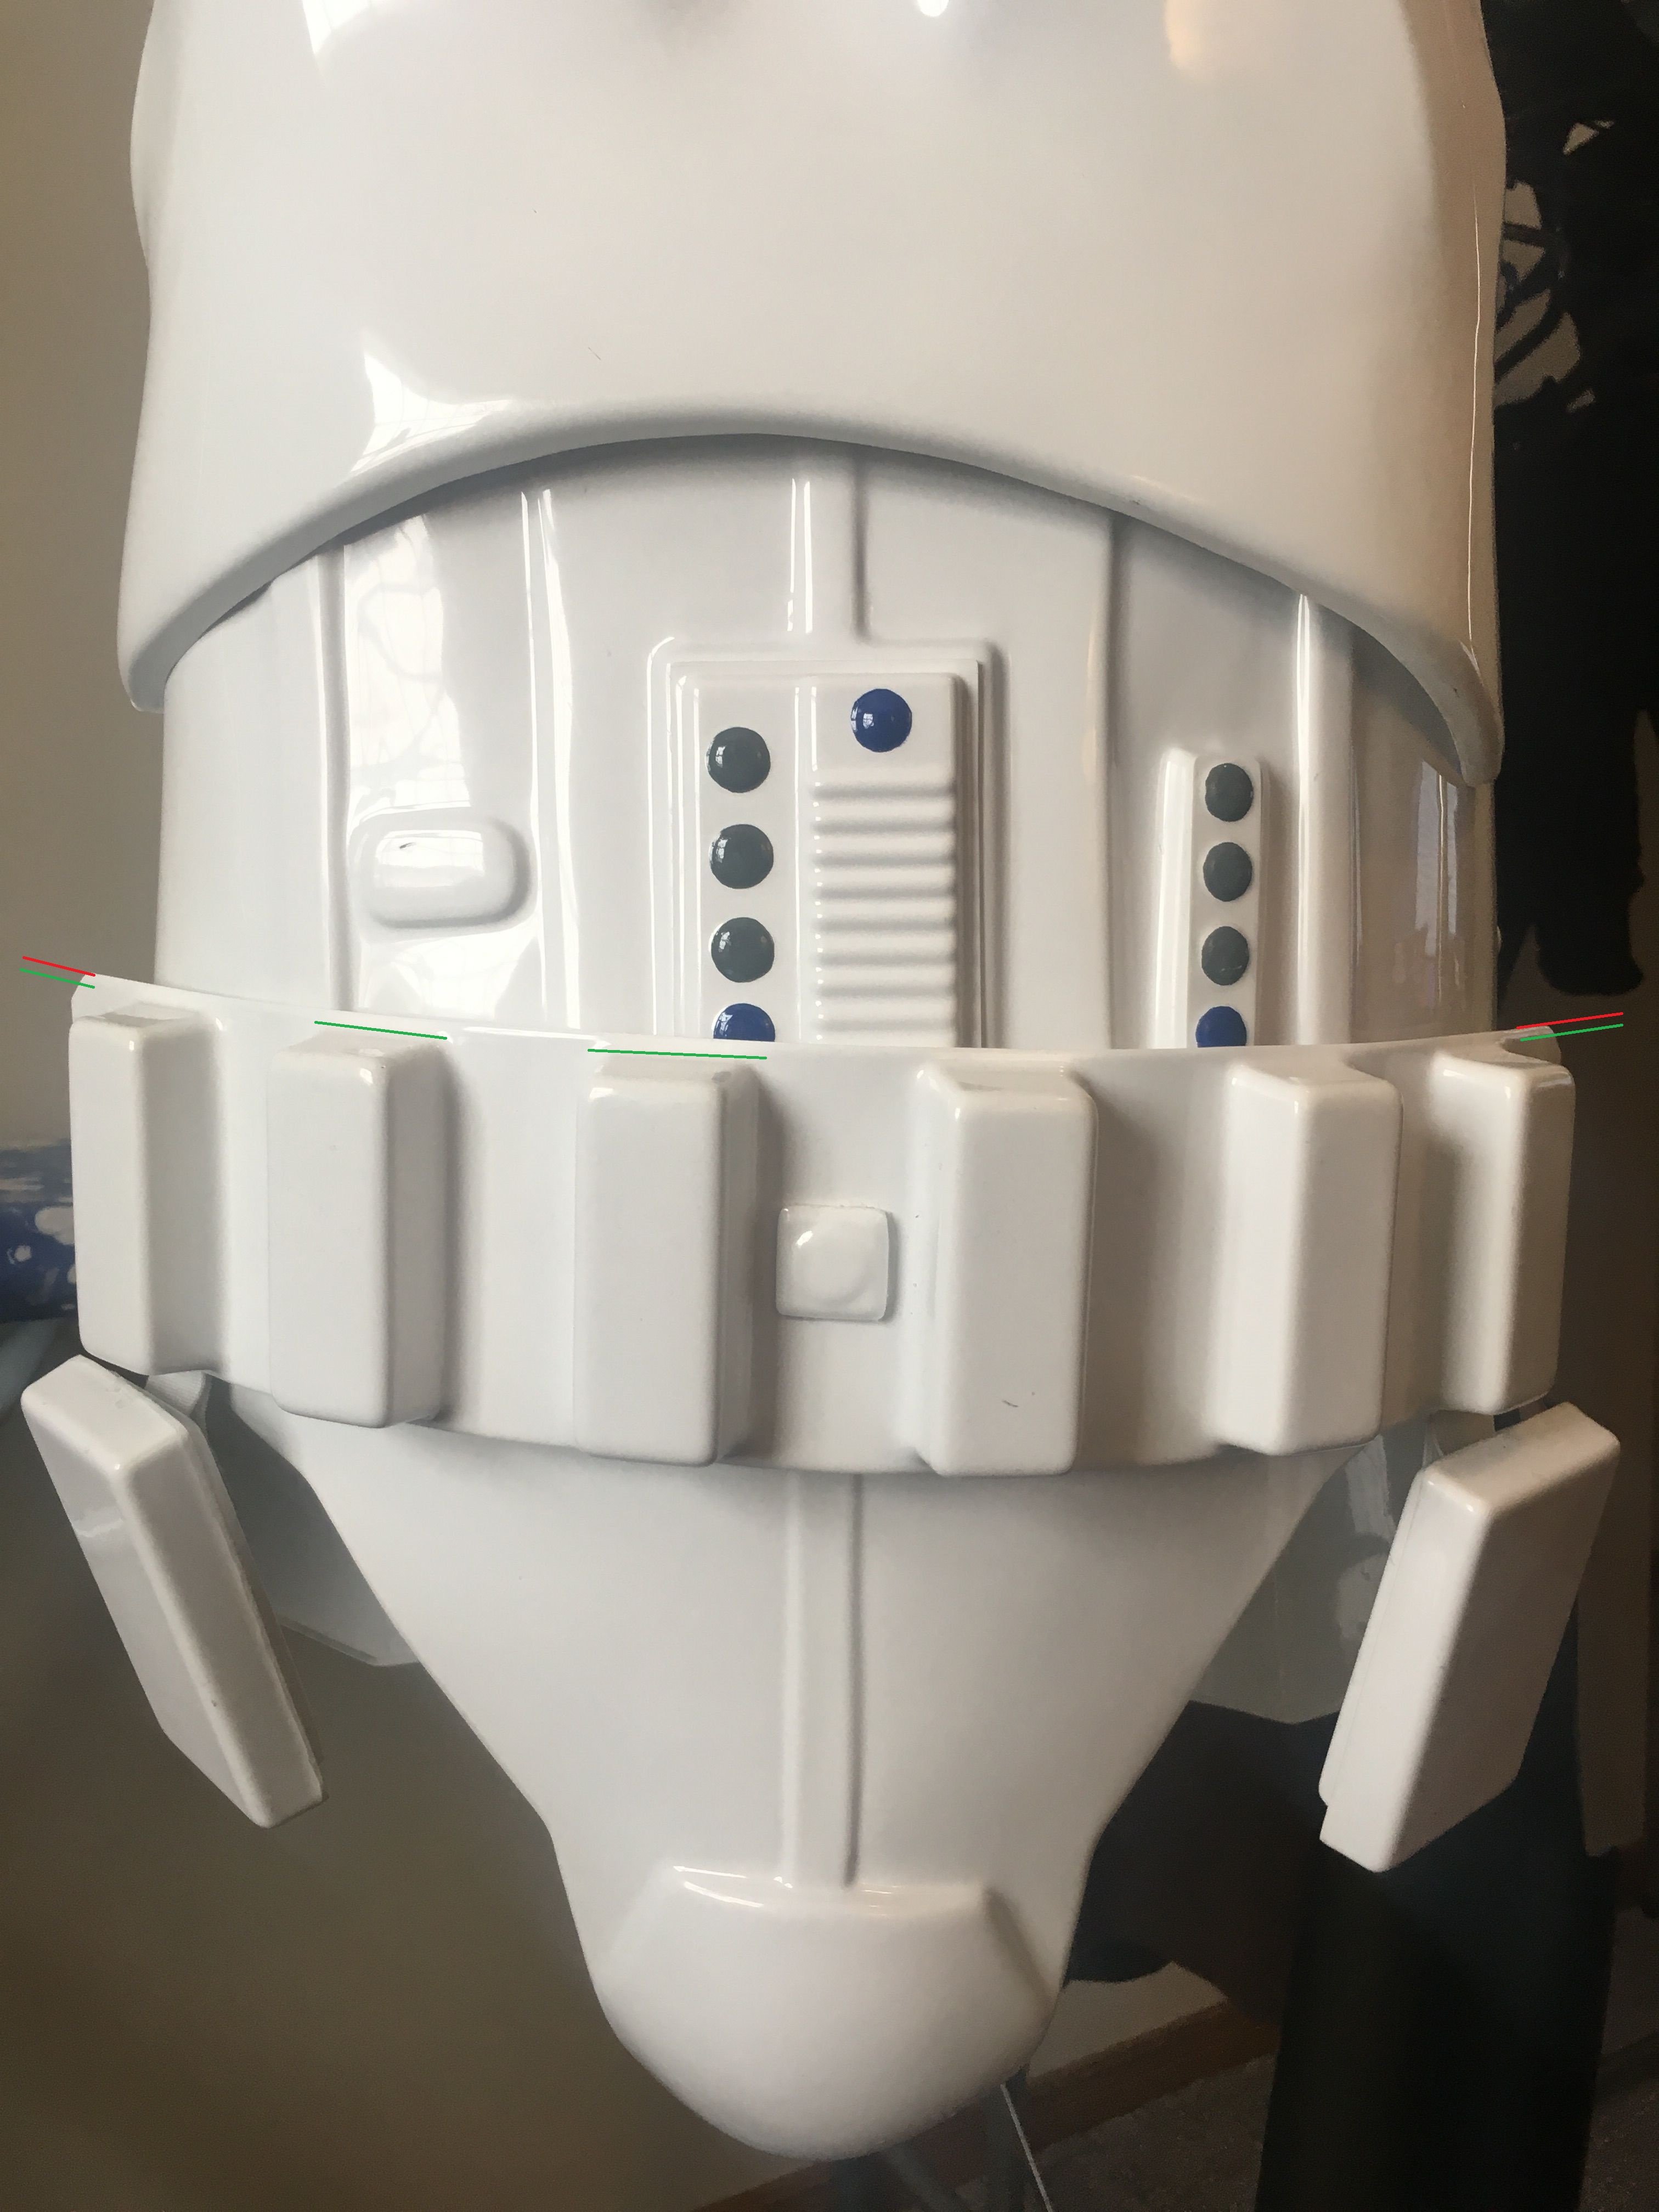
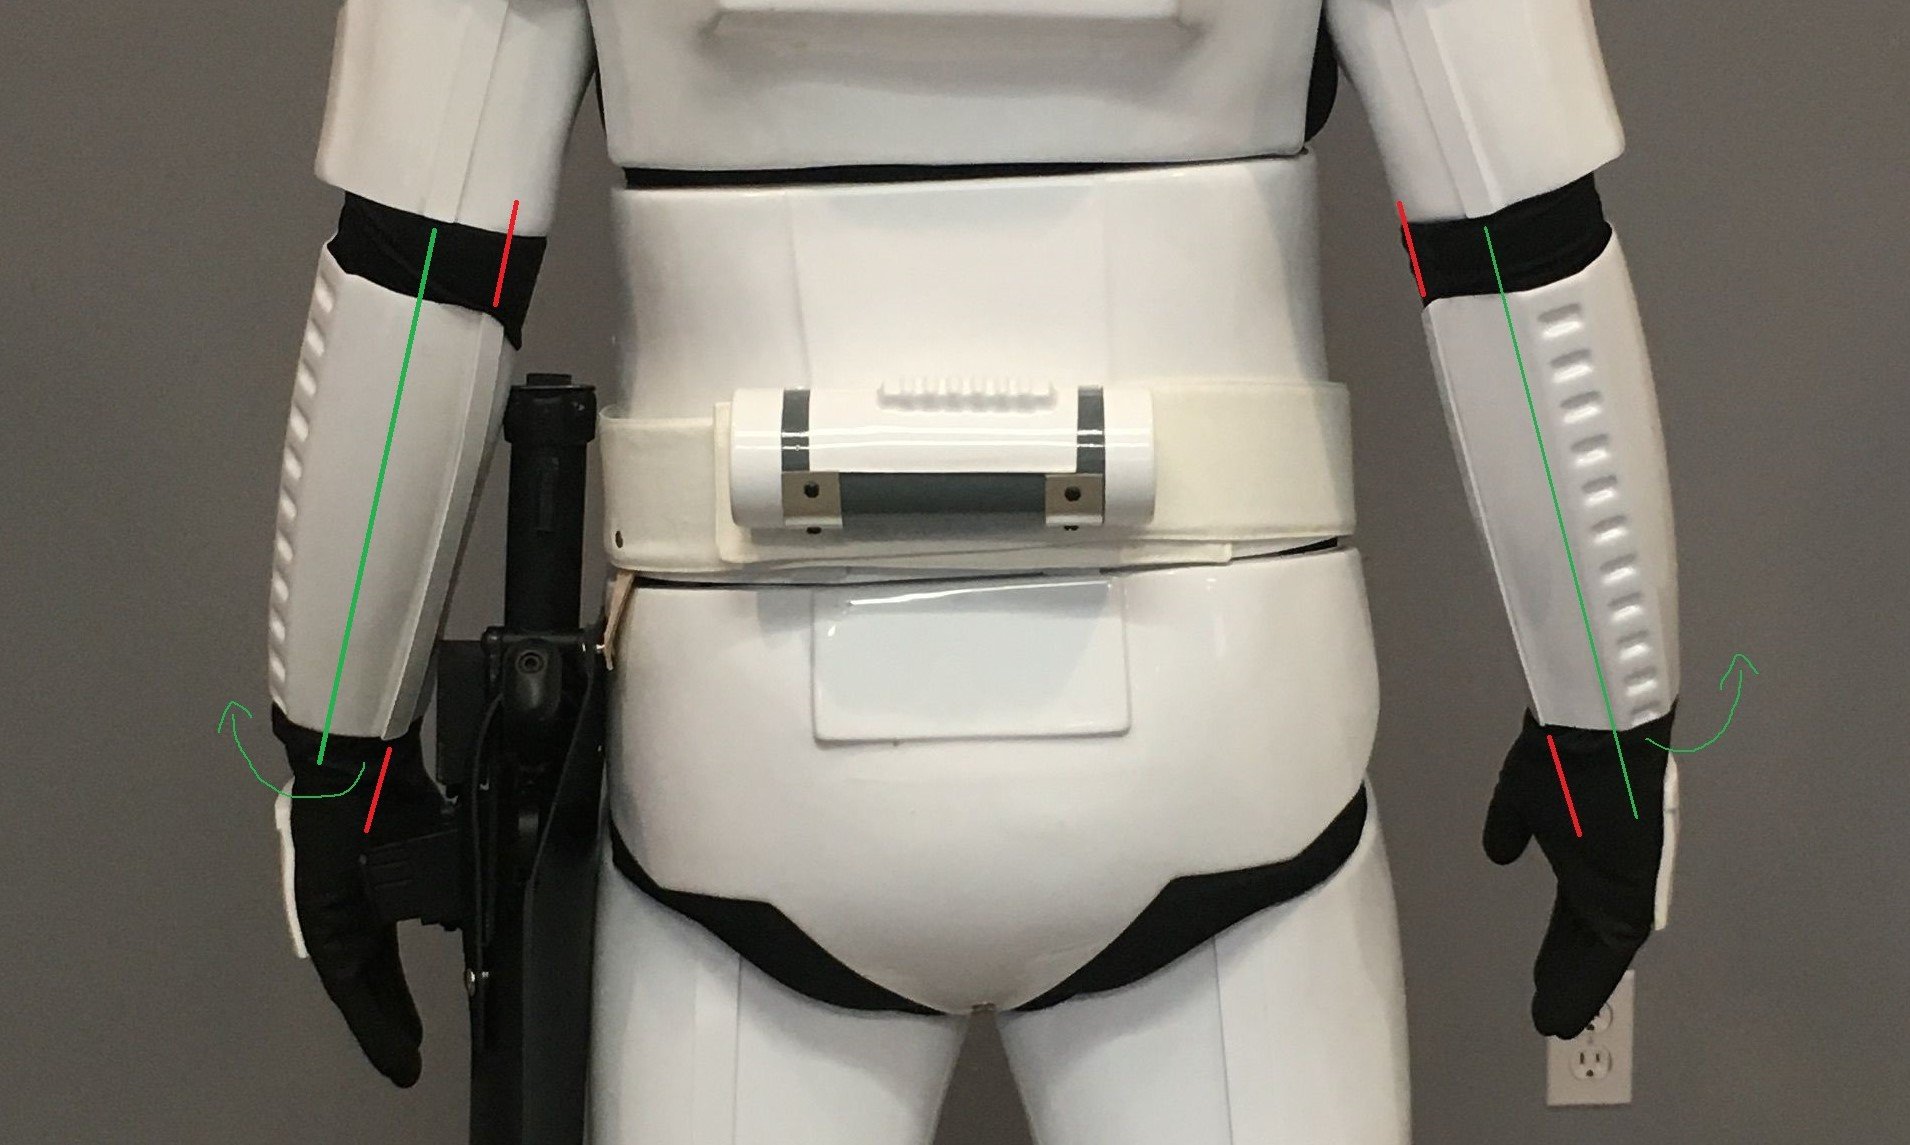
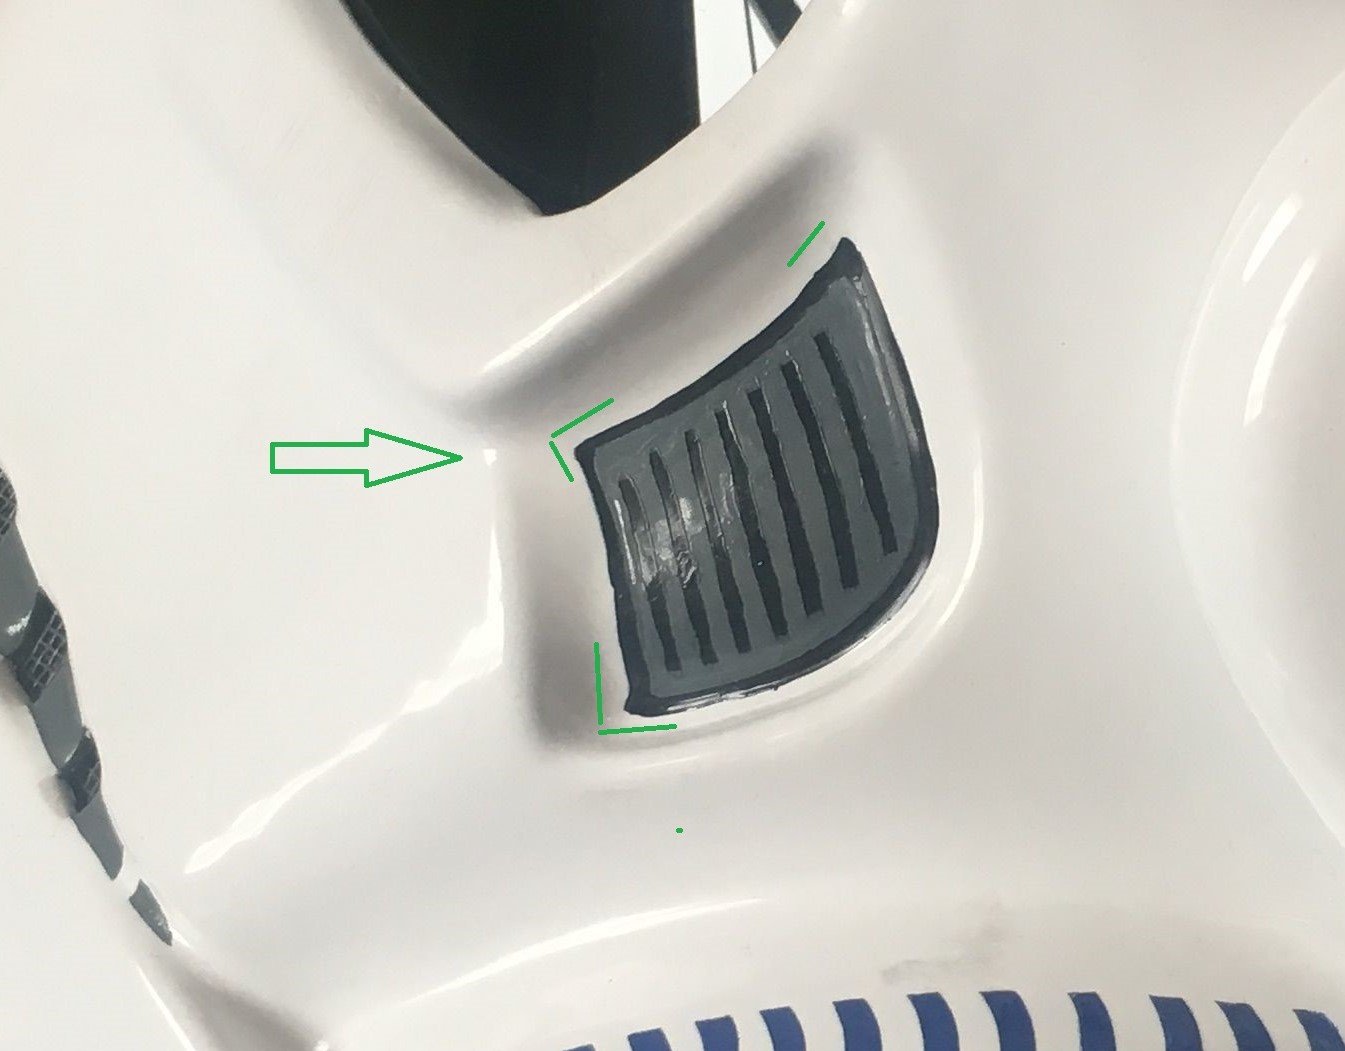
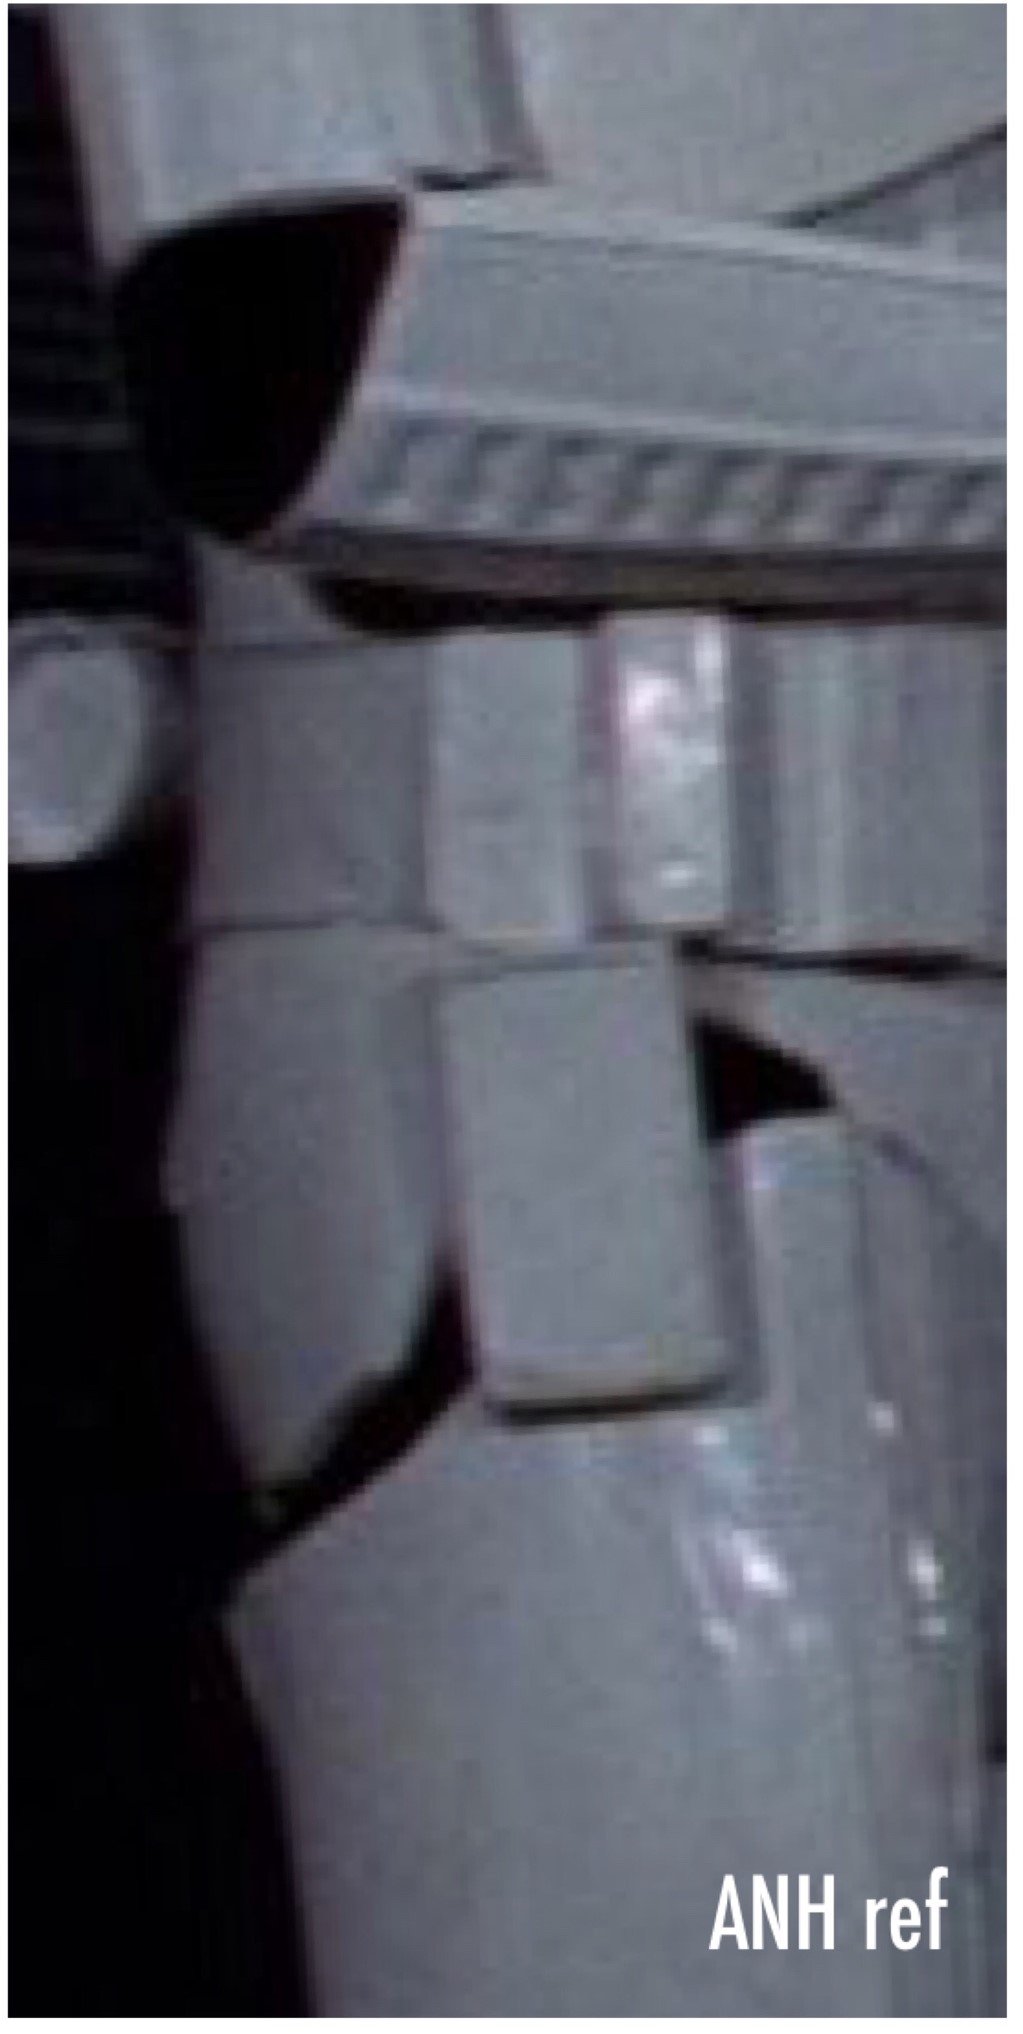
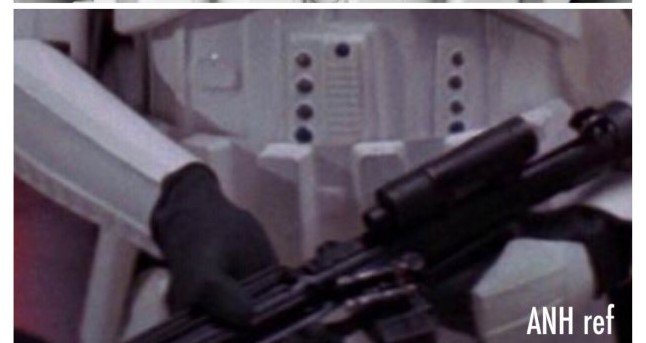
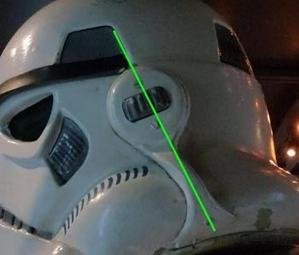
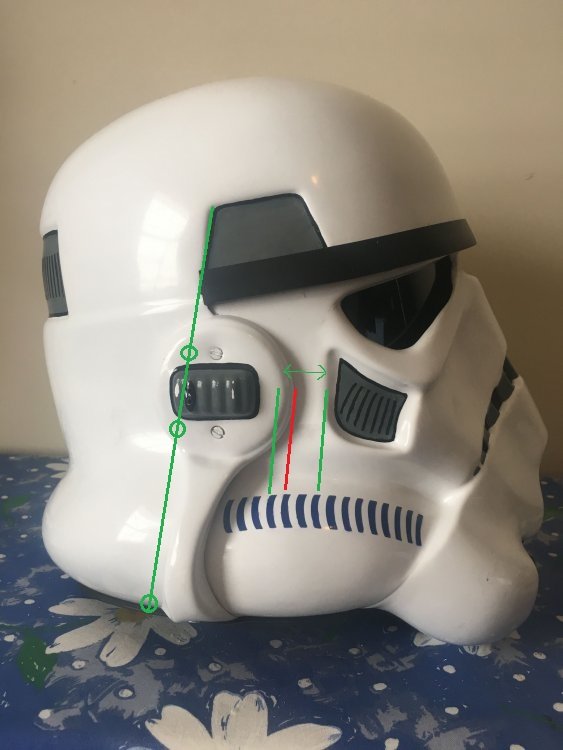
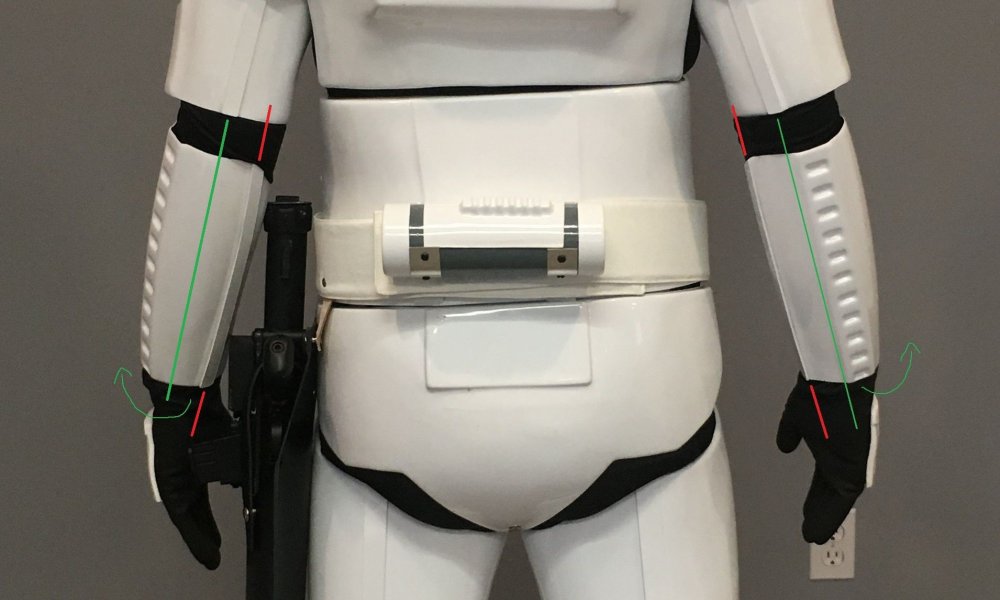
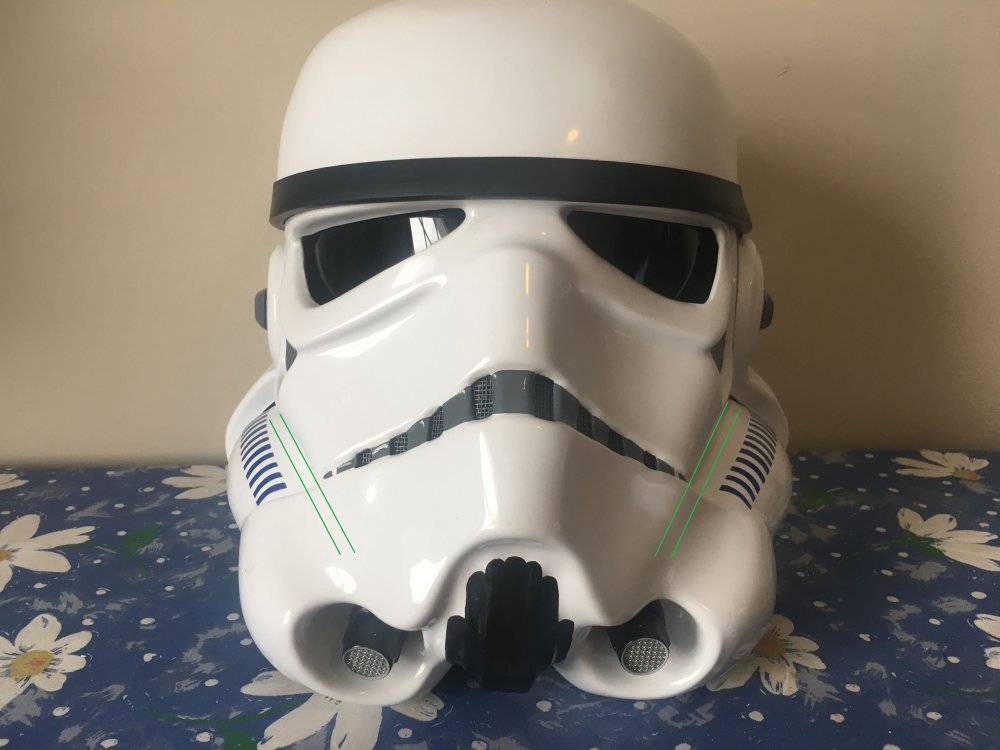
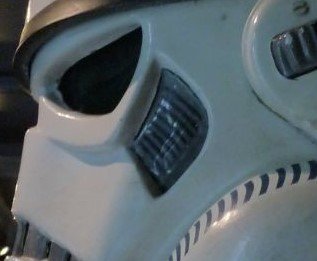
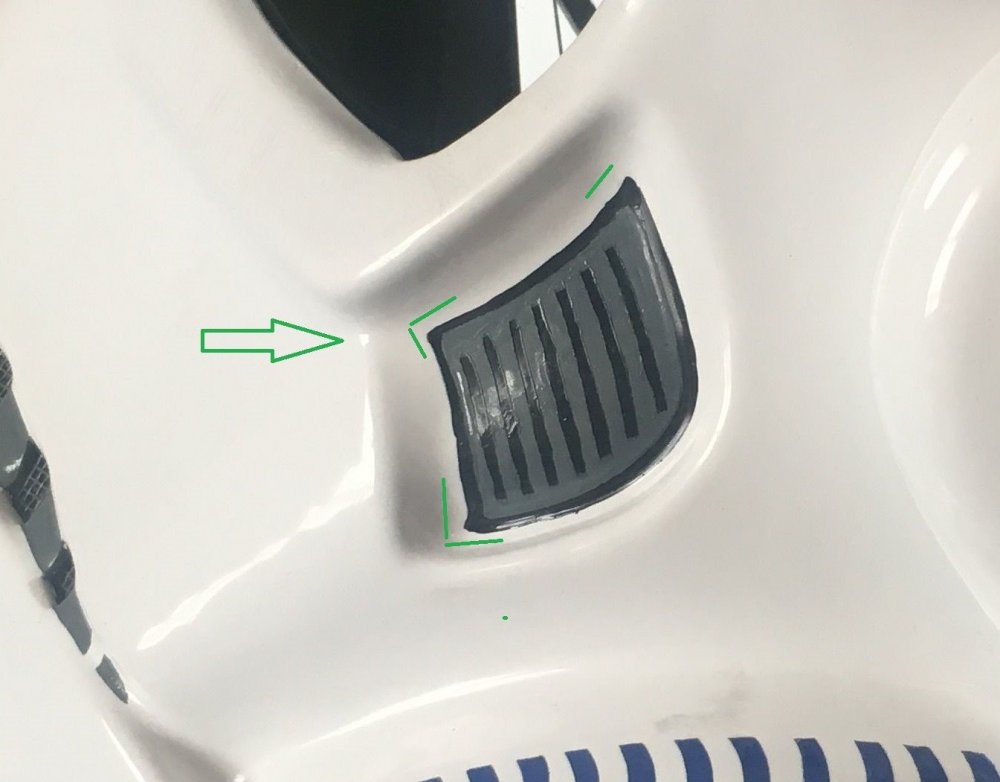
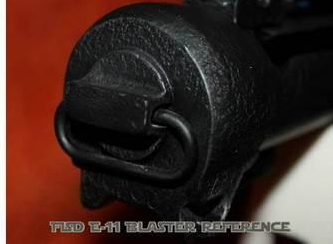
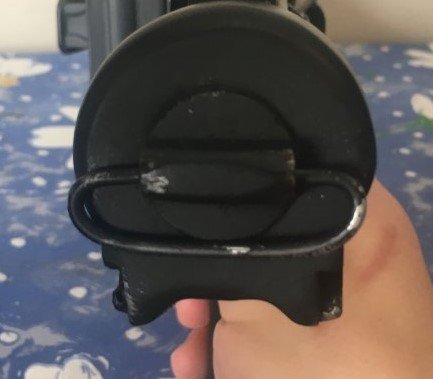
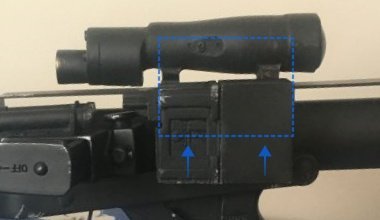
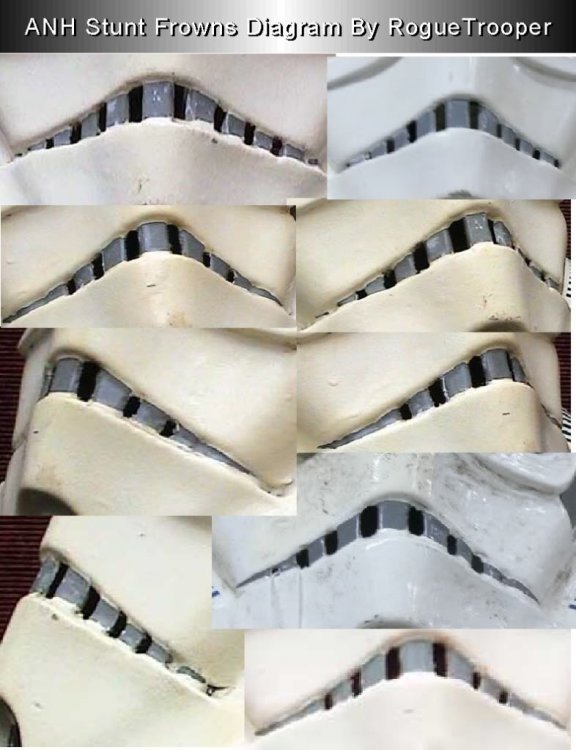
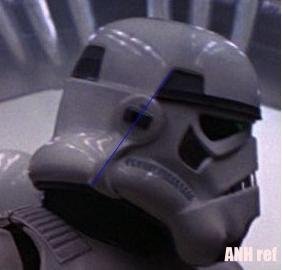
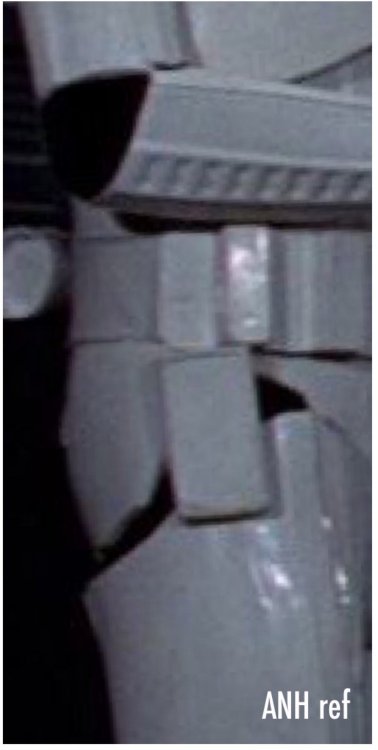
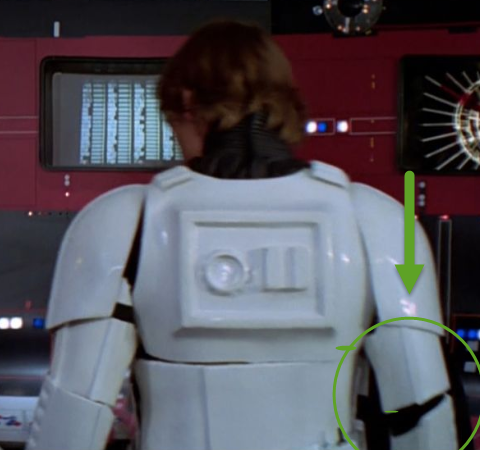
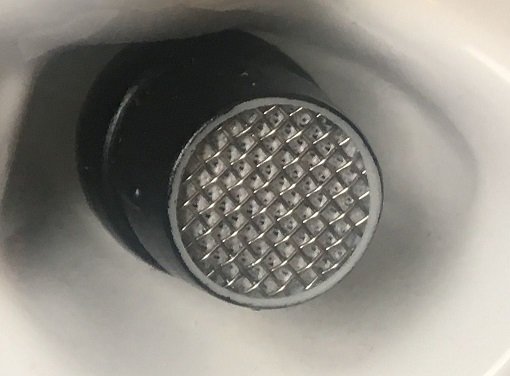
Hi Brendan and thank you for your EIB application - In this review I will ensure that your armor follows the requirements set out in the CRL L2 Expert Infantry and also point out what I can to prepare you for Centurion, should you choose to apply. I hope you do! Let´s get started shall we! CRL and EIB Application Requirements: All required submission photos have been posted and I am very pleased to announce your armor displays all the necessary elements to qualify for ANH Stunt Expert Infantry. On behalf of myself and the entire D.O. Staff, congratulations! Other-Armor Fit/Assembly: In this section we review observations made by your fellow troopers and ourselves. Some observations may lead to suggestions to improve the overall look of your armor. You have a great looking set of armor and you should be proud! Although at first glance it may seem like a lot, most of my suggestions that follow below are minor. Starting from the helmet and working our way down. Frown - The Paint looks great, however I did notice one tooth has a bit extra paint past the ideal line. If you can kindly clean that one up. thanks Reference: Ears - In this adjustment request, and it might be more of the angle the helmet picture was taken in, were looking for the ear screws to be within a straight line following the edge of the Trap, I have drawn this green line and a reference picture. Really the bottom screw is off a bit. See what you can achieve to get the lower screw closer to the green line. thanks Reference For the Right side, see if you can move the ear back a bit getting it closer to the green line. This will also improve the distance between the Tear Drop and Ear. Reference: The Tube stripes appear to be a bit low. The distance of the tube stripes should be a bit closer to the cheeks. Reference Photo: The Traps on both the Left and Right side of the helmet look a bit small. If possible fill in more area closer to the Green reference lines. Reference Picture Easy amendment. Looks like your forearms are twisted a bit off axis, but that's easy, just twist them back Reference: The 4 button ab plate could definitely use some trimming, and the paint on the buttons is much wider than we like to see. It should ideally be within the edges of the button itself and not extend past the edges. Reference image For the Belt, see if you can kindly trim off a bit more from the top. On the screen they had little return edge to none. Ive included green reference lines to achieve too. Reference photo: Blaster D Ring - Looks a bit wide. See if you can squeeze it a bit so the overall width matches the reference picture below Reference Picture: The Henglester appears too low and needs to be raised. See about raising it to be within the blue box. Reference Centurion Suggestions:In this section we prepare you for Centurion. More photos may be requested in the future that allow us to make better decisions on possible adjustment etc. If there are any areas of concern they will be discussed here. Because Centurion photos show much more detail than EIB, items pertaining to Centurion might be seen there and not here. We try to point out all we can from what is seen but the final accuracy is the responsibility of the trooper. Although the wire screen mesh is the correct size, the white area underneath will have to be removed for level 3. This should be fairly easy by removing the wire mesh, using a Dremel or razor knife to remove the plastic mesh and then adding the wire one back in. Reference images Shoulder Bells - Look to tighten up the space on the bells distance to the chest. Ideally we would like to see minimal to no space. You may achieve this easily by tightening the strap which holds the bell to the shoulder strap. Reference Pic Looks like the Right and Left belt boxes are off alignment, the left looking better. You may have to re-affix the strap on the rear for that one drop box. The drop boxes are vertically aligned with the end of the ammo belt with minimal gap between belt and box. Reference Photo Besides that all looks Fantastic and Congratulations once more!!! Let us know if you have any questions and or concerns on these. Thanks again Andy


 1 point
 -
Well not now anyway, I know A LOT of members who pulled out and many signed up for these pre order kits before Anovos even started advertising, hence Anovos reaching out to anyone who had shown interest in the kits, looks like they'll have a few left over. Agreed but Anovos kept insisting "these kits will not require paint" well true if you don't want them 501st approved, seems strange they don't think about 501st approval when some of there team are ex 501st members, which brings me to when I read the Anovos Adventures in Thermoforming page yesterday I could have sworn it mentioned the team had been cosplayers and members of the 501st, when I went back today it looks like that has been removed Since they aimed their Alpha and Beta kits at 501st members you'd think they would think about 501st approvability with the new kits but seems not. Also appears the forearms are going to need some work and paint too.1 point
-
I know I should be focusing on completing my TK, but I'm having so much fun making progress on the T-21 this weekend! I needed to find a cup or something to create the taper from the 3" to the 2.5" barrel. I don't have anything here at home for it, so I made a trip to Target to see what I could find there. Happily, I found some kids party cups that were a pretty good shape and size. And on clearance for just $0.50 each, too! Oh, and they're Star Wars themed. Perfect. I picked up two in case I mucked one up. Once home, I cut out the bottom and top parts of the cup off to create approximately 2 3/8" length of the taper. Here's a test fit. Hello, Poe. And the small barrel, taper, and large barrel test fit together. In order to secure the smaller barrel securely in the middle of the taper cup, I decided to craft a gasket of sorts inside the cup. I made cuts of two pieces of EVA foam (1cm x 6mm, and 1cm x 1cm). I wrapped the 6mm piece snugly around the inside of the taper cup and made my cut so the ends met together. Using hot glue, I secured the ends. Then I hot glued the ring inside the taper cup and fit the smaller barrel inside. It is a really snug fit and will not be going anywhere soon. Next I attached the larger strip of foam to the small barrel with hot glue. I stretched this piece a bit as I glued it on. Then I fit the small barrel into the larger barrel. It's another very tight fit here. I had to coax the foam to cooperate. And everything fits really well! Oh, hai Rey! I put the whole thing together to see how it looks. I put a little blue tape on the end of the small barrel so you can see it more easily in the pic. Once I verified that everything test fitted well, I added some construction adhesive inside the gaskets to permanently secure them to the barrels. I weighed everything so far as it is, including the feed plate thingy (not shown in the pic above). It all weighs... 1lb, 12oz! It's a little heavier in the front, but the overall balance of the blaster isn't bad at all because the PVC barrels are thin-walled. I know the weight will increase a bit as I add greeblies and bondo, but I'm really happy that it's so light at this stage.1 point
-
Thanks Draco, yes, i thought, when you are holding the blaster normally, you will not be able to see the power level indicator if it is on the backside. You look at it from the top, that is why i put it there. Today, some more little updates. Added some green stuff to cover the plexiglass. In addition to that i added the power level indicator led as well... Have a great start in the upcoming week ! Marko1 point
-
Apart from a rushed assembly and test-fitting I think it looks great1 point
-
Just an update on my 2nd attempt, remember how my 1st attempt was just hilarious Sent from my SM-G965U using Tapatalk1 point
-
I'll just wait until I have enough for a full kit from AM. Not worth the trouble and worry.1 point
-
Nice work, you could adjust your sniper plate, from the CRL L2: Sniper knee plate must be aligned with the ridges on the shin.1 point
-
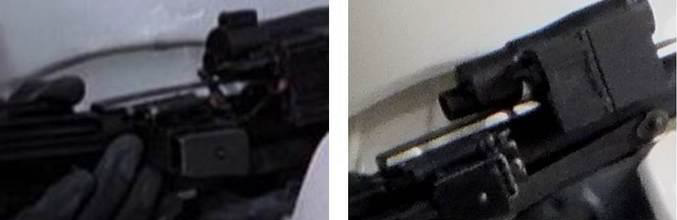
Hi guys, i was able to invest some time to go on with the blaster build. This time, I focused on the Hengstler counter and its electronics. The power level indicator and the display, to show in which fire mode I am and how much ammo I still have, need to be placed very precisely. First, I shaped out the two holes that are needed to hold the two displays. AAs well, a hole for the cables is needed. Two cover the displays with Plexiglass, I shaped an additional level around the holes to hold the glasses. The glasses have been cut out of a 3 mm Plexiglas unit. With sandpaper I was able to get the correct fit. I hope, you guys will have a nice weekend ;-)! Thanks for reading and commenting!1 point
-
Great job Bro !!! Good luck with your approval for centurion.1 point
-
Great job brother with those modifications. You are already kissing the floor of the Olympus of the troopers!! Enviado desde mi SM-G960F mediante Tapatalk1 point
-
A friend of mine graciously sewed some patches on my jacket yesterday. Sent from my iPhone using Tapatalk1 point