Leaderboard


Popular Content
Showing content with the highest reputation on 01/28/2019 in all areas
-
Hi everyone! Been a little while since I've posted an update, but I have made sure to get some work done each day! Lots of the time it was just glueing and clamping a new part of the thighs and shins, so the day-to-day updates wouldn't have been very meaty. Here is the montage! Really feeling like I'm starting to get close now. After finishing my tab and slot for the ab/kidney connection, I thought I'd go ahead and get the little "V-tabs" the keep the ab and butt plates in alignment. I can't remember which thread I saw this image on first, but it's what I emulated. I cut out some tabs and prepared them for a hot water bath. Since I was going to be boiling the water anyway, I thought I'd first prepare my thigh ammo pack and get it ready for its bath as well. Here's how it came from AP: Scored, snapped, and rounded the bottom corners: Then into the bath they went! Here is the result: I glued them into the butt plate and have since done a test fit. I am pleased! By this point, my thighs had finished curing and were ready for cover strips. Firstly, I used PlasticWeld to fill in the cracks in the bottom trim, let it harden, and then sanded it smooth (thanks for the a-okay on that, Daniel!). I went ahead and did the same to the back of the thighs as well, even though I might be trimming some off to make walking easier. Now, in case I don't, it will look clean like the front. And here they are after hardening and being sanded: I will be painting those junctures pure white so that they blend in with the ABS. I did a test fit to figure out my strapping, and then started gluing cover-strips on. That was a few days ago, so I'll jump right to the finished photos. (I did some cleaning up at the top, front ends between photos. That's why they look messy from behind in the second photo). Strapping-wise, I'll be following Eric's advice and running my thigh straps along the side of my legs instead of the front. I measured the distance to my belt and prepared 2" elastic straps, reinforced with ABS as usual. The distance was 4" for me, plus an extra 1/2" inside the thigh to connect to the snaps. I used the same method to make straps to connect my biceps to my forearms. I didn't originally think I would need these, but I've reconsidered. It's hard to predict how much they'll twist over the course of a troop. Better safe than sorry! Thanks for everyone's input on this way back when. Then I set all the snaps, including the male ones that will glue inside the armour. I had to buy one last pack of Line 24s for this. That should be all now, though. At least I hope so—that was over $150 dollars worth of snaps over the course of the build! Of course, I did break a few. Or several. You'll notice I accidentally set the snaps in one of the thigh straps backwards (grrrrr). I thought about re-doing it, but ultimately it's such a small detail I don't think it's worth the time just to make it sit slightly more flush against my leg. Plus, I can just use that one on my left side so it's covered by the holster and isn't seen anyway. And that basically just leaves the shins! After that, I'm a couple of knees and some white paint away from submitting my application photos. By the way—I saw on the bulletin that applications won't be processed until after the 19th of February while the Legion elections are taking place. Duly noted! I elected to use velcro for my shin closures. I think they look good enough, but I took some pictures to get your opinions of them. I wish they closed up a little more flush, but I think that's simply a drawback of velcro and that hooks or magnets could/should be used for a tighter connection. All the same, velcro was the most functionally desirable for me so I stuck with my path. If they need work, or if anyone has any suggestions, please do let me know. Lastly, I got the finishing strips cut out, sanded and glued in place. And that's where we are for right now! Whew, that post was a lot bigger than I thought it was going to be. In hindsight maybe I should have broken this into smaller posts throughout the week. Thanks all for your continued feedback and critique. You guys rock!2 points
-
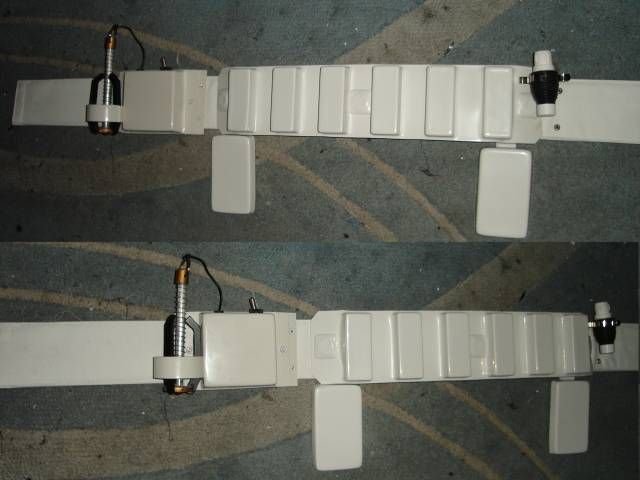
We have a rule locally, if you hit 20 pages you have to buy everyone an icecream Storing your holster with a tin or tube inside can also help, I applied a little heat to mine which also helped to keep it a little more open. And in case the holster its too light and flaps around in the wind you could always try this:2 points
-
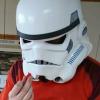
These photos are the same from my EIB submission. I have not gotten to the suggestions yet as I have been busy working on other costumes, and life got in the way. but everything for Centurion should be here. I will say that I will be doing the "extra push" to the things suggested in the EIB submission, but don't feel they will keep me from L3. Name: Jordan Garrison/Squad: Star/Imperial Rough Riders TK-21523 Armor = AM Helmet= AM Blaster= E-11 Hyperfirm Optional Height = 6'1" Weight = 215 Boots = TK Boots Canvas belt = unknown (Second hand) Hand Plates = Justjoseph63 Electronics= Voice Electronics Maker Neck Seal = Darman's Props Holster = Unknown (second hand) Here we go!1 point
-
Hello, I am building a TK Commander and have run into a few problems due to my size. I am 6'1" 300lbs, pretty thick. I've had to make everything bigger to fit my upper arms and thick thighs. I'm sure I'm not the only bigger sized trooper out here. Some things don't really line up the way they should. I was hoping for some advise and or some direction to other builds that could help out with my build. Thanks in advance1 point
-
As I have mentioned before, you have one incredible build thread going here, Brendan! If I could (yet again) make a few small suggestions, they would be: 1. Trim down the tops of your thighs a bit. Those sharp points will poke into your legs. It will not affect approval, but the thigh ammo pack return edges could be trimmed as well.1 point
-
Joseph summed it up but youve got a great start already. Sent from my iPhone using Tapatalk1 point
-
Not to worry, Ramiro. There are TK's (even TKCs) of all sizes, and we can help you get approved, brother! The front of your armor actually looks as if it fits pretty well, but it appears as if the back plate could come down quite a bit. Ideally, it should not overlap the kidney as it does now, though. If you drop it down a bit, that would help you better align the kidney and ab plates. You may even be able to trim down the top of the kidney if needed. Shims are always an option, but are not required for basic approval. Note that for basic approval for TKC the chest, back, ab and kidney must each have a flexible white U shaped gasket around them and that the posterior (butt) plate and kidney must be one piece. Keep posting up pics as you progress, follow the CRL as closely as possible, and know that we are here to help!1 point
-
Nice work. Progressing nicely. :-) Coverstrip corners can vary from build to build, however, here’s some lovely reference pics if you wanted to angle those corners a little. Shins look great, btw. :-) Keep up the good work.1 point
-
Looking great. You are getting so close! The shins look fine at the back. And yeah, that is a lot of snaps.1 point
-
Hallelujah, there is movement at last!! Yoke gluing to the inner back plate connection. Once dry, it will be glued into the back plate and be a complete piece ready for final sanding. I did manage more trimming, majority of the rough trimming is done, some of the fine sanding and trimming is done- the hand guards and knee plates are finished in that regard. I've trimmed and molded (where necessary) the boot spats, and now I'm ready to trim to make them look like the shape they do in the CRL photos (they're kinda wonky- I'll take photos later). But I'm not gonna lie, she sat pretty much undisturbed for a good three months before last weekend. I went to a Mando build party and finally managed to get working again. This kit is just a huge snot to work with. I'm constantly frustrated as I keep running into walls where I can't figure out what to do next. So I start on another part, and run into a wall there, then another part, another wall, repeat until so frustrated it sits for three months. Christmas and the holidays were busy (and cold in the garage), so that did slow me down a little, but honestly I had no desire to work on it even when I had time. It's not just the kit itself, by KB, it's FO in general- they're stupid complicated. Though the boot spats have me a bit concerned (more later). I thankfully have a friend's assembled FOTK kit for reference at my disposal (it's basically a mannequin piece, so he's letting me borrow it while I build), and that has helped tremendously. I got a little of the desire back after working on her this weekend, so I'm hopeful I'll be able to continue the trend of at the very least chipping away at it. My goal is to be finished and troop her at the Episode 9 premiere (locally). I need a firm date in my head to get me moving. I'll only forgo that if it comes down to producing quality work that I'll be happy with in the long run or just finishing it to be finished, at diminished quality. Realistic expectations. I should be able to get it done by then, provided I just keep moving. My Geeky Pink gaskets and neck seal came in, and they're phantastic! I really love them, and I can actually move better than I expected. I should be able to start assembling some of the parts, now- forearms, biceps, thighs and shins. My gloves came in (just basic Nomex, like my TK- they'll be primarily covered anyway), and I can mod them and add in the finger tip magnets for finger armor connections. Ironically we've got a potential new member working on an TLJ Executioner right now, and though he started after me, he's pretty far along and I'm likely going to be hitting him up for help and tips. I've also officially decided I'm going to pay someone else to chrome her. I will do the black base coat depending on cost, but I simply don't have the skill level or ability (or honestly desire) to attempt to chrome her myself. I'm actually happier now that I don't have that hanging over my head, too. I have two uncles who work in the auto industry (truck decals) and they have industry contacts I'm going to try and talk with. I have options, but I'm just not quite ready to explore them fully yet because I need more done to show them what I have and what I'm after. It will be expensive to outsource, but like this costume was gonna be cheap anyway, plus, I finally got that raise! (I'm proud of my negotiating skills, had to pat myself on the back there). For me, it will be worth it to avoid all the frustration and confusion. I still think there's a fair amount of viable at-home options for other Phasmas out there, just not this one. So... tl;dr version: finally working on her again, hope to keep it up, more updates to follow! Wish me luck- I need it all!1 point
-
Hello Ramiro, If you can post some pictures here, it would help us to make a diagnosis more effectively. About posting pictures on FISD forum:1 point
-
Excellent, thank you1 point
-
Keep the designs coming people, time is growing short.1 point
-
No you can't have that on an angle, the kidney plate and also the butt plate is sitting too high and needs to come down it shouldn't be overlapped by the backplate, this would help with the angle, but if you brought it down far enough to align with the ab section you may find you end up with a big gap between the kidney and backplate, you may have to add some shim material to the back plate to reduce this gap, but I'd try bringing it down to see exactly what gap there would be first. Here are a few threads on adding shims to kidney/ab which may be of help https://www.whitearmor.net/forum/topic/30448-adding-kidney-shims-for-larger-troopers/ https://www.whitearmor.net/forum/topic/29077-adding-the-kidney-shim-not-bad-but/ For level 3 you would have to blend in the join lines too, here is a how to make abs paste https://www.whitearmor.net/forum/topic/42866-how-to-make-abs-paste/ Pinched this from another build to show how the sides should align1 point
-
No problem. these clips don't actually have any springs. I cut the main clip metal part with shears for cutting metal. I just cut the exact strip size from that metal and bent it to specs. It has worked perfectly since. I used dollar store large sized bulldog clips as the metal isn't as rigid (cheap metal) as the more expensive ones.1 point
-
Looking forward to seeing some fully kitted up photos1 point
-
Great news, looking forward to seeing those BBB's soon.1 point
-
Can just make the clip out in the following image Mine with clip
 1 point
 -
Clip release, end cap and end cap clip look great. Nice work on these parts. For the end cap clip I think I used a piece of scrap metal from something I had. Sorry my memory on that is fuzzy. But I do remember having to punch a hole through the metal and it took a few attempts. I will have a look at my old build and see what I used. Aluminum is too soft as you mentioned and won’t be great long term.1 point
-
Today I worked on some small details again. New end cap clip Made a new end cap clip with a smaller axle diameter to ensure sufficient strength around the drill hole. Since the 3D printed part did not come with the knurling pattern, I applied some green stuff and pressed the pattern into that. I initially tried to use a clip from a pen as spring mechanism, but my metal drills just wouldn’t go through. So I used some aluminum instead, but that bends back too easily. Any suggestions..? 20190127_214058 Thou shalt not look like a toilet After reading Jesse’s build thread I had to agree that the DoopyDoo’s end cap looks a bit like a mini-toilet. Tried to replicate his reshaping of the bottom side of the cap: 20190127_220553 Magazine clip release lever At least I think that’s what this part that is completely missing from the DoopyDoo’s magazine is called. Feel free to correct me on that if needed! I used some leftover aluminum parts to recreate this based on pictures I found on the web. Due to the small size of the magazine I could only fit this “cut-off” version: 20190127_204609 Cheers!1 point
-
Ummm you know you’ve got to actually wear the armor right???? Jk looking good. My pics were in my bedroom taken by my wife so your good Sent from my iPhone using Tapatalk1 point
-
"All right Mr. DeMille, I'm ready for my closeup..." * OK, gang. It's photo time. I still need to get dressed and really get started on all the photos, and I'll post them later today, but here's my first test shot. I still want to play around with the lighting and maybe adjust it a bit, but I think I have everything else pretty much set. Man, I'm am one excited Old Fart! A.J. * "Sunset Boulevard" 19501 point
-
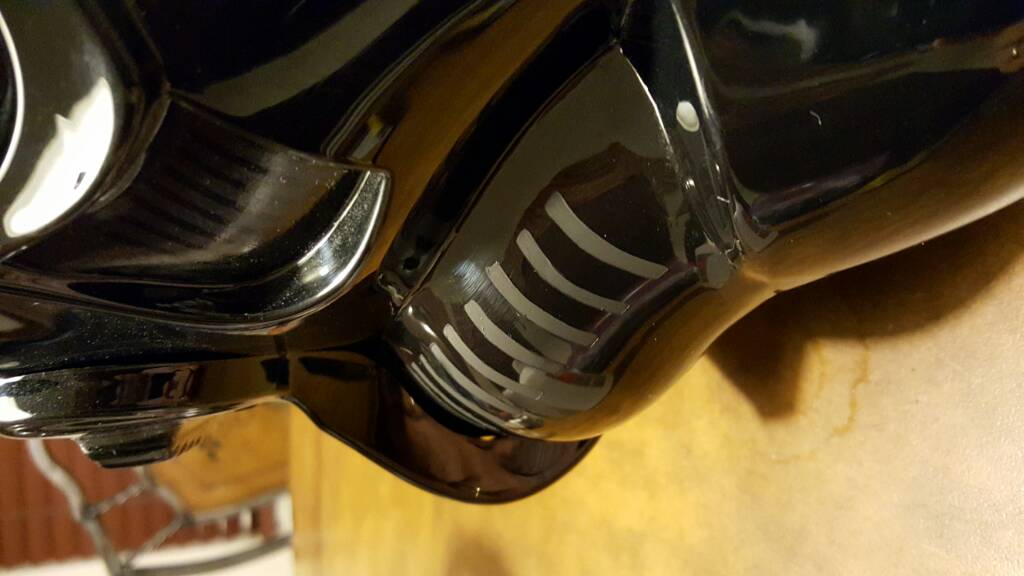
Like Tony said, your teeth look fine and in fact, the more roughed they are the better for that gnarly ANH look - close up of the teeth of the RS helmet (screen used, striped of paint) Keep upp the good work1 point
-
Gluing in some buttons and making straps today. Suspenders for the torso to keep the weight off my hips a little. and some straps to keep it closed in the back. The suspenders kept sliding off my shoulders so I sewed in a cross bar to keep them together. I noticed some straps coming from the waist to the cod piece in a reference photo and it gave me an idea. made a crotch strapping that goes from my belt like a jock strap and then magnet the cod piece to the straps. This way I have lots of movement and if I need the space it will break free and stick back in place after. I noticed a few reference pics from the movie have the cod piece dislodging quite a bit so it should be realistic. Plus I can snap it away to go to the bathroom. Here is the reference photo zoomed up on the straps. Also I can see down the side of the thy to connect the upper leg armor like a garter. It also looks like it's sheathed in some black material. So I made this The magnets are in a slotted pouch so they have some movement to adjust to meet the magnets on the cod piece and give some room to move around. Only 4 magnets so far I may need to add another big one to hold it down better It all goes together well and I'm planning on doing the same thing to but plate.1 point
-
I am covered in white dust and plastic bits. I am weary. I am not finished my build, but I practically am. There are a few things gluing (shoulder straps, hand plates) and tube stripes to be cleaned up and shoulder strap snaps to be sewn in and that is - Lord willing - all. Here's one random photo of midway through today when I first put my leg armor on and realized that I'm getting to look kinda like a stormtrooper. More later!1 point
-
They are desperately trying to raise some money from their in stock items (that won't sell) to pay for producing armor for the backlog of FOTK orders. No that was not an official update1 point
-
You are clear to proceed (abs-paste would work a treat)1 point
-
You are rocking this build! Nice work. Someone has clearly done their homework.1 point
-
Great Looking Build Brendan. Nice Work.1 point
-
Why thank you TheLorelei ^^ As for the tools getting bent, indeed this can come from a number of reasons. 1: Hammering to hard on a hard surface. I would recommend having a cutting mat on a table you are not afraid of scratching. Also, see to it that it´s sturdy. Now.. with sturdy, i am not meaning something " good enough " I am talking " you cannot move the table but by force " sturdy. Any and all vibrations while hammering will affect the quality of the holes or how straight it is. 2: Using the correct tool and size. Make sure you have the correct tool. In short, there are Pricking irons and there are Stitching Chisels. If you are trying to punch all the way through with a Pricking iron, you set yourself up for more work. 3: Quality VS Quantity. Quality cost, as with anything, but Tandy sells quite good items, so i am not concerned that you are ending up with an Asian replica that bends after three slams. However, make sure you keep the tool sharp, oiled and clean and never use it in an angle ( aka hammer it from the top, not an angle. If i can help in any leather related questions, anyone feel free to ask away =)1 point
-
Got straps doubled over now and drying. Marked the locations for new side strap holes based on the measurements. Looks like all three need to shift up. Going to test some abs paste that I'd use to fill the holes on a coverstrip first before I start the side strap move. Want to be able to fill the old holes and make it blended before cutting new ones. Sent from my SM-G955U1 using Tapatalk1 point
-
The brown box has arrived ! But I have an exam next week , so I cant work on it right now haha wish me luck !1 point
-
Here is a quick shot post template. Sent from my SAMSUNG-SM-G890A using Tapatalk
 1 point