Leaderboard


Popular Content
Showing content with the highest reputation on 01/24/2019 in all areas
-
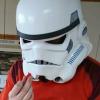
Hello FISD!!!!! Been a member since 2015 and finally am able to make a Build Thread. I reached that most highly anticipated day, The BBB Day on October 23rd 2018 . Being new to this, I brought BBB in the house and didn't touch it for 45 min.. I finally built up the courage..2 points
-
First thing to do with fiberglass is wash it. Most of my good info on fiberglass comes from automotive sites and they all say wash is the first thing. There is a mold release agent left over on it and it will prevent adhesion not just with the mold but paint and glue. So... I want paint and glue to stick so I washed it. Also that was a big tip from a friend of mine who has made a lot of kits and when someone as experienced as James says wash it first then not taking that advice is just silly. In the bath it goes and my armor gets washed with some blue dawn and rinsed well so there is no soap left over.2 points
-
Thanks to Henry this problem got solved2 points
-
You rang, Sir. ;-) Lovely job on the traps, tears and vocoder so far, Lorelei! For the tube stripes, I’d just suggest the ‘approximately a pencil width from the cheek’ rule. This is for the actual stripes themselves, not just the edge of the template (if you’re using a template). If you’re using a template such as the “Dave-M” template, see the below for the correct orientation. The front few stripes should lean towards the frown. https://www.whitearmor.net/forum/topic/44755-tube-stripes-anh-stunt-dave-m/ Keep up the amazing work. :-)2 points
-
Vocoder looks very good to me. Paging @CableGuy as he is the tube stripe police, he’ll make sure you are on the right track.2 points
-
Who here is excited for The Mandalorian? I know I am! I love Mandalorians, so this show is a dream come true for me! This show just seems to get better and better as they release more info on it. One very exciting thing is the appearance of Stormtroopers and Deathtroopers on set. As expected, the TK's appear to be Rogue One/Solo style. It would be interesting if Disney took into consideration that this show takes place after ROTJ, So the troopers should be styled after ROTJ troopers. They could add trim to the chest, back, ab, and kidney. And use snowtrooper hand guards. White soles on the boots would be cool too. It's hard to tell from the picture whether they did this or not, but I'm not very hopeful. I'm also hoping that they introduce more upgraded Imperials. That would be cool if they redid the Scout trooper, or Snowtrooper. I'm pretty sure they won't though.1 point
-
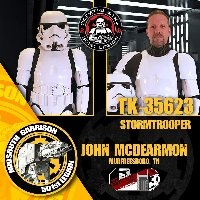
Submitted my photos this morning for 501st HWT approval. May shoot for EIB once I get cleared. Here are some other random photos we took for fun. Sent from my iPhone using Tapatalk1 point
-
1 point
-
It's at the top of the page - I'm betting you just scrolled up. Now let me paint!! I'll reply to all you guys as soon as I can bring myself to put the brushes down!1 point
-
Your on and for the record the sniper knee looks off, I want to confirm it’s straight before admitting defeat. You better hurry, Roddie, our GML (yea I remembered) already said there would be no approvals during the election. Sent from my iPhone using Tapatalk1 point
-
With new rivet holes in the canvas belt, the belt conforms to the curvature correctly now. Got the main ab buttons glued and waiting to set.1 point
-
Ya know, Lorelei, even though we started at different times, did things in different order, had different issues and successes, and different treatment from Frank (he's much nicer to me, I think), it looks like we're wrapping up at the same time, taking our submission photos at the same time and probably submitting at the same time.1 point
-
Yepp - but don´t - saver the build as you´ll likely miss it when completed...oh wait, you have that RS kit to build - crack on1 point
-
It will come closer as you screw down the ear but I would first do as others suggested and trim more on the ears as they are quite thick and I can’t see the slippery slope as you have lots of material to work with and...I’m pretty sure Mike has no problem in supplying extra set if ears if it comes down to it1 point
-
Hitting the Ground running. Going off of Tony's Build threads is a wise decision. They are nothing short but legendary. Keep it up friend. Well done so far. Sent from my HTC U11 using Tapatalk1 point
-
Of course I had to get it all out a take photo, notice my meow meow curious about something new in the house Started trimming just cutting the extra flashing off and leaving plenty return edge because i was in fear. I apply here the saying, "Less is best". I don't want to buy replacement parts because I trimmed to much off. At this point in my build, i was and is depending HEAVILY on Ukswrath Anovos Build1 point
-
It's about time, John!! LOL. I know you work crazy hours, but am glad to see that you are ready to get started... Walt makes a great kit, and I'm sure you will be more than happy with it. My words of advice at this point would be: 1. Study some of the build threads, especially the WTF ones. 2. Have all of your build supplies in place before diving in. I can't stress this enough. 3. Measure twice (or better yet 3 times) before cutting. 4. If you are unsure about something, post a photo before cutting or final fitting/gluing. 5. Ask as many questions as you like, no matter how small. We were all in your shoes boots at one time and are here for ya'. 6. Don't forget # 4.1 point
-
Welcome to FISD there’s nothing we like more than to see another Stormtrooper joining - we got your back now1 point
-
Yes! Awesome. Very happy to see you make the build thread John! We are here to help and look forward to your progress.1 point
-
Yes! We love the BBB day photos. Congrats and no the building and so many questions. Guess what though? We're here with answers when you ask. With that said good luck on your build. Sent from my 5054N using Tapatalk1 point
-
Looking forward to using this when I redo the stripes on my helmet. Thanks.1 point
-
Nice job!! When you get ready to attach the rivets this may help:1 point
-
That came out fantastic, Mark! If I could make a small suggestion, it would be to see if you can tighten up the space inside the clip, which will help keep it securely on your belt. A lot of us also use white Velcro on the back (the fuzzy side), which will keep the clip from scratching your armor. Keep up the great work!!1 point
-
TD done Sent from my iPhone using Tapatalk1 point
-
My pleasure, sir. You are doing exactly as I always suggest, which is to post up photos when you have a question before moving forward. Feel free to ask as many as you like (no matter how small), and keep the photos coming.. we are here to help!1 point
-
The one on the right is the correct type, Mark. Before painting, I suggest roughing up the tops with some fine grit sandpaper and then cleaning them well. This will help with adhesion1 point
-
Also, this should be flat and should come off. That's too much material at the bottom. Sent from my SM-G950U using Tapatalk1 point
-
Dont. Your gonna end up messing up the ears. Just my two cents. But if you really must, you need to take some off the top circle part to get it to sit closer to the helmet. It's a slippery slop your on. Sent from my SM-G950U using Tapatalk1 point
-
Haha! Safe bet. I'm well taken care of. WELL I NEVER. Y'all... honestly my jaw dropped before I started laughing. Excellent motivation, and I'm going to prove you SO wrong, Frank, and prove you SO right, Matt! Haha. While I blob about a bit after dinner, here, have an update: Yesterday after work I stood outside for two hours in the sub-freezing weather painting Smudge. Ever notice that Testor's doesn't have any application temperature guidelines? I did. These were my results: Well, those, and I painted the vocoder half a dozen times, hating it and wiping it each time. Speaking of wiping, a cosmetic wedge sponge soaked in mineral spirits is my best friend while painting. Those sponges are the bee's knees! I left the pieces in my heated workroom overnight and did some more painting this afternoon. Full sized pics this time because I am SO fond of how it's coming along: Lower edge of left ear will be cleaned up as the black is too wide. Touched up the hovis: and admitted to myself I could not freehand the vocoder shape, opting to sketch it in with pencil like so: How's this look? The frown was being annoying so I think I'll mask that before painting. I'm going for the full hand-painting experience on the tube stripes having figured out that I paint best when employing sharpshooting breath control techniques, I'm confident I can pull it off. Enough dilly-dallying - off to get my knee ready!1 point
-
Somehow that picture makes it seem so doable! Trimming the knee down now, and will acquire those exact clamps (but from Walmart) tonight and set it a-gluing. Thank you! And I'm glad you've caught up, @Rat .1 point
-
Odds 'n' Ends -- Part III Before getting back to work on those Shoulder Bridges, I took care of another little odds 'n' ends task I've been wanting to get around to. I don't like sharp edges, especially when they come into contact with me. They're coarse and rough and irritating. Kinda like sand on Tatooine. Yeah, same thing. The split rivets joining the left side of the Ab/Kidney connection are a perfect example. I mentioned this a while back in the build, and opined that I'd probably cover them with some E6000, but I came up with a better idea. And, once again, I'm making use of something from my woodworking shop. First, take a look at what they do, then I'll explain what they are. Those are called "screw caps," and they're used on ready-to-assemble furniture and cabinetry anytime there would be visible screws. They come in a matched set of two pieces -- a washer with a flanged edge and a cap. The idea is you drive the screw through the washer, snug it down tight, and then snap a cap on top so it clicks into place on the washer flange. This effectively hides the bare screw, and yet allows it to be accessible if you ever needed to disassemble the furniture. These things come in a couple sizes, and about a hundred different colors. As it happens, I designed and built a bookcase using these things just a few weeks ago for a project article. For that bookcase, I bought a bag of a hundred caps. Way more than I needed, but it was the smallest quantity I could get. But as I'm snapping those caps in place on the bookcase, it occurred to me I could put them to good use in service to the Empire. First, I dabbed a bit of E6000 onto the splayed tips of the split rivets, followed by another dollop inside each cap. Then it was just a simple matter to press them in place over each rivet and let the glue cure. Bingo, no sharp edges to snag my undersuit, and it gives a nice clean appearance should anyone ever be poking around inside my armor. And since it's E6000, should I ever need to get at those rivets I can pry the caps right off.1 point
-
Decided to ad some neck trim. Before After1 point
-
Now that all my adulting stuff has finally been taken care of, I can resume working on my TK Hero. Back in October, I thought I was pretty much done. But believe it or not, based on ShaSha's feedback (as well as scrutinizing over the pics of the back of my kit), I ended up tearing the entire kit apart so I could get some better shaping done on the kidney and butt plates. This TK has been in pieces on my floor since October. Gah! Thankfully, I still have my stunt TK in good working order for trooping in the meantime. At Christmas I trooped in the Atlanta Christmas Parade, and I was so proud to represent the Empire in my shiny white (and very wet, extremely cold) armor. And I wasn't the shortest TK in the squad, either! This is the first time our garrison has marched in formation in years. Years I tell you! So excited to have been a part of this. And with that weather, I couldn't resist recreating a scene from one of my favorite movies! Okay, so back to continuing this build... Since I'm simultaneously working on this along with my husband's RS TK, I thought now might be a good place to show some comparisons of sizing/shaping of certain pieces. Here, I'm comparing butts. Butt plates, that is. The only trimming alteration I have made to my butt plate is near the snaps at the crotch. I had to make it more narrow for my size. The rest of the butt plates are identical. Any difference in sizing is due to hot water bath and curving the butt plate to better match the lower curve of the bottom of my kidney. Here, you can see my butt plate inside of my husband's out-of-the-box butt plate. The curve of the kidney on the left side is much more significant on my kit, thus you can see more curve on the left side of the butt plate at the return. And you can see how I curved the area near the snaps inwards to reduce strain on the strapping. From the sides: So even though my butt plate looks smaller, it's not. It's just got more curves to it. On the left is my properly fitted (curved) kidney with the unaltered butt plate. The right photo shows my curved butt plate with the same kidney. My suggestion to other vertically challenged individuals is to refrain from cutting the sides of butt plate at all until you've properly curved and shaped it. Trimming may not be necessary at all, but instead, just some gentle hot water sculpting. After reshaping the butt plate, I noticed that I needed to move a bracket on the right butt plate return. Grrr. So now I wait for ABS paste to cook so I can patch up the screw holes and drill some new ones. So another tip to those who are sizing down their kits: wait to drill your bracket holes until everything is shaped correctly! Once I patch things back up, I'll reassemble the back half of the armor, then reinstall the split rivets on the ab/kidney. From there, it's just fine-tuning the armor for length. I'm still shooting on earning EIB/Centurion on this kit. More progress pics to come!1 point
-
WOW! Incredible job on that, Paul.... always great to see another HWT join the ranks!! Hopefully we will be seeing your EI submission soon, but be sure to take photos without the SE-14R. GREAT work!1 point
-
Good luck, you can't go wrong following Tony's build and images as references1 point
-
Okay, here are some close ups of the stands after equipping them with E-11 blasters. Below is the small fat stand. And here the slim wide one (looks better in my opinion). The top view shows the different dimensions and positions on the base: While one stand was meant to sit on the bottom of the large cabinet, the second stand required a shelf to rest on. Another MDF board seemed a bit simple to me, so I added two drawers, which I had found at work and painted them. These are perfect for smaller things like scopes and my counters. And this is what it now looks like with everything in there: Enjoy your weekend.1 point
-
I think there is a way to get a permit to receive stuff like this.... im checking1 point
-
Congrats on your BBB day and so now the fun begins. Sent from my VK815 using Tapatalk1 point
-
Everything causes cancer, I used to live in California and there is a Prop 65 warning on nearly anything nowadays. In all seriousness I would like to know why they banned it, E6000 stinks something fierce so I'd always assumed it was bad for you, but with proper protection (don't huff or eat the stuff, wear gloves etc.) I don't see how it would be any worse than plenty of household cleaning chemicals.1 point