Leaderboard


Popular Content
Showing content with the highest reputation on 12/29/2018 in all areas
-
Hey Patrick, very nice build progress. Can't see anything wrong so far. Okay, you had small problems but successfully managed to fix them. Considering your attention to details, this is going to become a very good blaster. Well, this is not rocket science. In the text from the Blaster Reference we just had to recommend something. This is what we ended up with but you are okay to roughly stick with that. The same was for the position of the scope. Some people had it sitting too close to the front or rear end of the rail. So we came up with that "rear foot of scope should be aligned with the folding stock hinge" because this looks correct. Meaning, as long as scope and counter are somewhere, where they are supposed to be, everything will look fine. You are on a good way!2 points
-
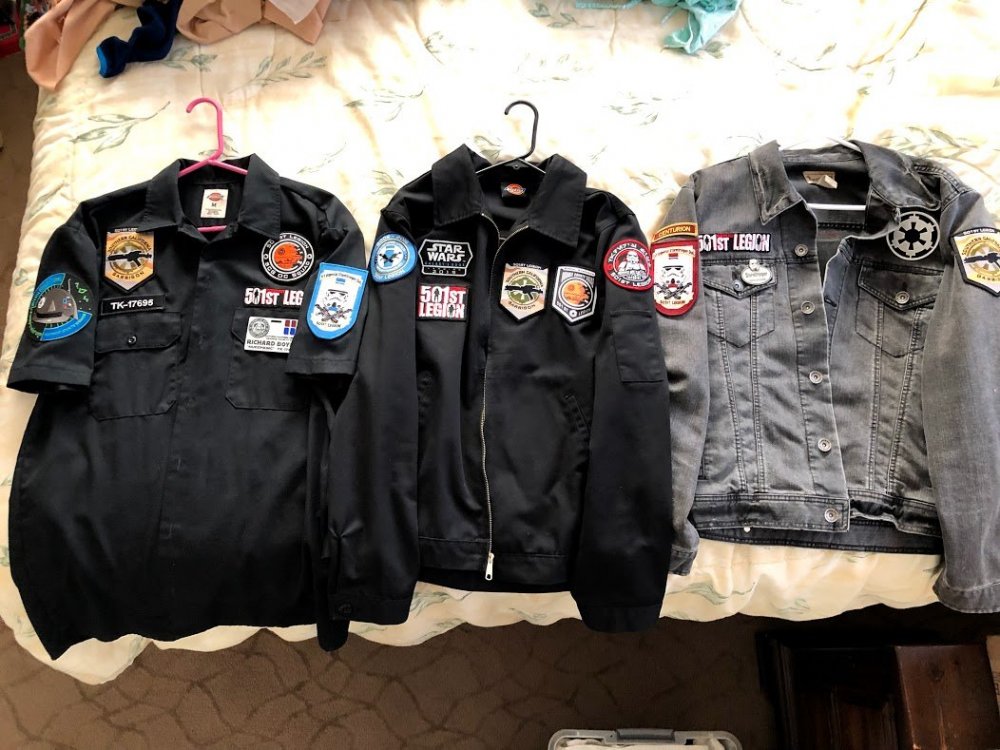
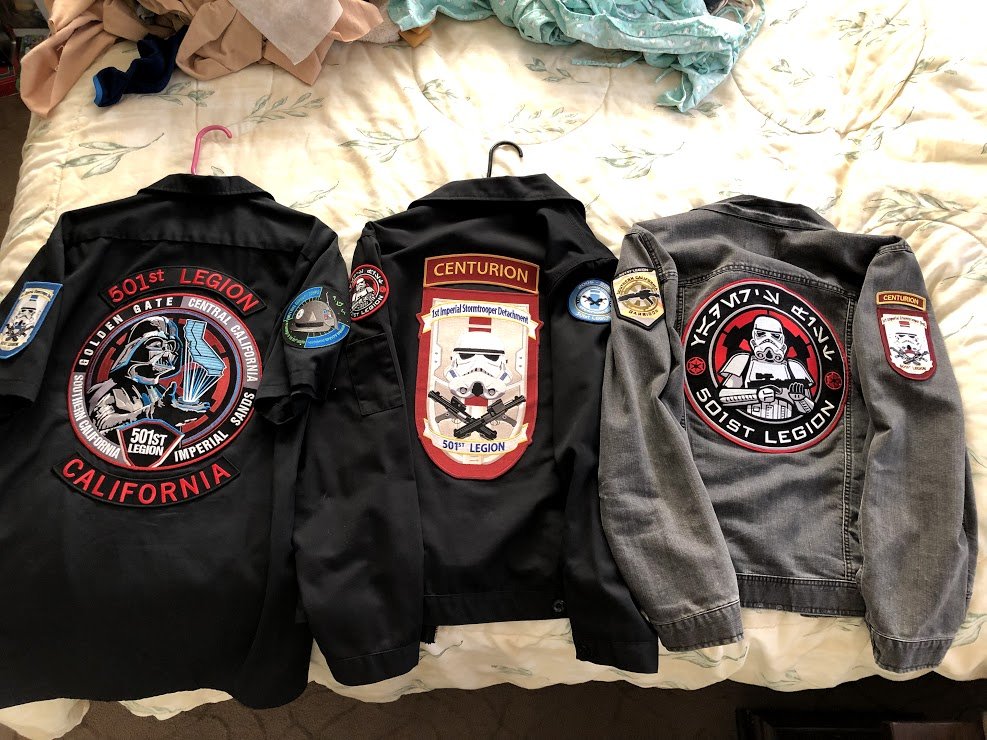
I have several jackets, including a varsity jacket, hoodies, and track jackets, but the two I use the most are the Dickies and an old jean jacket. I also use a Dickies shirt for summer.
 2 points
 -
Snaps 'n' Straps -- Part III Christmas, along with all preliminaries and Christmas-week travel, is about over at last and I can finally get back to my build. I had hoped to have a Shiny Whitey Christmas, but too much stuff going on. Still, the finish line is definitely in sight, so let's get back to those snaps 'n' straps. Up till now, I've been concentrating on getting all the snap plates located and glued into place. As a reminder, I'm working up from the Butt Plate in back, to the Kidney, the Back Plate and then down the front onto the Chest Plate and Ab. Essentially a big circle starting at the lower back portion. As such, I hadn't yet gotten up to the snap plates at the shoulders, which is where I picked up this time. As you can see, unlike the black webbing snap plates I used elsewhere inside the armor, up on the shoulder extensions I opted for white webbing. When worn, it's not difficult to see up under the shoulder extensions, and I felt that black webbing snap plates might be more visible, while white ones would blend in better. Note that I still have two final snap plates to locate and glue into place, and those are the ones on the lower inside of the Chest Plate that connect to the Ab. I'm going to hold off on those until I get straps made for the Butt, Kidney, Back and shoulder connections, and then suit up with the full torso. With those sections of the armor on, I figure I'll be able to more accurately mark the locations where those two snap plates for the Chest should go. So, on to the straps. I've read a lot of pros and cons about whether these should be all webbing, all elastic or a mix of the two. I may be wrong, but in looking at about a bazillion build threads so far, most seem to favor elastic so that's what I'll start with. (I can always swap them out for webbing later.) With the exception of the white shoulder straps, which are plain old Jo Ann Fabric 2" elastic, and a few narrow 1" black elastic straps, I opted to use suspender elastic. I bought a pair of suspenders with 2"-wide black straps, and cut that into the lengths I needed. The suspender elastic material is far superior to the fabric-store stuff -- it's thicker, stiffer and doesn't stretch quite as much or as easily as regular fabric-store elastic. I'll still have the "give" I need in all my connections, but they won't be stretching so far that it'll open up big gaps. (In theory...) For strength, I planned to fold over the ends of each elastic strap and then install the snaps through the double folded layers. I've also seen a number of ways folks are further strengthening those folded ends -- those will undergo a lot of stress when snapped and unsnapped, and the stronger those ends are the less likely the snaps will tear out of the elastic. Some of you have sewn those folds closed; others have slipped a thin piece of ABS into the fold. These are both good ways to make those ends stronger. However, I decided to glue those folds down. Gluing will not only keep the folded layers intact, but will stiffen the overall construction of the strap ends. As a bonus, it keeps the ends thin enough to get the snaps in (adding a piece of ABS would have made the straps too thick for the snaps I have). Gluing is also faster than sewing. Plus, due to an unfortunate occurrence the last time I borrowed my wife's sewing machine, I'm not allowed to use it unsupervised. Less said about that story, the better. (But it's a really good story...) Anyway, I found that prepping the elastic straps for gluing is easier if you crease the ends first where you plan to fold them. Here, I've just folded the ends over and put a couple small clamps on the fold to hold it. You don't have to clamp for a long time (or at a high pressure), and by the time I had several straps clamped and came back to the first one, there was a nice crease right where I wanted to fold it. Working on one end of the strap at a time, I removed the clamps and slathered in some glue. I'm using Duco Cement here, but I also did some straps with E6000. I decided I liked the ones with Duco better -- the bond was stiffer, and took a lot less time for the glue to set and cure. And, the stiffer bond makes snapping and unsnapping easier. I'll still use the ones I made with E6000 as an experiment to see if there's any difference in how they stand up to use, but I think the Duco Cement will win out. With the glue applied, I just folded the ends over and clamped them up -- using small pieces of wood on each side of the fold to keep it nice and flat -- and allowed the glue to set. When dry and ready to work, I marked them for the snap holes. You can see that I'm getting a lot of use out of my snap jig. Here, I'm just using the jig to mark where the holes will go. You're maybe wondering why I'm not making the holes the same way I did for the webbing, by placing the ends in the jig and using the guide holes in the jig to burn holes into the strap with a soldering iron as before. Well, I tried that but found that the soldering iron didn't do a very good job of getting through the elastic straps. It sort-of did, more or less, but the holes where messy and undersized for some reason. (The strap material seemed to stretch over the tip of the soldering iron instead of melting to the same diameter.) So instead, I used my snap-setting pliers, which come with hole punching inserts, to make the holes. This worked well, and I found that with the elastic strap being glued into a two-layer "sandwich" on the ends, there was no fraying at the holes -- the glue kept everything nice and solid. I continued working my way through all the straps, and then installed all the snaps once I'd finished all the holes. I have to say, I am mightily tired of making snaps. But all the snaps and straps for the armor's torso are done except for those two on the Chest Plate I mentioned earlier, and I am one extremely pleased about-to-be Trooper. Let's snap everything together and take a look at what we have so far. Don't look now, but I think it's almost time to get dressed and see how everything fits. Since I've already had the full torso assembly on with everything attached with tape for measuring and marking for straps, if all goes well it should fit fine. Then, with the torso on I'll mark for those last remaining snap plates on the Chest Plate and move forward from there. Moving forward means moving on to the Shoulder Bells, Biceps and Forearms -- the last major parts of my TK build. Those parts are all assembled, with cover strips, and ready to go; it's just a matter of strapping them together. I'll still have the Shoulder Bridges, Belt and Hand Plates, but the biggest part will be complete. I really am nearing the end!2 points
-
Hello! I'm undertaking a helmet electronics project what I'd consider mostly from scratch (no components pre-wired together). I'm near-novice level; it's not that I've never wielded a soldering iron, it's just that the last time I did I was 12. Fortunately a good friend is an electrical engineer working in the field who can both explain things five times in a row AND lend a hand with stringing everything together. Phew. THE CURRENT (lol, electrical jokes already) PLAN: My voice changer will be a Teensy 3.2 coupled with the audio adapter shield and Bluetooth module as per TK Talkie's delightfully detailed V3 directions. A PJRC prop shield LC will act as amplifier for the little speakers which I'll be setting in my hovi mic tips. I'll have [many] helmet fans ('cause I'm here for a good time, not a sweaty time) on an independent circuit to cut down on electrical noise within my audio system, most likely powered by a rechargeable USB battery. I'll experiment with lavalier microphones behind my neck seal, and will probably integrate a hearing assist system down the road. Disclaimer: this project is in between invention and re-inventing the wheel. People sell similar pre-built components and systems! I've just been spoiling for an electronics project so I want to do it all myself. This promises to be quite the adventure for my ANH stunt bucket Smudge and me. Come along, if you dare.1 point
-
Sure, go ahead :-)... it will be a bunch of work, but it is worth it ;-)... Gesendet von iPhone mit Tapatalk1 point
-
Nice work Patrick. Yes I would echo what Tino has said about the placement of the scope and the counter. There isn’t an exact position per say just what looks correct from the screen used blasters. Using those reference points as Tino recommends will give you the best look. Have a look at some screen shots of the blasters and I think you will see they mostly all fall closely within these reference points. The front muzzle adds a bit of work doing it that way but as you said, having access for the electronics is good. This will come in handy if you intend to install a reflector tube for the LEDs .1 point
-
Exciting stuff, and great call on using suspenders for elastic! I bought a big roll of industrial elastic online because yes, the elastic at the fabric stores is not durable. Fun fact: most readily available elastic is knit, which has much less resilience than woven elastic - which is what suspender and mil-spec elastics are.1 point
-
I'll back you on the amount of hard work put into making molds by hand. No joke, a lot of hard work and money. Not to mention the hours and hours put into heating and pulling plastic. It's not right for someone to step in and steal your work and profit from it.1 point
-
Same setup as gmrhodes, Icomm running through a 1505. Two years and still going strong.1 point
-
Thanks for all the feedback guys! Some more updates: Nose job I replaced the resin cast nose by a 3D printed one. In retrospect the resin cast nose wasn’t as bad as I had seen on some pictures, except for the 2 screws which were just shapeless blobs. But since I will replace those by the beautiful real ones from Tino’s completion kit that was no problem. The 3D printed nose will make installing the LEDs and the acrylic tube somewhat easier though, so I replaced it anyway. When enlarging the holes for the real screws to fit I noticed that the 3D printed material was less “Dremel-friendly” than the resin. 20181229_003208 Metal details on folding stock Installed the metal details from Tino’s completion kit on the folding stock. To be honest I found this to be harder than it looks. Anyway, here’s the result: 20181227_193658 Scope rail 2.0 Initially I got the position of the scope wrong, because I followed the measures from the template without knowing that the rear scope foot is supposed to be above the folding stock pivot. So I had to drill new holes and fill the old ones with green stuff. Never really liked that, and I still had some aluminum left, so I decided to make a new one. And this time I wanted to include the Hengstler Counter bracket in one piece. Many Bothans...ehm...Dremel cutting discs have died , but here are some pictures of the result: 20181228_225034 20181228_231150 20181228_231803 I have one question regarding the placement of the Hengstler Counter: according to the E11 blaster reference, the logo of the counter should be aligned with the front scope foot. Is it the left side or the center of the logo that must be aligned (I assume the center, is that correct)? That’s it again, thanks for reading!1 point
-
You can purchase the amp directly from voicebooster but they do cost a little more than ebay and they offer several different amps, I would advise using the 10W 1506, it is loud enough and thinner than the 1505 so sits behind the chest plate nicely1 point
-
I doubt it would affect approval. It'd bug the heck out of me, though! LOL1 point
-
While we're still waiting for our shipments, I figure I'd go ahead and wish all of you patient folks a Happy New Year as well!!1 point
-
A lot of guys here use a denim vest (no sleeves) but I prefer to use a bomber jacket, yes it does actually get cold down under For those cooler troops I let my FISD racing shirt do the talking1 point
-
As many do I use an Aker amp 1506 no issues with 6 years of trooping, can find on eBay @ $30. It Also has an input on the amp for external sounds, many of us locally use electronics in blasters so we run an a jack to the speaker which then runs up the arm to the amp, you can also play the TK background loop through. Some use a wireless amp setup but I've never looked into it.1 point
-
looks good. i will suggest what I always suggest: - the helmet (bucket) is honestly the first, middle, and last thing the crowd sees. the Tk bucket is THE iconic face of the franchise. with that in mind, make it perfect. - with regards to comfort: ensure cover strips do not extend beyond that which they are covering. trim them so they are flush-ish. in both cases, I always suggest finding a Centurion Application thread for your armour, and compare photos. More work done out of the box, less anguish later undoing or redoing small things. as far as basic approval, you should be fine :-)1 point
-
Before painting I wipe down the surface with alcohol for no contamination. Then blow air to make sure no fabric contamination Sent from my SM-G965U using Tapatalk1 point
-
Great progress, Patrick!! :-) For the knurling, i purchased a relatively cheap set of ‘Rolson’ shaping/modelling tools from Amazon - they happened to have a nice knurling pattern on them which worked well for mine. Here’s a pic showing the tool and the packaging that the whole set (around 10pcs) came in. Lovely build thread so far, Patrick. :-)1 point
-
Thanks! The end cap "slope" and the recess came from Tino's Lucky#Eleven build (see update #09). I also saw it on original sterling end cap pictures. Note that I initially overdid it and it still needs to be sanded down. Here it is with the excess removed: 20181216_2143321 point
-
Snaps 'n' Straps -- Part II OK, back to work. All the snap plates are done, so let's start gluing them into the armor. For reversibility I'm going with E6000 all the way here. Yeah, it's slow to cure but I definitely want to be able to rework and relocate the snaps for whatever reason may arise. Like putting them in the wrong frakkin' place... which I did with one pair. Duh. No problem; just tugged them free, cleaned the plastic, and reset them with fresh glue where they belonged. I took a careful look inside the armor and did some measuring and marking in pencil to be sure that everything would go in evenly and symmetrically. (Symmetrically?!! Yeah, anti-canon, I know. But there you have it.) To make the snap plates easier to handle and to avoid getting E6000 all over my fingers, I used an extension magnet to hold them while I slathered on the glue. This is just one of those telescoping pick-up tools I use in my shop, but it works quite nicely to hold the plates while working and placing them. Yes, I'm still using the white E6000. I found that its holding power is no different than the clear version, and I've also come to like it better -- it's easier to see when applying to be sure you get it right where you want it in the right amounts. With the underside of the snap plate fully slathered, it was a simple matter to use the magnet to place it where I wanted it inside the armor, in this case at the top/center of the Kidney. I decided I wanted the snaps uniformly at 1" from any joining edges, so in the photo above you can see that I used a ruler to slide the plate around as needed to get it into position. (The sticker on the back of the ruler is 1" from the end, and it was easier to just use this side for placement rather than looking at tiny numbers with Old Fart eyes.) Once positioned and held in place with the ruler, I just pulled the magnet free, then used a small wooden stick to press the snap plate down securely and allowed the glue to set. Some thoughts on E6000 --- I think I noted before that even though you want to allow a minimum of a full 24 hours for it to be fully cured, the glue doesn't really take all that long to set. It's all slippery-slidey when you first put things in place, but they'll typically set in 15-20 minutes when gluing webbing. The fabric webbing allows some air movement right through it and unlike, say, gluing plastic-to-plastic, these webbing snap plates were fairly solid in short order. Still, take care not to push on them or they might still slide, but you can safely work with the armor in far less than the full 24-hour curing time. At this point, I just worked my way around the Kidney until all the snaps were in place and the glue set. Next up were the mating snap plates in the Butt. First, line everything up the way it'll be when worn, and slap some masking tape on the outside to keep it lined up. On the inside, I used a pair of small clamps to pinch the return edges between Kidney and Butt together, and glued the mating snap plates in place as before. While the glue is still slippery-slidey, use a straightedge to be sure the new snaps are in-line vertically with those glued in earlier, and adjust as needed. If the snaps aren't aligned vertically, the straps will want to pull the armor pieces out-of-line when snapped on. That would be a Bad Thing, so check that alignment now and be sure nothing moves until the glue has set (again, in about 20 minutes or so). Once all the snap plates were in place in the Butt, I put it aside and glued in the three snap plates at the bottom of the Back piece, and then put it, the Butt and the Kidney aside for a while to allow the glue some more setting-up time while I started with the connections for the left side of the armor between the Ab and the Kidney. If you've looked at the many builds here, you know that there are half a dozen ways of doing this. The one and only thing that has to be consistent is the fact that there must be rivets on the outside of these two pieces of armor, three evenly space in each. But what you do on the inside is up to you -- snaps and straps, glued straps, use the rivets through straps, etc. One of the things I liked that a number of folks here have done is to use a single wide piece of strapping that bridges the edge of that joint between the Ab and Kidney. This keeps things lined up nicely and prevents one piece or the other from shifting up and down, and I liked that idea. So I stole it. I also saw how several folks reinforced this strapping with strips of ABS, so I stole that, too. I combined both ideas to create a strapping "hinge" for that side of the armor. I used a piece of 2" black webbing, to which I glued 3/4" wide strips of ABS using Duco cement for a permanent, fast-curing bond. Next, I secured the left edge of the Ab to my worktable with some clamps, then measured out the locations for the rivets. If you haven't done this yet, it's pretty basic. Measure in 10mm from the edge and pencil in a line. Then, measure down about 20mm from the top edge of the Ab and mark, and 20mm up from the bottom edge of the Ab where the Cod starts, and mark again. Then, just split the difference between your marks and pencil in the center rivet location. Clamp the Ab side of the hinge in place securely with clamps, making sure everything is centered top-to-bottom and that the center of the hinge is right on the edge of the Ab. Now, using a 5/32" bit, just drill through the Ab on your marks and on through the hinge. You can't see it in the photo, but I also have a thin scrap of wood clamped with the hinge on the underside for support. This keeps everything pressed against the inside of the Ab for efficient drilling. With all three holes drilled, I removed the clamped hinge and used the tip of a soldering iron to seal the edges of the holes in the webbing. Now, it's just a matter of slipping in the rivets from the outside, putting the drilled side of the hinge in place, slipping on some washers and bending over the wings of the split rivets. I started this process on my worktable by using a large screwdriver to open the wings of the rivets just enough to hold everything in place, and then moved to the concrete floor. I placed a scrap of ABS underneath, then simply hammered the wings flat and flush with the washers. Keep in mind that even though the rivet wings are flush, they can (and will) snag and catch on your undersuit, so once I have everything done with the armor I'll put a dollop of silicone caulk on those wings, essentially creating a rubbery cap on top -- no snagging and catching. With the Ab side done, now on to the Kidney side. The glue on all the snap plates has set nicely, so I taped the Ab/Kidney assembly together, and then marked matching hole locations on the Kidney side. With the hole locations marked, I repeated the drilling steps as before by clamping the hinge and the wood scrap in place, and drilled right through to make the matching holes. Then just slip in the rivets, position the hinge, add the washers, bend open the rivet wings with my screwdriver, and then move to the concrete floor to hammer the rivets flat. At this point, there's just one more step to do and that's add the "Han snap" to the top right corner of the Ab. Like those rivets, this must be visible from the outside but it's not necessary for this snap to be functional. However, I decided to make it functional and use it as part of the closing straps on the inside (like they did originally). For this, I measured in 20mm from the top and 20mm from the edge, drilled a 5/32" hole, countersunk the hole from the outside to accommodate the male snap post, and then set the snap. OK, let's take a look. Not bad at all, if I do say so myself. (Spoiler alert: I just did.) I'm considering the lower half of the body armor done, ta-da! The Ab, Kidney and Butt are all trimmed and sized, and all snaps are in place. You'll notice in the above photo that I haven't yet done the snap plates at the shoulder extensions or on the lower inside of the Chest piece. There's a reason. When I start making the straps I'll need to make them in sets that match the fit of the lower half of the armor -- in fact, I'll be doing that in the next installment. From there, I'll work up across my back, and it's at that point that I'll decide how those shoulder extensions need to be trimmed to match my height and body shape. Not much you can do with the lower armor since it has to fit snug in the Nether Regions and around your abdomen; can't trim for height down there. You have to trim for height at the top. Wearing the abdomen assembly (Ab, Butt and Kidney), I'll hold the Back and Chest pieces in place, then mark and trim those shoulder extensions to size. That's when I'll add those snaps and straps at the shoulders. With that done, I'll see where the Chest piece falls in relation to the top of the Ab, then mark and add those final snap plates.1 point
-
Looks like a good solution Christine. You are a return edge master!1 point
-
Guys, guys, guys, guys, guyzzzzzzzzz!!! It's all happening!!!! OMG!!!! Now, I'm still working on finalizing things (thighs and forearms still need cover strips, thighs at the top need additional trimming/shaping, drop boxes/holster need to be reattached), but I am sososoclosetofinishing!!!! #socloseitskillingme Tried on everything today for the first time. Check out the 5'4", 108lb trooper! (remember that all the pics are taken in the MIRROR so it will all look BACKWARDS) And from the back... The back plate looks like it's overlapping, but it's not. I've got to trim a little off of the front of the right thigh to bring it up a tad in the back. Again, still need to fine tune the right thigh as seen below. I'm really happy with the following pic because I don't have any strapping inside of the kit where the ab and kidney meet, and this is how things are lining up naturally. Once I add the strapping, it should all come together nicely. Big pic so you can see my snazzy magnetic shin closures. Can you see them? I can't either. I was even able to remove the shins and put them back on while I had the entire kit on. This is because the magnets do an auto-lock thing that works like magic. Maaaagicccc I say! Okay, so now it's time for me to get over my initial excitement and hunker down to finishing this kit. That said, I would like some serious feedback with regards to adjustments that you see that could be made. Already I'm thinking that I might want to bring up my shins a little and bring down the thighs a bit as well in order to reduce the gap at the knees. I'm also having a little trouble with the ammo pack at the knee because it doesn't want to sit straight. I've seen other troopers with the angled ammo pack, but would like to know if I should bring it down a bit. Be as brutally honest as you wanna be because I can take it. I want to make this kit as good as I possibly can. Thank you!!!!!!1 point