
Leaderboard


Popular Content
Showing content with the highest reputation on 12/04/2018 in all areas
-
More progress... Was having a bit of trouble getting the thermal detonator on all the way and straight. I think I just need to adjust the velcro overlap a bit more. The left side was having trouble getting over the double layer. The big sew on popper snaps to attach the shoulder bell to the shoulder strap will arrive this evening so I only have one arm on because I could safety pin the left arm and still put my armor on. Sent from my iPhone using Tapatalk4 points
-
2 points
-
Actually they can, and have. If you look closely, all of them were posted within a 3 day period, (red flag # 1). The "reviewers" have names like Jordan, David, etc. but if you read them, the language (syntax, gramar, spelling and punctuation) are obviously not from anyone whose primary language is English. The person(s) who own the site have obviously made those up, and would not add any negative ones. Also, shipping alone for a costume that size would be considerably more than the inclusive price they are charging. They count on people not wanting to return them because of the return shipping costs and hoops you have to jump through. At that price, they figure most people will be like "Well, it was only 30-50 bucks, so it's not worth the hassle". This way they can continue to rip people off.2 points
-
As they were all hand painted, each will be a little bit differs. However, as you say, this one has a little of each raised circle unpainted. As if by magic, this is probably what you were thinking of. Just bear in mind, this might vary a little from armour maker to armour maker. For example, AP has very large buttons.2 points
-
Oh my sweet summer child.2 points
-
I'm sure most of you has seen the image below. These Billgrams have become a bedrock on which many TKs have been built. However this image, and 1 very similar, has a colour on it no longer deemed correct. Rather than carrying on explaining it I've made a new diagram, sorry no catchy name this time, with just the correct colours. The images show the Humbrol colours, but the Testors equivalents are shown too if that's easier to source. All this was built upon Billhags work, so it would be wrong for me not to thank him for it. He's also my GML so he has had a hand in me getting this far in more than just billgrams. I already owe him a pint, so Bill if you see this and the opportunity presents it's self, make that 2. ANH Stormtrooper Paint Colours by Christopher Pearson, on Flickr Click through to flickr to get access to a full resolution version, and feel free to share this if you find it helpful.1 point
-
So the Imperial Gaskets are definitely helping fill the gap between me and the armor. At least with the bicep and forearm pieces. We'll see how much it will help with filling the thigh and calf pieces as they are humongous on me and the main pieces I'm worried I'll have to trim. Also I see now what everyone was saying about the limited mobility with real rubber gaskets. I think I will purchase cloth gaskets for more casual events so I can be more comfortable.1 point
-
Did anyone notice that Deadpool's boots are on backward? Not on the wrong feet, but facing the wrong direction. lol.1 point
-
So true, always a good thing to include a smiley of some sort to help clarify the intention with the post or...run the risk of beeing ”a sweet sommer child”1 point
-
A Centurion in the making1 point
-
thanks lads1 point
-
Okay, so you guys tell me if I'm just being nitpicky... What I ordered... What I received... I'm guessing that I misunderstood "durable PU Leather,top notch quality fabric has been used with outstanding craftsmanship,highly durable, comfortable and easy to wear." I thought PU leather would mean Leather like or leather look. I guess PU stands for pee-yew. I also misunderstood, "Including: A jumpsuit+ Gloves+ Belt + Helmet + shoes" Maybe I got the deluxe version where they were able to combine all of those elements into one item? I'm also sensing that sarcasm doesn't come across on message boards very well.1 point
-
Best reply ever. Truly Dave, you are new to the ways of the Interwebs. Alas, the world will not let you stay that way, but on the plus that is what this site was created for - transparent information. Just google (or bing) how to game Amazon reviews and let your eyes be opened.1 point
-
Well...buy one and just tell her the nice guys on FISD wanted to give you one for Christmas1 point
-
Dan I think we need to come up with some sort of Schedule1 point
-
Hiya, This is a handy resource. The ab buttons use the same colours as the helmet. https://www.whitearmor.net/forum/topic/39650-anh-paint-colour-guide/1 point
-
So wait... everything on the internet isn’t true? Sent from my iPhone using Tapatalk1 point
-
Yeah that would be me1 point
-
Good observation!! You are correct. The paint is not supposed to cover the entire button.1 point
-
Now is the perfect time for researching all this. You’ll find as you read a ton of build threads there are 100 different ways to achieve the same thing, it basically comes down to what you like best and what you want to do. As long as you stay within CRL there is basically no wrong way to do it. Sent from my iPhone using Tapatalk1 point
-
I believe he used self stick velcro for his. The entire helmet is velcro so those pads can move anywhere and it’s easy to put velcro on anything (fans, batteries, etc.) to have it stick in there, plus they are removable to clean. I personally used a hard hat liner. I found it easier, just another thought to throw in there. Sent from my iPhone using Tapatalk1 point
-
http://www.501st.com/members/displaymember.php?userID=25197&costumeID=124 Hope this helps if I done it right Sent from my SM-G950F using Tapatalk1 point
-
Hi Rodney, Almost there! Could you please include a photo of the inside of your thigh ammo belt connection? This is to check the EIB requirement: Thigh ammo belt is attached to thigh with a solid head rivet, painted white, in the upper corner and fastened to the lower thigh ridge. The rivets used shall be single cap, double cap or split rivets. No pop rivets allowed.1 point
-
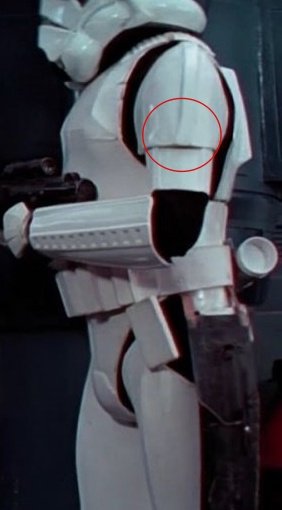
Looking good Jennifer nice work. Tip: You have the shoulder bells on the wrong arms. The lower outer edge should swoop forward. On the WTF armor it's not very defined but it is there. Reference photo I normally don't post build photos as reference however, since this is what you're building I thought I'd post a couple recent WTF build photos in addition to the screen used photo. Notice the lower swoops Left arm Right arm

 1 point
 -
Much like AC-DC, I’m back in black. Well at least my TD screws are! Please let me know if there is anything else you need and have a great rest of the day!1 point
-
I used machine screws/fender washers/lock nuts to fasten my boxes. Anything can possible be used. Just remember to keep weight in mind. The pack does eventually work on your back. Keep thinking, light and sturdy. I used a different oil pan but here it goes. Sent from my LGMS631 using Tapatalk1 point
-
Fixed the other one! Sent from my iPhone using Tapatalk1 point
-
I finally figured out how to post images on here and I will be posting more soon after last fitting this week1 point
-
Oh and as far as inner strips they help with stability and reinforcement. Though I would would highly suggest inner strips on the shins. They get a lot of stress from putting on and taking them off. Adding them will help prevent cracking. Sent from my VK815 using Tapatalk1 point
-
I built a pair from a storage container and use my camera inside. It takes pictures and just for general looks workable when I let someone look in. I'll hold it and hit the zoom button once they peek in viewfinder. Camera is held in with some blue foam. Wedge in and go. Pops out with pull from wrist strap. I haven't used them in awhile. I did add a new leather strap. And. need to weather it up more. ( I know Joseph ) Your's is coming along nicely! Sent from my LGMS631 using Tapatalk1 point
-
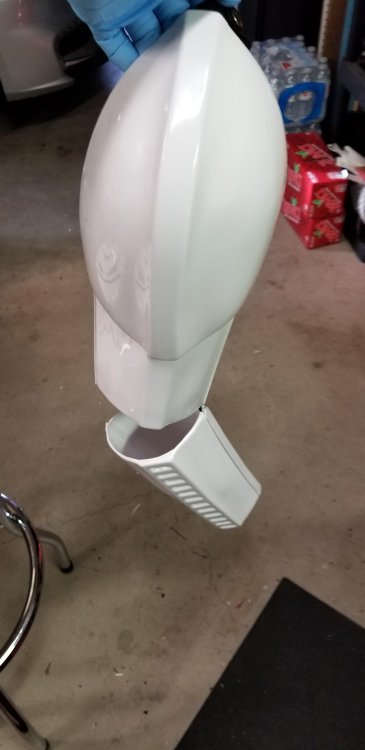
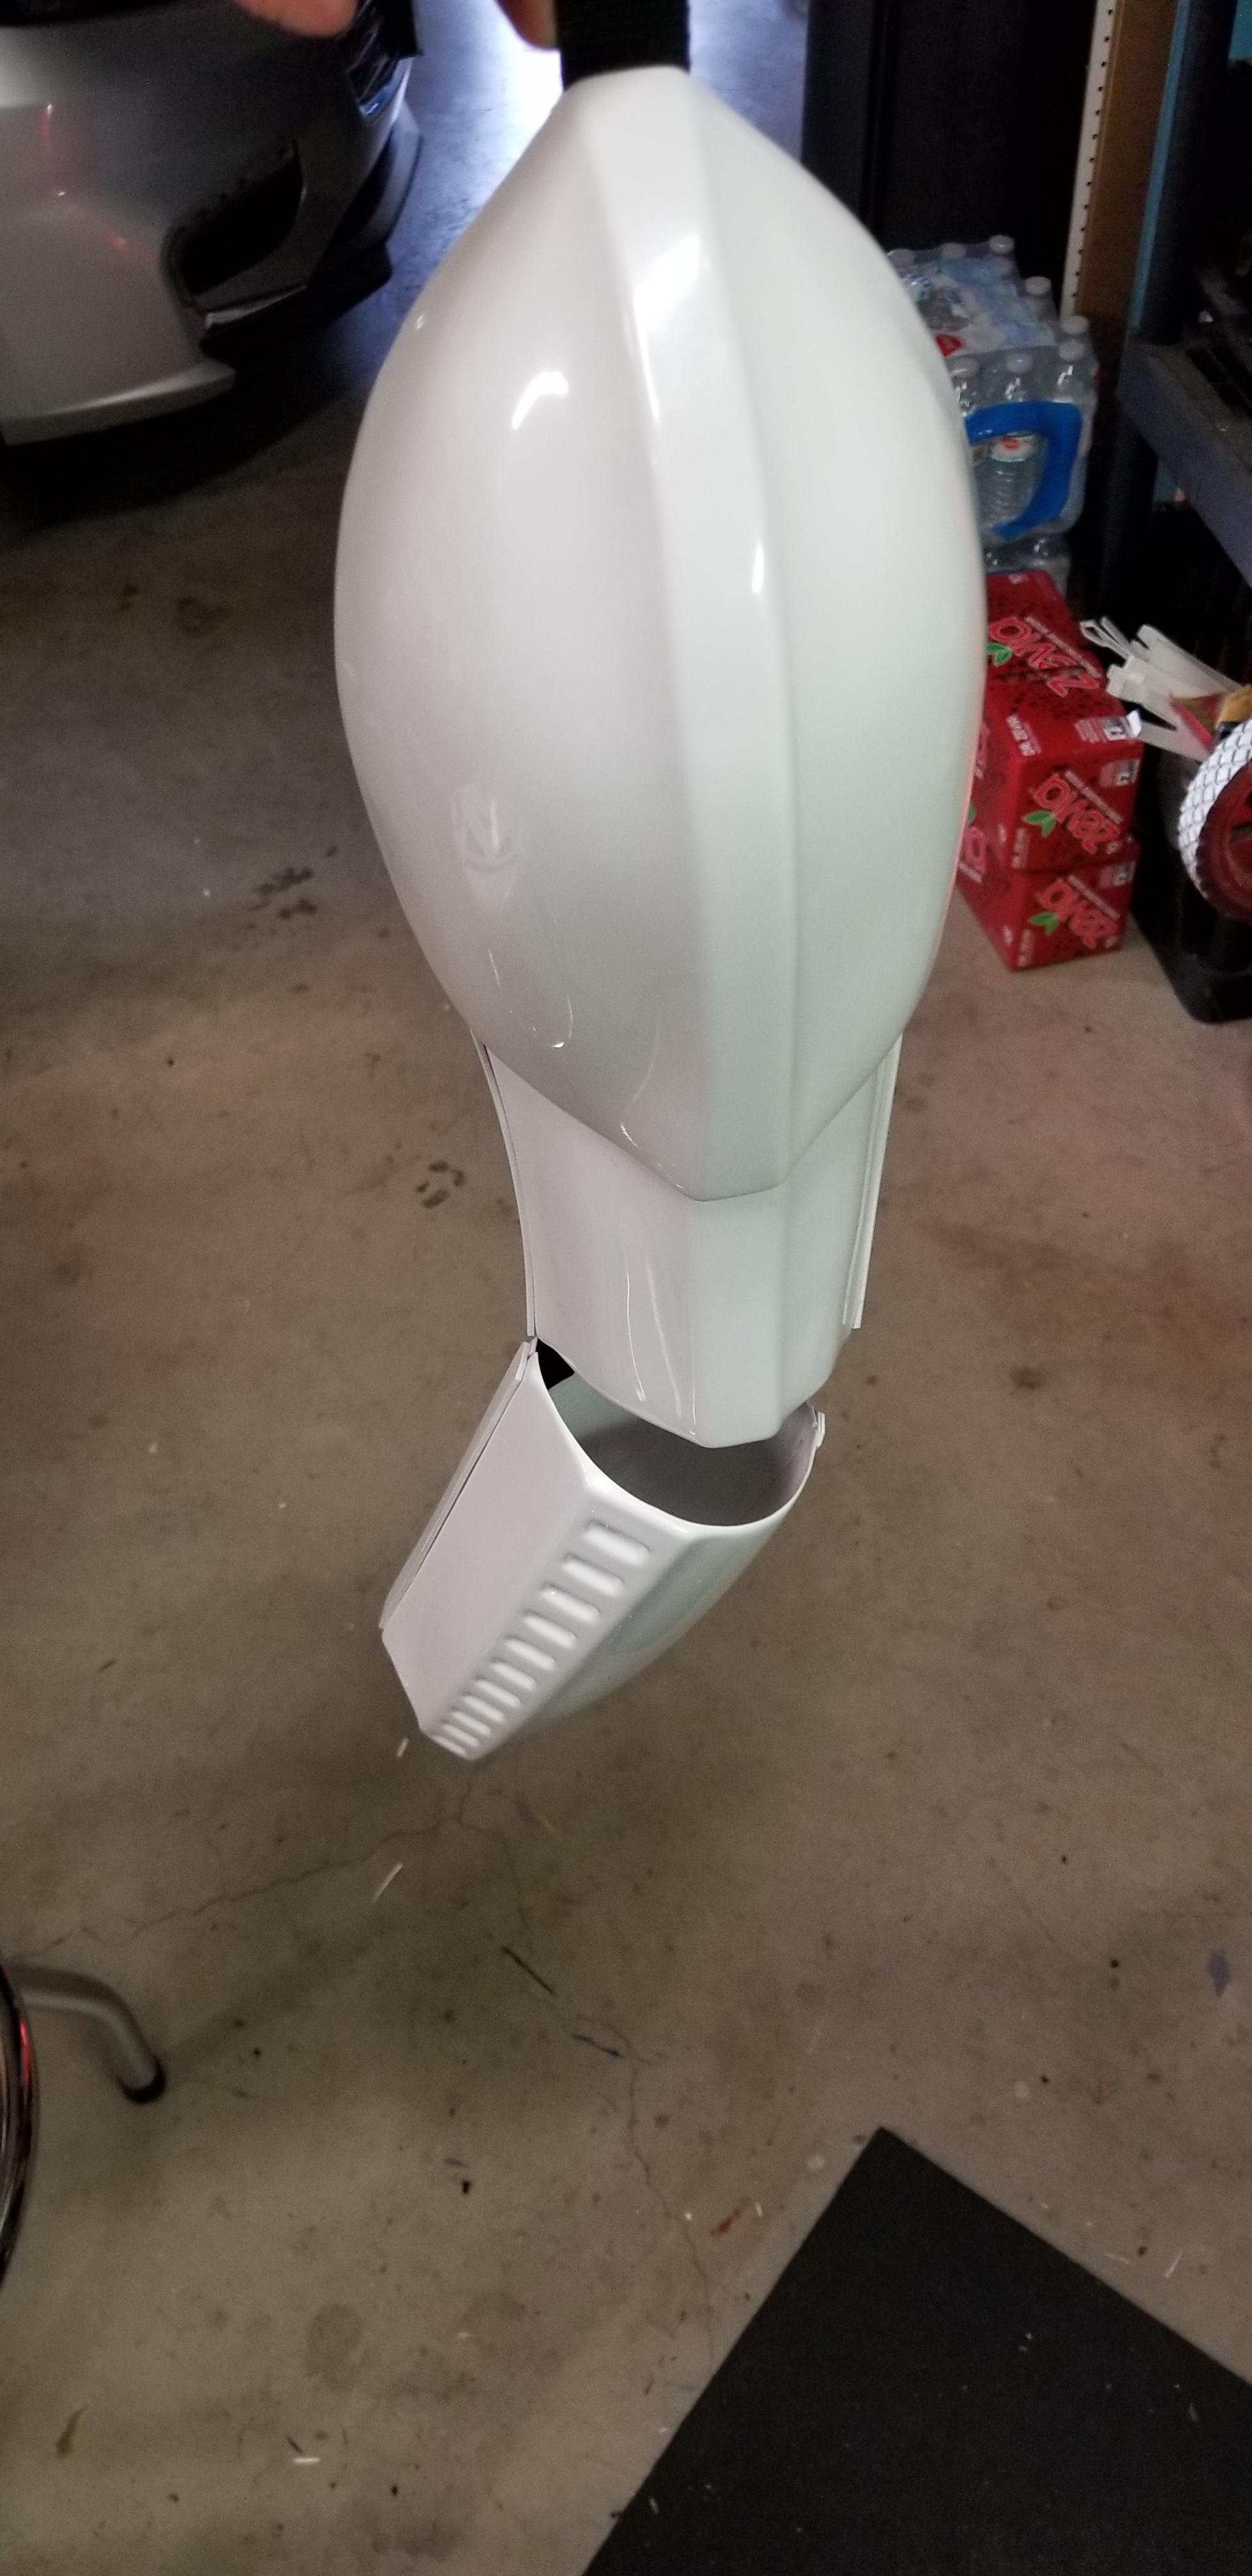
This is something I need to address as it comes up in almost all the build threads. The original armour limbs are OVAL! Everyone seems to think the parts should be rounded but they are in fact oval shaped, just as your limbs are if you care to check. The problem with most other kits are they are oval shaped the wrong way, so if the wrist opening is wider from joint to joint on ANH armour, they are wider top to bottom making them look odd. Maybe that's why people think they need to reshape but whatever the reason the rounded myth started, it's just a myth Apologies for the slight diversion but I feel this myth needs to nipped in the bud.1 point
-
When matching up the front of the thighs, you really want to have the lower ridges meet to an apex and not offset. I took the liberty of flipping your photo and correcting using the red lines and your blue line. Here's the inside of the RS original thigh.1 point
-
Welcome and looking good! Not too far for EIB from the looks of it...be sure to read the requirements and submission requirements carefully...a lot of folks miss one or two of the basic pics. good luck! chris1 point
-
OK Results are in . Hot water bath was a success. For those worried about their first time doing this, as I certainly was , here's some details. Since my shins are the XL length and I don't have a pot or container big enough, I searched about for alternatives and found a rubber made tool box my Wife uses for craft paints that fit perfectly. I took the lid off, tested it to be sure it wouldn't give way with so much boiling water in it and away I go! I boiled the water for about 3-5 minutes to remove impurities before dipping my precious plastic in there (also boiled the twine I used to hang it) and set off on a number of attempts. This is a big container so I ended up boiling three large kettles worth of water to fill this thing with enough to submerge the calves. Because I was a bit nervous about the cover strip areas being effected by the heat (I had read a thread last night where he indicated he had to redo some), I only submerged them right up to - but not including the return edge for the cover strips. The first two or three attempts seemed to be working but only by a small amount. After the first round of water started cooling, I learned that I had to ensure the water was fully boiling and without delay, quickly submerge them. Additionally, I found the 25-30 seconds others has posted as being sufficient time, wasn't enough for mine. I'm guessing because TM is a bit thicker than some (1.5 mm), I needed to leave them in for about a minute or so before it started making a difference. Next step was to quickly remove, overlap the back calf ends by about 3/4 inch on both ends (tried a bit less at first but it was not enough), tape them in place and swing them over to the sink where I ran cold water over them. Here's the results. They're nearly touching now which is quite an improvement over the two inch gap they previously had! I'm pretty happy and relieved now. Whew... Thanks to Paul (TM) for the slight overlap tip and to Tony for the confidence boost on the hot water bath method. For those with similar concerns, it really wasn't that risky or difficult once I got set up and had a few runs under my belt. The biggest challenge was getting all that water to boil at the same time and smoothly as well as quickly transitioning through each step in the process. I think I'll reserve the heat gun method for a future build Onward to sniper knee!1 point


.thumb.jpg.e86e88beeb307b04b228a2b44e3af075.jpg)
