
Leaderboard


Popular Content
Showing content with the highest reputation on 07/26/2018 in all areas
-
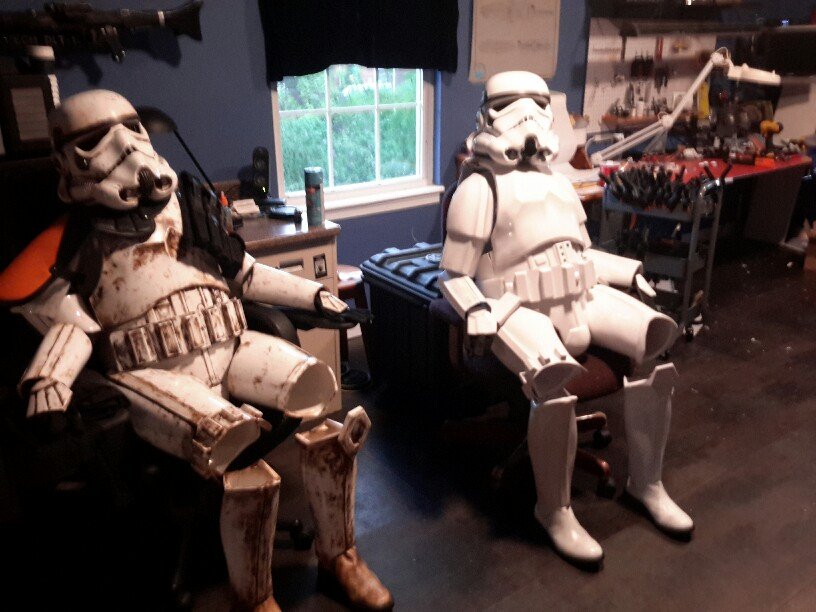
Ukswrath, thank you. Sskunky, thank you for the compliment and I agree, I am also looking forward to seeing how this kit will hold up for troops. Update, So last night I finished getting the helmet squared away. After close examination I did notice a faint line on the back panel sections. I am guessing that I must have applied more primer to this area than I had thought and almost filled them in completely. Anyway, I masked off the back panels and painted the lines black then shot them with flat clear. I think they came out well for barely not being visible. Next, I glued in the tabs that hold all the fabric screens in place. This will be a semi-permanent mounting where I will need to break the tabs off to remove the screens and I will need to make new tabs to reinstall them. I glued these tabs in place with three different methods because for some reason one method would only work in certain areas of the helmet???? So I used hot glue, 2 part loc-tite 1 minute epoxy, and superglue with activator and/or baking soda. Anyway, between these three methods I got all the screens mounted with the tabs instead of using tape. After that I installed new Velcro, the lenses, padding and fans. Here are some pics of the completed helmet. Oh, and why would I be taking these other pics? After that I started lining the transport box and making individual protective bags out of thin fleece blankets I got from Walmart for each armor part. I have another AP tonight so I am hoping to cut down the abdominal armor sides. I have not shot the glossy clear on the side plates yet but I am in no rush to do that until after the AP. Thanks for the interest.3 points
-
Ah, forgot how much information Tony's build guide HAD! Definitely should've gone back to read this (pre assembly) again. I see here he's experiencing that same offset.2 points
-
This would make for a great profile pic. Plastic, tape, E6000, knife, and a sh!tload of clamps. All the important elements. Looking good!2 points
-
I’m just adding washes of burnt umber and black. Trying to build up the dirtiness of certain areas. It is a slow process and I’ll be too busy this weekend to work on the armour. So close! Sent from my iPhone using Tapatalk2 points
-
Alright all here it is. I am asking for your help to let me know if there are any changes needing to be made before I submit for my approval to the GML. Name: Jordan Tindol Garrison: Star Garrison Armor: AM Bucket: AM Cloth Belt: unknown (bought second hand/New) Neck Seal: Darman's Props Boots: TK Boots Blaster: Hyperform Height: 6'1" (186cm) Weight: 215 lbs (98 kg) Type: TK ANH Stunt Super big thank you to every one of you that had a hand in this, both on the forum and in person! ( @justjoseph63 @ukswrath @Pretzel @LTM @TheSwede @Frank75139 @Seansull and everyone else i may forgot to mention (Im sorry))1 point
-
LOL Did Tony jack my photo and put it into his build thread? That picture of the shins is mine, complete with my mouse-drawn red lines done with MS Paint in a hurry while at the office, LOL. (Not that I mind; I just wasn't aware!) James, until you actually glue your shins together (and are certain they're in the right place!), don't sand them smooth where they join.1 point
-
Looking good! Nice and clean1 point
-
More pictures = more progress. So here we go. I took the lid of a Plastidip can and cut it down in size to match TLJ TD end cap. I used some CA glue to glue it into place on the end of the TD before I sand down and prime again. Not shown in this picture. I also used some spot putty to close the seams from the cap and the TD so it's a continuous piece. Then it was on to more paint: The wind did actually lift the box and throw a lot of the armor while wet, so I had to wet sand down to smooth again and then do it over again. These pictures are after that happened. Finally I applied the jim kit decals I got from trooperbay onto the hand plates now that they are fully cured with the enamel. Get some time off tomorrow so I will do some more work. Can't wait to enamel what I have done next Monday.1 point
-
I just took a scrap piece I had laying around, and used that. its not even something that is checked on, most do it for their own pleasure.1 point
-
length will depend on your arm length. I did mine at about 15 mm.1 point
-
Bicep hook. Is the correct size 15mm by 150mm?1 point
-
Where are you based? Have you tried RWA Creations? (UK). He makes almost any colour under the sun. :-)1 point
-
The ANOVOS calves are a bit weird, they were sent incorrectly marked to a lot of people, my playing with the pieces resulted in swapping the left and right inners. This fixed the issue of having 2 blade curves on the right leg and 2 calf muscle buldges on the right. However, this also resulted in more material to trim on the left and less material to work with on the right. The result of the re-matching corroborated with what people had done online (pieces 24+27, 25+28), so I think I'm good, just not sure if the lower edges (near the foot) should be roughly the same length or not and whether I should employ trimming to fix the angles of wear. I think the snaps feel ok, I have some meaty arms and a soft armpit, where the snaps sit so I don't feel them at all. Using a black strap material also gives the bicep some illusion of a float. I'll post pictures of it worn soon.1 point
-
Thanks. Hopefully this will be the last setback with this shin. And I did find some other screws for the TD. Do these look correct? Sent from my iPhone using Tapatalk1 point
-
You make a good point. Thanks!1 point
-
I used snaps. this way I can separate the belts if I need to do any work on one or the other. also can interchange them if ever needed. say I can double the cloth belt for something else.1 point
-
I suggest using Chicago screws, double cap or pop rivets.1 point
-
Got some nooshooz! Fits pretty well, my feet vary from 9.5-11.5, seems like the average shoe maker fits well at 10. I ordered an IB 11, and the width is very good, but I have a good toe clearance about .5-.6 inches. Now I can start adjusting the calves! I'm having a bit of trouble getting the calves to not tilt outwards. I'm not sure if it's because the bottom crescent edge on the inside is longer/closer to the ankle bone that the outer. (Left edge is on right ankle bone) Not only does the ankle bone push against the edge and tilts the calves' top side outwards, the shoe also gives it a rise. I trimmed as much off as i could without making them "even". Should the be "even?" or should the inside be longer than the outside? Notice I'm tilting my leg INWARDS to get the calve to sit perpendicular to the floor. If I stood up straight, the calve would go to the left. Biceps: I tried using bicep hooks, but it appears that the hook length needs to be about 4 inches long, 2 inches to close the gap between bottom of the bicep cutout and 2 inches to be glued. I decided to forego the hooks and use elastic straps and snaps. I plan to glue about 4inches and leave 1-1.5 inches for some tautness when attaching to the shoulder's inner elastic strap. I'm excited, can't wait finish!1 point
-
Great news congratulations trooper and welcome to the ranks1 point
-
Yay!!! but your not done yet trooper! Celebrate, then submit your app for EIB!1 point
-
Woohoo! Great work. You did an awesome job. And your littlest build is adorable1 point
-
Congratulations! you look great awesome job!!!!! Mark (AP)1 point
-
As we suggested on FB, I'd look into Chicago screws first.1 point
-
One of the awesome parts about being in a small garrison? Besides essentially knowing all your fellow troopers?? Submitting your approval photos, getting GML approval, and 501st approval in the same day! TK-18131 reporting for duty! A pic with the other TK I built (now 9 months old) while building my armor. Sent from my iPhone using Tapatalk1 point
-
That would work, industrial strength would be the best option, or you could install snaps yourself1 point
-
Alright. Now that I'm more secure on knowing how to use this paint and clear coat here's my most recent update: Finished up the Helmet. Letting it dry/cure and next Monday will enamel it (I'm giving it more than 3 days just because it's a real pain so I'm being more cautious with it.) I will also work on painting a few other parts so I can enamel them all next Monday. Oh so pretty. Can't wait to clear coat and get it smoother and prettier.1 point
-
Great to see you had some time to start on the limbs, looks like you are on the right path to success.1 point
-
Boy, has this build stalled, or what? I still seem to be in the collecting phase. I have purchase a few upgrades for the build, Ukswraith's shoulder reinforcements and bucket sound system. Aluminum holster upgrade ... The list goes on. I just finished printing my F-11D and SE-44 (thanks 5th Horseman) and will be knocking those together to test out my paint. As to paint, I opted for a paint I have used in the past when doing bodywork on my old motorcycle. It had full plastic (ABS) bodywork, and this is a spray that is specifically designed for use on flexible body work. SEM paints. Here is a link to the white I am trying out: https://www.amazon.com/gp/product/B000PKZ2J4/ref=oh_aui_detailpage_o06_s00?ie=UTF8&psc=1 I will try and update this thread a little more often. I have a new build deadline (self imposed) of September 20th.1 point
-
Just recently got started in the 501st. Never had the time to do this sort of thing, but always wanted to, since 1977. Decided I would have to make time. So far I have the TK approved. The TD is still under construction. I think they need more squad members.
 1 point
 -
So, I have requested pre-approval. I know this is a marathon, and I know I still have lots of small things that I need to tweak, but I am at the point in the journey where I need to sprint. After over a year of working, I'm itching to finally have a TK ID. So, any who follow me here, head on over to put in your two cents. PS-- I already know I need to figure out how to fix that sniper knee plate. It's wanting to tuck under my thigh. Suggestions?1 point
-
I got the same gloves. You are good1 point
-
Assembled some more limbs! I am starting to see a hint of a stormtrooper.. Also made the elastic shin-closure hook thingymajigs: Hit the hooks with some white spraypaint Also went out and got the last part that I need, gloves! Would the knurling on the topside (on fingers) of the gloves be a problem?1 point
-
I'm feeling the love! It's been a pleasure serving you. (most of you) I've had lots of emails from members in support of me. People are just too afraid to get involved. I can't say I blame them; The new sheriff shoots first. It also looks like the deputies are in charge of this one and are calling the shots for him. I also want to mention Mrs.tk4205. I lost count of the sandwiches she has made for troopers at events. Cookies too. The old timers can tell you about bantha patties. The Mrs. took food to almost every major event our garrison did for many years. Few people know that these days, as so many of our old-timers have been ousted. I myself have only trooped once or twice a year for the last couple of years due to the unwelcome feeling we get from our CO and his little group of noobs. We'll see what happens this year, but there is always next year to look foreword to. I'm not going to let a few egomaniacs turn me off of what I love. I've been through a few bad commanders in my years and I always seem to outlast them. I've gone up against worse too. You guys are worth fighting the good fight for.1 point


