Leaderboard


Popular Content
Showing content with the highest reputation on 06/27/2018 in Posts
-
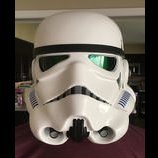
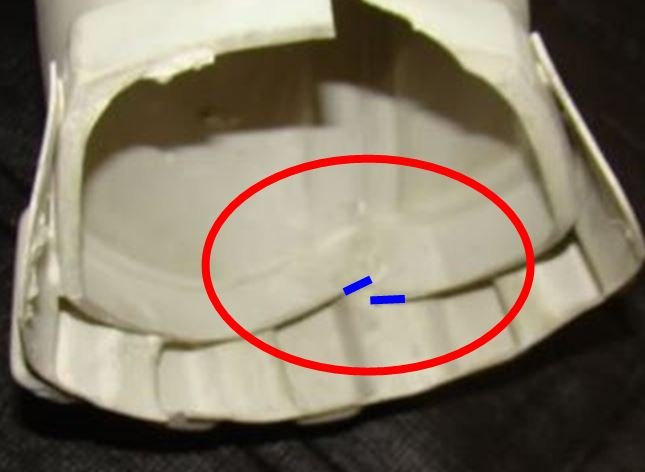
Decided to paint the inside of the helmet flat black. It was simple enough to mask everything off and spray the inside with some Krylon plastic paint. I may touch up around the eyes and teeth with some Humbrol black satin and a brush, but that would be more for my sense of perfectionism than anything else. Next I need to reassemble the helmet, paint the tube stripes, reinstall the mesh and lenses, and reinstall the mic tips. I think I'm going to buy one of those helmet padding kits from Amazon to get the fit correct. I'll deal with fans and electronics further down the road. It's possible the helmet could be (more-or-less) finished by this weekend! (I've a feeling "more-or-less finished" is going to be a general descriptor for this kit even when it's "done"!) So, no questions today; just sharing my progress. Thanks all for the comments and likes. I appreciate this community! It's helpful to have the encouragement and support.5 points
-
Wow, thanks guys that is an overload of information! Based on your suggestions I will be taking the leg apart again and moving the outer thigh down a bit. I technically have enough space around my knee to allow for the misaslignment at the bottom. I'd rather do that than trimming the top Not sure it will fully resolve the offset the two halves have though, but will see!4 points
-
Blaster coming along nicely3 points
-
tons of e11 tubes..............2 points
-
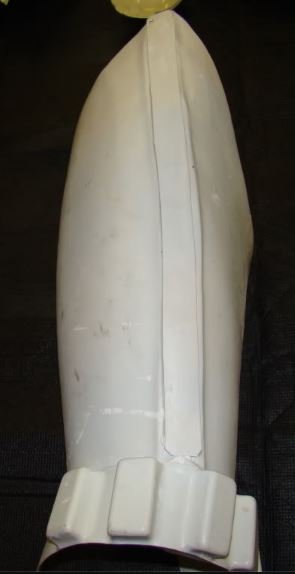
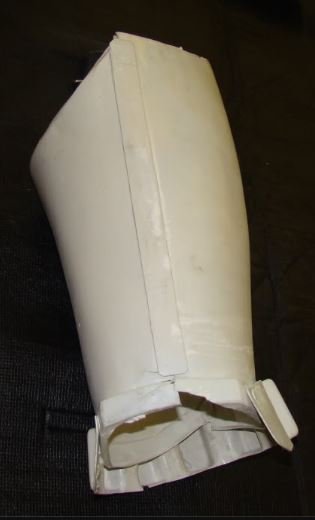
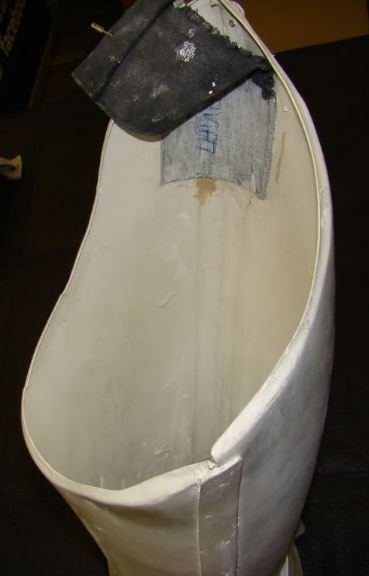
I did some work on the arms at this point but I will show photos starting from the feet and up. I have Totally Killer TK boots so I wore those to fit the shins. I first glued the front inner cover strip and then glued on the back flap that will eventually close with velcro. Lots of clamps and magnets are my friend. I used this thread to help me identify which parts went where: https://www.whitearmor.net/forum/topic/28321-sure-fire-am-20-shin-identification/ After the inside and back was done I did the front cover strip. At the same time I started working on the thighs. These were tricky since I didn't have help to measure but I got them eventually. I did inner and outer strips on the thighs as well for strength. I used this video to help me size the thighs: https://www.youtube.com/watch?v=gPj5DIWHJbI After the thighs were assembled I had to trim some off the tops so that I could move my legs without the tops hitting my hips. I trimmed them in small increments until they fit juuuuuuust right.2 points
-
After seeing your photos this is what I was after, something was off I just couldn't tell with the other photos. As Dan mentioned try shifting the inner thigh side up. this should help resolve some of the upper alignment also. If you look at the following canon reference photo take note of the lower edge offset.
 2 points
 -
Hi Martijn, Making good progress. Before you finish measuring and gluing the backs of your thighs, personally, I would recommend that you attempt to level out the top of the thighs a little more. I know you referenced a fellow trooper with that offset, however that might be adding to your discomfort. Evening out the top would also add to the screen accuracy of your suit. (See ref pics). FISD gallery Here is a link to a fellow trooper here: you can see how the bottom of the right thigh is purposefully misaligned. This will help to even out the top and the discrepancy at the bottom will be covered by the thigh ammo pack. Doing this might allow you to move the whole thigh up by an inch or so (the amount that the outer part of the thigh currently site above the inner part of the thigh). Hope that helps. Dan [emoji4]2 points
-
Hey peeps, figured I'd update this thread for anyone who hasn't seen my stuff on Instagram. My armor is basically there, save for a couple minor strapping issues and a couple dead LED strips. Once that's sorted out, I'm gonna send a new round of pictures to our LMOs and hopefully get this approved. I took this out for its first test drive this past Saturday at a local convention in Portland, Maine. Biggest issue I had was my powerbanks falling out and swinging around outside my kit, but I have a fix in mind for that. Also need to chop an inch or so off the tops of the thighs to improve mobility. Had a lot of fun though, and the armor was a hit. It was nice to be the very first TFU Shadow most people have ever seen! Hopefully more of us start popping up once we get that CRL green-lit!2 points
-
Thumpy, thanks for the suggestion. Updates, more sanding but also some progress. Here is everything that is ready for masking and painting at this time. Once all the parts are on this table then I will begin building the paint booth. Ok so a small package arrived today and I am so excited. I will be doing a full review of this product in the future but here is a quick down and dirty. I contacted Brian Hall owner of Bulldog Props in Japan through his Bulldog Props Facebook page on May 9th 2018. I was familiar with his products from his post on RPF. I knew Brian made resin cast versions of 1942 M38 scopes used on E-11s in the OT; however, these were not just a cast of the outside of the scope (like DoopyDoo’s). These were a complete reconstruction of the entire scope in resin parts. The scope can be completely assembled and disassembled. If you are seeking a very realistic but low cost (less than $50.00) and extremely light weight option to an actual M38 then I urge you to consider Bulldog Props. Anyway, I contacted Brian on May 9th inquiring about him making a 1943 version like was used in Rogue One. In our conversation Brian pointed out that they used the 1943 resin scope made by DoopyDoos for the film. I found his honesty and candor refreshing and asked him if he could make a version of his 1942 into a 1943. He advised me that he could not alter the 1942 model but he did have a 1943 scope and would be happy to attempt to cast it. Casting these small parts is very tricky give the level of detail in the threads and how the parts fit together. On May 12 Brian began disassembly of his 1943 scope and completed casting on June 17th. He shipped it to me on June 17th and I received it on June 25th. So here is my open box review: The packaging is well protected and professional. Once I removed the outer wrapping and bubble wrap I expected a simple box with the scope inside wrapped in bubble wrap since this was the first cast and not a production item. I was surprised with the presentation. Not only did I get the scope which looks awesome but also two sets of instructions. These were not an extra set of instructions from a 1942 scope but a 1943 specific instruction sheet. Apparently he is all set to produce and sell these 1943 scopes. All the small parts were packaged and protected. Once I unwrapped everything I discovered just how detailed the scope was and how much time and work Bulldog Props put into this. So what to expect from a resin cast scope. The small thin parts (like the locking rings) are brittle and cannot take a lot of force. Brian had notified me that one small ring in particular would not screw in properly but that it would most likely not be needed. Brian even included a few extra rings in case I damaged some in the assembly process. This is obviously one area where actual metal parts win out but it was not the goal of this product and I did not want a metal version of the scope. Regardless, this is the first version of this product and I do not know if Brian will make an attempt to address this issue. Even if he does not, I am very happy with the results. Next, due to the molding and casting process, most of the screw holes need to be drilled out. For this you will need some very small bits (which you can get at harbor freight or in Dremel kits). Lastly, the prism cell is a cast part and does not have any reflectivity, so actually looking through the scope is not possible unless I alter this because the objective lens is not aligned with the eye piece. I will toy around with some mirror vinyl when I have time and see if this works but to be honest I wanted this scope to add a reticle and LEDs and possibly the small micro display made by Trooper Amps. So far the only issue I have found is the two things that Brian told me about before I agreed to purchase the scope. There is a small bubble defect in the Eyepiece Mounting Plate which is an internal part and will not be seen and does not affect the scope in any way. The other issue is the Ocular Lens Retaining Ring not screwing in properly. I will most likely make a sleeve insert that will hold this lens in place and again will not be seen or affect the scope. Overall, I am very impressed and pleased with this product. Yes you can purchase a brass 1942 version and/or an aluminum 1942 version but if you need a 1943 version of the scope for a Rogue One or Solo build the only options I am aware of are DoopyDoos and Bulldog Props. Personally I feel for the price and the detail, you cannot beat this option. I asked Brian to make something new to fit my needs and he achieved this. I appreciate his willingness and professionalism. I will do a more detailed review in the E-11 thread in the coming days. And that is it for this update, thanks for the interest.2 points
-
1 point
-
Finally!! I need one of those. Looking great pal.1 point
-
Thats all you need Lou! One thing a day at a time!1 point
-
I just did this same thing with 2mm ABS - no issues. If you want, you could give the thighs a quick hot bath and try to shape them a little, but I think ample E6000 will work just fine. Good job on your build!1 point
-
Still looking good! Sent from my iPhone using Tapatalk1 point
-
Sounds good. That's what I love about trimmed parts, they will get used one way or another. Remember, measure twice, cut (drill) once. On parts that should "line up" take a pencil and draw where you plan to drill. make sure those marks line up first, then drill. Don't go based off measurements alone. your doing great, this is just a small hiccup and will actually help you down the line. never know when you will need to do so more major surgery and the experience will come in handy!1 point
-
that's what I thought but just wanted to be sure. I don't think I would need it, but for the case that some stress is placed in an odd manner on the armor, I don't want it to pop off. the "glue" I am using is some pretty tough stuff so far. But you never know. Appreciate the help!1 point
-
There is no restriction on how you join the pieces on the inside, so you can use various scraps of ABS, or a long inner cover strip that matches the outside. Some don't use any inner strips at all.1 point
-
That sounds good! Great progress so far, keep it up mate!1 point
-
More canon shots
 1 point
 -
I agree with Dan on this and as I´m the "fellow trooper" with the RS kit (Shins are TM though) he referenced to I´ll chime in and saying that RS has an offset but that mostly takes place at the knee and the consesus is that that`s what the ammo pack is for (to hide it) and on that subject: If you got the 1.5 ABS there`s no need to pre-bend it, it flexes enough so when it comes to putting it in place (measuring and drilling the holes are done) just secure one end and then bend it by hand - done Back to the thighs…..I´m stealing the pic Dan provided showing how to alligne the thighs (lower detail), this way reduces the offset att the top. And finally: Mobility will never be great and my advice would be to be careful not to remove to much, the original armor has minimal gaps between armor parts and in my opinion that`s the look everyone should strive fo - simply looks the best I can barely manage stairs but never considered cutting away more but everyone is free to decide for themselves, atleast to a point (can`t just cut`n slice) To give you an idea I´m 5.10 and kept leg pieces to original lenght and by clicking the "sandtrooper-video WIP" link you can see how it looks when walking1 point
-
Great progress! Nice work.1 point
-
And your right back in it! Nice work. Sent from my iPhone using Tapatalk1 point
-
Great work! You are almost at the finish line!1 point
-
Going to have to agree with Dan on this one. Evening everything out will add mobility and comfort. Well, as comfortable it can get for us troopers Keep at it! You are making great progress.1 point
-
Line 24 Snap File-Name: snap.stl Designer: Bill Alvini Last Update: 6/26/2018 File-URL: https://www.tinkercad.com/things/fGAowfjoPHV https://www.thingiverse.com/thing:2979061 Description: This is a 3d printed line 24 snap. It allows you to adjust the length of the strap for varying tightness Terms of Use: Nobody is allowed appropriating himself to this work for profit. There is no permission to recast and resell this design. You can print it for yourself, for your friends, or sell 3D prints made from these files, but there is no permit to anyone to sell the 3D files themselves nor to create molds without approval of the maker. Image: Hey guys, I designed this part from scratch. It is modeled after the snap that is used on my hockey helmet. I use it to make the strapping in my stormtrooper adjustable. I am not a TK yet but I have used so many of the resources on these forums I want to give something back. I could not find any other part like this. snap.stl1 point
-
I wasn't alarmed just wasn't sure what you meant is all. This is a first for me. I've been working on a rubies E-11, but it's no good for higher levels and I'm hoping for centurion. Here's where that is. It's been mostly for fun. It's not super accurate, but like I said it's been fun working on it. Sent from my VK815 using Tapatalk1 point
-
Ah I see yeah it is a bit to one side, but it mostly alright so far as bubbles and defects go. Sent from my VK815 using Tapatalk1 point
-
Sorry, not meant to sound bad. It appears from the photos the seam line from the two part mold look a bit off perhaps but only a tiny bit. Could just be my eyes. You will know better after you remove those seam lines.1 point
-
Yeah I'm just cleaning it up now. Sent from my VK815 using Tapatalk1 point
-
With some TLC you can get that blaster back on track for sure. Looking forward to seeing how you do on this. The casting certainly has issues with alignment and surface trouble but nothing a willing trooper can't fix. Good project to start on. I have a version one of the DVH kit before DDay started making them. The parts need a ton of cleanup and reworking but I am slowly starting to make progress. Going to turn it into a Bapty blaster.1 point
-
Thanks for the heads up! Planning to get a size 11 for myself when they start taking orders in July. Progress update - glued the rear shim, planning to sand, and apply some ABS paste into the valley, repeat sanding/polishing to smooth out the paste and then gluing the cover strip directly on the valley to maintain center. Oh! and I got Justjoseph's silicone handguards! They look really good! In fact... the gelatinous feel of them kind of makes me want take a bite out of them... reminds me of a delicious piece of fresh coconut meat... but will probably taste like a tidepod...1 point
-
Email them first, I'm not sure if they have anything smaller than 11's left. AFAIK I bought the last pair of 9's back in November.1 point
-
Thanks guys! Okay, lets start this build thread off right and show off my helmet. Bought the kit a few months back and only intended to own a helmet, but quickly decided that a full set of armor was in order. I took very few pictures during the build process, and this is all ive got. I mainly used Trooperbay's videos as a build guide for this.1 point
-
Thank you Jeff for that great review and super kind comments. Happy you like the scope kit and based on your detailed review, I will try to make some more improvements on the rings and bubble areas. Arigato! edit: one retainer ring might be slightly smaller than the other. Sometimes it takes a little even pressure to press the threads in a bit and the ring then screws on. amazing build as well. I wish I had seen this earlier! Following from now on. I want to go R1 at some point, built the pack already but no armor or helmet.1 point
-
Thank you guys. I'll definitely post some pictures when I start1 point
-
You can use Velcro to hold foam padding inside you armor (instead of using glue directly on armor/foam). Like this, you can always remove the foam if you don't need it, or you can also change the foam piece if you need a bigger one, for example. And as Daniel said, look at some overall photos and try to get that look while your pieces are padded. You might need to put foam at the top and at the bottom of some pieces so that they look even, as some other pieces might just need some padding in the middle or on one side, for example. Try it on yourself while holding the foam using some tape, and by trial and error you'll find what lookas the best in the end!1 point
-
Wow, fantastic job!!1 point
-
Beautiful!!! Sent from my SM-G950U using Tapatalk1 point
-
Amazing! You look great!1 point
-
I have my elastic loops sewn to the bridge elastic, no chance of it moving1 point
-
I agree with Chris, make sure your handler/spotter is aware of the situation and try and avoid being by yourself. Very hard to be able to have a phone on your person and still accessible in armor. In fact, I have just given my phone to them on more than one occasion.1 point
-
I made a pocket a bit bigger then my phone and velcroed it to the inside of my chest plate. It’s not completely accessible cause I can’t really reach it with my armor on, but it’s there. Other stuff I leave in my bin. Haven’t had a situation yet where I felt it to be unsafe. Sent from my iPhone using Tapatalk1 point
-
You may have heard the term "Armor Party" mentioned here, and wondered exactly what that means. While these are not "official" 501st or FISD events, below is some basic information which may be helpful for those who would like to either attend or host one. How do I find one in my area? These are normally posted on your local Garrison or Squad websites, usually in the "New recruits" or Events area. If you have any questions, you can ask the board admins for your local unit. A list of all Garrison/Squad/Outposts can be found here: http://www.501st.com/members/displayUnits.php You may also have a local Imperial Attache that you are welcome to PM. A complete list can be found here: https://www.whitearmor.net/forum/topic/38483-fisd-imperial-attache-list/ Goals These events are aimed for those who are beginning or are in the process of building a set of TK armor. There will be approved Troopers there who have been there-done that and will help you with any questions or problems you may encounter and offer advice. However... if you have not received or even ordered your kit you are more than welcome (and encouraged) to attend. These are "judgement free" zones, so no matter how strange or inane you think your questions may be (or how many you have) we have heard them all, and are here to assist you. You will also get to meet the future friends you will be eventually trooping with. Supplies "I have my kit, so what else should I bring"? 1. I would start with a spiral notebook and a pen. This way you can write down any questions you may have before you get there, as well as take notes and contact information. Bring these items even if you don't have your armor yet. 2. Many hosts may have some supplies on hand, but what stage of your build you are in will determine what you will need. I suggest bringing a Dremel tool (with accessories), clamps, magnets, E-6000, sandpaper, a pencil, etc. When in doubt, bring everything you have. A complete list can be found here: https://www.whitearmor.net/forum/topic/31404-supply-list-for-your-tk-build/ 3. If you have them, bring your undersuit and boots. These will come in handy for fitting your armor if you are at that stage. 4. If you have a laptop, bring it for FISD references. Food/Drinks While some hosts will supply snacks and water, some make a whole day event (or a barbeque) out of it. Ask your host in advance, and be prepared to bring your own water/soda/juice, snacks etc. Some hosts allow alcohol (usually BYO), some do not, so please respect their wishes. Again, check with the host before bringing it. Not to be a buzzkill, but I personally don't recommend drinking while using a razor knife or electric tools. Conduct 1. If you smoke or vape, please check with your host to see if there is an area where you can do this and not offend others who don't. 2. If you drink (alcohol), please be responsible. 3. If you need to use someone else's tools or supplies, ask beforehand. 4. Please try to avoid bringing small children without checking with your host first. Sharp objects, flying ABS pieces and kids may not mix. Plus, they can get really bored. 5. The same goes for pets. 6. If you sign up to attend, please do so. You may also want to enquire about where to park. 7. Please do not expect others to build your armor for you at an AP. They are here to help, not do it for you. I have heard of some who actually dropped their armor off and said "I'll be back later to get it". Needless to say it was left in the box untouched. When it's over.. Remember to thank your host, as well as those who helped you, and PLEASE offer to assist in the clean-up afterward. It's the right thing to do. HOSTING AN AP If you wish to host an Armor Party, I highly recommend it. A Saturday or Sunday afternoon of camaraderie with fellow (and future) TKs can make for a great time, and is REALLY appreciated by those who need help with their build or have questions. So how do I do it? 1. Determine what type of space you have and how many people you can accommodate. Some use a garage, basement or patio, as long as there is shade (summer) or heat (winter). You will also need multiple electric outlets for tools, as well as sufficient tables, chairs and hopefully a workbench of some sort. 2. Ask the senior TKs, EIs and Centurions in your Squad/Garrison if they can commit to attend and help out with build questions. You really can't have too much white-armor knowledge at these events. Having one or more experienced FO TKs will definitely help. 3. Check with your neighbors. These events very rarely get loud, but parking may be a concern. 4. After you have determined that you are good to go, post up the information on your local 501st site (and FB if you have that). Be sure to give all the details you can in the post, including day, date, begin/end time, food/drink/alcohol/kid/pet/parking policy and if there is a limit on how many people you can accommodate. Don't forget the address/directions to your house! You may also want to provide an alternate date in case in inclement weather. 5. Have a laptop or computer online and at the ready with the FISD site available. This will help with any technical info. 6. Be prepared to answer the same questions over and over. These folks are depending on and will appreciate your knowledge. 7. If you get the chance, take lots of photos and post them up here! If you have any suggestions/additions for this, please feel free to post up below, or if you have any questions about hosting or attending please feel free to PM me.1 point
-
I havent used E6000 since its not available in my country, I used blue UHU for plastics and its STRONG... it fuses the parts together, no trace of glue left but its kind of permanent, no ungluing once its there. I hope this is useful1 point
-
Hey Chris The blue should match the reference image the best you can. People have been doing Commanders for some years now. When I did my research in peoples build threads there was many different brands used. My first choice "Blue Angel" blue was about impossible to find. I ended up using Tamiya TS-15 blue. It's a nice deep blue. And Tamiya is perfect for plastic that flexes. Good Luck and look foward to seeing what you come up with!1 point
-
I agree with Preston that RT-Mod or AM will likely be a better fit for you. To make this fit you, you will need to lengthen the chest to back elastic strap and tighten the chest to ab. You will also need to reposition the shoulder bridges to ensure that they meet the back plate. They could also use some reshaping as well to curve more as they are very straight right now.1 point
-
Hey Tudor this is a situation EVERY troopers deals with. Most of the time it just takes practice. When I build armor for people the arms are one piece connected by elastic, nylon webbing and a single snap. I usually instruct them to assemble the entire armor with the left at connected then slide into the armor from the right side leaving only the right arm, the cod to ab, kidney to ab, chest to back (right side) and the waist belt remaining. Works excellent for 85% of them.1 point
-
P.S. for any of the other AM 2.0'ers out there who still haven't determined whether or not you've got duplicate shins, this should help make the determination. MightyTank prompty and professionally handled the mix-up and distributed correct shins to those who notified him of the situation.1 point