

Ironmonk
-
Posts
32 -
Joined
-
Last visited
Content Type
Profiles
Forums
Gallery
Articles
Everything posted by Ironmonk
-
Thanks! I'll pm him. And thanks for the info on the blaster.
-
Thank you! I'm going to need to get some new screws. Mine are definitely rounded. The ones that came with the kit are incorrect. Can they be painted black or do they need to be made of black metal? Any suggestions of where to get the most accurate screws or is something from the hardware store good enough? Once I get the screws settled I'll post the rest of the pics. I've also ordered a Doopy's E-11 kit, so once I finish that I'll resubmit my blaster photos. So, back to the drawing board, I guess...
-
Well, there's the problem. I ordered the baptys. Newbie mistake. Didn't realize it was for a sandie... smh...
-
Not sure what you mean. There's a small return edge on the butt plate - just a couple millimeters - but it is minimal. My kit is very comfortable, if that's what you're referring to. I have no issues with "bite" or rubbing and I've worn it for as much as 4+ hours at a time.
-
You're welcome! I couldn't stand how the right side kept overlapping. This fix worked great and wasn't difficult to do.
-
Thanks for the feedback. I appreciate the help. Here's some clarifying comments... - The pics I posted were what was listed on the form for EIB application. I thought the others were for Centurion but I'd be glad to add more if needed. - The DT screws were what came with the kit from AP. Guess I need to replace them though? - Yes, definitely on the foam, though I probably need to put some behind the thigh to pull it back. The knee already has foam in the front. - The blaster came like this from Sheartech. I have to admit I was disappointed when I received it. The form is fine, but the weathering is awful and why no trigger? I'll have to look into adding the other parts you mention. I did add a D-ring, which you can see in my left side detail photo. But, yeah, it needs work. Anyway, I appreciate all your suggestions and well wishes.
-
Mandatory Information Armor = Authentic Props Helmet = Authentic Props Blaster = ShearTech (UK) Optional Height = 5'9" Weight = 155lbs Boots = Imperial Boots Canvas belt = Authentic Props Hand Plates = Authentic Props Electronics= Helmet Fans by Jeff Aurand Neck Seal = Trooper Bay Holster = Authentic Props Photos
-
TK-12176 requesting detachment access. https://www.501st.com/members/displaymemberdetails.php?userID=29127
-
Hi, folks! Time tending to always be my limiting factor, my build thread took a back seat to just building. I apologize for not documenting the rest of the build, but it is "finished". You can see my pre approval photos here: Thank you to all of you who chimed in on questions and gave helpful advice in your own build threads. This was a tough project but well worth the time and effort I've put into it. I'm excited to be at this point and looking forward to moving towards EIB and Centurion eventually. I'm truly grateful to this community and for the confidence you gave me to pursue this dream. If you don't mind, go to the pre approval thread and let me know what you think. Thanks!
-
Darrell (Ironmonk) Ohio Garrison (Oregon, OH) Armor, Helmet, Cloth Belt all by Authentic Props (AP) Neck Seal by Trooperbay Boots by Imperial Boots Blaster is a cheap plastic one I bought on Amazon and painted (This is just temporary until I get my "real" blaster) I am 5'9" tall and 150# ANH Stunt Thanks to the many folks who posted excellent build threads, diagrams, supply lists, hints, etc. It's really difficult to single anyone out. I've found this to be a very helpful community. I admit I was intimidated when I started because I'd never built anything like this before, but you all gave me confidence and were very helpful. A special thank you to wook1138 whose AP build I followed closely and TheSwede for his expertise. The plan is to apply for EIB and Centurion eventually. All helpful comments are welcome! I'm aware the TD is crooked. I need to add some velcro to the belt so I can cinch it up tighter. And one final shot for fun...
-
I haven't been posting but work has continued... I fitted, glued, and rough sanded/shaped the biceps and the forearms. I still have to do some fine tuning with a dremel and sandpaper. I also need to finish cleaning up the squeeze out from the E6000. I'm pleased with how they've turned out so far. I was able to use 15mm strips and everything fits fine. I guess I am "standard Stormtrooper size". : ) Today I trimmed and sized my thighs. After having done the arms, these went together fairly easily. I feel like I'm getting the hang of the process. I will glue with 20mm strips. My plan at this point is to finish all the appendages and then start strapping everything together. I think I'm still on target to be finished by Halloween (October 31). I may not be Centurion approved by then, but will hopefully have a usable costume by then. As always comments, critique, and suggestions are welcome.
-
Today I have some questions. I've been working on the torso. My AP kit included hardware for the torso - split rivets, snaps, washers. I have 8 longer split rivets and 1 shorter one. My question is about where I use the shorter one. I'm guessing it is for the cod on the front ab piece. I've read/seen where this split rivet is supposed to be "brass". Does that mean yellow brass? The shorter one in the pic is more nickel colored. I know I don't paint this rivet white like the others, but is the color correct? I'm assuming 6 of the longer split rivets are for the connection on the left side between ab and kidney. However, I only have 3 washers. Should I have 3 for each side? If I only need 3, I'm wondering which side I use those on. Or maybe the washers aren't for the ab/kidney connection? I'm also wondering where I use the two "extra" split rivets. Are those for the belt maybe? I also test fit the ab plates and am wondering if I've trimmed them small enough. Especially wondering about the smaller plate. I'm thinking the smaller one needs to be, ummm, smaller, but before I trim it further I want to check in with you all. Finally, I'd like to extol the virtues of this tool I received as part of the lexan scissors kit I bought. It worked really well for putting neat holes in my armor. I was concerned about the possibility of a drill bit "walking" across the surface, but this tool is like an awl with a cutting blade. A few turns and it makes a good, clean hole. I had to be careful not to make the holes too big, but it worked like a charm. That's it for today. Happy Independence Day to those celebrating in the United States!
-
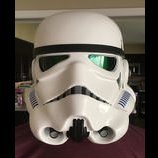
Hahahahahahaha! Finished my helmet and it's the coolest thing ever! My wife took a pic... What you don't see is the big, dumb grin on my face. I still need to install padding and do something more permanent than masking tape for the lease and mesh, but I'm loving it. I also sanded that smaller ab plate: Tony, does this look acceptable? Next I'm going to start assembling the torso. Seems logical to me, for the sake of fit, to build that first and add the limbs from there. I feel like I'm making progress and, in case anyone missed it, I'm having more fun than....well, a really fun thing.
-
Thank you very much! I've had fun painting this thing. I will definitely sand more off the edges of the smaller plate. Thanks!
-
Slow but steady progress. Finished the paint on my helmet today: Obviously I need to go back and clean up the edges with thinner on the tube stripes, but I'm pleased with how it turned out. Trooperbay's stencils are quite good. I had a little trouble curving it to fit the shape of the helmet, but after cutting it in a few places along the bottom edge I got it to stick down more-or-less flat. You can see I also added a bit of gray for the 5th tooth on each side. I don't know if that was necessary but I noticed a number of AP ANH Stunt builders applying for Centurion with that part painted. I figure it can't hurt. I need to touch that up with some thinner also but it's not bad. I touched up the traps and tears since my last post too. Fiddly work, but having been a miniature painter for decades it wasn't very difficult. I also got the ab plates painted: I just free handed them. Hopefully they are good enough. Held at arms length they look fine to me. I don't think anyone is going to look at them as close as the above pic allows. : ) Oh, yeah! Lest I forget, you may notice I also did a little dry-brush with some white on the hovi mic tips. You can see it on the first pic if you zoom in. So, again, no questions really. Just checking in with my progress. Comments are welcome and encouraged. If you see any errors please don't hesitate to say so. I'm aiming for Centurion status so any helpful suggestions are most welcome.
-
Decided to paint the inside of the helmet flat black. It was simple enough to mask everything off and spray the inside with some Krylon plastic paint. I may touch up around the eyes and teeth with some Humbrol black satin and a brush, but that would be more for my sense of perfectionism than anything else. Next I need to reassemble the helmet, paint the tube stripes, reinstall the mesh and lenses, and reinstall the mic tips. I think I'm going to buy one of those helmet padding kits from Amazon to get the fit correct. I'll deal with fans and electronics further down the road. It's possible the helmet could be (more-or-less) finished by this weekend! (I've a feeling "more-or-less finished" is going to be a general descriptor for this kit even when it's "done"!) So, no questions today; just sharing my progress. Thanks all for the comments and likes. I appreciate this community! It's helpful to have the encouragement and support.
-
A bit more progress on painting the helmet today... Right tear: Right trap: Left trap: Left tear: Can see on this one that I will need to do a little touch up with gray. But that is it as far as I'm concerned! I used the templates from TrooperBay and they worked very well. The left tear was most difficult to fit, but overall these worked excellently...unless you all say otherwise that is. I also finished the ears: Free handed and I'm completely satisfied with how they turned out. Now a question. My AP kit came with decals for the tube stripes. I also have a template from TrooperBay that I can use. The template I bought is very uniform and straight. The decal has a less uniform appearance. Here's a side-by-side: Decal on the left, template right. I'm interested in opinions on which is better. I'm building ANH Stunt, if that makes any difference. I'm leaning towards the template because I like the idea of having everything painted, but I welcome others opinions. Any difference as far as Centurion approval goes?
-
After two weeks of travel for business and pleasure, I'm back home and hoping to get some work done on my TK. Unfortunately, my wife is in China this week on business. So, in addition to my full-time job, I'm solo parenting two teens, a toddler, and two dogs! If you haven't guessed, June is a bit crazy for us this year. Regardless, I had a chance to do a little work this evening. My goal is to finish painting the helmet this week. Tonight I added black lining around the traps and tears and touched up the vocoder I messed up. Let me know what you think. Is my black lining too thin? Does the vocoder look centurion approvable?
-
Thanks for the comments all! I’ve been out of town on business and am now on vacation so haven’t done any work on my TK in a while. Next week I’ll be back at it. Rainy weather has me wishing I’d brought my helmet and paints along....oh, well... [emoji16] Sent from my iPhone using Tapatalk
-
Thanks, Frank. I'm wondering how is it made? You say it's light so is it solid rubber or is it rubber skin over a nerf-like foam rubber? Also, did you paint/weather yours? Does it take paint well?
-
Work continues, albeit slowly this week. No photos to share other than these: Obviously my boots arrived! I ordered from Imperial Boots when they were "open" in May. I was delighted with how quickly I received them. Can't say I'm a shoe expert or anything, but quality is very good to me. I normally wear a 9.5US, so ordered a 10. Fit is good and they are surprisingly comfortable. The 4 year old said, "I don't have boots for my Stormtrooper..." with a big sad face. We'll have to negotiate that! Kid is going to eventually have me building a child TK! Anyway, I've begun looking into blasters. Right now I'm leaning towards a Hyperfirm E-11 but I'm wondering what others have to say. I'm looking for something in the midst of the spectrum between "display piece" and "good for trooping". Any good recommendations out there? Anyone have input about Hyperfirm? Thanks, all! I appreciate this community. So much good info and stellar people.
-
I've been gluing snaps to the torso pieces in preparation for the strapping. Meanwhile, I disassembled my helmet and began painting it. I need to do some touch up along the top of the vocoder. It's a work in progress. The teeth are fine, unless one of you tells me otherwise. Obviously need black trim and lines, but traps are looking okay, IMHO. Didn't get a pic of the side, but the tears are at this same stage. Ears still need black trim too. Screw heads are done though! I spray painted my DT tube gloss gray. I hope the color is okay. I used Rustoleum's "Winter Gray" from their Painter's Touch line of primer-paint combo spray cans. I can always respray before assembly if there's another color I should have used. Also managed to finish trim my forearms. I first trimmed the front to accommodate a 15mm cover strip on the ridge that comes on the AP kit arms. Then I taped, test fitted, untaped, trimmed, taped again, test fitted again, etc., etc., etc. I only took a tiny bit each time until I got down to what seems a good fit to me. My hands just barely get though the wrist openings and the pieces sit comfortably on my arms. I still need to finish sand the edges. Only issue is on the back the little ridge that is on AP will be wider than a 15mm cover strip. Should I do a wider cover strip in back or just do 15mm and not worry about it not matching the ridge? I also rough trimmed my biceps. Hopefully fitting these will be less time consuming now that I understand the process a bit better.
-
Thanks, Wook. Positive feedback coming from you tells me I'm on the right track. I'm having fun with this thing but I have to admit it is anxiety provoking. Costs too much money to eff it up! Anyway, glad to have the support.
-
I've tapped a mock up of the inside of my helmet. I'm wondering what people do about lenses. The film that came with the AP set seems thin to me, but maybe it's ok? I'm planning to use Sugru to affix things when I'm ready for more permanent set up. I'm considering painting the inside black as well. Thought? Finally, I think I want to trim the opening a bit. My head is big and it's tight getting it on as is. Not impossible, but very snug. Any suggestions on trimming around the bottom edge? I know, he's a little short for a Stormtrooper. ; )
-
I'm trying to fit the torso pieces. I've trimmed everything and tapped it up. My question is about the fit. I'm wondering if I need to take more off the ab and kidney around my middle? I cut to the "original movie prop size" as marked by Mark from AP. Should I take it in a bit more? I'm also wondering about how high the cod should be. Does this look about right? And yes, I'm always more bald and gray in pics than I recall... : )
